

Have you ever sat down to play your favorite song, only to find a piano key won’t pop back up? It is a frustrating moment for any music lover.
Renters, homeowners, and DIY enthusiasts all face this annoying issue eventually. The good news is that learning how to repair sticking piano keys is entirely possible. You do not need to be a master technician to solve the most common problems.

Fixing a stuck piano key yourself saves money and gives you a great sense of accomplishment. Professional repairs can be costly and require waiting weeks for an appointment.
With a little patience and the right tools, you can get your acoustic piano playing beautifully again. Let’s dive right into this easy, neighborly guide to fixing your instrument.
What Causes Sticking Piano Keys?
Before you start taking things apart, it helps to know what is going wrong. Pianos are complex machines made of wood, felt, and metal.
These natural materials react to their environment and daily use. Here are the most common culprits behind sluggish or stuck piano keys:
- Changes in Humidity: Wood expands in high moisture, causing parts to rub together tightly.
- Foreign Objects: Coins, pencils, or paperclips often slip between keys and jam the mechanism.
- Swollen Key Bushings: The red felt inside the key hole can absorb moisture and grip the metal pin too tightly.
- Tight Key Slip: The long piece of wood in front of the keys can warp and rub against the front of the keys.
- Broken Action Parts: Sometimes, a small wooden part inside the piano action is cracked or unglued.
Tools and Materials Needed
You do not need a fancy workshop to tackle this project. Most of these items are already sitting in your house or garage.
Gather these simple supplies before you begin. Having everything nearby will make the repair process smooth and stress-free.
- A standard flathead screwdriver
- A standard Phillips-head screwdriver
- A flashlight or headlamp
- A soft microfiber cloth
- A pair of tweezers or needle-nose pliers
- A simple business card or thick piece of paper
- Key easing pliers (optional, for advanced fixes)
Step-by-Step Guide: How to Repair Sticking Piano Keys
Are you ready to fix that annoying key? Roll up your sleeves, and let’s get started on the main event.
This guide on how to repair sticking piano keys is designed for absolute beginners. We will take things one simple step at a time.
Take a deep breath. You are completely capable of handling this repair safely.
Step 1: Clear Your Workspace
First, make sure the top of your piano is completely empty. Remove sheet music, metronomes, and family photos.
You need a clear space to work without knocking things over. Set up a small table nearby to hold your screws and wooden parts.
Step 2: Open the Piano Cabinet Safely
To find the problem, you need to see inside the piano. On an upright piano, lift the top lid and fold it back.
Some lids are secured with small wooden latches inside the cabinet. Look closely and turn them gently to release the front panel.
Step 3: Remove the Upper Front Panel
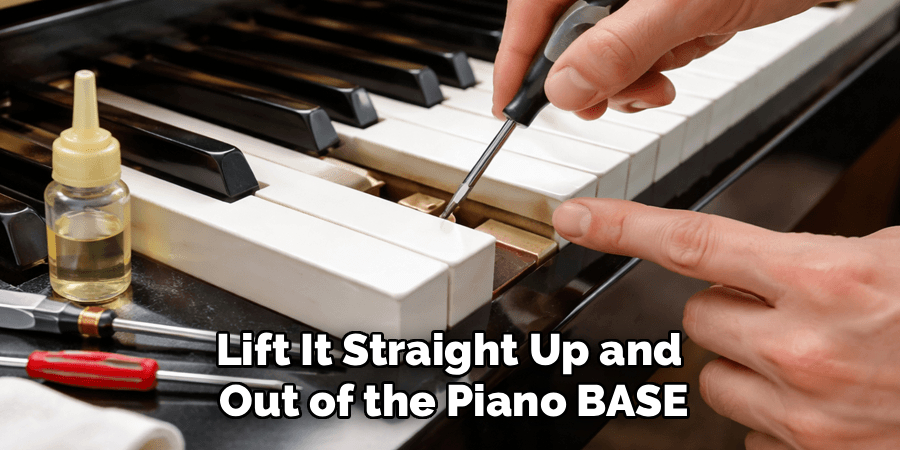
Once unlatched, tilt the top front board toward you. Lift it straight up and out of the piano base.
Set this heavy wooden panel safely on a soft carpet or blanket. You do not want to scratch your beautiful instrument.
Step 4: Take Off the Fallboard
The fallboard is the lid that covers the keys. Usually, you can lift it straight up and out.
Sometimes there are two screws on either side that need to be removed. Keep track of any screws you remove in a small cup.
Step 5: Test the Key Slip
Look at the long strip of wood directly in front of the keys. This is called the key slip.
Sometimes, this wood bows inward and traps the keys from moving. Take your business card and slide it between the keys and the key slip.
Step 6: Fix a Warped Key Slip
If the card gets stuck, your key slip is rubbing against the keys. Remove the key slip by unscrewing it from underneath the keyboard.
Place a small cardboard shim behind the key slip to push it away from the keys. Reattach the screws and test the keys again.
Step 7: Inspect for Hidden Debris
If the key slip was not the problem, grab your flashlight. Shine the light down between the sticking keys.
Pianos are magnets for dust, paper clips, and loose change. Look closely for anything wedged between the wooden key sticks.
Step 8: Remove Foreign Objects
Did you spot a rogue penny or paperclip? Use your tweezers or needle-nose pliers to reach in gently.
Pull the object straight out without wiggling it too much sideways. Be careful not to scratch the surrounding keys.
Step 9: Lift the Problem Key
If there is no debris, you need to remove the key itself. Press the key down slightly and lift it straight up from the front.
Pull it gently toward you to slide it out of the piano. Hold it carefully, as the wood is old and fragile.
Step 10: Check the Key Bushings
Look underneath the key you just removed. You will see small holes lined with red felt, known as key bushings.
If this felt is swollen, it grips the metal guide pins too tightly. This is a massive cause of sluggish piano keys.
Step 11: Ease the Felt Bushings
If the felt looks thick, gently compress it. You can use key easing pliers if you bought them.
Alternatively, press the felt firmly with the smooth end of a flathead screwdriver. Do not tear or rip the felt; just press it down.
Step 12: Clean the Guide Pins
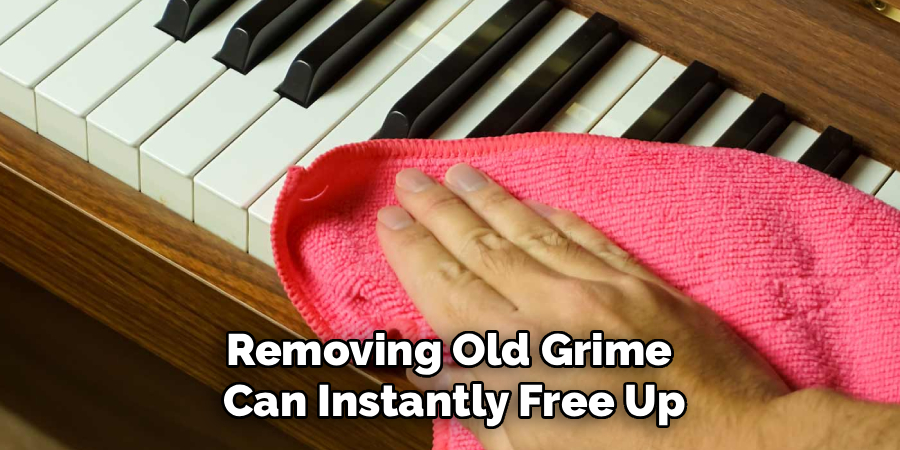
Look at the metal pins sticking up from the piano bed. They guide the key up and down.
Wipe these pins with a clean, dry microfiber cloth. Removing old grime can instantly free up a sticking mechanism.
Step 13: Reinstall the Key
Slide the key back into its slot gently. Ensure the hole in the bottom lines up with the metal guide pin.
Press it down slowly to make sure it sits flat. Test the key by pressing it down a few times.
Step 14: Test the Piano Action
If the key bounces back perfectly, you have solved the issue! Give yourself a well-deserved pat on the back.
Test all the surrounding keys just to be sure nothing shifted. Play a quick scale to feel the smooth, even movement.
Step 15: Reassemble the Piano
Now it is time to put everything back together. Slide the fallboard back into place and secure any screws.
Lift the front panel, set it on its pegs, and lock the internal latches. Finally, close the top lid and polish off any fingerprints.
Safety Warnings and Precautions
Working on a piano is safe, but you still need to be careful. A piano is a heavy instrument with thousands of moving parts.
Keep your fingers clear of heavy wooden panels when lifting. Wood can easily pinch your hands if it slips.
Never force a part to move if it feels stuck. If a screw won’t turn, stepping back is better than breaking the wood.
Absolutely never use WD-40 or standard household lubricants on a piano. These oils ruin the wood and felt, causing thousands of dollars in damage.
When to Call a Professional
DIY repairs are incredibly rewarding, but they have their limits. Knowing when to stop is just as important as knowing how to start.
If you followed the steps above and the key still sticks, the problem is deeper. The issue might be inside the piano action mechanism itself.
The piano action contains tiny, delicate parts like jacks, whippens, and hammer flanges. These require specialized tools and expert knowledge to repair.
If you hear a loud snapping sound or see broken wood, stop immediately. Call a registered piano technician to handle the complex repairs safely.
Cost Estimate: DIY vs. Professional Repair
Fixing a sticking key yourself is incredibly budget-friendly. Most times, the repair costs absolutely nothing but your time.
If you need to buy a specific tool, like easing pliers, expect to spend $20 to $30. Compare this to the cost of professional services.
A professional piano tuner usually charges a basic service call fee. This fee ranges from $100 to $200 just to walk through your door.
If parts need replacing, a pro repair can easily reach $250 to $350. By doing the simple fixes yourself, you keep that cash in your wallet!
FAQs on How to Repair Sticking Piano Keys
You probably still have a few questions about piano maintenance. That is completely normal for a DIY beginner.
Here are the most common questions people ask when fixing their keyboards.
Can high humidity cause piano keys to stick?
Yes, absolutely. Pianos are made primarily of wood and felt, which absorb moisture from the air.
When humidity rises, these materials expand and swell. This swelling causes moving parts to rub together tightly and stick.
Is it safe to use WD-40 on sticking piano keys?
No, never use WD-40 on a piano. Traditional oils and lubricants will permanently ruin the wood and delicate felts.
If lubrication is needed, professionals use specialized dry Teflon powder. Stick to cleaning and adjusting rather than spraying household chemicals.
How long does it take to fix a stuck piano key?
If the problem is a coin or a tight key slip, the repair takes 15 minutes. It is a very fast and satisfying DIY project.
If you need to ease multiple key bushings, expect to spend about an hour. Take your time and enjoy the process of learning.
Can I clean my piano keys with water?
You can use a very slightly damp microfiber cloth to clean the plastic or ivory tops. Do not let water drip down between the keys.
Water dripping into the wood causes swelling and sticking issues. Always follow up immediately with a dry cloth.
Why does my key stick only in the summer?
Summer brings higher humidity levels to most homes. This seasonal moisture swells the wood inside the piano case.
Running an air conditioner or a dehumidifier in the room usually solves this seasonal sticking issue naturally.
Conclusion
Taking care of your instrument does not have to be intimidating. You now know exactly how to repair sticking piano keys with confidence.
By checking the key slip, removing debris, and easing the felt, you can solve the most common issues. You saved yourself a costly repair bill and learned a valuable new skill.
Your piano is an incredible piece of craftsmanship meant to be played and enjoyed. Keep a clean environment, manage your room’s humidity, and your keys will dance smoothly for years.
Ready to tackle more easy home repairs? Bookmark our blog for more beginner-friendly, step-by-step DIY guides!