

Have a broken classic car part, a snapped vintage toy, or a cracked decorative handle? You are likely dealing with pot metal. Knowing how to repair pot metal can save you a frustrating trip to the specialty welder.
Pot metal is notoriously brittle. Since it is a cheap mix of zinc, lead, copper, and aluminum, it rarely welds like standard steel. When it breaks, many people assume the part is ruined forever.
Replacing vintage or custom pot metal parts costs a fortune. Sometimes, you cannot even find a replacement. Fixing it yourself saves you serious money and rescues your favorite items from the trash bin.
We will walk you through exactly what you need to do to fix it. Grab your safety glasses, clear off your workbench, and let us get started.
What Causes Pot Metal to Break?
Before you grab your tools, it helps to know why your part broke in the first place. Pot metal is an alloy made from scrap metals. Because the mixture varies, it is highly unstable over time.
Here are the most common causes of pot metal degradation:
- Zinc Pest (Zinc Rot): Impurities in the metal alloy cause it to expand, blister, and crack from the inside out.
- Pitting and Corrosion: Exposure to moisture eats away at the surface, leaving tiny holes and a weakened structure.
- Extreme Temperature Changes: Rapid heating and cooling make the brittle alloy expand and contract until it snaps.
- Overtightening Screws: Because it is a soft metal, putting too much torque on a pot metal bracket will easily crack it.
- Physical Impact: Dropping a pot metal part almost always results in a clean break or shattered edges.
- Natural Aging: Older pot metal from the mid-20th century degrades naturally as the unstable elements react with one another.
Tools & Materials Needed
You need the right gear to fix this tricky metal. Standard welding tools will just melt your part into a puddle. Here is everything required before starting.
For Cleaning and Preparation:
- Degreaser: A standard automotive degreaser or rubbing alcohol to remove old oils.
- Stainless Steel Wire Brush: For scrubbing away loose debris and corrosion.
- Rotary Tool (like a Dremel): Use a carbide burr bit to grind out cracks and create a rough surface.
- Sandpaper: 120-grit and 220-grit for smoothing edges.
- Clean Microfiber Cloths: To wipe away dust without leaving lint behind.
For the Epoxy Method (Best for Beginners):
- Two-Part Metal Epoxy (J-B Weld or similar): Specially formulated for metal bonding.
- Mixing Stick and Disposable Tray: For blending the epoxy resin and hardener.
- Clamps or Painter’s Tape: To hold the pieces tightly together while curing.
For the Low-Temp Soldering Method (Best for Structural Strength):
- Propane or MAPP Gas Torch: You need a manageable, low-heat flame.
- Specialty Pot Metal Solder: Look for zinc-based, low-temperature brazing rods (like Muggy Weld).
- Pot Metal Flux: Essential for drawing the solder into the joint and preventing oxidation.
- Stainless Steel Brush (dedicated): Only use this brush on the pot metal to avoid cross-contamination.
Step-by-Step Fix Guide: How to Repair Pot Metal
You have two main options for this repair. The epoxy method works best for decorative items that do not hold weight. The soldering method is better for parts that need structural strength. We will cover both.
Phase 1: Preparation (Crucial for Both Methods)
Do not skip this phase. If your metal is not perfectly clean, neither epoxy nor solder will stick.
Step 1: Clean the Surface
Spray the broken pieces generously with your degreaser. Wipe them down firmly with a clean cloth. You must remove years of grease, oil, and dirt.
Step 2: Grind the Edges
Take your rotary tool and gently bevel the broken edges. You want to create a “V” shape where the two pieces meet. This gives the epoxy or solder a channel to fill, creating a stronger bond.
Read More: How to Repair Etched Marble.
Step 3: Scuff the Metal
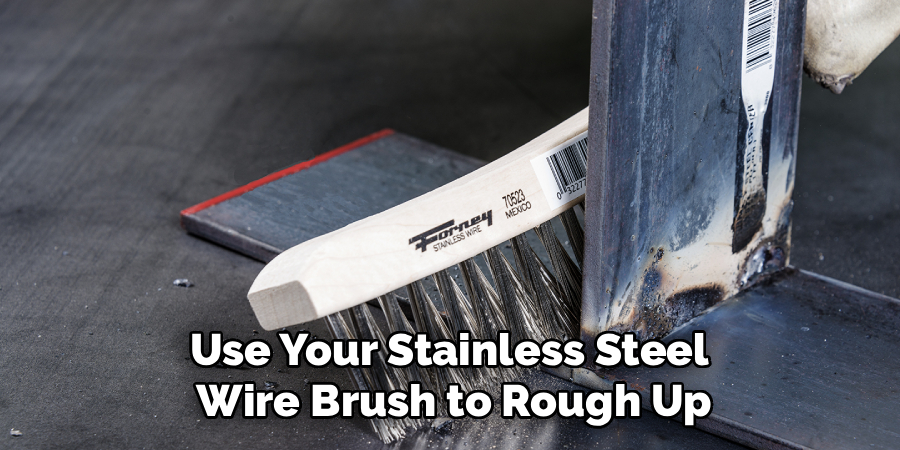
Use your stainless steel wire brush to rough up the surface around the break. The repair material needs a textured surface to grab onto.
Step 4: Final Wipe Down
Wipe the pieces down one more time with rubbing alcohol. Let them dry completely. Do not touch the clean edges with your bare fingers, as the oil from your skin can ruin the bond.
Phase 2, Option A: The Epoxy Repair Method
If you are a beginner or fixing a decorative trim piece, this is your best route. It requires no heat and involves very little risk.
Step 1: Mix the Epoxy
Squeeze equal parts of the metal epoxy resin and hardener onto your disposable tray. Mix them thoroughly with your stick until the color is completely solid and uniform.
Step 2: Apply to the Joint
Dab the mixed epoxy into the “V” groove you created during prep. Coat both broken edges evenly. Do not use too much, or it will squeeze out and create a messy bump.
Step 3: Press and Clamp
Push the two pieces firmly together. Wipe away any excess epoxy that oozes out using a cloth dipped in rubbing alcohol. Secure the part with clamps or wrap it tightly with painter’s tape.
Step 4: Let it Cure
Leave the part alone. While epoxy sets in a few hours, it needs a full 24 hours to reach maximum strength. Keep it in a warm, dry room while it cures.
Read More: How to Repair a Broken Mug.
Step 5: Sand and Finish
Once fully cured, remove the clamps. Use 120-grit sandpaper to knock down any high spots. Finish with 220-grit sandpaper until the repair blends smoothly with the surrounding metal.
Phase 2, Option B: The Low-Temp Solder Method
If you are fixing a door handle or a bracket, you need this method. It takes a bit more practice, so test your skills on a scrap piece first if possible.
Step 1: Apply the Flux
Dip your low-temp soldering rod into the flux. Coat the grooved joint of your pot metal part generously. The flux cleans the metal under heat and guides the solder.
Step 2: Heat the Metal, Not the Rod
Light your torch. Keep the flame moving constantly over the thickest part of the pot metal near the break. Never point the flame directly at the thin edges, or they will melt instantly.
Step 3: Test the Temperature
Pot metal melts around 750°F, which is dangerously close to the melting point of the solder. Every few seconds, tap your rod against the fluxed joint.
Step 4: Flow the Solder
When the metal is hot enough, the rod will suddenly melt upon contact. Let the solder flow naturally into the “V” groove. Do not use the torch to melt the rod directly.
Step 5: Cool and Clean
Let the piece air cool slowly. Never dunk it in water, as the thermal shock will shatter the metal. Once cool, wash away the leftover flux with warm water and a wire brush.
Read More: How To Repair Leather Coat.
Step 6: File and Polish
Use a metal file to shape the hardened solder so it matches the part’s original contour. Sand it smooth. You can now prime and paint the part to hide the repair completely.
Safety Warnings
Working with broken metals and heat requires a little common sense. Keep these safety tips in mind to protect yourself and your workspace.
- Wear Safety Glasses: Metal dust from grinding can easily get into your eyes. Always protect your vision.
- Use Proper Ventilation: Melting flux and heating pot metal can release toxic fumes, especially if the alloy contains lead. Work outside or in a well-ventilated garage.
- Wear Heat-Resistant Gloves: Even if you are heating one end of a part, the heat travels fast. Protect your hands from severe burns.
- Have a Fire Extinguisher Ready: Whenever you use a torch, keep a fire extinguisher nearby. Make sure your workbench is free of flammable rags and chemicals.
- Beware the Melting Point: Pot metal gives no warning before it melts. It does not glow red. It simply collapses into a puddle. Keep your heat moving.
When to Call a Professional
We love DIY projects, but some repairs cross the line into professional territory. It is okay to admit when a part is beyond your home workbench.
If the pot metal part supports heavy weight, do not risk a DIY fix. A broken motor mount or heavy structural bracket could cause severe injury if your repair fails under stress.
Additionally, if the piece is suffering from advanced “zinc pest,” a repair will not hold. Zinc rot destroys the metal at a chemical level, making it crumble like a cookie.
For highly valuable, irreplaceable antiques, consider hiring a specialist. Expert welders have TIG welding setups and specialty gases that can fuse tricky alloys flawlessly.
Cost Estimate: DIY vs. Professional
Fixing things yourself keeps cash in your wallet. Let us break down what you can expect to spend.
The DIY Cost:
If you go the epoxy route, you will spend roughly $10 to $15 on a high-quality metal epoxy and sandpaper.
If you choose the low-temp solder method, expect to spend $40 to $70. A basic torch costs about $20, and specialty pot metal solder with flux costs around $40.
The Professional Cost:
Taking a broken pot metal part to a specialty welder usually starts at $100 just for the labor. For complex shapes or vintage car parts, the bill can easily climb to $250 or more.
Doing it yourself easily saves you anywhere from $80 to over $200 per repair.
FAQs on How to Repair Pot Metal
Can you weld pot metal with a standard MIG welder?
No, a standard MIG welder burns way too hot. The intense heat will instantly vaporize the zinc in the alloy, turning your part into a useless, bubbling puddle.
What is the best epoxy for pot metal?
You want a two-part, steel-reinforced epoxy. Products like J-B Weld Original are highly recommended because they cure slowly, providing incredible tensile strength on porous alloys.
Why does my pot metal part keep crumbling?
This is a condition called zinc pest. Impurities in the original casting process cause the metal to expand and destroy itself from the inside out. Unfortunately, heavily rotted metal cannot be saved.
Can I powder coat a repaired pot metal part?
If you used the low-temp solder method, yes, but you must be extremely careful. The oven temperatures for powder coating can sometimes melt low-temp solder. Epoxy repairs cannot be powder coated because they will melt in the oven.
Is brazing the same as soldering pot metal?
The terms are often used interchangeably in this context. Because pot metal requires such a low melting point, you are technically doing a high-temperature solder or a very low-temperature braze.
Conclusion
Broken parts do not have to end up in the scrap heap. Learning how to repair pot metal takes a little patience, but it is a highly rewarding skill.
Whether you choose the simple epoxy route for decorative trim or step up to low-temp soldering for a stronger hold, preparation is your best friend. Clean your edges, take your time, and watch your heat carefully.
You can absolutely bring your classic car parts, vintage toys, and antique hardware back to life. You just need the right materials and a steady hand.
Ready to tackle more home projects? Grab your tools, start prepping that broken joint, and show that brittle metal who is boss!