

That favorite leather coat tells a story, but a deep scratch across the chest or a split along the elbow can make it look tired before its time. You spent real money on that jacket, and tossing it over one flaw feels like a waste.
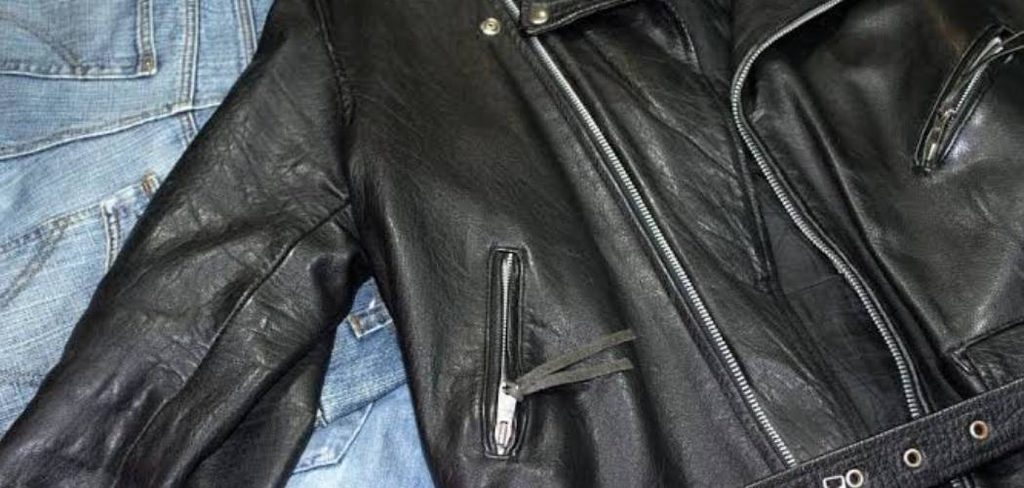
Here’s the good news: most leather damage is fixable at home. A surface scratch, a small tear, a few cracks, or a loose seam often comes back to life with patience and the right supplies. You don’t need a workshop or fancy skills.
Knowing how to repair leather coat damage saves you money and keeps a piece you love in rotation for years. This guide walks you through cleaning, fixing, and protecting your coat step by step, while showing you when a problem truly needs a pro.
Why Learning To Repair A Leather Coat Matters
Leather shows up far beyond the city sidewalk. Think weathered boots at camp, a worn satchel on the trail, gloves, belts, and the trusty jacket you throw on around the fire. The same repair skills work across all of them.
For outdoor beginners, this knowledge is gold. Gear takes a beating in the wild, and a small crack or scratch can spread fast once moisture and cold get in. Catching it early keeps your equipment lasting longer.
You’ll also gain real confidence. Once you understand how leather grain, adhesive, and conditioner work together, you can patch a tear at the campsite or buff out a scuff mark before it worsens. That self-reliance saves money and keeps you out in the field instead of waiting on a repair shop.
Tools and Materials You’ll Need
Gather everything before you start so you can move through each step smoothly. Here’s what to keep within reach:
- Leather repair kit with flexible filler and color compounds
- Leather conditioner to soften and protect the hide
- Leather dye in a shade close to your coat for color match
- Topcoat or sealer to lock in the repair
- Fabric or leather patch for backing larger tears
- Strong leather adhesive rated for flexible bonds
- Soft brush and clean cleaning cloth for prep and finishing
- Mild leather cleaner or gentle soap and water
- Fine sandpaper for smoothing rough edges
- Cotton swabs and a palette knife for precise application
- Optional: a hair dryer on low heat to speed up drying time between coats
A clean, well-lit table makes the whole job easier and your results far more even.
Step-by-Step Guide on How To Repair Leather Coat
Step 1 – Clean and dry the coat first
Never rush into a repair on dirty leather. Grime, oils, and dust block adhesive and dye from bonding, so cleaning comes first every time.
Wipe the whole coat with a soft cleaning cloth dampened with mild leather cleaner. Work in gentle circles and feel the surface for sticky spots or built-up residue. Pay extra attention around the collar and cuffs, where oils gather.
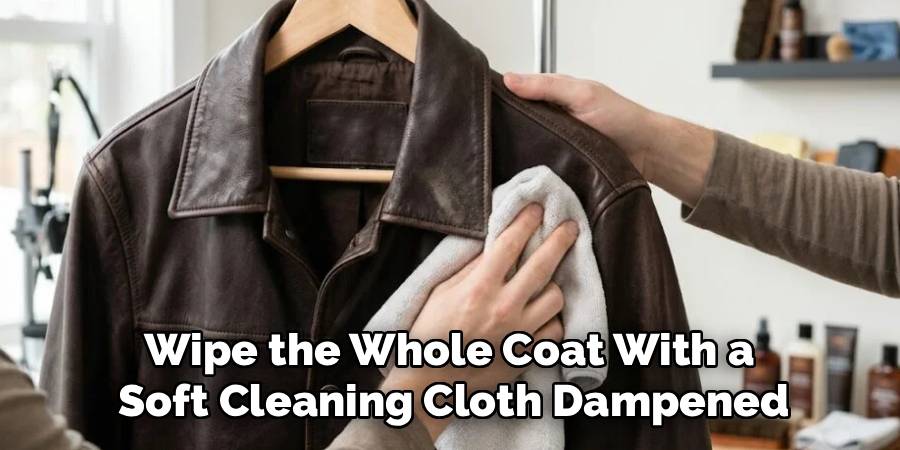
Once clean, let the coat dry fully in a cool, shaded spot. Avoid direct heat or sunlight, which can warp the grain or fade the color.
The leather should feel cool, smooth, and completely dry before you continue. A clean, dry surface is the foundation of every lasting fix, so don’t skip ahead here.
Step 2 – Inspect the damage and test products
Now study what you’re dealing with under good light. Different problems call for different fixes, so identify each one before you start.
A surface scratch only marks the topcoat and buffs out easily. A scuff mark sits on the finish. A small tear cuts through the grain, while cracked leather shows dry, flaky lines. A loose seam means the stitching has let go.
Before applying anything, test your products on a hidden spot, like the inside hem or under the collar. Dab a little dye or conditioner and wait. Check that the color matches and nothing darkens oddly.
This quick test saves you from a visible mistake. Knowing how to repair leather coat damage well starts with matching the right method to the right flaw.
Step 3 – Buff out surface scratches and scuffs
Light scratches and scuff marks are the easiest wins, so tackle them early for a quick confidence boost.
Start by rubbing a small amount of leather conditioner into the scratch with your fingertip or a soft cloth. Many shallow marks simply vanish as the conditioner refills the grain and the leather relaxes.
For a stubborn scuff mark, warm the area gently with your hand and buff in small circles. You’ll feel the surface smooth out and watch the mark fade.
If a faint line remains, dab on a matching leather dye with a cotton swab and feather the edges. Let it dry, then assess. Surface fixes like these restore that soft, even sheen without any heavy work or long waiting.
Step 4 – Fill cracks with flexible filler
Cracked leather feels dry and brittle, with thin lines running through the grain. Filling those cracks stops them from spreading and smooths the surface.
First, lightly sand the cracked area with fine sandpaper to remove flaking bits. Wipe away the dust with a clean cloth so nothing gets trapped.
Scoop a small amount of flexible filler from your leather repair kit onto a palette knife. Spread a thin layer across the crack, pressing it in so it sits level with the surrounding leather. Wipe off any excess right away.
Let it dry fully, then add a second thin layer if the crack still shows. Thin coats beat one thick blob every time, giving you a flat, flexible finish that bends with the coat instead of cracking again.
Step 5 – Repair small tears with patch and adhesive
A small tear needs support from behind so it won’t pull open again. This is where a patch earns its keep.
Cut a fabric or leather patch slightly larger than the tear. Using tweezers or a palette knife, slide it under the torn edges so it backs the gap evenly.
Apply a thin line of leather adhesive to the patch and press the torn edges down onto it. Line up the grain as closely as you can and hold firm pressure for a minute. You’ll feel the bond grip.
Wipe away any squeezed-out glue, then let it cure fully according to the adhesive instructions. Once set, smooth flexible filler over the seam of the tear to blend it. Patience during curing makes the repair nearly invisible.
Step 6 – Restitch loose or damaged seams
A loose seam looks alarming, but it’s often a straightforward sew-up. Catch it before the gap grows.
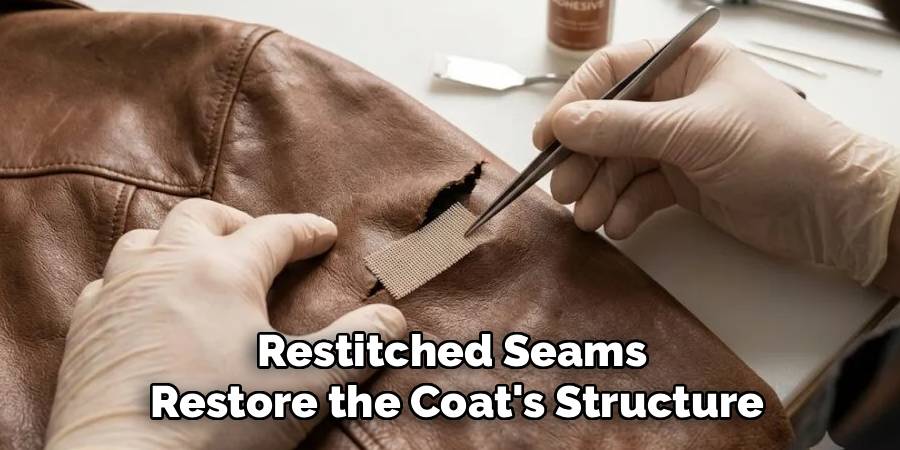
Thread a curved leather needle with strong waxed thread. Work along the existing stitch holes whenever you can, since punching new ones weakens the hide. Push the needle through, pull snug, and repeat in a steady saddle stitch.
Keep your tension even. Too tight puckers the leather, too loose leaves a sloppy line. You’ll feel the right pull as the edges draw together neatly.
Knot the thread securely at the end and tuck it inside the lining out of sight. A dab of adhesive over the knot holds it for good. Restitched seams restore the coat’s structure and keep it looking sharp.
Step 7 – Color match and blend the repair
Now make every fix disappear into the surrounding leather. Color blending is what separates a clean repair from an obvious one.
Pick a leather dye that matches your coat as closely as possible. Apply it in thin layers with a cotton swab or soft brush, building the color gradually rather than soaking the area.
Feather each coat outward past the repair so there’s no hard edge. Step back often and check the match in natural light, since indoor bulbs can fool your eye.
Let each layer dry before adding the next. The goal is a seamless shift from repaired spot to original grain. Take your time here. A patient color match rewards you with a finish that looks like the damage was never there.
Step 8 – Seal, condition, and let it cure
The final step locks everything in and brings the leather back to life. Don’t skip the sealing and conditioning.
Brush a thin, even layer of topcoat over the repaired area to protect the dye and filler. This sealer guards against scuffs, moisture, and daily wear. Let it dry completely.
Next, work leather conditioner across the whole coat, not just the fixed spot. Massage it in with a soft cloth until the hide feels supple and smells faintly rich and earthy. This keeps the grain flexible and prevents future cracking.
Finally, let the coat rest for a full day before wearing it. Proper curing time ensures the repair holds. When it’s ready, you’ll have a coat that looks revived and feels soft and strong again.
Critical Mistakes When Repairing A Leather Coat
The most common mistake is skipping the cleaning step. Working on dirty leather traps oils and dust under your repair, so the adhesive, dye, and filler never bond properly. Always clean and fully dry the coat first.
Rushing the drying time runs a close second. People get impatient and add the next layer or wear the coat too soon, which smears the dye and pulls the filler loose. Let each stage cure completely, even if it tests your patience.
Another frequent slip is skipping the hidden-spot test. Dyes and conditioners can darken or react unexpectedly, and finding that out on the front panel is heartbreaking. Test on the inside hem first, every single time.
Mismatching products causes trouble too. Treating suede or faux leather like genuine hide ruins the surface, since they need their own specific cleaners and tools. A soft brush suits suede, not heavy conditioner.
Finally, many folks try to fix damage that’s beyond home repair. Severe structural tears, valuable vintage pieces, or extensive lining and zipper problems deserve a professional leather repair service or a skilled tailor. Knowing your limit protects the coat you love.
Expert Tips
Always build color in thin layers rather than one heavy coat. Light passes blend far better and let you match the grain gradually without dark blotches.
Keep a small scrap of leather, or use a hidden seam, to practice your technique before touching the visible damage. A quick rehearsal builds your confidence.
Store your coat on a wide, padded hanger in a breathable garment bag. Cramped closets and plastic covers trap moisture and encourage cracks.
Condition the whole coat two or three times a year, not just when something breaks. Regular care keeps the leather supple and stops scratches and cracks before they start.
For faux leather, skip oily conditioners entirely and stick to gentle wipes. Treating it like real hide only damages the finish.
Frequently Asked Questions
Can I repair cracked leather at home?
Yes, you can fix most cracked leather yourself. Clean and dry the area, sand away flaking bits, then press flexible filler into the cracks in thin layers. Let each layer dry fully before adding the next. Finish with matching leather dye and a topcoat, then condition the whole coat. Deep, widespread cracking in a valuable piece may still need a professional.
How do I match the color of my leather dye?
Start by cleaning the leather so you judge the true shade. Then test dyes on a hidden spot, like the inside hem, and check the match in natural light. Build the color in thin layers and feather the edges. Keep these points in mind:
- Indoor bulbs distort color, so always confirm outside
- Leather darkens slightly as dye dries
- Thin coats blend better than one heavy layer
What’s the difference between repairing suede and smooth leather?
Suede has a soft, napped surface that needs gentle care, while smooth leather has a sealed grain. For suede, use a soft brush and specialized suede products, never oily conditioners, which flatten and stain the nap. Smooth leather takes conditioner, dye, and topcoat well. Faux leather differs again and needs only mild wipes. Always identify your material before choosing any product.
When should I call a professional instead of fixing it myself?
Call a pro when the damage is structural, like a large tear through a load-bearing seam, or when the coat is a valuable vintage piece you can’t risk. Extensive lining damage, broken zippers, and reshaping jobs also belong to a leather repair service or tailor. Home methods shine on scratches, scuffs, small tears, and cracks, but heavy repairs need expert tools and experience.
How long should I wait before wearing the coat after a repair?
Give each step its full drying time, then let the finished coat cure for at least 24 hours before wearing it. Adhesive needs time to reach full strength, and dye and topcoat must set so they don’t smear or lift. Rushing this is one of the easiest ways to ruin good work, so be patient. The wait pays off with a lasting, clean repair.
Conclusion
Reviving a tired leather coat is well within your reach. The secret is working in order: clean and dry the leather, inspect the damage, then match the right method to each flaw. Surface scratches and scuff marks buff out fast, cracks fill smoothly, small tears bond over a patch, and loose seams restitch with a little patience.
Keep the essentials close. Always test products on a hidden spot, build color in thin layers, and give every step enough drying time before moving on. Finish by sealing the repair and conditioning the whole coat so the grain stays soft and strong.
Remember your limits too. Severe structural damage, prized vintage pieces, and major lining or zipper issues deserve a professional leather repair service or tailor.
Now that you understand how to repair leather coat damage the right way, you can rescue a jacket you thought was done for and keep wearing it proudly. So gather your supplies, take your time, and give that coat the second life it deserves. What’s the first flaw you’re planning to fix?