

That moment when you slip on your favorite shades and notice a hairline scratch right in your line of sight? It’s frustrating, especially when those sunglasses cost a pretty penny. Before you toss them or rush out for a new pair, it’s worth knowing how to repair scratched sunglass lenses at home with simple supplies you probably already own.
Here’s the honest truth upfront: DIY methods work best on minor surface marks on plastic lenses. They won’t erase deep gouges or fix damaged coatings, and sometimes replacement is the smarter call. Still, for those light, annoying scratches, a little buffing can make a real difference.
This guide walks you through safe, realistic methods to reduce minor scratches, while helping you know when it’s time to replace the lenses instead.
Why Repairing Scratched Sunglass Lenses Matters
If you spend time outdoors, your sunglasses take a beating. Camping, hiking, fishing, or biking all expose your lenses to sand, dust, and the occasional drop on a rocky trail. Knowing how to handle minor scratches keeps your vision clear when you need it most.
For outdoor beginners, a scratched lens isn’t just annoying, it can distort what you see and strain your eyes during long days in bright sun. Learning a few quick fixes means you won’t be caught squinting on the trail.
For everyday homeowners and DIY fans, the payoff is simple. You save money, extend the life of gear you love, and gain confidence in handling small repairs yourself. Just remember that these methods have real limits, and some lenses are better replaced than buffed.
Tools and Materials You’ll Need
Gather everything before you start so you’re not hunting for supplies mid-job. Most of these items are cheap and likely already in your home.
- Microfiber cloth (two, ideally, one for cleaning and one for buffing)
- Mild cleaning solution or dish soap and water
- Baking soda for making a gentle polishing paste
- Non-gel, non-whitening toothpaste as an alternative mild abrasive
- Soft cotton swabs for working small areas
- A small bowl for mixing your paste
- Clean, lukewarm water for rinsing
- Plastic lens polishing compound (optional), made specifically for eyewear
That dedicated polishing compound isn’t essential, but it gives you more control and better results than household pastes. If you fix scratches often, it’s a worthwhile little upgrade to keep on hand.
Step-by-Step Guide on How To Repair Scratched Sunglass Lenses
Step 1 – Inspect the lenses in good light
Before you do anything, hold your sunglasses up to a bright window or lamp and tilt them slowly. Watch how the light catches each mark. You’re looking to tell the difference between a shallow surface scratch and a deep gouge you can feel with your fingernail.
Run a clean fingertip gently across the lens. If your nail catches in the groove, that scratch is too deep for DIY buffing to fix. Light, faint scratches that barely show? Those are your best candidates.
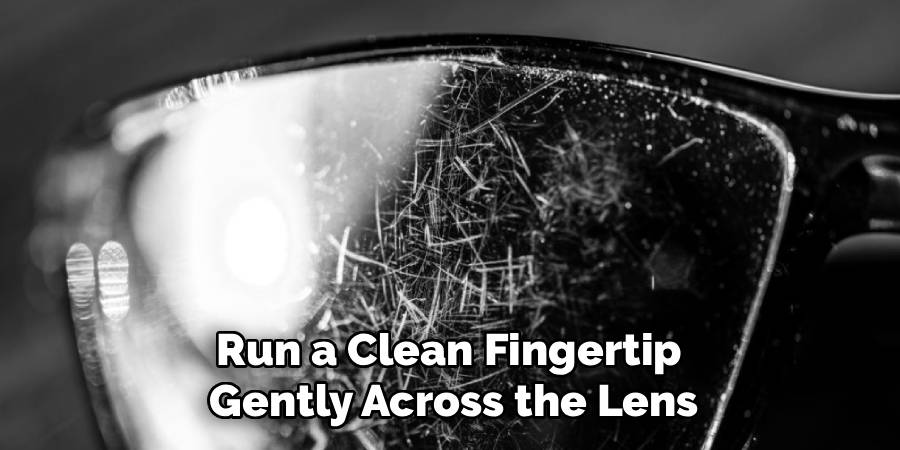
This quick check saves you wasted effort. It also helps you set realistic expectations, because no home method restores deep damage to perfect optical clarity. Knowing what you’re dealing with shapes every step that follows.
Step 2 – Identify the lens type and coating
Not all lenses respond the same way, so figure out what you’ve got. Most affordable sunglasses use plastic lenses, which tolerate gentle buffing better than glass. Higher-end pairs often carry an anti-reflective coating or a mirrored finish, and those are tricky.
Here’s the catch: if your lenses have a special lens coating, any abrasive method can strip or cloud it, making things worse. Rub a coated lens with toothpaste and you may trade one scratch for a hazy, uneven patch.
Check the lens edge or the box for clues about coatings. When you’re unsure, test very gently in a corner first. If the surface looks like it’s smearing or dulling, stop right away and consider replacement lenses instead.
Step 3 – Clean the lenses thoroughly
Never buff a dirty lens. Tiny grit trapped on the surface acts like sandpaper and adds fresh scratches the moment you start rubbing. So begin with a proper clean every time.
Rinse both lenses under lukewarm water to float away loose dust and sand. Then add a drop of mild cleaning solution or dish soap and work it gently with your fingertips. You’ll feel the surface turn slick and smooth as the grime lifts.
Rinse again, then dry with a soft microfiber cloth using light, circular motions. Hold the lens up to the light once more to confirm it’s spotless. A truly clean lens gives you the best shot at a safe, even result.
Step 4 – Mix a gentle polishing paste
Now prepare your mild abrasive. In a small bowl, stir baking soda with a few drops of water until you get a thick, smooth paste, roughly the texture of toothpaste. It should cling to a swab without dripping.
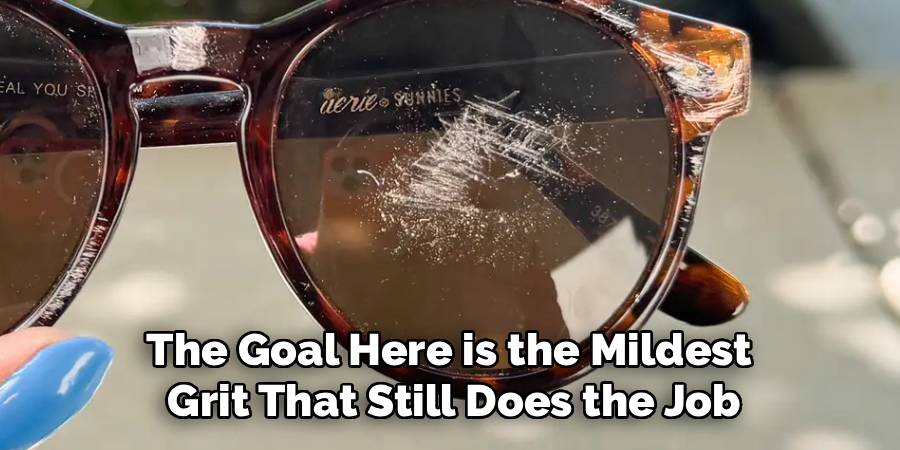
If you’d rather use toothpaste, reach for a plain white, non-gel, non-whitening type. Whitening formulas pack harsher abrasives that can dull the surface. The goal here is the mildest grit that still does the job.
This is the gentlest approach to repair scratched sunglass lenses with minor surface marks. Remember, you’re polishing away a microscopic layer to soften a scratch’s edges, not grinding the lens. Less aggressive always wins, so start mild and build up only if needed.
Step 5 – Apply and buff in small circles
Dab a little paste onto a cotton swab or the corner of a clean microfiber cloth. Touch it to the scratched area and begin buffing with light, slow, circular motions. Keep your pressure feather-soft.
You’ll feel a faint drag as the paste works across the surface. Don’t press harder hoping for faster results, because that’s how you create new swirl marks. Patience matters far more than force here.
Work one small section at a time for about ten to twenty seconds. The paste may turn slightly cloudy as it lifts a fine layer. Keep your circles even and gentle, checking your progress often so you don’t overdo any single spot on the lens.
Step 6 – Rinse and check your progress
After buffing a section, stop and rinse the lens under lukewarm water. Wash away every trace of paste, since leftover grit can keep scratching as you handle the glasses.
Dry the lens with a fresh microfiber cloth, then hold it up to the light again. Look closely at the scratch you targeted. Has it faded? Does the surface look smoother and clearer?
Be honest with what you see. Minor scratches often soften nicely, looking much less noticeable. Deeper ones may barely change, and that’s normal. If you’ve buffed a spot two or three times with little improvement, more rubbing won’t help and may harm the lens. Knowing when to stop protects what optical clarity you have left.
Step 7 – Repeat carefully or switch to polishing compound
If light scratches improved but a few remain, you can repeat the buffing process gently on those spots. Always re-clean between rounds so no grit lingers on the surface.
For stubborn but shallow marks, a dedicated plastic lens polishing compound gives you finer control than household paste. Apply a tiny amount, buff in soft circles, and rinse exactly as before. These products are formulated for eyewear, so they tend to be kinder to plastic lenses.
Resist the urge to keep going round after round. Each pass removes a sliver of material, and too many passes can leave the surface foggy or warped. Two or three careful attempts is plenty. If the scratch persists, accept the limit and move on.
Step 8 – Make the final call: keep or replace
Give your sunglasses one last inspection in bright light. Slip them on and look around. Does your vision feel clear, or do you notice distortion, haze, or glare where you buffed?
If the lenses look better and you see clearly, congratulations, your fix worked. Store them in a hard case to protect your effort.
But if scratches still distort your view, if a coating looks damaged, or if buffing left a cloudy patch, it’s time to think about replacement lenses or a new pair. Damaged coatings can’t be restored at home, and distorted vision isn’t worth saving a few dollars. There’s no shame in replacing them. Sometimes knowing when to stop is the smartest repair skill of all.
Critical Mistakes When Repairing Scratched Sunglass Lenses
The most common mistake is expecting miracles. Home methods only soften minor surface marks on plastic lenses, and they never restore deep scratches to like-new condition. Going in with realistic expectations saves you a lot of disappointment and protects your lenses from damage.
Another big error is buffing coated lenses. If your sunglasses have an anti-reflective coating, a mirror finish, or polarization, abrasives can strip or cloud that lens coating fast. The result often looks worse than the original scratch, and once a coating is damaged, you can’t fix it at home. When in doubt, don’t buff, and lean toward replacement instead.
Skipping the cleaning step causes trouble too. Buffing over trapped sand or dust drags grit across the surface and carves brand-new scratches. Always rinse and clean first, every single time.
Many people also press far too hard, thinking force speeds things up. Heavy pressure creates swirl marks and dull spots that ruin optical clarity. Light, patient circles work better. Finally, don’t overdo it. Buffing the same area again and again removes too much material and can leave a hazy, distorted patch where you once had a clear lens.
Expert Tips
A few small habits make your results cleaner and safer. First, always test any paste in a tiny corner of the lens before tackling the visible scratch. If you spot dulling or smearing, stop immediately and rethink your approach.
Keep two separate microfiber cloths, one for cleaning and one for buffing. Mixing them spreads grit and undoes your careful work. Replace cloths once they feel rough or look worn.
Prevention beats repair every time. Store your sunglasses in a hard case, never face-down on a counter, and clean them only with a soft cloth and proper cleaning solution. Paper towels and shirt hems are scratch factories.
Finally, set a realistic budget mindset. If a quality replacement lens or pair costs little, replacing often beats hours of buffing.
Frequently Asked Questions
Does toothpaste really remove scratches from sunglasses?
Toothpaste can reduce the appearance of very minor surface scratches on plastic lenses, since it acts as a mild abrasive. But it won’t remove deep scratches or repair damaged coatings. Use only a plain, non-gel, non-whitening type, and buff gently. Keep your expectations modest, because results vary and aggressive rubbing can dull or cloud the lens instead of helping.
Can I fix deep scratches on my sunglass lenses?
Honestly, no. Deep scratches that catch your fingernail sit too far below the surface for home buffing to fix. Trying to grind them out removes too much material and distorts your vision. For deep scratches, your best options are:
- Replacing the lenses if your frames support it
- Buying a new pair of sunglasses
Distorted vision isn’t worth saving, especially outdoors.
Will these methods work on coated or polarized lenses?
Usually not, and you should be careful here. Anti-reflective coatings, mirror finishes, and polarized films sit on the lens surface, so abrasives easily strip or cloud them. Buffing a coated lens often makes it look worse and can’t be undone at home. If your lenses are coated, skip the buffing and consider replacement lenses instead for the best, clearest result.
How do I prevent my sunglasses from getting scratched?
Prevention is far easier than repair. Always store your sunglasses in a hard case when you’re not wearing them, and never set them face-down on a surface. Clean them with a microfiber cloth and a proper cleaning solution, not your shirt or a paper towel. These simple habits protect both the lens and any coating, keeping your view clear far longer.
When should I just replace the lenses instead of fixing them?
Replace your lenses whenever scratches distort your vision, when a coating looks damaged or cloudy, or when home buffing leaves a hazy patch. If the scratch catches your fingernail, it’s too deep to fix. Your eyes and safety matter more than the cost, so when in doubt, choose replacement lenses or a fresh pair over risky repairs.
Conclusion
Bringing a faint scratch off your favorite shades feels great, and now you know how to do it safely. You’ve learned to inspect the damage, identify your lens type, clean thoroughly, and gently buff minor surface marks with a mild paste or polishing compound. Just as importantly, you’ve learned the limits of these methods.
Here’s the key takeaway: home fixes work best on light scratches on plastic lenses. They won’t restore deep gouges or repair damaged coatings, and that’s perfectly okay. Knowing when to buff and when to replace is the real skill, and it protects both your eyes and your gear.
So the next time you spot a scratch, don’t panic and don’t toss them right away. Inspect carefully, test gently, and set realistic expectations. With a steady hand and a little patience, you can repair scratched sunglass lenses with minor marks, or confidently decide it’s time for a replacement. Either way, you’re making the smart call, and your future self will thank you for it.