

You reach into your closet to grab your favorite piece of outerwear, only to notice small flakes falling off the shoulders.
Discovering that your beloved garment is shedding bits of plastic everywhere is incredibly frustrating.
You might think it belongs in the trash, but do not throw it away just yet.

If you are wondering how to repair peeling faux leather jacket like a pro, you are exactly in the right place.
Many homeowners and renters face this exact issue as synthetic materials age and break down over time.
Fixing it yourself is much easier than you might expect, and it requires zero professional sewing skills.
Tackling this quick DIY project will save you the hefty cost of replacing your wardrobe or hiring a specialized tailor.
Grab a cup of coffee, roll up your sleeves, and let us walk through this simple process together.
What Causes Faux Leather to Peel?
Before we dive into the fix, it helps to understand why your synthetic clothing is shedding in the first place.
Faux leather is usually made of a fabric base coated with polyurethane (PU) or polyvinyl chloride (PVC).
Over time, this top coating separates from the fabric backing, leading to those annoying flakes.
Here are the most common culprits behind this breakdown:
- Excessive Heat and UV Exposure: Leaving your clothing in direct sunlight dries out the synthetic oils, causing the plastic layer to crack.
- Normal Wear and Tear: Areas that experience heavy friction, like elbows and collars, tend to wear down and peel the fastest.
- Harsh Cleaning Chemicals: Using heavy detergents or alcohol-based cleaners strips the protective finish right off the material.
- Natural Body Oils and Sweat: The oils from your skin can slowly degrade the synthetic binders holding the material together.
- Lack of Moisture: Unlike real animal hides, synthetic materials cannot absorb natural conditioners easily, making them brittle over time.
- Age and Quality: Lower-quality synthetic garments simply have a shorter lifespan and will naturally degrade after a few seasons.
Tools to Repair a Peeling Faux Leather Jacket
You cannot do a good job without the right tools on your workbench.
Gathering your materials before you start will make the entire process smooth and stress-free.
You can find all of these items online or at your local craft and hardware store.
Here is exactly what you need to get the job done right:
- Soft Bristle Brush: You need this to gently sweep away loose, flaky debris without damaging the surrounding material.
- Rubbing Alcohol (Isopropyl): A small amount of alcohol helps clean the exposed fabric so your repair compounds stick properly.
- Microfiber Cloths: These are perfect for wiping the surface clean without leaving lint behind.
- Fine-Grit Sandpaper: Grab some 400-grit to 600-grit sandpaper to smooth out the edges of the damaged area.
- Flexible Leather Filler: This thick paste fills in the gaps where the synthetic topcoat has completely peeled away.
- Small Palette Knife or Spatula: You will use this to spread the filler evenly across the damaged spots.
- Acrylic Leather Paint: Find a color that perfectly matches your garment to blend the repair flawlessly.
- Small Paintbrushes or Sponge Applicators: You need these to dab the paint onto the repaired sections.
- Leather Finisher or Sealant: A quality topcoat seals your fresh paint and prevents future cracking.
Step-by-Step Fix Guide: How to Repair Peeling Faux Leather Jacket
Now that your workspace is set up, it is time to get your hands dirty.
Take your time with each step, as patience is the true secret to a seamless DIY repair.
Follow these beginner-friendly steps to bring your garment back to life.
Step 1: Remove the Loose Flakes
You cannot build a solid house on a crumbling foundation.
Start by taking your garment outside or laying it over a trash can to catch the mess.
Use your fingers to gently peel away any pieces of the topcoat that are already loose.
Next, take your soft bristle brush and lightly scrub the damaged area.
This sweeps away the stubborn bits of synthetic material that are barely hanging on.
Only remove the parts that easily flake off; do not force the healthy material to peel.
Read More: How To Repair Leather Coat.
Step 2: Clean and Prep the Surface
Once the loose debris is gone, you are left with the bare fabric backing.
This fabric needs to be completely clean, or your filler will peel right back off.
Dampen a corner of your microfiber cloth with a few drops of rubbing alcohol.
Gently wipe down the exposed fabric and the immediate surrounding edges.
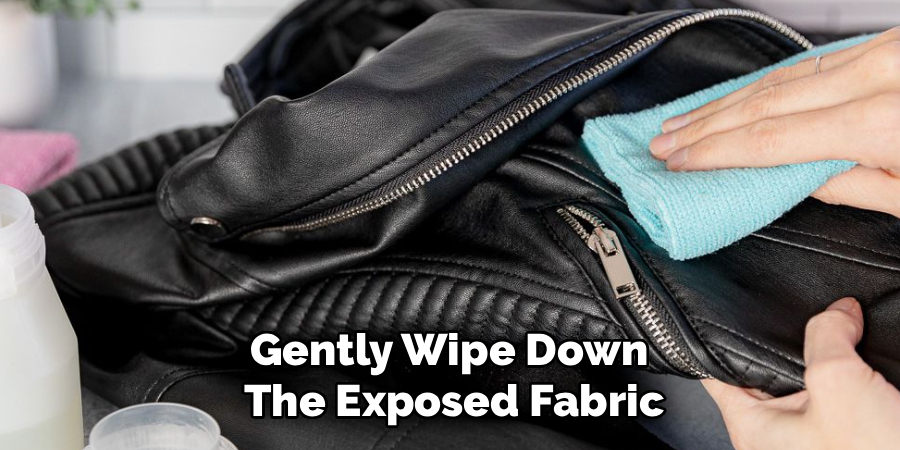
This removes dirt, invisible skin oils, and old fabric softeners.
Let the area air dry completely, which should only take about five minutes.
Step 3: Apply the Flexible Filler
This is where the real magic happens and your garment starts to look whole again.
Scoop a tiny amount of your flexible leather filler onto your palette knife.
Spread it smoothly over the exposed fabric, working it slightly over the healthy edges.
You want to create a bridge between the bare fabric and the remaining synthetic topcoat.
Apply it in thin, even layers rather than one massive clump.
Thick clumps take forever to dry and usually end up looking lumpy and unnatural.
Read More: How to Repair Silk.
Step 4: Let it Dry and Sand Smooth
Patience is crucial during this stage of the repair process.
Let your first layer of filler dry completely according to the package instructions.
Usually, this takes about 30 to 45 minutes, depending on the humidity in your home.
Once it is completely dry to the touch, assess the depth of your repair.
If there is still a noticeable dip, apply a second thin layer of filler and wait again.
When the patch is flush with the surrounding material, grab your fine-grit sandpaper.
Gently buff the dried filler until the transition from patch to original material feels perfectly smooth.
Step 5: Match the Color and Paint
Now it is time to blend your handiwork so no one knows a repair ever happened.
Shake your acrylic leather paint well to ensure the pigments are perfectly mixed.
Using your small sponge or paintbrush, dab a thin layer of paint over the dried filler.
Dabbing, rather than brushing in long strokes, helps mimic the natural texture of synthetic hides.
Let the first coat dry completely before adding another layer.
You will likely need two or three thin coats of paint for full, opaque coverage.
If the color is slightly off, you can mix in tiny drops of white or black acrylic paint to adjust the shade.
Read More: How to Repair Peeling Auto Paint.
Step 6: Seal and Protect the Repair
Your paint job looks great, but it will not last long without a protective barrier.
A high-quality leather finisher acts as a clear coat to lock in the color.
Wait until your final coat of paint is 100 percent dry before moving to this step.
Apply a thin, even layer of the clear sealant over the painted area using a clean sponge.
Make sure to blend the sealant slightly past the repaired zone into the original material.
Allow the garment to cure in a well-ventilated, dry room for at least 24 hours before wearing it.
Safety Warnings to Keep in Mind
Fixing things around the house is rewarding, but safety should always come first.
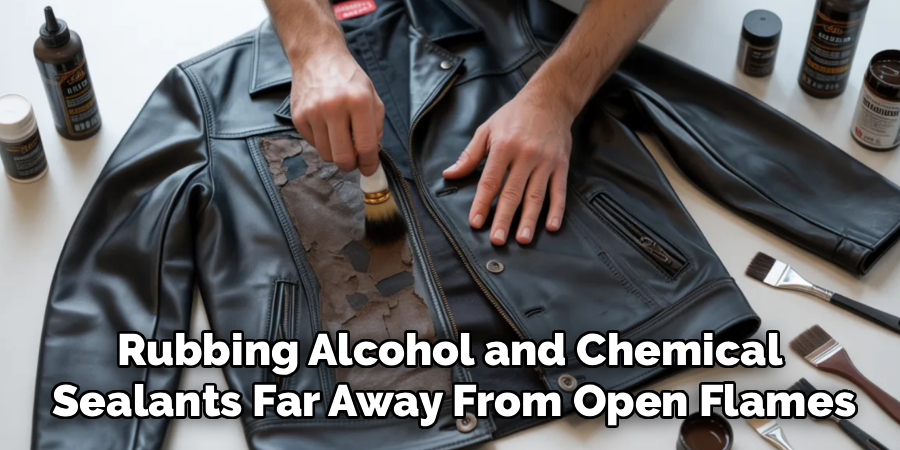
When working with rubbing alcohol, sealants, and acrylic paints, fumes can quickly build up.
Always set up your repair station in a well-ventilated area, like an open garage or a room with open windows.
If you are sensitive to chemical smells, wearing a standard dust mask or respirator is a smart move.
Keep all rubbing alcohol and chemical sealants far away from open flames or heating vents.
It is also wise to wear disposable nitrile gloves to keep sticky fillers and paints off your skin.
Finally, keep your repair materials out of reach of curious pets and small children.
When to Skip the DIY and Call a Professional
I always encourage homeowners to try fixing things themselves, but every DIYer has limits.
If the peeling spans the entire back or covers both sleeves entirely, a spot repair will not look good.
Massive structural damage usually means the base fabric itself is breaking down.
If the garment holds immense sentimental value, such as a family heirloom, you might want an expert’s touch.
Professional tailors have access to heavy-duty sewing machines and replacement synthetic panels.
They can completely remove the damaged sections and stitch in brand-new material.
If you attempt the repair and the filler refuses to stick, the fabric backing might be chemically compromised, requiring professional help.
Cost Estimate: DIY vs. Professional Repair
Let us talk numbers, because saving money is usually the best part of doing it yourself.
Purchasing the supplies for this project is incredibly budget-friendly for most households.
A basic flexible filler costs around $10, while a bottle of acrylic leather paint runs about $5.
Add in the rubbing alcohol, sandpaper, and a cheap brush, and your total DIY cost is roughly $20 to $25.
The best part is that you will have plenty of leftover supplies for future repairs.
On the other hand, taking a synthetic garment to a professional tailor is rarely cheap.
Tailors often charge between $50 and $100 just to replace a small panel of synthetic material.
If the damage is extensive, the professional repair cost could easily exceed the original price of the garment itself.
Frequently Asked Questions
You might still have a few lingering questions before you start your project.
Here are some common concerns folks have when tackling this specific repair.
Can I use super glue to fix peeling faux leather?
No, you should never use standard super glue on synthetic garments. Super glue dries incredibly hard and brittle, which will cause the flexible fabric to crack even worse when you move.
Can I just peel all the faux leather off and wear the fabric underneath?
While you technically can, it is generally a bad idea. The underlying fabric is usually a thin, unfinished mesh that offers zero warmth, no water resistance, and looks quite messy.
Will olive oil stop my faux leather jacket from peeling?
No, natural oils like olive oil or coconut oil sit on top of synthetic plastics and leave a greasy residue. They do not absorb into polyurethane and will actually speed up the degradation process.
Can I use regular fabric paint instead of acrylic leather paint?
Standard fabric paint is too soft and easily absorbs into the filler, leaving a dull finish. Acrylic leather paint is specially formulated to bond with synthetic plastics and bend without cracking.
How do I prevent my jacket from peeling again in the future?
Keep it out of direct sunlight and store it in a cool, dry closet. Wipe it down occasionally with a damp cloth and apply a specialized synthetic leather conditioner every few months to keep the plasticizers flexible.
Conclusion
Seeing your favorite clothing start to flake away can easily ruin your day.
However, you now have the knowledge and confidence to tackle this common household annoyance.
Knowing exactly how to repair peeling faux leather jacket saves you money and reduces textile waste.
By carefully cleaning the area, applying flexible filler, and matching the paint, your outerwear will look incredible again.
Take your time with the sanding and drying steps to ensure a completely invisible patch.
Do not let a little bit of wear and tear convince you to throw away a perfectly good garment.
Grab your supplies today, claim a spot on the workbench, and give your favorite clothes a second lease on life.