

Your generator dies the moment you need it most. The storm hits, the power drops, and the engine won’t turn over. Frustrating, right? The good news is that most generator problems are simple fixes you can handle yourself. You don’t need a technician or a service appointment. When you learn how to repair generators, you save money, avoid downtime, and keep your home powered through any outage.
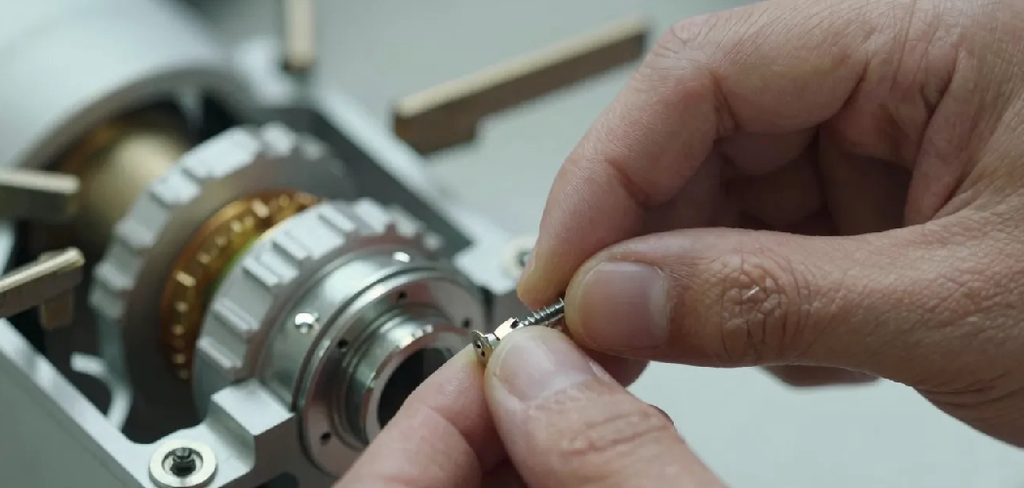
Most failures trace back to old fuel, a dirty carburetor, or a worn spark plug. These are beginner-friendly repairs with basic tools and a little patience. You’ll be surprised how quickly a dead unit roars back to life.
This guide walks you through the exact steps to diagnose, fix, and maintain your generator so it runs when you need it.
Why Repairing Your Generator Matters
A working generator is your backup plan. When it fails, you lose refrigeration, heat, and safety during the worst moments. Knowing how to fix it puts that control back in your hands.
Repairs save you real money. A technician visit runs $80 to $150 before parts. Most DIY fixes cost under $25 in supplies. That’s a clear win.
Regular engine maintenance also extends your generator’s lifespan by years. A neglected unit corrodes from the inside, gums up, and eventually quits for good. A maintained one starts on the first pull, season after season.
You also gain confidence. Generator troubleshooting teaches you how the engine, fuel system, and ignition work together. Once you understand the basics, no breakdown will catch you off guard again.
Tools and Materials You’ll Need
Gather everything before you start. The right tools make the job faster and cleaner.
- Socket and wrench set – for removing panels, bolts, and the spark plug
- Screwdrivers (flathead and Phillips) – for housing screws and clamps
- Spark plug wrench or gap gauge – to remove and measure the plug
- Carburetor cleaner spray – to clear varnish and clogs from jets
- Fresh fuel and fuel stabilizer – to replace old, degraded gas
- Clean engine oil and oil filter – for a quick oil change
- Shop rags and a drain pan – to catch spills and wipe parts
- Wire brush – to scrub corrosion off terminals and the plug
- Work gloves and safety glasses – to protect your hands and eyes
- Compressed air can (optional) – to blow debris from tight passages and the air filter
A small parts tray keeps screws organized so nothing rolls under the workbench.
Step-by-Step Guide on How to Repair Generators
Step 1 – Disconnect and secure the unit
Safety comes first. Turn the engine switch to off and let the unit cool completely. A hot muffler can burn skin in seconds.
Disconnect the spark plug wire so the engine can’t start while your hands are inside. Pull the rubber boot, not the wire itself. Move the generator to a flat, ventilated area, away from anything flammable.

If your model has a battery, disconnect the negative terminal. This removes any electrical risk before you begin.
Take a moment to look it over. Listen for nothing, smell for stale gas, and note any obvious leaks or loose parts. This quick scan often points you straight to the problem before you even pick up a wrench.
Step 2 – Check the fuel system first
Most starting problems come down to fuel. Old gas turns to a sticky, sour-smelling varnish that clogs the entire system. If your fuel has sat for more than 30 days, drain it.
Open the fuel valve and let the tank empty into your drain pan. Watch the color and smell. Fresh gas is light and clean; bad gas looks dark and smells like turpentine.
Refill with fresh fuel and add a stabilizer. This keeps the gas usable for months and protects the carburetor from future buildup.
Knowing how to repair generators starts here, because a clean fuel system solves the majority of no-start issues without touching anything else.
Read More: How to Repair Solar Lights.
Step 3 – Inspect and clean the spark plug
Pull the spark plug with your plug wrench. Hold it up to the light. A healthy plug has a light tan tip. A black, oily, or crusty tip tells you it’s misfiring.
Scrub the electrode gently with a wire brush until the metal shines. Check the gap with your gauge and adjust it to your manual’s spec, usually around 0.030 inches.
If the porcelain is cracked or the electrode is badly worn, replace it. A new plug costs a few dollars and often fixes a rough, hard-starting engine instantly.
Thread it back in by hand first to avoid stripping the threads, then snug it with the wrench. Reconnect the wire firmly.
Step 4 – Clean the carburetor
The carburetor is where fuel and air mix. When it clogs, the engine starves and won’t run. This is the most common deep-clean repair.
Remove the air filter cover and the carburetor bolts. Set the small parts in your tray so nothing gets lost. You’ll likely see a sticky brown film on the jets.
Spray carburetor cleaner into every passage and jet opening. Let it soak, then blow it clear with compressed air. The cleaner has a sharp chemical smell, so work in fresh air.
Reassemble carefully. A properly cleaned carburetor restores smooth idling and full power. Many DIYers repair generators that seemed completely dead just by clearing the carb.
Read More: How to Fix a Garbage Disposal Clog.
Step 5 – Service the air filter
The air filter protects your engine from dust and grit. A clogged filter chokes airflow and makes the engine run rough or stall.
Pop off the cover and pull the filter. Hold it up to a light. If you can’t see through it, it’s too dirty.
Foam filters can be washed in warm soapy water, squeezed dry, and lightly oiled. Paper filters get tapped clean or replaced. Use compressed air to blow debris from the inside out.
A clean filter improves combustion and fuel economy noticeably. Reinstall it snugly so no unfiltered air sneaks past the edges. This five-minute job prevents bigger engine problems down the road.
Step 6 – Perform an oil change
Old oil turns dark, thin, and gritty. It stops protecting the engine and leads to overheating and wear. A fresh oil change keeps internal parts moving smoothly.
Place your drain pan under the oil plug. Remove the plug and let the warm oil flow out completely. The old oil will look murky compared to clean amber oil.
Replace the oil filter if your model has one. Wipe the area clean, reinstall the plug, and refill with the grade listed in your manual.
Check the dipstick to confirm the level. Don’t overfill, which causes smoking and rough running. Regular oil changes are the single best habit for long engine life.
Step 7 – Test the ignition and electrical parts
If the engine still won’t start, check the ignition system. Reconnect the spark plug to its wire, ground the metal base against the engine block, and pull the starter.
Look for a strong blue spark. A weak yellow spark or no spark points to a bad coil, faulty switch, or loose wiring.
Inspect the kill switch and on/off toggle for corrosion. Scrub any green or white buildup off the terminals with your wire brush. Tighten every loose connection.
Test the outlets with a multimeter once the engine runs. Steady voltage confirms the alternator and windings are healthy. Unstable readings may mean a worn brush or capacitor that needs replacing.
Read More: How to Fix a Stripped Bolt Thread.
Step 8 – Reassemble and run a test
Put everything back together in reverse order. Double-check that each bolt is tight and every wire sits in its place. Loose parts vibrate free and cause new problems.
Reconnect the battery and spark plug wire. Open the fuel valve, set the choke, and pull the starter or hit the electric start.
Listen closely. A healthy engine settles into a steady, even hum within a few seconds. Watch for smoke, leaks, or odd rattles.

Let it run for ten minutes and plug in a small load, like a lamp. Confirm the power stays stable. A smooth, quiet run means your repair worked and your portable generator is ready for the next outage.
Critical Mistakes When Repairing a Generator
Even simple repairs go wrong when you rush. The first mistake is skipping the spark plug disconnect. People reach into the engine with the wire still attached, and one accidental pull can start the motor on their fingers. Always remove that wire first. It takes three seconds and prevents serious injury.
The second mistake is leaving old fuel in the system. Many owners add fresh gas on top of stale gas and wonder why the engine still sputters. That old varnish keeps clogging the carburetor. Drain it completely before refilling, every time.
A third common error is overfilling the oil. More is not better here. Too much oil causes white smoke, fouled plugs, and rough running. Check the dipstick and stop at the full line.
The fourth mistake is forcing the spark plug back in. Cross-threading the aluminum head strips it and creates an expensive repair. Always start the plug by hand.
Finally, many people ignore routine engine maintenance entirely. They only touch the unit when it dies. Skipping seasonal checks turns a five-dollar fix into a dead machine. A little upkeep now saves a big headache later.
Expert Tips
Run your generator every month for ten minutes, even when you don’t need it. This circulates oil, keeps seals fresh, and prevents the carburetor from gumming up between uses.
Always store it with a full tank and fuel stabilizer added. Empty tanks invite rust and condensation inside the fuel system.
Keep a spare spark plug, fresh oil, and an extra air filter on hand. When a storm knocks out power, parts stores are closed and shelves empty fast. Being stocked means you fix problems immediately.
Label your fuel can with the fill date so you always know its age. Gas older than 30 days without stabilizer is the top cause of breakdowns.
Finally, read your owner’s manual once, fully. It lists the exact oil grade, plug gap, and torque specs your specific model needs.
Frequently Asked Questions
Why won’t my generator start even with fresh fuel?
Fresh fuel alone won’t fix a clogged carburetor or fouled spark plug. The most common culprits are:
- A dirty carburetor blocked by old varnish
- A worn or carbon-covered spark plug
- A clogged air filter choking airflow
- A tripped low-oil sensor
Start with the spark plug and carburetor. Clean both, confirm the oil level, and the engine usually fires right up.
How often should I change the oil in my generator?
Change the oil after the first 20 hours of use on a new unit, then every 50 to 100 hours after that, or at least once a year. Heavy use during outages calls for more frequent changes. Dark, gritty oil signals it’s overdue. Regular oil changes prevent overheating and protect the engine, making them the cheapest way to extend your generator’s life.
Can I repair generators myself without experience?
Yes. Most generator troubleshooting involves basic tasks any beginner can handle:
- Cleaning the spark plug
- Draining old fuel
- Spraying out the carburetor
- Swapping the air filter
These need only common tools and a little patience. Save the technician for major electrical faults or internal engine damage that requires specialized testing equipment.
What causes a generator to run rough or surge?
Surging usually means the engine isn’t getting steady fuel. A partially clogged carburetor jet is the top cause. Other reasons include a dirty air filter, stale fuel, or a loose spark plug. Clean the carburetor, replace the fuel, and check the plug gap. If the surging continues, inspect the governor linkage for sticking or debris.
Is it safe to store a portable generator with fuel inside?
Yes, if you use a fuel stabilizer. Add the stabilizer, run the engine a few minutes to circulate it, then store the unit in a dry, ventilated space. Stabilized fuel stays usable for up to a year and protects the fuel system from corrosion. Never store a generator indoors while running, since the exhaust is deadly.
Conclusion
Fixing a generator is far easier than most people expect. Nearly every breakdown traces back to four things: old fuel, a dirty carburetor, a worn spark plug, or skipped engine maintenance. Address those, and your unit starts on the first pull.
You now have a clear, step-by-step process. Disconnect safely, drain the old gas, clean the plug and carburetor, service the air filter, change the oil, and test the ignition. Each step uses simple tools and costs a fraction of a service call.
The real payoff is independence. When the next storm hits, you won’t wait on a technician or sit in the dark. You’ll grab your tools and have power back fast.
Build the habit of monthly run-ups and seasonal checks. A little care keeps your machine reliable for a decade or more. Once you know how to repair generators, you protect your home, save money, and gain peace of mind that lasts well beyond any outage.
Grab your tools and put this guide to work today.