

You push your mower across the lawn, expecting it to glide forward on its own, but instead you’re wrestling it like a stubborn shopping cart. The self-propel feature has quit, and the culprit is usually a worn, stretched, or snapped drive cable.
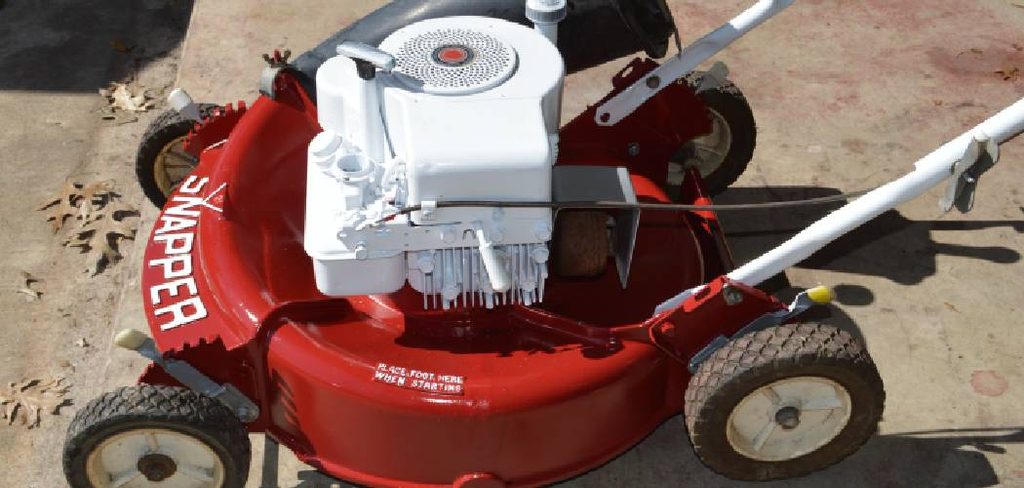
Here’s the good news: you don’t need to call a repair shop or buy a new machine. Learning how to fix self propelled lawn mower cable issues is a straightforward job you can handle in your own driveway with basic tools and a little patience.
A faulty cable kills your mower’s drive engagement, leaving you to power it manually across the yard. Once you understand how the cable connects the control handle to the traction system, the repair feels simple. This guide walks you through diagnosing, adjusting, and replacing the cable step by step.
Why Fixing a Self-Propelled Lawn Mower Cable Matters
A working self-propel system saves your back and your time, especially on hills or large yards. When the drive cable fails, every pass becomes a workout you didn’t sign up for.
For homeowners, renters, and DIY enthusiasts, this skill keeps your outdoor equipment running without the cost of a technician. A simple cable fix often runs a few dollars instead of a hundred-dollar service bill.
The payoff grows when you’re far from a repair shop. Campers and outdoor beginners who handle yard work at a cabin or clear a campsite can’t always pop into town for a fix. Knowing how to repair the cable yourself means you avoid breakdowns in remote places and keep your mower cutting. You’ll also build confidence with your traction system and handle assembly that carries over to other repairs.
Tools and Materials You’ll Need
Most of these tools are already sitting in your garage. Gather everything before you start so you’re not running back and forth mid-repair.
- A new replacement cable that matches your mower’s make and model
- A socket or wrench set for the adjustment nut and mounting bolts
- Needle-nose pliers to grip springs and hook the cable ends
- A flathead screwdriver for prying clips and cable housing tabs
- Work gloves to protect your hands from sharp edges and grease
- A clean rag to wipe down greasy parts as you work
- Your mower’s service manual for the exact cable routing diagram
- A flashlight or headlamp (optional, but it makes spotting the cable path under the deck far easier)
That headlamp is a small convenience that frees up both hands while you trace the cable through the handle assembly and down to the transmission.
Step-by-Step Guide on How to Fix Self Propelled Lawn Mower Cable
Work through these eight steps in order. Take your time, and always start with the engine off for safety.
Step 1 – Disconnect the Spark Plug Wire
Safety comes first, always. Before you touch a single bolt, pull the spark plug wire off the spark plug to make sure the engine can’t fire while your hands are near the blade.
Find the thick rubber boot sitting on top of the engine and give it a firm twist as you pull. You’ll feel it pop loose with a satisfying click. Tuck the wire to the side so it doesn’t accidentally reconnect.
This one move protects you from a dangerous surprise start. A mower blade spins with brutal force, and an accidental kick of the engine can cause serious injury. Never skip this step, no matter how quick you think the repair will be. With the wire off, you can work calmly.
Step 2 – Inspect the Old Drive Cable
Now play detective and find out exactly what’s wrong. Trace the drive cable from the control handle at the top down to the transmission near the wheels.
Run your fingers along its length, feeling for frays, kinks, or a spot where the inner wire has snapped. A failed cable often feels loose and limp, with no resistance when you squeeze the lever. You might even see the metal strands poking through the cable housing.
Watch how the lever moves. If you squeeze the drive engagement bar and nothing tightens, the cable is either stretched, disconnected, or broken. Knowing how to fix self propelled lawn mower cable problems starts here, because a quick inspection tells you whether you need a simple adjustment or a full replacement.
Step 3 – Try Adjusting the Cable Tension First
Sometimes the cable isn’t broken, just stretched loose over time. Before you replace anything, test whether a tension adjustment brings the self-propel system back to life.
Find the adjustment nut or barrel adjuster along the cable, usually near the control handle. Turn it slowly with your fingers or a wrench to take up the slack. You’ll feel the cable grow tauter with each turn.
Reconnect the spark plug wire briefly, start the mower on a flat surface, and squeeze the drive lever to test the engagement. If the wheels pull forward smoothly, you’ve solved it without spending a dime. If the cable still slips or feels dead, turn the engine off and move on to a full replacement.
Step 4 – Remove the Old Cable From the Handle
If adjustment didn’t work, it’s time to swap the cable. Start at the top, near the control handle and operator presence bar.
Look for where the cable end hooks into the lever. It’s usually a small metal nipple seated in a slot or a clip holding the cable housing in place. Use your needle-nose pliers to unhook the cable end, and a flathead screwdriver to pop any housing clips free.
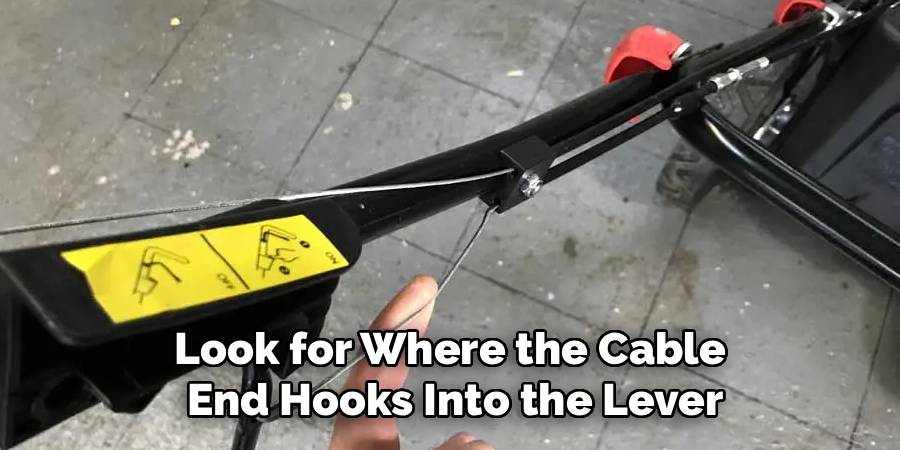
Work gently, since plastic tabs on the handle assembly crack easily when you force them. You’ll feel the cable release with a soft give. Take a quick photo with your phone before fully removing it, so you remember exactly how the cable routing wraps around the handle.
Step 5 – Detach the Cable at the Transmission
Now follow the cable down to its other end at the transmission or traction system near the rear wheels. This is where the cable engages the drive that pushes your mower forward.
Tip the mower back or onto its side, keeping the air filter and carburetor facing up to avoid oil leaks. Locate the spring and bracket where the cable connects.
Unhook the spring with your pliers and slip the cable end out of its mounting slot. You may need to loosen a bolt or two on the cable housing bracket. Grease and grass clippings often cake this area, so wipe it down with your rag. Once both ends are free, pull the entire old cable out along its route.
Step 6 – Route the New Replacement Cable
Grab your new replacement cable and lay it next to the old one to confirm they match in length and end fittings. A mismatched cable won’t tension correctly, so double-check before installing.
Thread the new cable along the exact same path the old one followed. Use your earlier photo and the service manual diagram as a guide. Keep the cable clear of hot engine parts, the muffler, and any pinch points near the mower deck.
Smooth, gentle routing prevents kinks that cause early failure. You’ll feel the cable settle naturally into the clips along the handle. Take a moment to make sure nothing crosses or twists, because clean cable routing is the difference between a fix that lasts and one that fails fast.
Step 7 – Connect Both Cable Ends Securely
With the cable routed, it’s time to anchor both ends. Start at the transmission, hooking the cable into its slot and reattaching the spring with your pliers.
You’ll feel the spring snap into place with a firm tug. Reinstall any bracket bolts you loosened earlier, snugging them down so the cable housing stays put.
Move back up to the control handle and seat the cable nipple into the lever slot, then clip the housing into place. Give each connection a gentle pull to confirm it’s locked in. Loose ends are the most common reason a repair fails, so don’t rush this part. Both ends should feel solid, with no wobble or play before you test the drive engagement.
Step 8 – Adjust Tension and Test the Self-Propel System
Almost done. Now fine-tune the cable tension using the adjustment nut, just like you did in step three.
Turn it until the cable feels firm but not overly tight. You want a little slack when the lever rests and full engagement when you squeeze it. Reconnect the spark plug wire, then start the mower on flat ground.
Squeeze the drive engagement bar and feel the wheels pull forward with steady power. Release it and the mower should coast freely. If the drive slips, turn the engine off and tighten the adjustment a touch more. Mastering how to fix self propelled lawn mower cable troubles comes down to this final balance, where smooth, confident forward motion tells you the job is done right.
Critical Mistakes to Avoid When Fixing a Self-Propelled Lawn Mower Cable
A few common errors can turn a simple fix into a frustrating afternoon, so let’s clear them up before you grab a wrench.
The biggest mistake is skipping the spark plug wire disconnection. People assume the engine won’t start on its own, but a spinning blade can cause severe injury if it kicks over while your hands are underneath. Always pull that wire first, every single time.
Another frequent slip-up is buying the wrong replacement cable. Cables vary by mower make, model, and even production year. A cable that’s too long or short will never tension properly, leaving your self-propel system weak or jerky. Match the part number before you buy.
Many beginners also forget how the cable was routed. Once they yank the old one out, they have no idea where the new one goes, and end up draping it across hot engine parts. Snap a photo before removal and follow your service manual’s cable routing diagram.
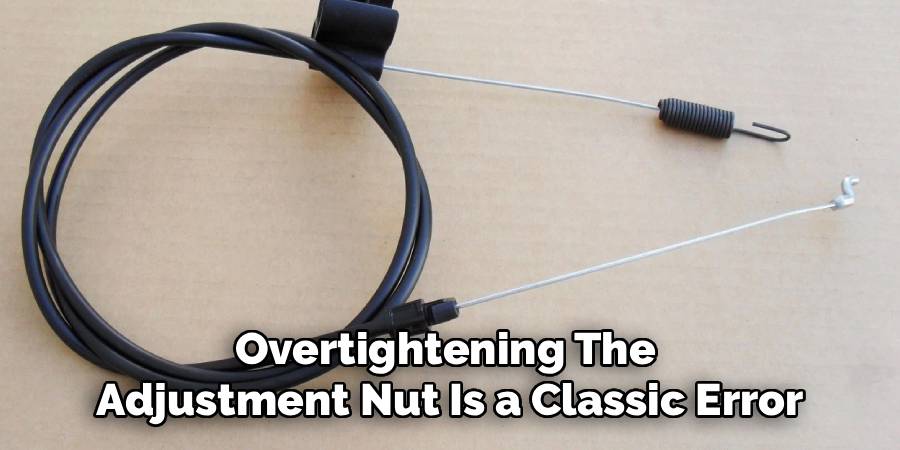
Finally, overtightening the adjustment nut is a classic error. A cable cranked too tight keeps the wheels engaged even when you release the lever, dragging the transmission and burning out parts. Aim for firm tension with a touch of slack at rest.
Expert Tips
A few smart habits make this repair cleaner and help your new cable last longer.
First, clean the entire cable path while you have the mower apart. Caked grass and dried grease hide pinch points and make routing harder, so a quick wipe-down pays off.
Second, add a tiny drop of light lubricant where the cable enters and exits the housing. This cuts friction and smooths your drive engagement, especially in cold weather.
Third, keep the old cable as a reference for length and end fittings, even after you install the new one. It’s a free template if you ever need to order another.
Finally, check your cable tension at the start of each mowing season. A quick five-minute adjustment prevents stretching from sneaking up on you and keeps the traction system pulling strong all summer.
Frequently Asked Questions
How do I know if my drive cable is broken or just loose?
Squeeze the drive engagement lever and watch the cable. If it tightens but the wheels still don’t pull, the cable is likely stretched and needs adjusting. If the lever feels limp with no resistance, or you see frayed metal strands, the cable is broken. A quick visual and feel test usually tells you which repair you’re facing.
Can I replace the cable myself without a service manual?
Yes, though a manual makes it much easier. The biggest challenge is cable routing, so snap clear photos before removing the old cable. Follow these basics:
- Match the new cable to your exact mower model
- Trace the same path the old cable followed
- Keep the cable away from hot engine parts
Your photos act as a reliable guide if you don’t have the manual handy.
Why does my mower still not self-propel after replacing the cable?
The most common cause is incorrect cable tension. If the cable is too loose, the drive won’t engage fully. Use the adjustment nut to add tension until the wheels pull firmly when you squeeze the lever. Double-check that both cable ends are properly hooked and that the spring at the transmission is securely attached before assuming a deeper problem.
How tight should the drive cable be?
Aim for firm tension with a small amount of slack when the lever is at rest. When you squeeze the drive engagement bar, the cable should pull taut and the wheels should grip. If the wheels stay engaged even after you release the lever, the cable is too tight. Back off the adjustment nut slightly until the mower coasts freely.
How long does a replacement drive cable last?
A quality replacement cable typically lasts several years with normal use. Lifespan depends on how often you mow, the terrain, and whether you keep the cable clean and properly tensioned. Stretching, kinks, and trapped grass shorten its life. A quick seasonal inspection and a drop of lubricant where the cable meets the housing can add years to its working life.
Conclusion
A dead self-propel feature doesn’t mean your mower is finished. As you’ve seen, the fix usually comes down to one worn or stretched drive cable, and you have everything you need to handle it yourself.
Start with safety by disconnecting the spark plug wire, then inspect the cable to decide between a simple tension adjustment and a full replacement. When you swap the cable, route it carefully along the original path, secure both ends at the handle and transmission, and dial in the tension until your wheels pull forward with steady, confident power.
Avoid the common traps of skipping safety, buying a mismatched cable, or overtightening the adjustment nut, and your repair will hold up season after season. A little seasonal maintenance keeps the whole traction system running strong.
Now that you know how to fix self propelled lawn mower cable problems, you’ve saved yourself a service bill and gained a skill that keeps your yard work easy. So grab your tools, roll up your sleeves, and get that mower gliding across the grass again.