

A ball mark might seem like a tiny dent, but it can quickly turn a smooth putting green into a bumpy, frustrating surface. If you’ve ever watched your ball wobble off course near the hole, an unrepaired pitch mark is often the culprit. The good news? Learning how to repair a ball mark takes just a few seconds and a simple tool you can keep in your pocket. You don’t need fancy equipment or years of experience to do it right.
Whether you’re a weekend golfer or someone who looks after a backyard green, this skill keeps the turf healthy and the play fair. This guide walks you through every step, from spotting the damage to smoothing the grass back into place.
Why Repairing a Ball Mark Matters
When your golf ball lands on a soft green, it presses the grass and soil down, leaving a small crater. Left alone, that crater can take weeks to heal. The bruised grass often dies, creating a brown scar that affects how every ball rolls across the surface.
Fixing the mark right away helps the turf bounce back in a day or two instead of fading away. It also keeps the green smooth for the next player, including you on your return trip. Think of it as good golf manners mixed with simple lawn care. A well-tended green rewards everyone with truer putts, healthier grass, and a course that looks and feels its best season after season.
Tools and Materials You’ll Need
You won’t need much to get this job done. Most golfers carry these items without even thinking about it. Here’s what helps:
- Divot repair tool (also called a pitch fork or ball mark repair tool) — the main tool for the job
- A tee — works as a backup if you forgot your repair tool
- Your shoe or putter — for the final tamp-down step
- A small towel — to wipe dirt off your hands and tool afterward
- A spare ball marker(optional) — handy for marking your spot before you start repairs
Keep your repair tool clipped to your bag or tucked in your back pocket. That way it’s always within reach the moment your ball lands and leaves a dent.
Step-by-Step Guide on How to Repair a Ball Mark
Step 1 – Find the Damage
Walk over to where your ball landed on the green. Look for a small indentation in the grass, often surrounded by a slight ridge of pushed-up turf. The center may look pale or bruised, and the edges might feel spongy under your fingers.
Newer marks are easy to spot because the grass still looks crushed and dark. Older ones blend in more, so scan the area carefully. Run your hand lightly across the surface if you’re unsure. You’ll feel the dip before you see it.
Spotting the mark quickly matters because fresh damage repairs cleaner. Once you’ve located it, you’re ready to grab your tool and get to work.

Step 2 – Insert Your Repair Tool
Take your divot repair tool and position it just outside the edge of the mark, not in the middle. Push the prongs into the turf at a slight angle, aiming them toward the center of the dent.
Press down firmly but gently. You should feel the prongs sink into the soft, cool soil with a satisfying give. Avoid jabbing straight down into the crater itself, since that does little to help the grass.
Work your way around the entire mark, inserting the tool at several spots along the outer edge. This sets you up to pull the surrounding turf inward, which is the real secret to a smooth repair.
Step 3 – Push the Turf Inward
Now for the part that does the magic. Instead of lifting up, gently push the edges of the turf toward the center of the mark. Use a slight twisting or rocking motion as you go around the rim.
Picture closing a small gap by drawing the healthy grass together over the bare spot. You’ll feel the soil shift slightly under the prongs as the dent begins to close. The center should start to fill in and level out.
This technique on how to repair a ball mark protects the roots that hold the grass alive. Pushing inward keeps those roots connected, while lifting upward tears them and kills the turf.
Step 4 – Avoid Lifting the Center
It’s tempting to scoop under the dent and pop the center up like fixing a dent in a car. Resist that urge. Lifting exposes the roots to air and breaks the delicate connection that keeps the grass green.
When roots dry out, the grass turns brown within a day or two, leaving an ugly dead patch. That’s the opposite of what you want.
Keep your motions focused on the edges, drawing the surrounding turf inward and downward. The grass in the center will rise naturally as you close the gap from all sides. Patience here makes the difference between a quick heal and a lingering scar.
Step 5 – Work All the Way Around
Don’t stop after one or two pushes. Move your repair tool around the full circle of the mark, working in small sections. Insert, push inward, and release. Then shift a couple of inches and repeat.
You’ll notice the crater shrinking with each pass. The bruised center starts to look more like the smooth turf around it. Keep your touches light and even so you don’t tear anything.
Take your time, especially on bigger marks. Larger dents need more passes to close fully. By the end, the once-obvious dent should look nearly flat, with healthy grass blades knitting together over the spot.
Step 6 – Tamp It Down Gently
Once the gap is closed, it’s time to smooth everything flat. Place the flat bottom of your putter head over the repaired spot, or simply step on it gently with your shoe.
Press down with light, even pressure. You want the surface level with the rest of the green, not pushed below it. Give it a soft tap or two until it feels firm and smooth beneath your foot.
This step settles the loosened turf back into the soil and removes any small bumps. Run your hand over it afterward to check. A properly tamped repair feels seamless and ready for the next putt to roll right across it.
Step 7 – Check Your Work
Step back and take a good look. The spot should now blend in with the surrounding grass, showing no obvious dip or raised ridge. The blades should stand upright rather than lying crushed.
Crouch down to eye level with the green if you want to be sure. Look for any lingering bumps or thin patches. If something still looks off, give it another gentle push inward and tamp it down again.
A solid repair leaves almost no trace within a few minutes. Knowing how to repair a ball mark properly means you can trust your fix to heal fast and keep the green rolling true for everyone who plays after you.
Step 8 – Repair Extra Marks Nearby
While you’re already down on the green, glance around for other dents that earlier players may have missed. Greens often collect several marks near the hole and along common landing zones.
Fixing one or two extra takes only seconds and makes a huge difference to the turf’s health. Many courses suggest repairing your own mark plus one more each round.
You’ll feel good knowing you left the green better than you found it. Plus, smoother turf means truer putts for you on your next visit. Pocket your tool, wipe your hands, and move on with the quiet satisfaction of a job well done.
Critical Mistakes When Repairing a Ball Mark
The most common mistake is lifting the center of the dent upward. It feels natural, like popping out a dent, but it rips the grass roots apart and exposes them to drying air. Within a day, that spot turns brown and dies, leaving a scar that lasts for weeks. Always push the turf inward instead.
Another frequent error is jabbing the tool straight into the middle of the crater. This compresses the already damaged soil and does nothing to help the surrounding grass close the gap. Insert your prongs at the outer edges and work inward for the best results.
Many people also skip the tamping step. After closing the gap, they walk away leaving a slightly raised, uneven surface. A loose repair quickly settles into a bumpy lump that throws off putts. Take the extra few seconds to press it flat with your putter or shoe.
Finally, waiting too long causes trouble. A fresh mark repairs cleanly, while an old one has already started to die. Fix the damage the moment you reach the green, and you’ll give the grass its best chance to recover fully.
Expert Tips
Keep your repair tool somewhere you’ll always find it, like clipped to your bag or in a consistent pocket. The faster you can reach it, the quicker you repair the mark while it’s fresh.
Repair marks before you putt, not after. A smooth surface helps your ball roll true, and fixing first means you won’t forget once you’ve sunk the shot.
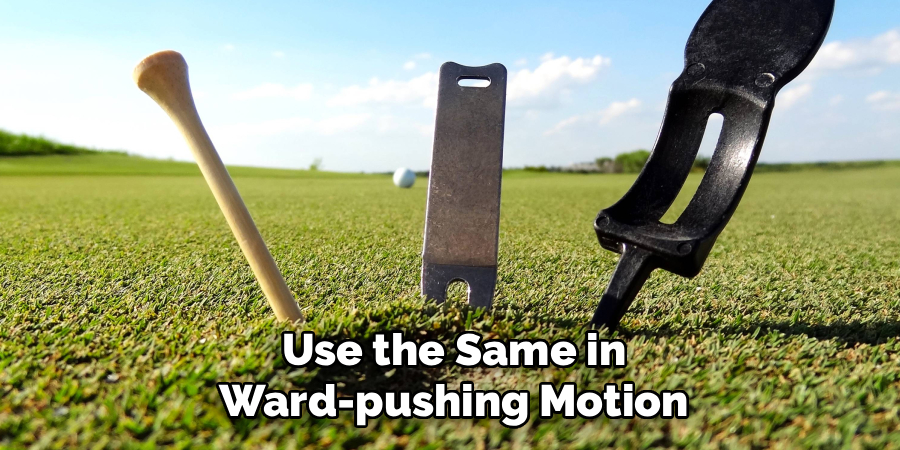
If you only have a tee, that works fine in a pinch. Use the same inward-pushing motion you’d use with a proper tool.
Finally, adopt the “fix two” habit. Repairing your own mark plus one extra keeps greens healthy and shows respect for fellow golfers. Over a full round, those small efforts add up to a noticeably better course for everyone.
Frequently Asked Questions
How long does a repaired ball mark take to heal?
A properly repaired mark usually heals within 24 to 48 hours. When you push the turf inward instead of lifting it, the grass roots stay connected and recover fast. A poorly repaired or ignored mark can take two to three weeks to fully grow back, and it may leave a dead brown patch in the meantime.
Can I use a tee instead of a divot repair tool?
Yes, a tee works well as a backup. Insert it at the edge of the mark and use the same gentle inward-pushing motion you’d use with a proper tool. The key is technique, not the specific tool. A tee, a key, or even a sturdy stick can do the job when you’re caught without your repair fork.
Should I lift the center of the dent?
No, never lift the center. Scooping under the mark and popping it up tears the grass roots and exposes them to air. This kills the turf and creates a lasting brown scar. Always push the surrounding edges inward toward the center. The middle will rise naturally as you close the gap from all sides.
How many ball marks should I repair per round?
A good habit is to repair your own mark plus at least one extra each time you’re on a green. This simple practice helps keep the course healthy, since many marks go unrepaired. Some golfers aim to fix:
- Their own ball mark
- One additional mark left by others
- Any obvious dents near the hole
What happens if I leave a ball mark unrepaired?
An unrepaired mark damages the green for everyone. The bruised grass often dies, leaving a brown scar that can take weeks to recover. These dents also create bumps that knock putts off line. Fixing the mark right away keeps the turf healthy, the surface smooth, and the play fair for the next golfer who comes along.
Conclusion
Fixing a pitch mark on the green is one of the easiest yet most important habits any golfer can build. With just a simple repair tool and a few seconds of effort, you protect the turf, keep putts rolling true, and show respect for the players coming behind you.
Remember the golden rule: push the turf inward, never lift the center. Work around the full edge of the dent, then tamp it flat with your putter or shoe. Check your work, and while you’re at it, fix an extra mark or two nearby. These small actions add up to healthier, smoother greens all season long.
Now that you know how to repair a ball mark the right way, you’re ready to leave every green in better shape than you found it. Keep your tool handy, act fast while the damage is fresh, and make repairs part of your routine. Your fellow golfers, and the course itself, will thank you for it. Grab your tool and give it a try on your next round.