

Finding a crack in your basement walls can feel like a nightmare. You might immediately picture your savings draining away on expensive contractors. But don’t panic just yet.
Learning how to repair home foundation cracks like a pro is entirely possible. In fact, tackling minor, non-structural cracks on your own is a smart move. It protects your property and saves you a massive amount of money.
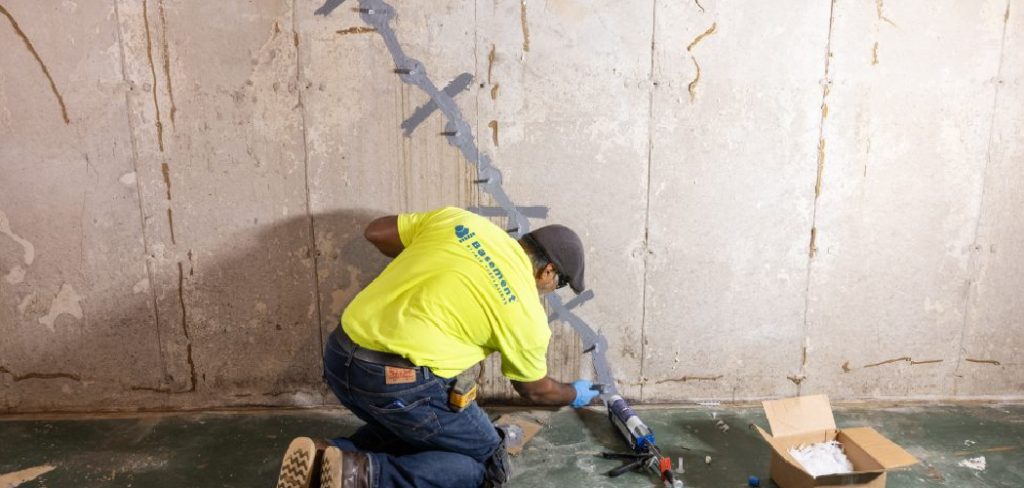
Most small vertical cracks are just a normal part of a house settling. They look scary, but they are completely manageable for a dedicated DIYer. You just need the right materials, a free weekend, and a bit of patience.
By fixing these minor issues early, you stop water from seeping into your basement. You also prevent freezing temperatures from making the damage worse. Let’s roll up our sleeves and get your basement secure again.
What Causes Foundation Damage?
Before diving into repairs, it helps to understand why your walls are cracking in the first place. Houses settle, and concrete reacts to the environment.
Here are the most common culprits behind foundation damage:
- Soil Expansion and Contraction: Clay-rich soil swells when wet and shrinks when dry. This constant movement puts immense pressure on your concrete walls.
- Poor Drainage: If your gutters leak or your yard slopes toward your house, water pools near the base. This water creates hydrostatic pressure that pushes against the concrete until it cracks.
- Tree Roots: Large trees planted too close to your house have aggressive root systems. These roots seek moisture and can push right through block or poured concrete over time.
- Temperature Changes: Concrete expands in the heat and shrinks in the cold. Over many seasons, this thermal movement creates stress fractures, especially in older homes.
- Plumbing Leaks: A slow leak from an underground pipe can saturate the soil around your home. This leads to the same heavy pressure issues as poor yard drainage.
- Normal Settling: Almost every new house sinks slightly into the ground during its first few years. This minor shifting frequently causes small, vertical hairline cracks.
Tools & Materials Needed
You cannot learn how to repair home foundation cracks without gathering the right supplies. Preparation is everything.
Having your tools ready ensures the patching material does not dry out while you search for a missing item. Head to your local hardware store and pick up these essentials.
The Fix-It Kit:
- Low-pressure crack injection kit (includes epoxy or polyurethane resin, injection ports, and surface paste)
- Standard caulking gun (for dispensing the resin)
- Wire brush and a stiff-bristled nylon brush
- Putty knife or margin trowel
- Shop vacuum or canned air
- Hammer and a small cold chisel
- Heavy-duty drop cloths
- Safety glasses and thick rubber gloves
Step-by-Step Fix Guide
Fixing a crack takes attention to detail. Do not rush the preparation phase, as it determines how well the patch holds.
Follow these beginner-friendly steps to seal your walls permanently.
Step 1: Prep and Clean the Work Area
Start by laying down your drop cloths to protect your floor. Epoxy and surface sealants are extremely sticky and will ruin your concrete slab.
Take your wire brush and scrub the crack vigorously. You need to remove all loose concrete, old paint, dirt, and efflorescence (that white, powdery residue).
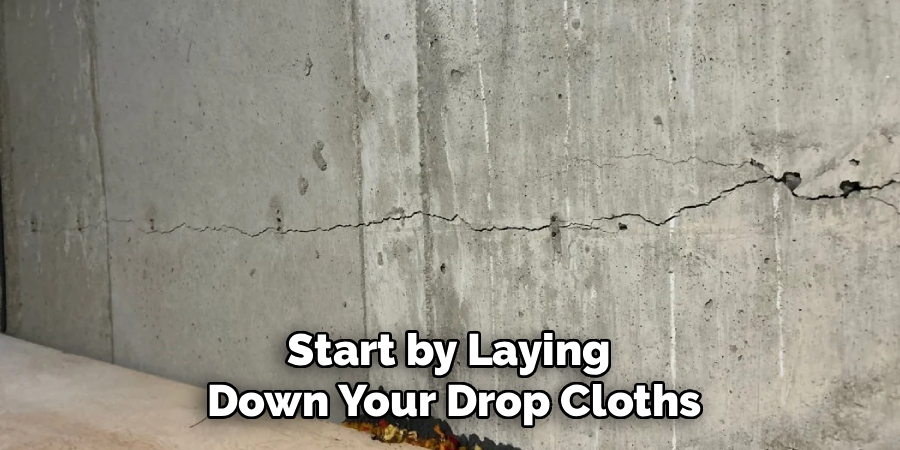
If the crack is very tight, gently tap your cold chisel along the edge to widen it just a tiny bit. This gives the surface paste more room to grip.
Finally, use your shop vacuum or canned air to blow all the dust out of the fissure. The area must be completely clean and bone-dry before you proceed.
Step 2: Set the Injection Ports
Your injection kit comes with small plastic ports. These are the entryways for your liquid epoxy or polyurethane resin.
Starting from the bottom of the crack, place the first port directly over the opening. Space the remaining ports all the way up the wall.
A good rule of thumb is to place them about eight to twelve inches apart. If the crack is wider, place them closer together.
Use a small dab of the surface paste (included in your kit) to stick each port to the wall. Make sure the hole in the port lines up perfectly with the center of the crack.
Read More: How to Repair Basement Wall Cracks.
Step 3: Seal the Crack with Surface Paste
Once the ports are in place, you need to seal the rest of the crack. Mix the two-part surface epoxy paste according to the package instructions.
Use your putty knife to spread the paste over the entire crack, covering the spaces between your ports. You want a layer that is about 1/8-inch thick and an inch wide on either side.
Also, spread the paste around the base of each port to lock them in firmly. This surface seal acts as a dam.
It keeps the liquid resin from spilling out of the wall when you inject it. Let this surface paste cure completely. This usually takes between 10 to 24 hours, so leave it overnight.
Step 4: Inject the Repair Resin
Now comes the fun part. Put your epoxy or polyurethane cartridge into your caulking gun.
Always start at the lowest port on the wall. Insert the tip of the cartridge into the port and squeeze the trigger slowly.
Keep pumping the resin gently. You will know it is time to move to the next port when you see the liquid oozing out of the port directly above the one you are filling.
When that happens, cap the lower port with the provided plastic plug. Move your caulking gun to the next port up and repeat the process.
Continue this steady rhythm until you reach the top of the crack. Let the injected resin cure for the full time recommended by the manufacturer (usually another 24 hours).
Read More: How to Repair Water Damaged Drywall.
Step 5: Remove the Ports and Clean Up
After everything is rock solid, you can remove the plastic ports. Grab your hammer and aim for the base of the port.
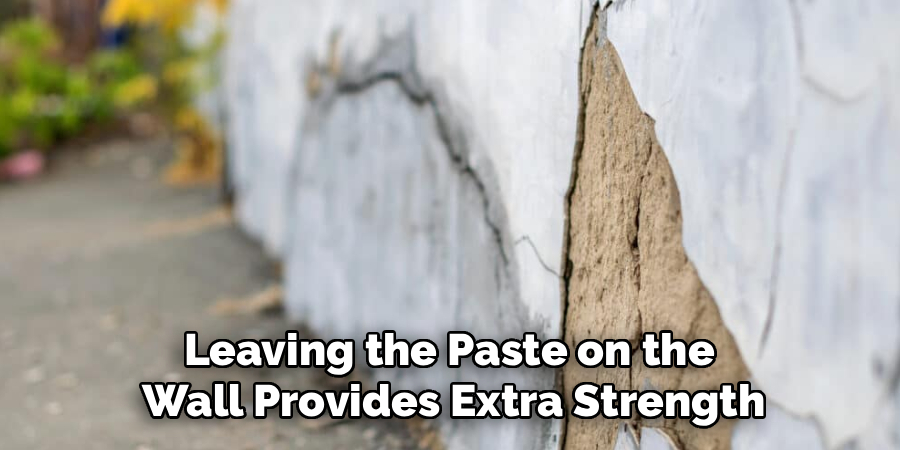
A sharp, downward strike will snap the port off flush with the wall. Do not worry if it leaves a little plastic behind.
If you want the wall to look perfectly smooth, you can use a chisel or a grinder to knock off the surface paste. However, leaving the paste on the wall provides extra strength.
If you plan to paint or frame over the area, smoothing it out is a good idea. Otherwise, your basement is now secure and waterproofed.
Safety Warnings
Even simple DIY projects carry risks. Always prioritize your physical safety when working with chemical resins and masonry tools.
- Protect your eyes: Concrete dust and sharp shards will fly around when you use a wire brush or chisel. Always wear wraparound safety goggles.
- Ventilate the room: Epoxy and polyurethane resins emit strong fumes while they cure. Open basement windows and set up a fan to keep fresh air moving.
- Wear thick gloves: Chemical pastes can cause severe skin irritation or allergic reactions. Heavy-duty rubber gloves are non-negotiable.
- Watch your tools: Keep sharp chisels and heavy hammers away from edges where they can fall. Never leave your caulking gun unattended if children or pets are nearby.
When to Call a Professional
Knowing your limits is the hallmark of a smart homeowner. Not every problem can be solved with a DIY kit.
You should only attempt to learn how to repair home foundation cracks if they are vertical or diagonal and narrower than a quarter inch. These are typically shrinkage cracks.
Call a structural engineer or a professional contractor immediately if you see any of the following:
- Horizontal cracks: A crack running sideways along your wall means the soil outside is physically pushing the wall inward. This is a severe structural failure.
- Bowing or bulging walls: If your wall looks like it is curving inward, a simple epoxy injection will not save it. You need carbon fiber straps or wall anchors.
- Stair-step cracks in brick: If the mortar outside your home is cracking in a zig-zag pattern, the footing is sinking. This requires professional underpinning.
- Wide gaps: Any crack wider than a half-inch means significant movement is still happening. A professional needs to evaluate the underlying soil conditions.
- Water gushing in: If a steady stream of water is pouring through the wall, an injection kit will simply wash away. You need professional exterior excavation and waterproofing.
Cost Estimate
One of the best parts about fixing minor cracks yourself is the financial savings.
If you buy a high-quality, low-pressure injection kit, expect to spend between $50 and $150. This covers the resin, ports, and paste needed for about 10 feet of cracking.
Add another $20 to $30 if you need to buy a caulking gun, wire brush, and safety gear. The total DIY cost rarely exceeds $200.
On the other hand, hiring a professional for the exact same epoxy injection job will cost significantly more. Most foundation companies have a minimum service call fee.
Expect to pay a professional between $400 and $800 per crack. If you have multiple shrinkage cracks around your basement, the bill can easily top $2,000.
By taking a weekend to do it yourself, you keep hundreds of dollars in your pocket.
Frequently Asked Questions
Can I use hydraulic cement instead of epoxy?
Hydraulic cement is great for stopping active, minor leaks quickly. However, it does not bond the concrete back together or flex with temperature changes. Epoxy and polyurethane injections are much better for permanent, waterproof repairs.
How do I know if my foundation crack is active?
Mark the ends of the crack with a pencil and measure the width. Check back in a few months. If the crack has grown past your pencil marks or widened, it is active and may need a professional assessment.
Should I fix foundation cracks from the inside or outside?
For minor vertical cracks, an interior epoxy or polyurethane injection is usually sufficient and much easier. Exterior repair requires digging a deep trench down to the footing, which is incredibly labor-intensive.
What is the difference between epoxy and polyurethane foam?
Epoxy cures into a hard solid, actually restoring structural strength to the concrete. Polyurethane expands into a flexible foam, which is excellent for stopping water leaks but does not add structural integrity.
Is it normal for a house to have foundation cracks?
Yes, almost all homes will develop small, vertical hairline cracks within the first few years. This happens as the concrete cures and the house settles into the soil. As long as they are small and not leaking, they are rarely dangerous.
Conclusion
Taking care of your house does not have to be an intimidating process. Now that you understand the basics of how to repair home foundation cracks, you can tackle that basement project with confidence.
Remember, preparation is the key to a watertight seal. Clean the area thoroughly, place your ports carefully, and let the resins cure completely. By catching these small issues early, you protect your property value and prevent costly water damage.
You have the tools, the knowledge, and the capability to get this done. Grab your safety gear and start inspecting those basement walls today!