

A cracked or slipped clay tile means water gets into your roof. Left alone, that leak rots timber, stains ceilings, and turns a small fix into a costly rebuild. The good news? You can handle most of this yourself. Learning how to repair clay roof tiles saves you hundreds in contractor fees and protects your home before the next storm rolls in.
Clay tiles are tough, but they’re not indestructible. Frost, falling branches, and foot traffic all take their toll. With the right approach, a single afternoon is enough to swap a broken tile and seal the gap.
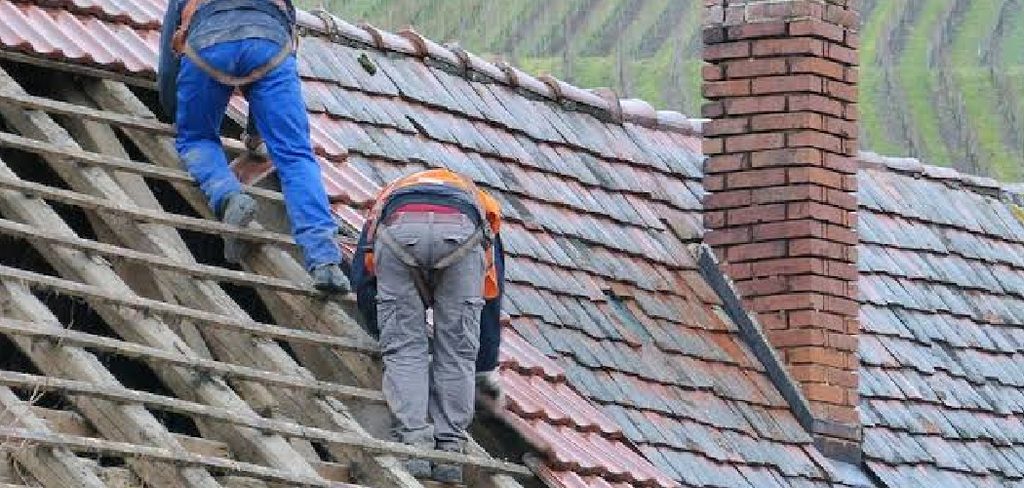
This guide walks you through every step, from spotting the damage to securing the new tile, so you can finish the job with confidence.
Why Repairing Clay Roof Tiles Matters
One broken tile is rarely just one problem. Water finds the gap, soaks the underlay, and spreads to surrounding tiles and battens. What starts as a hairline crack ends as a sagging ceiling.
Fixing it early protects three things: your structure, your wallet, and your home’s value. A dry roof keeps timber sound and insulation working. A patched leak stops mold before it starts. And intact tiles keep your property looking maintained, which matters when you sell.
There’s a practical payoff too. You skip the wait for a roofer, you control the cost, and you learn a skill you’ll use again. Clay tiles last 50 years or more when you keep up with small repairs. A little effort now buys decades of protection.
Tools and Materials You’ll Need
Gather everything before you climb up. Stopping mid-job to find a missing tool is how accidents happen.
- Replacement clay tiles — matched to your existing size, profile, and color
- Roofing ladder with hooks — secures over the ridge for stability
- Flat pry bar or trowel — lifts and slides tiles free
- Wooden wedges — hold overlapping tiles up while you work
- Roofing cement or tile adhesive — seals and bonds the new tile
- Hammer and roofing nails or copper wire — fixes tiles to the batten
- Stiff wire brush — clears debris and old mortar
- Work gloves and safety goggles — protect hands and eyes from sharp shards
- Putty knife — applies cement cleanly
- Safety harness (optional but recommended) — anchors you on steeper roofs
Step-by-Step Guide on How to Repair Clay Roof Tiles
Step 1 – Inspect the Damage From the Ground
Start with binoculars and a clear view. Walk the perimeter of your house and scan the roof slope by slope. Look for tiles that sit lower than their neighbors, dark patches where water pools, or jagged edges catching the light.
Note every problem spot before you climb. A clipboard or phone photo helps you remember the exact location once you’re up top and your angle changes.
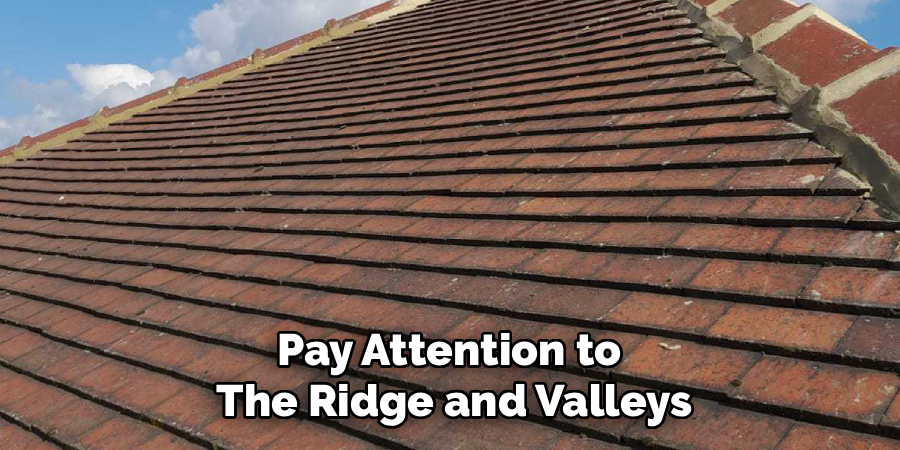
Pay attention to the ridge and valleys too. These take the heaviest rain runoff and crack first. If you see green moss or a chalky white bloom, that’s moisture working its way in. Mark those tiles. Knowing what to repair clay roof tiles in advance keeps your trip up the ladder short and focused.
Step 2 – Set Up Safe Roof Access
Position your ladder on firm, level ground at the right angle: one foot out for every four feet up. Hook a roofing ladder over the ridge so it spreads your weight and won’t slide.
Clip on a safety harness if your roof pitch is steep or the surface feels slick. Clay gets slippery when damp, and one wet patch is all it takes.
Work on a dry, calm day. Wind pushes you off balance, and morning dew makes tiles treacherous. Wear shoes with grip and move slowly. Test each tile with light pressure before you put full weight on it. A solid setup turns a risky climb into a steady, controlled job.
Step 3 – Locate and Lift the Broken Tile
Find the damaged tile you marked earlier. Clay tiles overlap like fish scales, so the broken one sits partly under the tiles above it.
Slide your wooden wedges under the two tiles directly above the damaged one. This lifts them just enough to free the broken tile beneath. Push gently — force cracks good tiles fast.
You’ll feel the tile loosen as the overlap releases. Listen for a soft scrape as it shifts. If it’s nailed down, you’ll need to break the bond next. Keep your wedges firm and your movements slow. The goal is to expose the broken tile fully without disturbing the sound ones around it.
Read More: How to Fix a Cut Wire.
Step 4 – Remove the Damaged Tile
With the upper tiles wedged up, work the broken tile free. If it’s loose, slide it down and out by hand.
If it’s nailed, slip a flat pry bar under the tile and gently rock the nail loose. For stubborn nails, a slate ripper hooks under and shears the fixing cleanly. You’ll hear a metallic pop as it releases.
Pull the tile out and set it aside. Clear any broken shards from the gap — sharp clay fragments cut through gloves easily. Brush out old mortar, leaves, and grit with your wire brush until the batten underneath sits clean and bare. A clean seat means the new tile sits flush and locks in place properly.
Step 5 – Check the Underlay and Batten
Look into the gap you’ve opened. The felt underlay and wooden batten matter as much as the tile itself.
Press the batten with your finger. Soft, dark, or crumbling wood means rot has set in, and that needs replacing before you carry on. A solid batten feels firm and dry.
Check the underlay for tears or holes. Small splits can be patched with self-adhesive flashing tape. Larger damage means cutting in a fresh section of felt that overlaps the existing layer, so water always runs downhill onto it, never under it. This hidden layer is your roof’s last line of defense. Fixing it now prevents leaks that no surface tile can stop.
Step 6 – Fit the Replacement Tile
Pick up your matched replacement tile. Slide it into the gap at a slight angle, easing the top edge under the tiles above.
Push it up until it lines up flush with the tiles on either side. You’ll feel it click into the overlap and settle onto the batten. Run your hand across the surface — the new tile should sit level, with no lip standing proud.
If it nails into place, drive a roofing nail through the pre-set hole into the batten, or twist copper wire around the tile and the batten for a hidden fix. Don’t overdrive the nail; clay cracks under too much pressure. A snug, flush fit means rain sheds straight off, just like it should.
Read More: How to Repair Cracked Tile.
Step 7 – Seal and Secure the Tile
Apply a thin bead of roofing cement or tile adhesive under the front edge and along any contact points with neighboring tiles. Use your putty knife to spread it evenly.
This bonds the tile down and stops wind from lifting it in a storm. Wipe away any excess that squeezes out — dried smears of cement look messy and trap dirt.
Press the tile firmly for a few seconds so the adhesive grabs. The cement smells sharp and tacky as it sets. Give it the curing time listed on the tub before rain hits it, usually a few hours. Once sealed, gently remove your wedges and let the upper tiles settle back into place over the new one.
Step 8 – Final Inspection and Cleanup
Step back and check your work from a couple of feet away. The repaired section should blend into the surrounding tiles with even spacing and no gaps.
Run your eyes along the rows. Look for any tile sitting high, any visible cement, or any wedge you forgot to pull out. Press lightly on the new tile to confirm it’s firm.
Sweep all debris and broken shards off the roof before you descend — loose fragments slide and become hazards. Carry your tools down with care. Once you’re on the ground, scan the finished repair through binoculars again. A clean, flush result means water now runs off exactly where it should.

Critical Mistakes When Repairing Clay Roof Tiles
The most common error is rushing the safety setup. People lean a ladder at the wrong angle, skip the harness, or climb on a damp roof. Clay turns slick in seconds, and a fall from roof height is serious. Take the extra ten minutes to anchor everything properly. No repair is worth an injury.
Mismatched tiles are another frequent slip. Clay tiles vary in profile, size, and shade between makers and even between production batches. Grab a sample of your existing tile and match it exactly before you buy. A new tile that sits proud or in the wrong color stands out and may not seal flush.
Many DIYers also ignore what’s underneath. They swap the tile but never check the batten or underlay. Rotten wood and torn felt keep leaking long after the surface looks fixed. Always inspect the hidden layers while the gap is open.
Overusing cement causes its own problems. A thick slab of adhesive traps moisture and cracks as it expands and contracts. Use a thin, even bead only where it’s needed.
Finally, forcing tiles cracks the good ones around the repair. Lift gently, wedge patiently, and let the overlap do the work.
Expert Tips
Buy two or three spare tiles whenever you replace one. Matching shades gets harder over the years, and having extras on hand means your next fix takes minutes, not days.
Work in mild, dry weather. Cold makes clay brittle and adhesive slow to cure, while heat dries cement before you’ve positioned the tile.
Photograph each stage as you go. If something doesn’t line up later, your pictures show exactly how the tiles overlapped before you started.
Keep a small bag tied to your belt for nails, wedges, and your putty knife. It saves trips up and down the ladder and keeps loose items off the slope.
Check the whole roof while you’re up there. Spotting one weak tile now beats discovering three after the next downpour.
Frequently Asked Questions
How much does it cost to repair clay roof tiles yourself?
A single DIY tile swap costs very little. You’ll spend mainly on materials:
- Replacement tiles: a few dollars each
- Roofing cement: a small tub covers many repairs
- Nails or copper wire: minimal cost
Compare that to a contractor callout, which often runs into hundreds for the same job. The biggest investment is your time and a safe ladder setup, both of which pay off quickly.
Can I replace a clay tile without removing the surrounding ones?
Yes. Clay tiles overlap, so you only need to lift the two tiles directly above the broken one. Slide wooden wedges underneath to hold them up, then ease the damaged tile out and the new one in. You won’t disturb the rest of the roof. This is exactly what makes clay tile repair manageable as a solo, single-afternoon project.
How do I know if my batten or underlay needs replacing?
Check the wood and felt once the gap is open. Look and feel for:
- Soft, dark, or crumbling batten — signs of rot
- Tears, holes, or brittle patches in the underlay
- A musty smell or visible damp
Firm, dry wood and intact felt are fine to leave. Anything soft or torn needs fixing before the new tile goes on.
What’s the best weather for roof tile repairs?
A dry, calm, mild day is ideal. Avoid rain, frost, and high wind. Wet tiles get dangerously slippery, cold makes clay brittle and prone to cracking, and wind throws off your balance on the ladder. Mild temperatures also help roofing cement cure at the right pace, giving you a stronger, longer-lasting bond.
How long does a clay tile repair last?
A properly done repair lasts as long as the surrounding tiles, often decades. Clay roofing easily reaches 50 years or more with basic upkeep. The key is a flush fit, a sound batten and underlay beneath, and a thin, correct seal. Skip any of those and the fix fails early. Do them right and you won’t touch that tile again.
Conclusion
A broken tile doesn’t have to mean a roofer’s bill or a leaking ceiling. With a steady ladder, a matched tile, and a careful hand, you can repair clay roof tiles yourself in a single afternoon.
Remember the order that keeps you safe and successful. Inspect from the ground, set up secure access, lift the broken tile gently, and check the batten and underlay before fitting the replacement. Seal it with a thin bead of cement, inspect your work, and clear the debris.
The mistakes to dodge are simple: rushing safety, mismatching tiles, ignoring the hidden layers, and overusing adhesive. Avoid those and your repair holds for decades.
You now have the skill to protect your home before small problems grow. Keep a few spare tiles on hand, watch the weather, and tackle damage the moment you spot it. Your roof works hardest when you least notice it — so give it the quick, confident care it deserves, and it will keep you dry for years to come.