

Dealing with wall damage can feel incredibly frustrating for any homeowner or renter. You might look at that unsightly damage and wonder how to repair small holes in plaster walls without spending a fortune.
Plaster is a beautiful, classic material found in many older homes. It offers excellent soundproofing and a unique, solid feel that modern drywall just cannot match. However, plaster is also brittle and prone to cracking or chipping over time. When damage happens, hiring a professional contractor can cost hundreds of dollars for a simple fix.
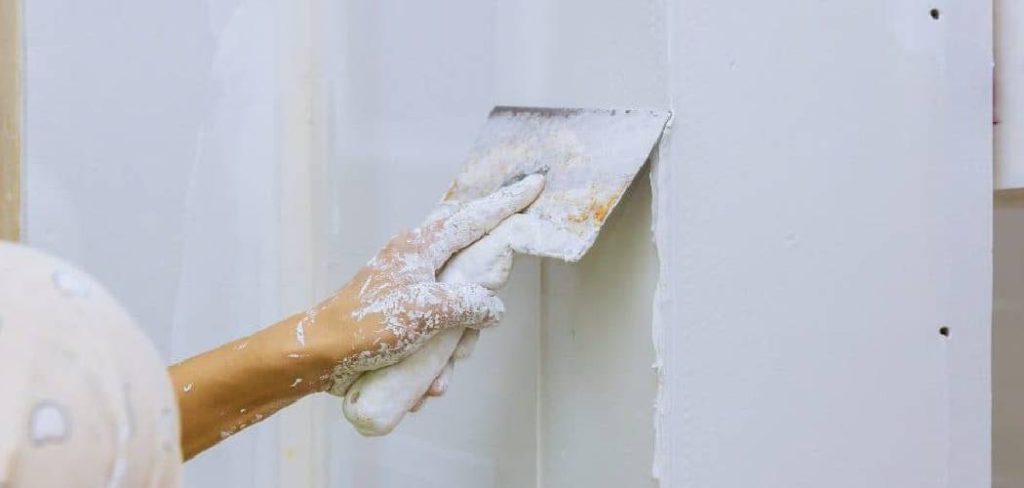
The good news is that tackling this project yourself is highly rewarding and incredibly budget-friendly. You do not need years of construction experience to make your walls look brand new again. With a little patience and the right materials, anyone can master this straightforward DIY repair. Let us dive into the best way to patch things up and get your room looking pristine.
What Causes This Problem?
Understanding why your plaster is damaged helps prevent future issues. Older homes naturally settle, but other factors contribute to wall deterioration.
Here are the most common culprits behind plaster damage:
- Picture hanging accidents: Using nails or heavy anchors that pull out under excess weight.
- Door handle impacts: Doors swinging open too fast and slamming into the wall without a doorstop.
- House settling: Natural foundation shifts over time that cause brittle plaster to crack and pop.
- Furniture bumps: Moving heavy couches or tables that scrape and puncture the surface.
- Water damage: Small leaks that soften the plaster, causing it to crumble away.
- Old age: The structural keys holding plaster to the wooden lath breaking down over decades.
Tools and Materials Needed
Before you start learning how to repair small holes in plaster walls, you need to gather your supplies. Having everything within reach makes the job much smoother.
You can find all these items at your local hardware store. They are inexpensive and great to keep on hand for future home maintenance.
Here is exactly what you need for a seamless repair:
- Joint compound or plaster patch: A lightweight setting-type joint compound works best for durability.
- Putty knife: A 3-inch or 4-inch flexible metal blade is perfect for applying the compound.
- Sanding sponge: A fine-grit block (120 or 220 grit) helps smooth the dried patch perfectly.
- Utility knife: Used to clean out loose debris from the damaged area before patching.
- Spray bottle with water: Plaster absorbs moisture quickly, so you need this to dampen the hole.
- Primer and paint: High-quality primer seals the patch, and matching paint blends it into the wall.
- Microfiber cloth or tack cloth: Essential for wiping away fine dust before you apply paint.
Step-by-Step Fix Guide
Fixing your wall is all about proper preparation and taking your time. Follow these simple steps to ensure your patch holds strong and looks invisible.
Step 1: Clean and Prep the Hole
Start by removing any loose, crumbling debris inside and around the damage. Use your utility knife to gently scrape away flaky edges.
You want to reach solid, firmly attached plaster so your patching material has a strong foundation. Once the loose pieces are gone, use a small brush to sweep out any remaining dust.
Step 2: Dampen the Area
Old plaster is incredibly dry and will suck the moisture right out of your patching compound. If this happens, your patch will crack and fail quickly. Take your spray bottle and lightly mist the inside and edges of the hole with water.
You do not want it dripping wet, just damp enough to prevent the surrounding wall from absorbing the compound’s moisture.
Step 3: Apply the First Coat of Compound
Scoop a small amount of joint compound onto the edge of your putty knife. Press the compound firmly into the hole, ensuring it fills any gaps and touches the wooden lath behind it.
Smooth it out by dragging the knife flat across the wall surface. Do not worry if it shrinks or looks slightly uneven; this is just the base layer.
Step 4: Let It Dry Completely
Patience is absolutely critical during this stage of the repair. Allow the first coat to dry completely, which usually takes between two to four hours depending on the room’s humidity.
You will know it is dry when the compound turns a solid, chalky white color and feels hard to the touch.
Step 5: Apply the Second Coat
Once the base layer is dry, it is time to build up the surface flush with the wall. Apply a second, thinner layer of compound, feathering the edges outward onto the healthy plaster.
Feathering simply means making the patch gradually thinner at the edges so it blends perfectly into the surrounding wall.
Step 6: Sand the Patch Smooth
Wait for the final coat to dry thoroughly overnight for the best results. Take your fine-grit sanding sponge and gently rub the patched area in light, circular motions.
Run your hand over the wall with your eyes closed. If you can feel a bump, keep sanding lightly until the transition is entirely seamless.
Step 7: Clean, Prime, and Paint
Sanding creates a lot of fine dust that will ruin your paint job if left behind. Wipe the wall down completely using your damp microfiber cloth or tack cloth.
Apply a coat of quality primer to seal the porous joint compound. Once the primer dries, roll on your matching paint, and your wall will look flawless.
Safety Warnings
While patching walls is incredibly safe, plaster dust can be an irritant. Older homes also carry hidden risks you must respect.
Always wear a well-fitting dust mask or N95 respirator when scraping and sanding. Plaster dust is very fine and can easily irritate your lungs.
Protect your eyes with safety goggles, especially when scraping loose materials that might flake outward.
If your home was built before 1978, the old paint on top of your plaster might contain lead. Never aggressively sand dry, unknown vintage paint without testing it for lead first.
Finally, be cautious of electrical wires or plumbing pipes hiding directly behind the wall cavity when digging out loose debris.
When to Call a Professional
DIY is fantastic, but some structural issues require an expert hand. Knowing your limits will save you from making a problem worse.
If you gently push on the wall and the entire plaster panel flexes or feels spongy, the damage is severe. This means the plaster has completely separated from the lath behind it.
You should also call a pro if the hole is larger than a dinner plate. Large-scale plaster restoration requires specialized bonding agents and advanced skimming techniques.
If you notice deep, stair-step cracks spreading from the hole, this points to structural foundation shifting. A structural engineer or professional contractor needs to evaluate the foundation before you fix the cosmetic damage.
Cost Estimate
Understanding the numbers makes this DIY project even more appealing. You can save a significant amount of cash by rolling up your sleeves.
If you buy all the tools and materials from scratch, a DIY repair costs between $20 and $40. Most of these supplies will last for dozens of future repairs, too.
In contrast, hiring a professional handyman or plaster specialist is much more expensive. They typically charge a minimum call-out fee just to show up.
A professional repair for a few small wall dings will easily cost between $150 and $300. By doing it yourself, you keep that money right in your pocket.
Frequently Asked Questions
Can I use spackle instead of joint compound for plaster?
Spackle is fine for tiny nail holes, but joint compound is much better for actual plaster repairs. Joint compound is stronger, adheres better to the old materials, and is easier to feather out for a smooth finish.
Why did my plaster patch crack after it dried?
Cracking usually happens because the patching compound dried too quickly or was applied too thick. Next time, remember to mist the hole with water first and apply the compound in multiple thin layers rather than one thick clump.
Do I really need to use primer before painting?
Yes, primer is absolutely essential. Joint compound is highly porous and will absorb your topcoat paint, leaving the patched area looking dull and flashing in the light. Primer seals the patch so the paint sheen matches the rest of the room.
How do I match the texture of my old plaster?
If your wall has a slight texture, you can mimic it using a thick nap paint roller. Apply the final coat of paint while the primer is still slightly tacky, and use the roller to create a gentle, stippled texture that blends in.
Final Thoughts on How to Repair Small Holes in Plaster Walls
Fixing your own home is an incredibly empowering experience. You now know exactly how to repair small holes in plaster walls safely and effectively.
By taking your time, prepping the area properly, and using the right materials, you can achieve professional-level results on a budget. Remember that patience during the drying and sanding phases is your best friend.
Do not let minor wall damage stress you out or force you to hire expensive contractors. Grab your putty knife, pick up some joint compound, and enjoy bringing your beautiful walls back to life!