

A top that fits everywhere except the armholes is one of the most frustrating wardrobe problems out there. You raise your arm and the fabric gapes at the side, flashing more than you’d like and ruining an otherwise great look. Maybe the garment stretched over time, or it just never fit your frame quite right off the rack.
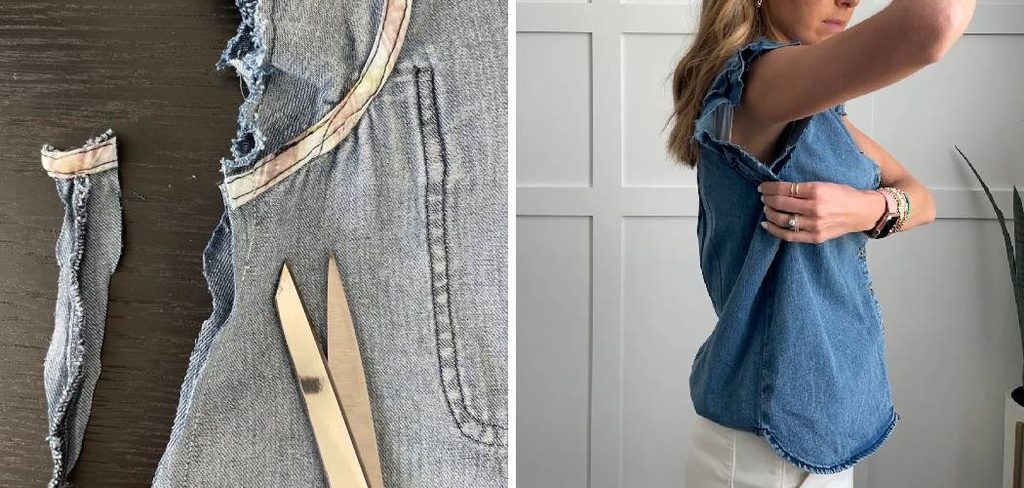
The good news? You don’t need a tailor or a sewing degree to fix this. Learning how to fix armholes that are too big takes a needle, some thread, and a little patience on a free afternoon.
A clean adjustment tightens the fit, stops the gaping, and makes your clothes feel custom-made for you. This guide walks you through pinning, marking, stitching, and pressing so your armholes hug your body comfortably again.
Why Learning to Fix Loose Armholes Matters
Your closet is full of clothes you love but don’t wear, often because of one small fit problem. A loose armhole can sideline a favorite sleeveless top or dress bodice, even when everything else looks perfect.
Fixing it yourself saves clothes you already own instead of tossing them or letting them gather dust. That’s money kept in your pocket and one less thing in a landfill.
You also skip the tailoring bill. A tailor might charge twenty or thirty dollars per garment for a quick take in, and that adds up fast across a wardrobe.
Beyond the savings, this skill gives you control over how your clothes fit. Once you understand the underarm seam and side seam, you can fix gaping, adjust ease, and balance a neckline on almost anything you own. It’s a small win with a big payoff.
Tools and Materials You’ll Need
Gathering everything first keeps the job smooth, so you’re not hunting for thread with pins already stuck in your fabric. Most of these items are cheap and probably already live in a drawer somewhere.
Start with a needle and thread that matches your garment, or a sewing machine if you have one and feel comfortable using it. You’ll want straight pins to hold the new fit in place and tailor’s chalk or a fabric marker to draw your seam line.
Keep a small pair of sharp scissors handy for trimming the seam allowance, plus a seam ripper for opening the old stitching. An iron and ironing board matter more than people expect, since pressing sets a clean, professional curve.
Optional but handy: a flexible measuring tape, which makes matching both armholes evenly far easier.
Step-by-Step Guide on How to Fix Armholes That Are Too Big
Step 1 – Try On and Pin the Excess
Start by slipping the garment on inside out so the seams sit on the outside where you can reach them. Stand in front of a mirror and look at where the fabric pulls away or where you see gaping at the side.
Pinch the extra fabric along the underarm and side seam until the armhole sits snug but still comfortable. You’ll feel the difference right away as the gaping disappears.
Slide straight pins along that pinched line, keeping the points facing down so you don’t poke yourself. Place pins every inch or so for an even line.
Move your arm a little to check that you can still lift it without strain. Comfortable underarm movement matters as much as a clean fit.
Step 2 – Mark the New Seam Line
Once your pins feel right, carefully take the garment off without disturbing them. This is where learning how to fix armholes that are too big really starts to take shape.
Lay the top flat on a table with the pinned area smoothed out. Use tailor’s chalk to draw a clear line right along where the pins sit, tracing the new curve you want.
Press lightly so you leave visible chalk marks without dragging the fabric out of place. A smooth, steady line gives you something solid to follow when you stitch.
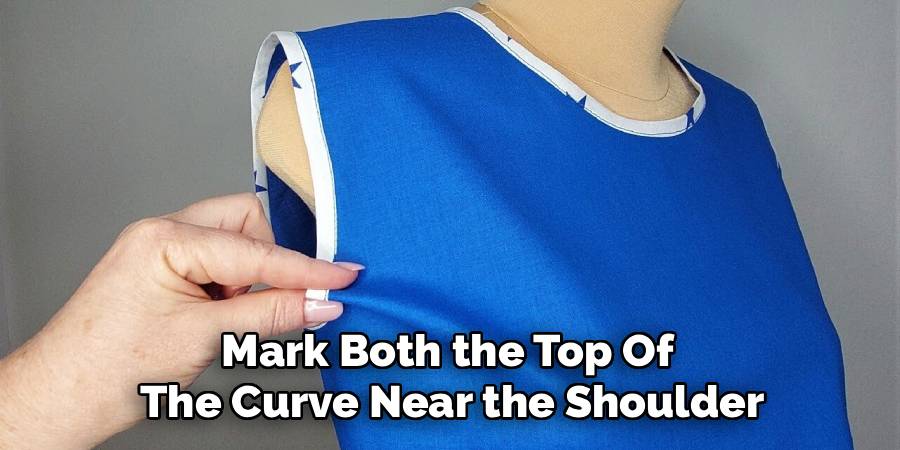
Mark both the top of the curve near the shoulder and the bottom near the underarm. Then remove the pins. Your chalk line is now your roadmap for the whole adjustment.
Step 3 – Turn the Garment Inside Out
Now flip the garment fully inside out so all your stitching stays hidden on the finished side. Working from the inside keeps the outer fabric looking clean and professional.
Smooth the fabric flat again and find the original underarm seam. You’ll likely need to open part of it with a seam ripper so you can adjust the curve freely.
Slide the seam ripper under each stitch and gently lift, listening for the soft pop as the thread releases. Work slowly so you don’t tear the fabric itself.
Open enough of the seam to reach your full chalk line, usually a few inches above and below the armhole. Lay everything flat once more and double-check that your marks still line up cleanly on both layers.
Step 4 – Baste the New Line First
Resist the urge to sew the final stitch right away. A quick basting stitch saves you from unpicking a permanent seam if the fit isn’t perfect.
Thread your needle and sew long, loose stitches by hand right along your chalk line. These temporary stitches hold the new shape without committing you to anything yet.
Keep the stitches even but loose enough to remove easily later. You’re just tacking the fabric in place for a test.
Turn the garment right side out and try it on again. Check the fit in the mirror, raise your arm, and feel for any pulling or tightness. This muslin test approach lets you tweak the curve before the real sewing begins, and it’s the secret behind a fitting adjustment that actually works.
Step 5 – Sew the Adjusted Curve
Once the basted fit feels right, you’re ready to stitch the seam for good. Turn the garment inside out again and settle in.
Sew along your chalk line with small, even stitches, whether by hand using a backstitch or with a sewing machine on a straight setting. Start and end with a few locking stitches so the seam won’t unravel.
Follow the curve smoothly rather than in sharp angles, since a gentle arc feels better against your underarm. Keep the tension steady so the fabric lies flat without puckering.
Go slowly around the tightest part of the curve. Rushing here creates bunching that’s hard to fix. When you finish, gently remove the basting stitches you added earlier.
Step 6 – Trim and Finish the Seam Allowance
With the new seam sewn, you’ll have extra fabric hanging inside the armhole. Trimming it keeps the area neat and comfortable.
Cut away the excess seam allowance, leaving about a quarter to a half inch beyond your stitch line. Don’t cut too close, or the seam may fray and pull apart.
Run your finger along the cut edge and notice if it feels scratchy or rough. Raw edges can irritate your skin every time you move.
Finish the edge to prevent fraying. Zigzag stitch it with a machine, fold and stitch it under, or dab a little fray-stopper along the raw edge. A clean finish means no scratchy seam edges rubbing your arm and a repair that lasts through many washes.
Step 7 – Press and Test Movement
Pressing is the step beginners skip most often, and it’s what separates a homemade fix from a polished one. Heat and steam set your new seam beautifully.
Lay the seam flat and press it with a warm iron, opening or folding the allowance to one side as your fabric prefers. You’ll see the fabric relax into a smooth pressed curve.
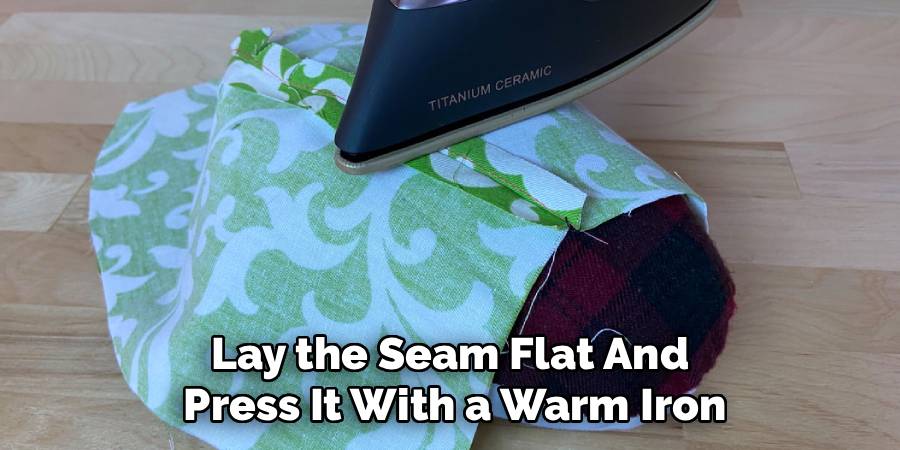
Hold the iron in place for a few seconds rather than dragging it, which can stretch the curve out of shape. Use steam if your fabric allows it.
Once it cools, slip the garment on and move around. Reach forward, raise both arms, and check that the underarm comfort feels natural. A good repair moves with you, not against you.
Step 8 – Do a Final Fit Check
Now for the satisfying part, where you confirm everything sits just right. Stand in front of the mirror in good light and study both armholes.
Check that the left and right match in shape and tightness, since uneven sides are the most common giveaway of a home fix. Compare them with your measuring tape if you’re unsure.
Look at how the armhole relates to the neckline balance and shoulder line. The whole top should feel harmonious, not tight in one spot and loose in another.
Raise your arms, twist, and sit down to test real movement. If anything pulls or gaps, you can still adjust before calling it done. When it feels comfortable and looks even, your repair is complete.
Critical Mistakes When Fixing Armholes That Are Too Big
The biggest mistake is taking in too much fabric at once. People pinch out a huge chunk hoping for a dramatic fix, then can’t lift their arms without the seam straining. Take in small amounts and test the movement before committing, because a snug armhole still needs room for comfortable garment ease.
Another common slip is skipping the basting step. Sewing the final seam right away feels faster, but if the fit is off, you’re stuck unpicking permanent stitches and risking damage to the fabric. A quick basting stitch saves you from that headache every time.
Many beginners also ignore both sides. They adjust one armhole perfectly, forget to match the other, and end up with a lopsided top. Always mark and measure both sides so they mirror each other.
Cutting the seam allowance too close trips people up, too. Trim away too much and the seam frays or rips after a few washes. Leave a quarter to half inch of fabric for security.
Finally, don’t skip pressing. An unpressed seam looks bumpy and homemade, while a quick press with the iron sets a smooth, clean curve that looks professional.
Expert Tips
Always work with the garment inside out and matched flat, so both layers of fabric line up exactly. A tiny shift between layers leads to a crooked seam you’ll notice the moment you put it on.
Match your thread color closely to the fabric. Even a slightly off shade catches the eye on a finished armhole, while a good match makes your stitches nearly invisible.
When in doubt, take in less than you think you need. You can always remove a little more, but adding fabric back is far trickier once it’s trimmed.
Press as you go, not just at the end. Setting each seam with the iron keeps your work flat and easy to handle. And test your arm movement often, since underarm comfort is the true sign of a great fit.
Frequently Asked Questions
Can I fix big armholes without a sewing machine?
Absolutely. A simple backstitch sewn by hand creates a strong, lasting seam that holds up to regular wear and washing. Hand sewing actually gives you more control around the tight underarm curve. A machine is faster, but for a single garment, your needle and thread work just fine. Take your time, keep your stitches small and even, and the result looks just as clean.
How much should I take in from each armhole?
Start small, usually a half inch to an inch from the underarm seam. Pin it, try it on, and test your arm movement before sewing anything permanent. The goal is a snug fit that still lets you raise your arms comfortably. Remember:
- You can always take in more later
- Too tight ruins comfort and ease
- Both sides should match exactly
Will fixing the armhole change how the rest of the top fits?
It can, especially around the side seam and neckline balance. Taking in the underarm sometimes tightens the bust or pulls the shoulder line slightly. That’s why the basting and try-on steps matter so much. Check the whole garment in the mirror before sewing the final seam, and adjust gradually so one fix doesn’t create a new fit problem somewhere else.
What fabric types are hardest to adjust?
Slippery fabrics like silk and stretchy knits are the trickiest, since they shift and pull as you sew. Pin them generously and baste before stitching. Thick fabrics like denim need a stronger needle and a bit more muscle. Woven cottons and linens are the most beginner-friendly because they hold their shape, stay put under pins, and press into a crisp, clean curve.
How do I keep both armholes even?
Measure carefully and mark both sides the same way. After pinning the first armhole, use a flexible measuring tape to record exactly how much you took in, then copy that on the second side. Try the garment on between adjustments to compare them in the mirror. Matching the chalk lines and stitch curves on both sides is the single best way to avoid a lopsided result.
Conclusion
A gaping armhole no longer means banishing a favorite top to the back of your closet. You now know how to pin the excess, mark a clean curve, baste for a test fit, and sew a seam that hugs your body comfortably.
The real secret lies in patience and testing. Take in small amounts, check both sides for balance, trim the seam allowance carefully, and press everything smooth before you call it done. Those small habits turn a quick fix into a polished, professional-looking result.
Knowing how to fix armholes that are too big saves your clothes, saves your money, and gives you control over how everything fits. It’s a simple skill that pays off again and again across your whole wardrobe.
So thread your needle, grab a top that’s been bugging you, and give it a try this weekend. Your clothes will fit like they were made for you, and you’ll have the quiet pride of having done it yourself. You’ve got this.