

Has your garage floor started showing hairline cracks, crumbling edges, or rough pitted patches that catch the toe of your shoe? Those rough spots aren’t just ugly. They trap dirt, collect moisture, and slowly get worse every time you park or roll a toolbox across them. The good news is that you can repair concrete garage floor damage yourself with a few basic tools and a free afternoon.
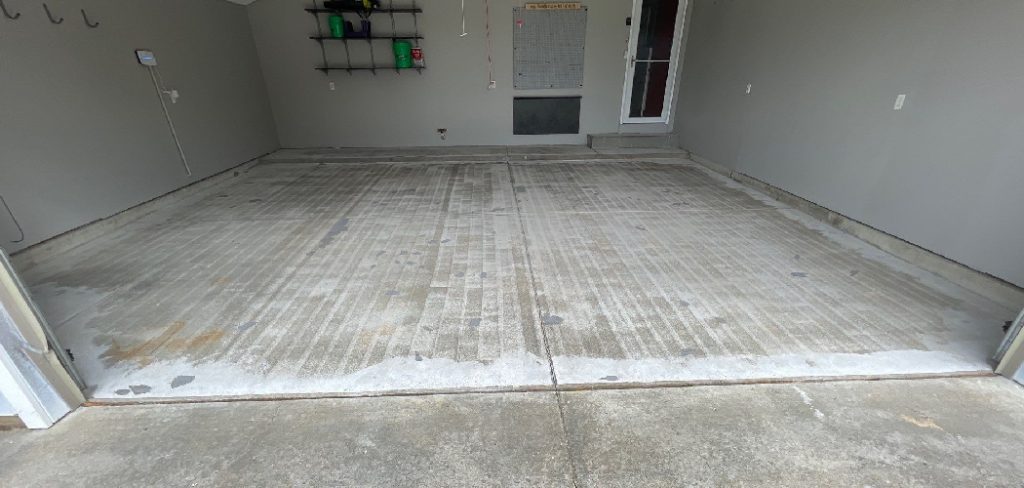
Most cracks, chips, and worn surfaces respond beautifully to the right patching compound or resurfacer. You don’t need to hire a crew or pour a whole new slab. A little patience and the proper steps go a long way. This guide walks you through the entire process how to repair concrete garage floor, from spotting the damage to sealing the finished surface, so you can restore a smooth, solid floor with confidence.
Why Learning Concrete Garage Floor Repair Matters
A small crack rarely stays small. Water seeps in, freezes, expands, and pries the concrete apart until that thin line becomes a crumbling gap. Catching it early saves you real money and a far bigger job down the road.
For homeowners, a smooth floor protects your tools, your car tires, and your back. Renters can handle minor fixes fast without waiting on a landlord. And DIY enthusiasts gain genuine confidence working with concrete crack filler, resurfacer, and sealant.
The same skills carry over outdoors, too. If you camp or love cabin life, knowing how to patch concrete helps you fix cracked patios, shed floors, fire-pit pads, and worn walkways. Once you understand how concrete fails and how to repair it properly, you’ll spot weak spots everywhere and fix them long before they spread.
Tools and Materials You’ll Need
Gather everything before you start, because mixing patching compound means you’re racing against curing time once it’s wet. Here’s what to keep within reach:
- A hammer and chisel – to clear loose, crumbling concrete from cracks and chips
- A stiff wire brush – to scrub away debris and roughen the surface for grip
- A shop vacuum – to pull out concrete dust and grit from every crevice
- Degreaser and water – to lift oil stains so your repair bonds well
- Bonding adhesive – to help new material grip the old slab
- Concrete crack filler or patching compound – matched to the size of the damage
- A resurfacer – for smoothing large pitted or spalling areas
- A trowel and putty knife – to spread and smooth your patch
- Concrete sealant – to protect the finished floor
- Safety glasses, gloves, and a dust mask – non-negotiable for chiseling
- A garden sprayer (optional) – handy for evenly wetting the surface before patching
Lay everything out on a dry, clear spot.
Step-by-Step Guide on How To Repair Concrete Garage Floor
Step 1 – Inspect the floor and assess the damage
Pick a dry day and walk the whole floor slowly, looking down at every section. Search for hairline cracks, wider splits, chipped edges, and rough spalling where the top layer has flaked away.
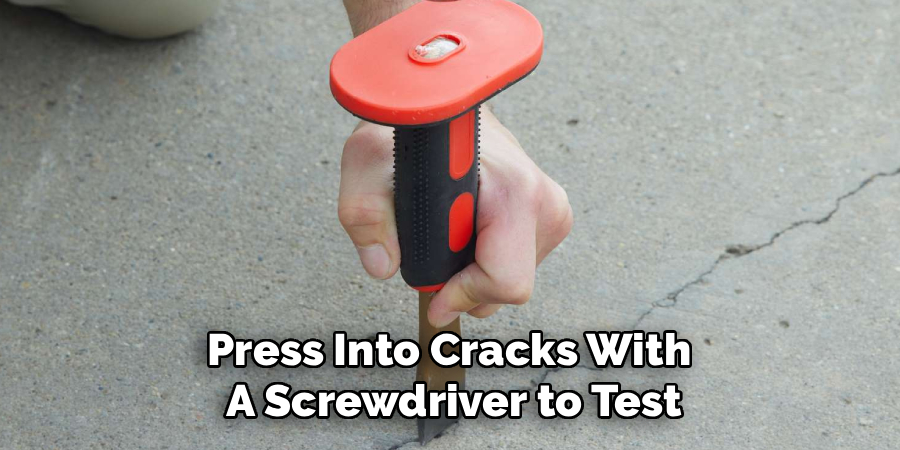
Run your hand over suspicious areas. A gritty, crumbly feel means the surface is breaking down and needs more than a quick fill. Press into cracks with a screwdriver to test how deep and loose they run.
Note any spots where moisture pools or stains spread, since dampness affects how your repair bonds. Mark each problem area with chalk so you don’t lose track once you start cleaning.
A careful look up front tells you exactly which products you need and saves you from buying the wrong fix.
Step 2 – Clean out cracks and remove loose concrete
Now grab your hammer and chisel and work along each marked crack. Tap firmly to knock away crumbling, flaky concrete until you reach solid material underneath. You’ll hear the sound change from a dull thud to a sharp ring when you hit a sound base.
Widen tight cracks slightly so filler can sink in and grip. This feels backward, but a narrow hairline crack holds patching compound poorly.
Brush the area hard with your wire brush to loosen grit and dust. Then vacuum every speck of concrete dust from the crack with your shop vacuum. Leftover debris blocks adhesion, so be thorough. A clean, solid edge gives your repair something strong to hold onto.
Step 3 – Degrease and wash the surface
Garage floors soak up oil, grease, and grime over the years, and none of it lets a patch bond. Spray or pour degreaser over stained areas and let it sit per the label.
Scrub hard with your wire brush, working the cleaner deep into the pores. You’ll watch dark stains lift and the concrete brighten as the oil releases. Rinse with clean water until no slick film remains.
Pay extra attention around the repair zones, since even a thin oily layer ruins your bond. For a lasting repair concrete garage floor finish, the surface must be genuinely clean, not just rinsed off.
Let everything dry unless your product calls for a damp surface. Check the directions before moving on.
Step 4 – Apply bonding adhesive
A strong bond between old concrete and new material makes the difference between a patch that lasts and one that pops loose in a month. Bonding adhesive is your secret weapon here.
Brush a thin, even coat over the cleaned cracks and chips, working it into every pore and rough edge. You’ll feel the brush drag slightly as the adhesive grabs the surface.
Cover the full repair area, including the sides and bottom of each crack. Don’t leave dry gaps where the patch could lift later.
Follow the timing on the label, since some adhesives need to stay tacky when you apply the patch. Working in that tacky window locks your new material tight to the old slab.
Read More: How to Repair Fiberglass Cracks.
Step 5 – Fill cracks with patching compound
Mix your concrete crack filler or patching compound according to the directions, aiming for a smooth, peanut-butter consistency. Mix only what you can use before it starts to set.
Press the compound firmly into each crack with a putty knife, pushing down hard so no air pockets remain. Overfill slightly, since the material settles a touch as it cures.
Smooth the surface level with the floor using your trowel, feathering the edges so the patch blends in. You’ll feel it firm up under the blade as you work.
For a clean repair concrete garage floor result, keep each patch flush and even. Bumpy ridges catch toes and tire treads, so take your time smoothing everything flat.
Step 6 – Resurface large pitted or spalling areas
When damage spreads across a wide pitted or spalling patch, a single fill won’t cut it. A concrete resurfacer rebuilds the whole top layer in one smooth pass.
Lightly dampen the area first if the product calls for it, then pour the mixed resurfacer onto the floor. Spread it with a trowel using long, even strokes, working it into every low spot and shallow pit.
You’ll smell the fresh, mineral scent of wet concrete as you go. Keep the layer thin and uniform, feathering the edges into the surrounding floor so there’s no visible lip.
Work steadily, because resurfacer sets faster than you’d expect. A smooth, even coat hides years of wear and gives you a fresh surface.
Step 7 – Smooth, finish, and respect curing time
Once your patches and resurfacer are in place, give the surface a final pass while it’s still workable. Lightly run your trowel over any ridges or trowel marks to leave it level and clean.
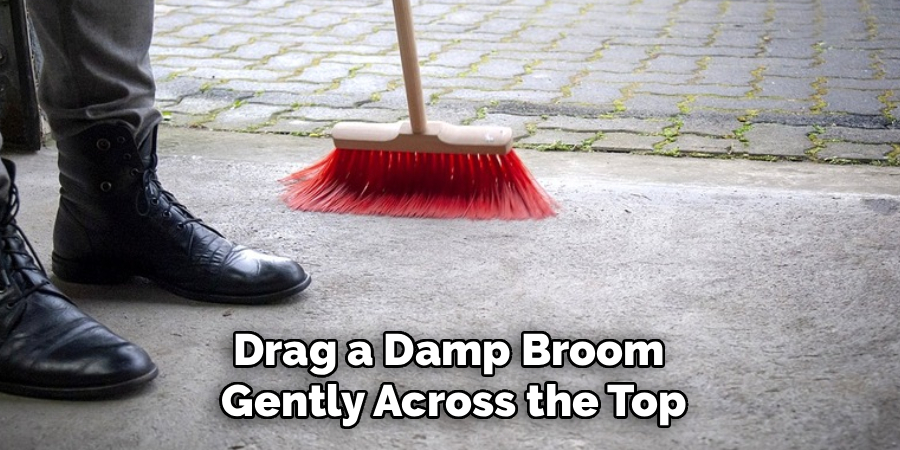
For a slightly textured, non-slip finish, drag a damp broom gently across the top. You’ll see fine lines appear that add grip underfoot.
Now comes the hard part: waiting. Respect the full curing time on the label before walking, parking, or sealing. Rushing this step is the fastest way to crack your fresh work.
Keep the area free of foot traffic and shield it from direct sun or harsh drafts. Slow, even curing builds the strongest, longest-lasting repair you can get.
Step 8 – Seal the finished floor
Sealing locks in all your hard work and keeps moisture, oil, and stains from sinking back in. Wait until the repair has fully cured, then sweep and vacuum the whole floor clean.
Apply concrete sealant or epoxy with a roller in thin, even coats, working in one direction across the surface. You’ll watch the dull concrete take on a richer, protected look as you go.
Cover the patched areas and the surrounding floor for a uniform finish. Most sealants need a second coat, so check the timing and add another pass once the first dries.
A good seal repels spills, resists wear, and makes future cleanup easy. Let it cure fully before parking on it.
Read More: How to Repair Brown Grass Patches.
Critical Mistakes When Repairing a Concrete Garage Floor
The most common mistake is patching over a dirty or oily surface. Bonding adhesive and patching compound simply won’t grip grease or dust, so the repair lifts within weeks and leaves you starting over. Always degrease, scrub, and vacuum until the concrete is genuinely clean before you apply anything.
Another frequent error is rushing the curing time. New concrete looks solid long before it actually is, and walking or parking on it too soon creates fresh cracks and weak spots. Read the label and wait the full recommended period, even when you’re eager to use the space.
Many beginners also skip widening tight cracks. They smear filler over a hairline gap, but with nothing to grip, it pops out fast. Open cracks slightly and clear the loose debris first so the compound can anchor itself deep inside.
Mismatching materials causes trouble, too. A thin crack filler won’t fix a wide spalling area, and heavy patching compound won’t feather into a shallow pit. Match the product to the damage you actually have.
Finally, plenty of folks skip the sealant entirely. Without it, moisture and oil seep right back in, and your repair wears out far sooner than it should.
Expert Tips
Always check the weather and your garage temperature before you start. Most concrete products cure best between 50 and 80 degrees, and extreme heat or cold ruins the bond and timing.
Mix only small batches of patching compound at a time. It sets faster than you expect, and a bucket that hardens mid-job wastes both money and momentum.
Keep a spray bottle of water nearby. Lightly misting your trowel helps it glide and leaves a smoother finish on patches and resurfaced areas.
Test for hidden moisture before sealing. Tape a square of plastic to the floor overnight, and if condensation forms underneath, the slab is still too damp to seal.
Finally, wear your dust mask whenever you chisel or brush. Fine concrete dust irritates your lungs, so protect yourself before the grit starts flying.
Frequently Asked Questions
What’s the difference between crack filler and resurfacer?
They solve different problems. The right choice depends on the damage in front of you:
- Concrete crack filler – for narrow cracks, splits, and individual gaps
- Patching compound – for chips, holes, and broken edges
- Resurfacer – for wide, worn, pitted, or spalling areas that need a fresh top layer
Match the product to the size and type of damage. Using crack filler on a large spalling patch, or resurfacer on a single deep crack, leads to a weak, short-lived repair.
Can I repair my garage floor myself, or do I need a pro?
Most homeowners can handle cracks, chips, and surface wear on their own with patience and basic tools. Clean the area well, use the right product, and respect the curing time. That said, deep structural cracks, a sinking slab, or major heaving point to foundation issues that need a professional. Know your limits, and tackle the cosmetic and surface-level fixes first before calling anyone in.
How long before I can park on my repaired floor?
It depends on the product, but patience pays off here. Light foot traffic is usually fine after 24 hours, while parking a vehicle often requires several days to a week of curing. Check your product label for exact times, since temperature and humidity affect the process. Driving on it too early crushes the soft repair and undoes your work, so wait the full recommended period.
Why does my concrete keep cracking after I patch it?
Recurring cracks usually mean an underlying issue rather than a bad patch. Common causes include trapped moisture, ground movement, or an expansion joint doing its job. If a crack follows the same line repeatedly, it may need a flexible sealant instead of rigid filler. Persistent, widening cracks across a slab can signal foundation problems worth having a professional inspect before you patch again.
Do I really need to seal the floor afterward?
Yes, sealing is well worth the extra step. A concrete sealant or epoxy blocks moisture, resists oil and chemical stains, and protects your repair from wear and weather. It also makes everyday cleanup far easier, since spills wipe up instead of soaking in. Skipping it leaves the porous surface exposed, so your fresh repair degrades much faster and you’ll be patching again sooner than you’d like.
Conclusion
Restoring a worn garage floor really comes down to good prep and a little patience. Start by inspecting carefully and marking every crack, chip, and rough patch. Clean out the loose concrete, degrease the surface, and vacuum away the dust, because nothing bonds to grime. Then brush on bonding adhesive, fill cracks with patching compound, and resurface the larger pitted areas for a smooth, even finish.
The real secret is respecting the curing time and finishing with a solid coat of sealant. Match your materials to the damage, smooth every edge flush, and always protect yourself from concrete dust while you work.
You don’t need to hire a crew or pour a new slab to repair concrete garage floor damage and bring the surface back to life. With the right tools, a careful eye, and one focused afternoon, you can stop cracks from spreading and add years of life to your floor. Next time you spot a chip or a crumbling edge, grab your gear, mix a fresh batch, and fix it with confidence.