

Are you tired of looking at a pitted, crumbling driveway or patio? You are not alone.
Surface flaking is a common headache for homeowners everywhere. Fortunately, learning how to repair concrete spalling is easier than you might think.
You do not need to be a master mason to fix this unsightly problem. With a free weekend and a little elbow grease, you can restore your surfaces.
Tackling this project yourself saves a lot of money compared to hiring a contractor. It also protects your property from further damage down the road.
Let’s grab some tools and get your driveway looking brand new again.
Understanding the Problem: Why Does Concrete Flake?
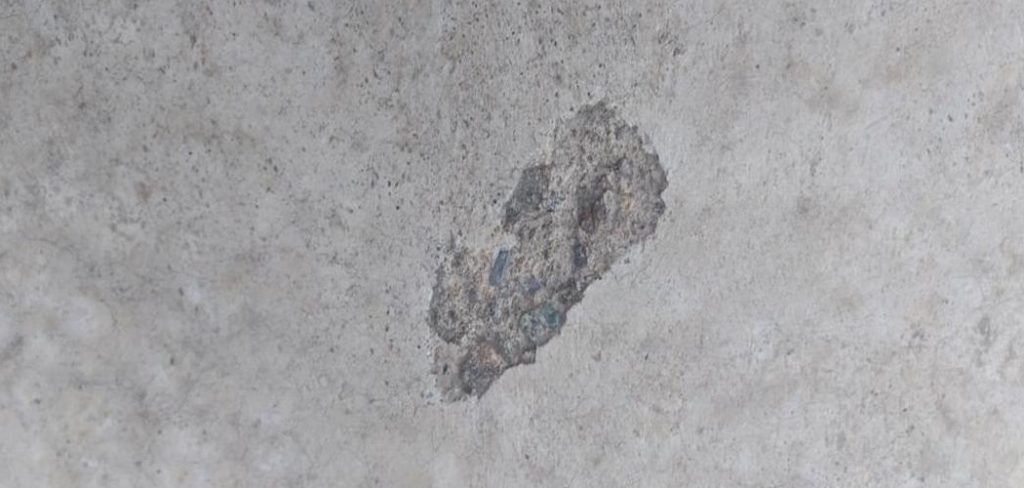
Before diving into the fix, we need to understand what we are dealing with. Spalling happens when the top layer of your concrete begins to chip, flake, or peel away.
This leaves a rough, rocky surface exposed to the elements. It looks bad, but it can also lead to deeper structural issues if left alone.
By fixing the scaling early, you stop water from penetrating deeper into the slab.
Why You Should Learn How to Repair Concrete Spalling
Hiring a professional for minor surface repairs can easily cost hundreds of dollars. The materials required for a DIY fix usually cost less than a good dinner out.
Taking the time to do it yourself gives you a great sense of pride. Plus, you will have the skills to tackle future patches whenever they pop up.
What Causes Concrete Spalling?
You might wonder why your patio or sidewalk decided to start crumbling in the first place. Several factors cause the top layer to weaken and chip away.
Here are the most common culprits:
- Freeze-Thaw Cycles: Water seeps into tiny pores, freezes, expands, and pushes the surface layer off.
- De-Icing Salts: Heavy salt use in the winter breaks down the chemical bonds in the concrete.
- Poor Mixing: If the original builders used too much water in the mix, the top layer becomes weak.
- Improper Curing: Concrete that dries too quickly in hot weather fails to develop its full strength.
- Rebar Rust: If water reaches the steel reinforcement inside, the steel rusts, expands, and cracks the surface.
- Heavy Wear and Tear: Constant impact from heavy machinery or vehicles takes a toll over time.
Tools & Materials Needed for the Job
Preparation is the secret to any successful DIY project. Having everything ready saves you from making mid-project runs to the hardware store.
Here is exactly what you need to gather before we start fixing the damage.
Essential Cleaning and Prep Tools
- Stiff wire brush
- Cold chisel
- Heavy hammer or mallet
- Push broom
- Pressure washer (or a garden hose with a high-pressure nozzle)
- Shop vacuum (optional, but great for removing fine dust)
Repair and Finishing Materials
- Concrete patching compound or resurfacer
- Liquid concrete bonding agent
- A clean bucket for mixing
- Stirring stick or drill with a mixing paddle
- Margin trowel (for scooping and small patches)
- Steel finishing trowel (for smoothing)
- Paintbrush (for the bonding agent)
Protective Safety Gear
- N95 dust mask or respirator
- Heavy-duty work gloves
- Safety goggles
- Knee pads (your joints will thank you later)
Step-by-Step Guide on How to Repair Concrete Spalling
Now it is time to roll up your sleeves and get to work. Follow these beginner-friendly steps to patch up those rough spots permanently.
Take your time with the prep work, as it determines how long the repair will last.
Step 1: Remove the Loose Concrete
Put on your safety goggles and heavy gloves. Take your cold chisel and hammer to the damaged area.
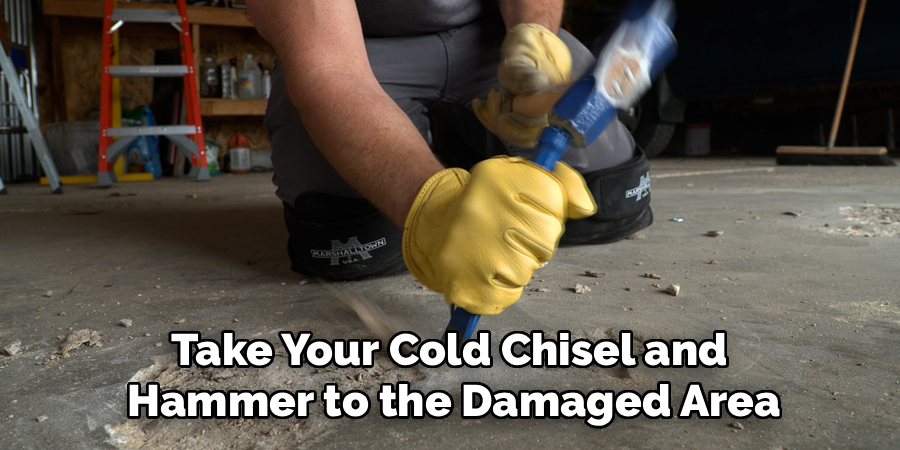
Tap around the edges of the spalled section to break away any loose or crumbling material. You want to get down to solid, healthy concrete.
Do not be afraid to hit it firmly. If the material easily chips away, it needed to come out anyway.
Step 2: Scrub and Clean the Area
The patching compound will not stick to dust, dirt, or grease. Grab your stiff wire brush and scrub the entire damaged section vigorously.
Sweep away the large debris with your push broom. Use a shop vacuum to suck up the fine silica dust left behind.
For the best results, use a pressure washer to blast the area completely clean. Let the surface dry until it is slightly damp but has no standing puddles.
Step 3: Apply the Bonding Agent
A liquid bonding agent acts like glue between the old slab and the new patch. Pour a small amount into a handy container.
Take your paintbrush and coat the entire chipped area with the bonding adhesive. Work it into all the tiny nooks, crannies, and pores.
Check the manufacturer’s instructions on the bottle. Some agents need to dry completely, while others require you to apply the patch while still tacky.
Step 4: Mix the Patching Compound
Grab your clean bucket and your concrete patching compound. Pour the dry powder in first, then slowly add water according to the bag’s directions.
Use your drill with a mixing paddle or a strong stirring stick. Mix it thoroughly until it reaches the consistency of thick peanut butter.
Avoid adding too much water, as a soupy mix will weaken the final repair. Mix only what you can use within twenty minutes so it does not dry out in the bucket.
Step 5: Fill and Smooth the Damage
Scoop the wet compound onto the damaged area using your margin trowel. Press it down firmly to force out any trapped air bubbles.
Overfill the hole just a tiny bit so you have material to work with. Switch to your steel finishing trowel to smooth the top.
Run the trowel flat across the surface to level it with the surrounding slab. Feather the edges by pressing down lightly where the new patch meets the old surface.
Step 6: Cure the Repaired Area
Concrete does not just dry; it cures through a chemical reaction that needs moisture. If it dries too fast, your new patch will crack.
Cover the fresh repair with a piece of plastic sheeting to trap the moisture. You can also lightly mist it with water a few times a day.
Keep traffic off the area for at least 24 to 48 hours. Give it a full week before driving any heavy vehicles over it.
Important Safety Warnings for DIYers
Working with masonry materials requires some basic safety precautions. Concrete dust contains silica, which is highly dangerous if inhaled into your lungs.
Always wear a high-quality dust mask or respirator when chipping, sweeping, or mixing dry powder.
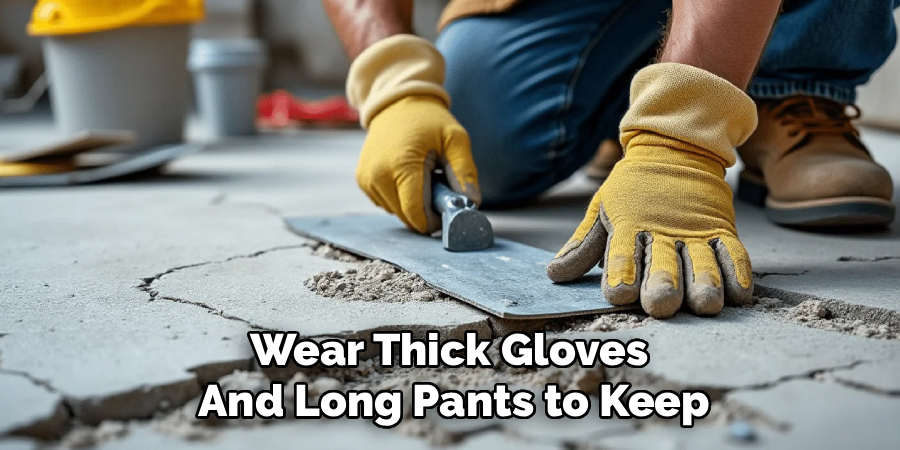
Wet cement is highly alkaline and can cause severe chemical burns to your skin. Wear thick gloves and long pants to keep the wet mix off your body.
If you get any wet compound in your eyes, flush them with clean water immediately and seek medical help.
When to Call a Professional
We love a good DIY project, but some jobs are better left to the pros. It is important to know your limits to keep your home safe.
If the spalling covers your entire driveway, a simple patch job will take forever. You might need a professional to resurface the whole slab.
Call an expert if you see deep cracks wider than half an inch. Large cracks often point to serious foundation shifting or drainage problems.
If your foundation walls or load-bearing pillars are flaking heavily, do not patch them yourself. Structural integrity is not something you want to gamble with.
Cost Estimate: DIY vs. Pro Repair
Budgeting is a huge part of any home maintenance plan. Let’s look at how much money you keep in your pocket by doing this yourself.
For a DIY fix, a bag of good patching compound costs about $15 to $25. A bottle of bonding liquid will run you another $10.
If you need to buy a few hand tools, expect to spend an extra $30. Your total DIY cost will land comfortably between $50 and $70.
Hiring a professional contractor paints a very different picture. Pros usually have a minimum call-out fee just to show up at your house.
For a basic scaling repair, a contractor will likely charge between $300 and $600. If the area is large, that price can easily shoot past $1,000.
By spending a Saturday afternoon on this project, you effectively pay yourself a fantastic hourly rate.
Frequently Asked Questions
Can I repair concrete spalling in the winter?
It is highly recommended to wait for warmer weather. Patching compounds need temperatures consistently above 50°F (10°C) to cure properly and bond tightly.
Will the patched area match my old driveway perfectly?
The new patch will almost certainly look lighter or darker than the older, weathered slab. You can use concrete stains or resurface the entire area later if you want a perfect color match.
Can I just use regular cement to fill the holes?
No, regular cement lacks the polymers needed to stick to a shallow surface. You must use a specialized patching compound or a vinyl-reinforced resurfacer for a lasting fix.
How long will a spalling repair last?
If you clean the area thoroughly and use a quality bonding agent, the fix can last for many years. Regular sealing of the slab will greatly extend the life of your repair.
Does sealing prevent future flaking?
Yes, applying a penetrating waterproof sealer is the best way to stop future damage. It blocks water from soaking into the pores and freezing during the winter.
Conclusion
Fixing a chipped and pitted slab does not have to be a stressful or expensive nightmare. Now that you know how to repair concrete spalling, you can tackle this project with total confidence.
Just remember to take your time chipping away the bad material and cleaning the surface. The secret to a repair that lasts a decade is all in the prep work.
You will save hundreds of dollars and add years of life to your driveway or patio.
Ready to get started? Grab your safety gear, pick up some patching compound, and show that damaged concrete who is boss!