

A wobbly footrest or a handle that won’t budge can turn your favorite chair into a frustrating piece of furniture. The good news? You don’t always need a professional to set things right. Learning how to repair recliner problems yourself can save money, time, and the headache of hauling a heavy chair to a shop. Most issues come down to loose hardware, a stretched cable, or a worn spring, and many fixes take less than an hour with basic tools.
Whether your seat won’t recline, the back feels loose, or the padding has shifted, you can usually tackle the job at home. This guide walks you through the most common recliner repairs step by step, so you can fix your chair confidently and get back to relaxing.
Why Repairing a Recliner Matters
Replacing a recliner can cost hundreds of dollars, and a small problem rarely justifies that expense. When you understand a few basic repairs, you keep a comfortable chair in service for years longer. That’s real money back in your pocket.
There’s also a confidence boost that comes with fixing things yourself. Once you’ve tightened a few bolts or swapped a broken cable, you start seeing furniture differently. Problems feel solvable instead of overwhelming.
For renters and busy homeowners, a quick reclining chair repair beats waiting on a technician or shopping for a new chair. You learn how your furniture works, you reduce waste, and you avoid throwing out something that just needs a little attention. These skills carry over to other repairs around the house too.
Tools and Materials You’ll Need
You won’t need a workshop full of gear to handle most recliner repairs. Start with a basic screwdriver set, including both Phillips and flathead options, since recliner frames use a mix of screw types. A socket wrench or adjustable wrench helps with the larger bolts that hold the reclining mechanism together. Keep a pair of pliers handy for gripping springs, cables, and stubborn clips.
A flashlight makes a huge difference when you’re peering under the chair into dim, tight spaces. You’ll also want a few replacement parts on hand depending on the issue, such as a new release cable, replacement springs, or matching bolts and hardware. A can of spray lubricant smooths squeaky joints.
For extra convenience, a small magnetic parts tray keeps loose screws from rolling away while you work.
Step-by-Step Guide on How To Repair Recliner
Step 1 – Inspect the Chair and Find the Problem
Before you touch a single bolt, flip the recliner onto its back or side so you can see the underside clearly. Shine your flashlight across the frame, springs, and reclining mechanism. Look for anything that’s bent, disconnected, or hanging loose.
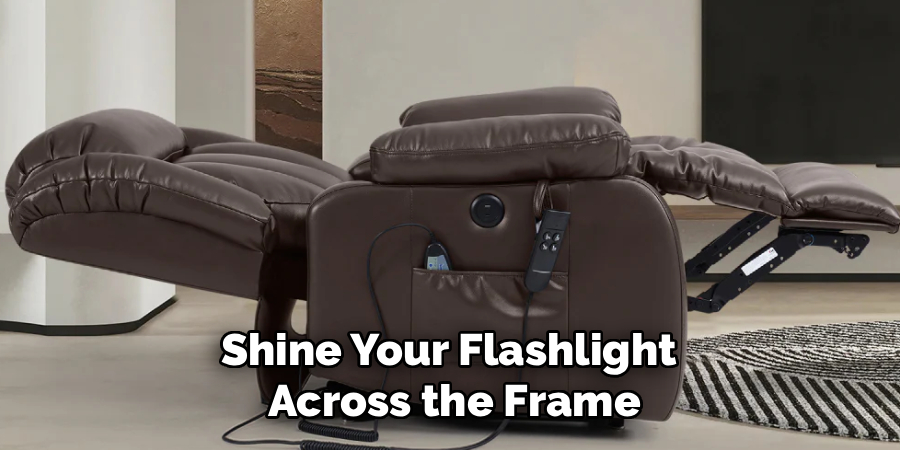
Push and pull the footrest gently. Listen for grinding, clicking, or a soft snapping sound, since each noise points to a different culprit. A loose rattle usually means hardware has backed out, while a stuck handle often signals a cable issue.
Take a quick photo with your phone before you start. This gives you a reference for how everything fits together. Knowing exactly what’s wrong saves you from disassembling parts that work perfectly fine.
Step 2 – Tighten Loose Bolts and Hardware
Loose hardware causes more recliner problems than almost anything else. Over months of daily use, the constant motion slowly works bolts and screws free. You’ll often feel this as a wobble in the seat or a back that leans more than it should.
Run your fingers along the frame and check every visible bolt with your wrench. Turn each one clockwise until it’s snug, but don’t crank so hard that you strip the threads. Pay close attention to the joints where the reclining mechanism meets the frame, since these take the most stress.
If a bolt spins freely without tightening, the threading is likely worn. Replace it with a matching bolt from your hardware kit for a secure, lasting hold.
Read More: How to Repair HDMI Cable Issues.
Step 3 – Fix or Replace the Release Cable
When the handle moves but the chair won’t recline, a damaged cable is usually to blame. The release cable connects the handle to the reclining mechanism, and it can stretch, fray, or pop loose over time.
Locate the cable along the side of the seat frame. Follow it from the handle to where it clips into the mechanism. If the end has slipped out of its bracket, you can often snap it back into place with your pliers.
A frayed or snapped cable needs a full swap. Unhook both ends, note how it routes, and thread the new cable along the exact same path. Test the handle a few times to confirm smooth movement before flipping the chair upright.
Step 4 – Repair the Footrest Mechanism
A drooping or stuck recliner footrest can ruin the whole experience. Start by examining the metal scissor arms that extend and retract the footrest. These arms should move smoothly without catching.
Look for bent metal or a spring that has come unhooked. A disconnected spring is a common cause of a footrest that flops down instead of staying firm. Use your pliers to stretch the spring back onto its hook, working carefully since these springs hold real tension.
If the arms are bent, gently straighten them with steady hand pressure or replace the damaged section. Apply a little spray lubricant to the pivot points. Open and close the footrest several times to make sure it locks and releases the way it should.
Step 5 – Replace Broken or Stretched Springs
Springs give your recliner its bounce and support, so a broken one makes the seat feel saggy or uneven. You’ll usually find a row of springs stretched across the seat base or attached to the footrest assembly.
Inspect each spring for rust, cracks, or stretching that won’t return to shape. A worn spring often looks longer and thinner than its neighbors. Wear gloves here, because springs can snap back and pinch your fingers.
Unhook the damaged spring with your pliers, keeping a firm grip the whole time. Attach the new spring to the same anchor points, matching the tension of the others. Once it’s secured, press down on the seat to feel the renewed firmness and even support.
Step 6 – Address Squeaks and Stiff Joints
That persistent squeak every time you lean back wears on your nerves fast. Squeaks come from metal rubbing against metal at the pivot points of the reclining mechanism.
Tip the chair back and locate the joints that move when you operate the recliner. Spray a small amount of lubricant directly onto each pivot, hinge, and slide. Avoid soaking the area, since excess lubricant attracts dust and grime.
Work the recliner open and closed a dozen times to spread the lubricant through the joints. You should hear the squeak fade with each motion. If a joint stays stiff, check for a bent component or a buildup of old grime that needs wiping away with a cloth first.
Read More: How to Repair Crumbling Concrete Statues.
Step 7 – Fix Sagging Padding and Upholstery
When the seat feels flat or lumpy, the padding underneath has shifted or compressed. This is one of the more satisfying fixes because you feel the difference instantly.
Unzip or unstaple the upholstery panel covering the affected cushion. Reach inside and feel for bunched or flattened foam. You can fluff existing padding by hand or add a layer of new high-density foam cut to fit the cushion shape.
Smooth the padding evenly so there are no gaps or bulges. Pull the upholstery back over the foam, keeping the fabric taut and wrinkle-free. Secure it with a staple gun or zip it closed. Sit down and shift around to confirm the seat feels supportive and balanced again.
Step 8 – Reassemble and Test Everything
With your repairs done, it’s time to put the chair back together and confirm your work holds up. Reattach any panels, covers, or hardware you removed, double-checking each bolt for tightness.
Set the recliner upright on a flat surface. Sit down slowly and test the full range of motion. Pull the handle, extend the footrest, and lean all the way back. Everything should move smoothly, lock firmly, and feel solid beneath you.
Listen for new noises and watch for any wobble. If something feels off, flip the chair and recheck that connection. A careful final test is the best way to repair recliner issues for good and trust your chair again.
Critical Mistakes When Repairing a Recliner
The most common mistake people make is skipping the inspection and diving straight into disassembly. Pulling apart parts that work fine wastes time and risks creating new problems. Always diagnose the actual issue first, then touch only what needs fixing.
Another frequent error is over-tightening bolts. It feels safer to crank everything as hard as possible, but excessive force strips threads and cracks brackets. Tighten until snug, then stop. Snug holds far better than stripped.
Many beginners also handle springs carelessly. These components store serious tension, and a slip can pinch fingers or send a spring flying. Always wear gloves and keep a firm grip with your pliers when stretching or unhooking them.
People often forget to take reference photos before they start. Without one, reassembly becomes a guessing game, especially with cables that route through specific paths. A quick snapshot saves real frustration later.
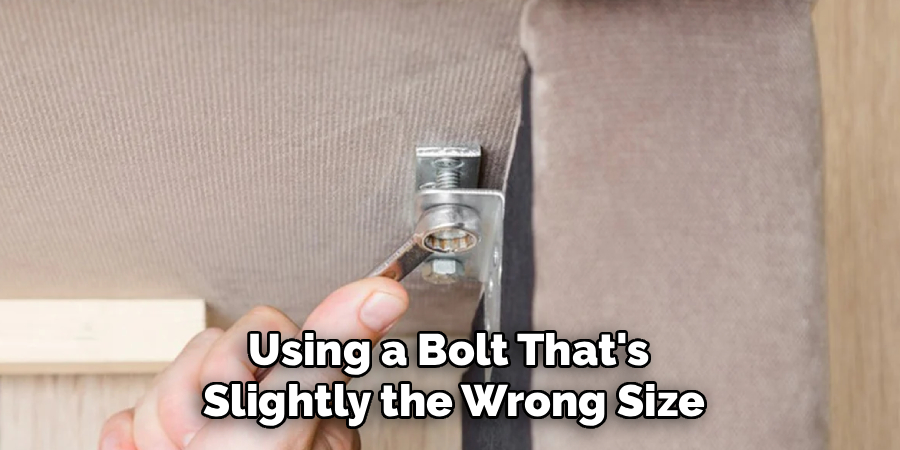
Finally, don’t ignore matching replacement hardware. Using a bolt that’s slightly the wrong size leaves a weak point that loosens fast. Match parts precisely for a repair that lasts.
Expert Tips
Keep a small bag of spare bolts, springs, and clips from any furniture you’ve taken apart. These odds and ends often match recliner hardware perfectly and save you a trip to the store mid-repair.
Work in good light and give yourself room to flip the chair freely. Cramped, dim spaces lead to missed problems and pinched fingers. A clear floor and a bright flashlight make the whole job smoother.
Lubricate the moving joints every six months as routine maintenance. A quick spray prevents squeaks and reduces wear on the reclining mechanism before it ever becomes a problem. Catching small issues early keeps your chair comfortable and extends its life by years, sparing you bigger repairs down the road.
Frequently Asked Questions
Why won’t my recliner stay reclined?
A recliner that won’t hold its position usually has a worn locking mechanism or a loose pivot bolt. Flip the chair and check the joints where the back attaches to the frame. Tighten any loose hardware first, since that solves the issue most of the time. If the locking pawl itself is worn or bent, you may need to replace that small component to restore a firm hold.
How do I fix a recliner handle that’s stuck?
A stuck handle almost always points to a cable problem. The release cable may have slipped out of its bracket, frayed, or snapped. Trace the cable from the handle to the mechanism and reseat it if it’s loose. If it’s damaged, replace it with a matching cable. A little lubricant on the handle pivot can also free up movement if grime is causing the jam.
Can I repair a recliner footrest myself?
Yes, most footrest repairs are beginner-friendly. The common causes are a disconnected spring or a bent scissor arm. Reattach loose springs with pliers and straighten or replace any bent metal. Apply lubricant to the pivot points so the footrest opens smoothly. With basic tools and some care, you can usually fix a drooping or stuck footrest in under thirty minutes.
What tools do I need for a basic recliner repair?
You can handle most jobs with a small toolkit. The essentials include:
- A Phillips and flathead screwdriver set
- An adjustable wrench or socket wrench
- Pliers for springs and cables
- A flashlight for seeing under the chair
- Spray lubricant for squeaky joints
Keep matching replacement bolts and springs on hand too. A magnetic parts tray is an optional extra that keeps loose screws from rolling away.
How often should I maintain my recliner?
A quick check-up every six months keeps your recliner in great shape. Tighten any loose bolts, inspect the cable and springs for wear, and apply a light coat of lubricant to the moving joints. This simple routine prevents squeaks, catches small problems early, and stops minor issues from becoming major breakdowns. Regular care can easily add several years to your chair’s lifespan.
Conclusion
Fixing a recliner isn’t nearly as intimidating as it first looks. Once you understand how the cable, springs, footrest, and reclining mechanism work together, most problems become quick, manageable jobs. You’ve now got a clear process: inspect the chair, tighten loose hardware, fix or replace the cable, repair the footrest, swap worn springs, silence squeaks, refresh the padding, and test everything before you settle back in.
The biggest takeaway is to slow down and diagnose before you disassemble. Pair that patience with matching hardware and careful spring handling, and your repairs will hold for years. A little regular maintenance keeps small issues from ever growing into big ones.
So the next time your chair wobbles, sticks, or sags, you won’t reach for your wallet or the phone. You’ll grab your tools instead. Knowing how to repair recliner problems puts you in control of your own comfort, saves real money, and gives you the confidence to tackle the next fix around your home with ease.