

Has your once-shiny tub started flaking and shedding little chips of coating into the water? You’re not alone. A peeling bathtub is one of the most common bathroom headaches, and it usually looks worse than it actually is. The good news? You can fix it yourself with a bit of patience and the right approach.
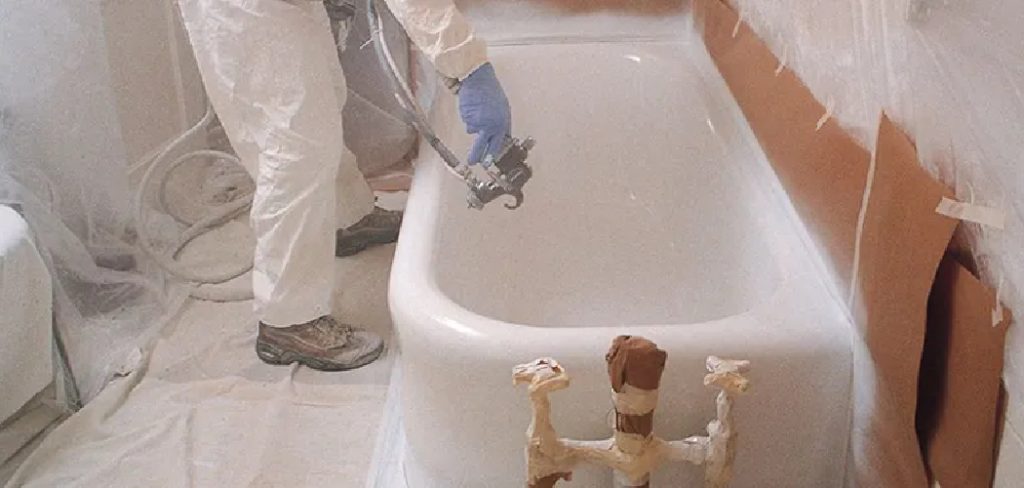
Whether you rent your place or own it, peeling spots can spread fast if you ignore them. Moisture sneaks under the surface, and before you know it, you’re staring at bare patches. But don’t worry, you don’t need a pro for this.
This guide walks you through how to repair peeling bathtub so you can restore a smooth, clean finish without spending a fortune.
Why Repairing a Peeling Bathtub Matters
Letting a peeling tub sit around isn’t just an eyesore. Those flaking spots expose the material underneath to constant water and bathroom moisture. Over time, that can lead to staining, rough patches, and even rust on metal tubs.
For homeowners, fixing the problem early protects your investment and keeps your bathroom looking fresh for resale. For renters, a quick repair can save your deposit and keep your landlord happy.
There’s also the money side. Calling in a refinishing company can cost a few hundred dollars. Doing it yourself runs a fraction of that price. Plus, learning this skill means you’ll handle future touch-ups with confidence. You’ll feel proud every time you step into a tub you fixed with your own two hands.
Tools and Materials You’ll Need
Before you start, gather everything so you’re not running to the store mid-project. Here’s what you’ll want on hand:
- A bathtub refinishing or repair kit (look for one that matches your tub color)
- Fine-grit and medium-grit sandpaper
- A scraper or putty knife
- Painter’s tape and plastic sheeting
- Epoxy or two-part filler for chips
- Primer made for tub surfaces
- A small foam roller and a soft brush
- Rubber gloves and a respirator mask
- Clean rags and a quality bathroom cleaner
- Caulk and a caulk gun for finishing edges
- A fan or open window for ventilation
Optional but handy: an electric orbital sander to speed up the prep work and save your arm from hours of hand-sanding.
Step-by-Step Guide on How To Repair Peeling Bathtub
Step 1 – Clear and Clean the Surface
Start by removing everything from the tub and surrounding area. Bottles, mats, and soap dishes all need to go. Then give the whole tub a deep scrub with a strong bathroom cleaner to strip away soap scum, body oils, and grime.
Pay close attention to the peeling spots. Any leftover residue will stop the new coating from sticking. Rinse thoroughly and wipe the surface dry with clean rags.
You want a squeaky-clean base, so run your fingers across the tub. If it feels slick or filmy, scrub again. A truly clean tub surface is the foundation of a repair that lasts, so don’t rush this part.
Step 2 – Remove the Loose Peeling Coating
Grab your scraper or putty knife and gently lift away every bit of loose, flaking material. Work slowly and let the blade slide under the edges of the peeling coating. The flakes should pop off with light pressure.
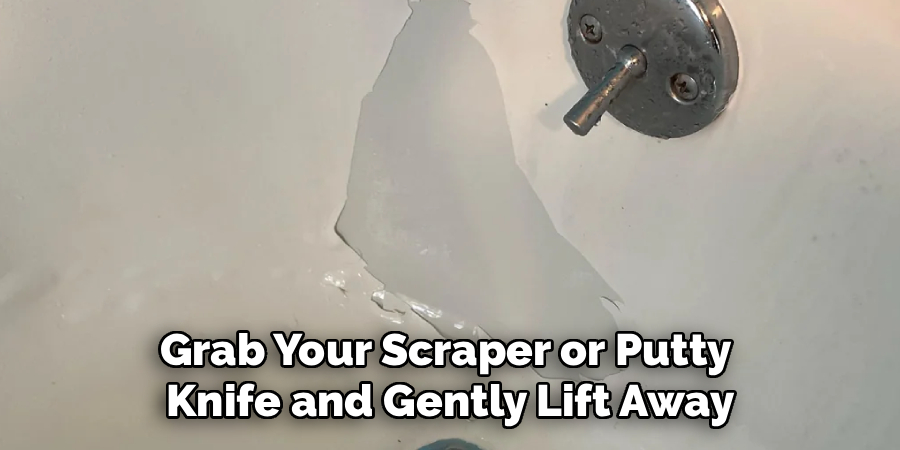
Don’t force any sections that feel firmly attached, you’ll handle those when you sand. Your goal here is to get rid of everything that’s already failing.
As you work, you’ll hear that satisfying little crackle as chips break free. Collect the debris in a bag so it doesn’t clog your drain. When you’re done, the surface should feel mostly stable with no dangling pieces ready to fall off.
Step 3 – Sand the Entire Tub
Now it’s time to roughen things up. Use medium-grit sandpaper to feather the edges where the peeling met the solid coating. This blends the transition so you won’t see harsh lines later.
Then switch to fine-grit sandpaper and lightly scuff the whole tub surface. This gives the new primer something to grip. If you have an orbital sander, this step flies by.
Wear your mask here, because sanding kicks up fine dust you don’t want in your lungs. Keep the area ventilated too. Wipe the tub down with a damp rag afterward, then dry it completely so no dust remains.
Read More: How to Repair Water Spots on Ceiling.
Step 4 – Fill Chips and Gouges
Deep chips and gouges need filling before you coat. Mix your epoxy or two-part filler according to the package directions. Work quickly, since these products start hardening within minutes.
Press the filler into each low spot with your putty knife, smoothing it level with the surrounding tub. Try not to overfill, because excess material means extra sanding later.
Let the filler set fully. You’ll know it’s ready when it feels hard and cool to the touch. Once cured, sand each patched area smooth with fine-grit sandpaper until you can’t feel a ridge. Run your hand over it, a flawless tub starts with a flat, even base.
Step 5 – Mask and Prep the Area
Protect everything you don’t want coated. Tape off the walls, fixtures, and trim with painter’s tape. Lay plastic sheeting over the floor and any nearby surfaces to catch drips and overspray.
Cover the drain and overflow plate too, since stray primer can be a pain to remove. Take your time pressing the tape down firmly so coating can’t seep underneath.
Crack a window and turn on a fan now. Proper ventilation matters a lot during the coating steps because these products give off strong fumes. A breeze of fresh air keeps you comfortable and safe while you work, and it helps the finish dry more evenly later on.
Read More: How to Repair Cracked Window Glass.
Step 6 – Apply the Primer
Wipe the tub one last time to catch any lingering dust. Then open your primer and stir it well. Using your foam roller, apply a thin, even coat across the tub surface, working from top to bottom.
Use the soft brush to reach corners and curved areas the roller can’t touch. Keep your strokes light and overlapping so you don’t leave thick lines or drips.
The primer creates the bonding layer that holds your new finish in place. Let it dry for the time listed on the label, usually an hour or so. The surface should look uniform and feel dry to the touch before you move on.
Step 7 – Coat the Tub Surface
This is the moment your tub starts looking new again. Mix the refinishing product from your repair kit carefully, following every instruction. Pour a little into a tray and load your foam roller.
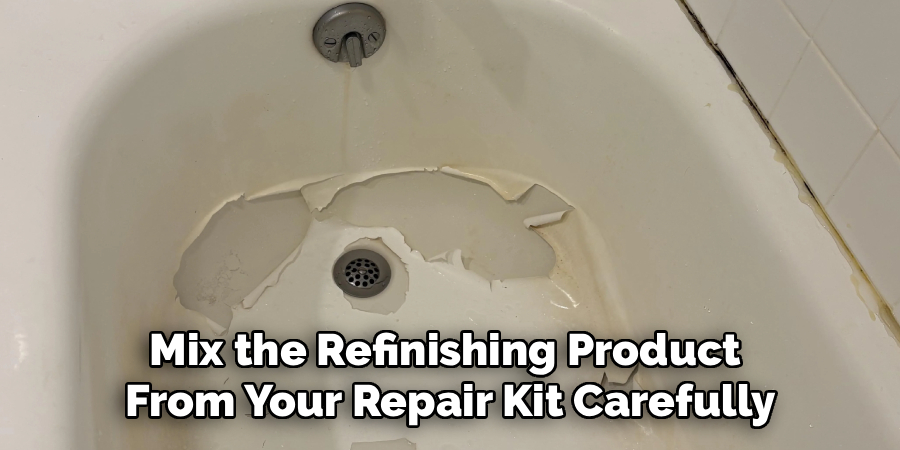
Roll on a thin, even coat in long strokes. Resist the urge to go thick, two or three thin layers always beat one heavy one. Heavy coats sag and stay tacky.
Use your brush for the edges and tight spots. The fresh coating has a glossy, wet sheen that smooths out as it settles. Once the first layer dries to the touch, apply the next. Most projects need two or three coats for full, even coverage.
Step 8 – Reseal the Edges with Caulk
After your final coat cures, refresh the seam where the tub meets the wall and floor. Old caulk often cracks and lets water sneak behind the surface, which causes peeling in the first place.
Cut away the old caulk with a utility knife and clean the gap. Load your caulk gun and run a smooth, steady bead along each seam. Smooth it with a wet fingertip for a clean, professional line.
Fresh caulk seals out bathroom moisture and protects all your hard work. Let it dry fully before any water touches it. This small finishing touch makes a big difference in how long your repair lasts.
Read More: How to Repair Tub Drain Lever.
Step 9 – Let It Cure and Inspect
Patience pays off here. Even when the coating feels dry, it needs full curing time to harden completely. Check your kit for the exact wait, often two to three days before you use the tub.
Keep the bathroom ventilated during this stretch so fumes clear and the finish hardens properly. Avoid touching or testing the surface, since fingerprints can mar a curing coat.
Once cured, inspect your work in good light. Look for thin spots, drips, or missed corners. Run your hand across the tub to feel for rough patches. If you spot anything, a light sand and quick touch-up coat will fix it before your first bath.
Critical Mistakes When Repairing a Peeling Bathtub
The biggest mistake people make is rushing the prep work. A clean, well-sanded surface is everything. If you skip scrubbing or leave dust behind, your new coating won’t bond and it’ll start peeling again within weeks. Take your time on steps one through three, because they decide whether your repair holds.
Another common slip-up is applying coats too thick. It feels faster to lay on one heavy layer, but thick coats sag, drip, and stay sticky for days. Thin, patient layers always win.
Ignoring ventilation is a serious one. These products release strong fumes that can leave you dizzy. Always open a window, run a fan, and wear your respirator mask. Your health matters more than finishing fast.
People also forget about curing time. Climbing into the tub too soon ruins a beautiful finish in seconds, leaving dents and marks you can’t undo. Wait the full recommended period.
Finally, don’t skip resealing the edges. Cracked caulk lets water seep behind the surface, and that hidden moisture is what triggers peeling in the first place.
Expert Cleaning Tips
Once your tub looks great again, keep it that way with gentle care. Skip harsh abrasive scrubbers and powders, since they scratch the fresh finish and wear it down over time. Reach for a soft sponge and a mild, non-abrasive cleaner instead.
Wipe the tub down after each use to stop soap scum and hard water spots from building up. A quick rinse and a swipe with a microfiber cloth takes just seconds.
Watch out for bathroom moisture too. Run your exhaust fan or crack a window after showers so dampness doesn’t linger. Trapped humidity is hard on any refinished surface. With these simple habits, your repair stays smooth and glossy for years.
Frequently Asked Questions
How long does a bathtub repair last?
A solid DIY repair usually lasts five to ten years with proper care. The lifespan depends on a few things:
- How well you prepped and sanded the surface
- The quality of your repair kit and primer
- How gently you clean the tub afterward
Avoid abrasive cleaners and reseal the caulk when needed, and your finish will hold up beautifully.
Why is my bathtub peeling in the first place?
Peeling usually happens when an old refinishing job wears out or moisture sneaks under the surface. Cracked caulk, harsh cleaners, and standing water all speed things up. Sometimes a previous coating was applied over a dirty or poorly sanded tub, so it never bonded well. Fixing the root cause, like resealing edges, keeps it from coming back.
Can I refinish a tub without sanding it?
It’s tempting to skip sanding, but don’t. Sanding roughens the tub surface so the primer and coating can grip tightly. Without it, your new finish slides right off and peels within weeks. Even a light scuff with fine-grit sandpaper makes a huge difference. Spend the extra time, your repair will reward you with a long-lasting, smooth result.
Is it safe to do this repair myself?
Yes, as long as you take precautions. The biggest risk is the fumes from primers and coatings, so always work with strong ventilation, an open window, and a respirator mask. Wear gloves to protect your skin too. Read every product label before you start. Thousands of homeowners and renters tackle this project safely each year, and you can too.
How soon can I use the tub after repair?
Wait for the full curing time listed on your kit, usually two to three days. Even though the coating feels dry sooner, the surface needs time to harden completely. Using it too early leaves dents, marks, or peeling spots. Be patient during this window, keep the bathroom ventilated, and resist testing the finish. The wait is worth a flawless result.
Conclusion
Fixing a flaking tub really comes down to patience and good prep. When you clean thoroughly, scrape away the loose flakes, sand carefully, and apply thin, even coats, you set yourself up for a finish that lasts for years. Don’t forget the small but mighty details, like proper ventilation, fresh caulk, and full curing time before that first soak.
You don’t need fancy skills or a pricey pro to bring your tub back to life. With a basic repair kit and a free weekend, you can restore a smooth, glossy surface and feel genuinely proud of the result. Your bathroom will look brighter, your budget will thank you, and you’ll gain a handy skill for future projects.
So gather your tools, open a window, and give it a go. Learning how to repair a peeling bathtub is one of those satisfying home projects that pays off every single time you step into a clean, fresh tub. You’ve got this.