

A bathtub that won’t hold water or won’t drain properly can turn a relaxing soak into a frustrating chore. More often than not, the culprit hides behind your overflow plate: the trip lever mechanism. The good news? You don’t need a plumber or fancy training to sort this out. Learning how to repair tub drain lever problems is one of those satisfying weekend wins that saves you money and builds real confidence around the house.
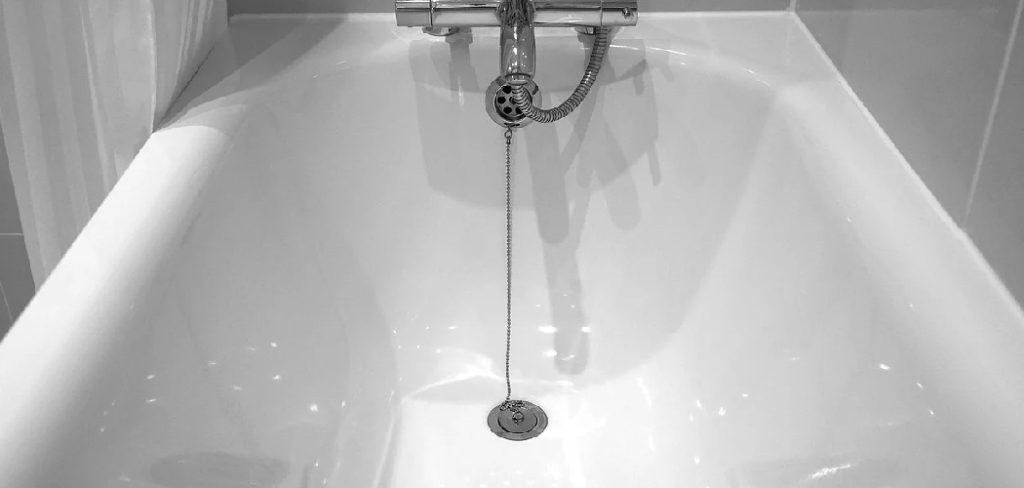
Whether your stopper sticks open, refuses to seal, or the lever feels loose and floppy, the fix usually comes down to a few small parts and some patience. This guide walks you through everything step by step, using plain language and practical tips so even a first-timer can follow along and get the job done right.
Why Fixing Your Tub Drain Lever Yourself Is Worth It
Calling a plumber for a simple lever issue often costs more than the repair deserves. A service visit can run anywhere from $100 to $200, and the actual job might take a pro fifteen minutes. When you handle it yourself, you keep that cash in your pocket and learn a skill you’ll use again.
There’s also the convenience factor. You don’t have to wait days for an appointment or rearrange your schedule. You fix it when it suits you, sometimes before your morning coffee gets cold.
Beyond the savings, understanding your tub’s drain assembly helps you spot small problems early. Catching a worn linkage before it fails completely means fewer surprises and a bathroom that simply works the way it should, day after day.
Tools and Materials You’ll Need
Before you start, gather everything so you’re not running back and forth mid-project. Most of these items live in a basic toolbox, and the rest are cheap hardware store finds.
- Phillips and flathead screwdrivers for the overflow plate screws
- Adjustable pliers to grip and adjust the linkage
- Replacement trip lever assembly matched to your tub brand (if parts are worn)
- Old toothbrush or small wire brush for scrubbing away gunk
- White vinegar to dissolve mineral buildup
- Clean rags or paper towels to wipe down parts
- Flashlight or headlamp to see inside the dark overflow tube
- Small bowl or magnetic tray to hold tiny screws so they don’t vanish down the drain
- Penetrating oil (optional) for loosening stubborn, corroded screws
Having a phone handy to snap reference photos as you disassemble things makes reassembly far easier later.
Step-by-Step Guide to Repairing Your Tub Drain Lever
Step 1 – Identify Your Drain Type
Start by figuring out what kind of stopper you’re working with. Flip the lever up and down a few times and watch what happens inside the tub. A plunger-style system uses a hollow brass weight that drops down inside the overflow pipe, while a pop-up style uses a rocker arm connected to a visible stopper in the drain basin.
Run your fingers along the overflow plate near the top of the tub. Two screws usually hold it in place. Knowing your type matters because the parts and adjustments differ. Snap a quick photo for reference. This small bit of detective work upfront saves you confusion later and helps you buy the right replacement parts if you need them.
Step 2 – Turn Off Water and Clear the Area
You won’t be touching the supply lines for this repair, but it’s still smart to keep things tidy. Wipe down the tub and remove any bath mats, bottles, or toys so you have a clean, open workspace.
Lay a rag over the open drain opening to catch dropped screws. Trust me, the sound of a tiny screw skittering down a drain pipe is one you want to avoid. Set up your flashlight nearby and lay out your tools within easy reach. A clutter-free tub gives you room to maneuver and keeps your knees comfortable while you kneel beside it. Take a breath, you’re ready to dig in.
Step 3 – Remove the Overflow Plate
Position your screwdriver on the top screw of the overflow plate and loosen it slowly. These screws often carry years of soap film and corrosion, so apply steady, firm pressure rather than rushing. If a screw feels frozen, a drop of penetrating oil and a few minutes of waiting works wonders.
Once both screws come free, gently pull the plate toward you. You’ll feel resistance as the attached linkage starts sliding out of the overflow tube. Ease it out carefully, wiggling slightly if it catches. The metal may feel cool and slightly grimy. Set the screws in your bowl immediately so they stay safe and accounted for.
Step 4 – Pull Out the Linkage Assembly
With the plate loose, draw the entire mechanism out through the overflow opening. This part can feel awkward because the linkage twists and bends as it emerges. Go slow and let it find its natural path rather than forcing it.
As it comes free, you’ll see a series of metal rods, a spring, and either a brass plunger or a rocker connection at the bottom. Lay the whole assembly on a towel and examine it under good light. You might notice hair wrapped around the parts, a crusty white mineral coating, or a snapped link. Knowing how to repair tub drain lever assemblies starts right here, with a clear look at what’s actually worn or broken.
Step 5 – Clean Every Component
Most lever problems come down to gunk, not broken parts. Soak the metal pieces in a bowl of white vinegar for ten to fifteen minutes to loosen mineral scale. You’ll often see tiny bubbles forming as the vinegar goes to work.
Grab your old toothbrush and scrub each rod, the spring, and the plunger until the metal looks clean and moves freely. Pay attention to the threaded adjustment nut, since buildup there throws off the whole system. Rinse the parts under warm water and dry them with a rag. As you handle each piece, notice how much smoother the joints feel once the grime is gone. Clean parts move freely and seal far better.
Step 6 – Adjust the Linkage Length
Here’s where the magic happens. If your stopper won’t seal, the linkage is usually too short, letting the plunger sit too high. If water drains slowly, the linkage may be too long, holding the plunger partway down.
Locate the threaded rod and its lock nut. Loosen the nut with your pliers, then turn the rod to lengthen or shorten the assembly. Small adjustments make a big difference, so move it just a quarter turn at a time. Tighten the lock nut to hold your setting. This trial-and-error tuning is the heart of how to repair tub drain lever issues, and getting it dialed in feels genuinely rewarding.
Step 7 – Replace Worn Parts If Needed
Sometimes cleaning and adjusting isn’t enough. If you spot a cracked plunger, a stretched spring, or a snapped linkage rod, swap in your replacement assembly. Match the new part against the old one to confirm the length and connection style line up.
Transfer the overflow plate to the new linkage if the plate itself is still in good shape. Hand-tighten the connections first, then snug them with pliers. New parts often feel stiff at first, but they loosen with use. Buying a matched replacement kit for your tub brand saves headaches, since universal parts sometimes need extra trimming or bending to fit properly.
Step 8 – Reinstall and Test
Feed the cleaned or new linkage back into the overflow tube, guiding it gently so it doesn’t snag. The assembly should slide in smoothly until the overflow plate rests flat against the tub wall. Line up the screw holes and drive both screws back in, tightening firmly but not so hard that you strip them.
Now for the satisfying part. Flip the lever up and run a few inches of water. Watch whether it holds steady or starts draining. Flip the lever down and listen for that gentle gurgle as water clears. Adjust once more if needed. When the seal holds tight and the drain empties cleanly, you’ve nailed it.
Critical Mistakes to Avoid When Fixing Your Tub Drain Lever
Rushing the screw removal trips up plenty of first-timers. Those overflow plate screws often sit under years of corrosion, and forcing a worn screwdriver into a stripped head only makes things worse. Take your time, use the correct size driver, and apply penetrating oil to stubborn screws instead of muscling them out.
Another common slip is skipping the cleaning step entirely. People assume they need new parts when really their existing linkage just needs a vinegar bath and a good scrub. Buying replacements you don’t need wastes money and time, so always clean and test first.
Over-adjusting the linkage causes frustration too. Turning the rod too far in either direction leaves you with a stopper that either floods the tub or refuses to seal. Make tiny quarter-turn changes and test between each one rather than guessing.
Finally, dropping screws down the open drain is an easy disaster to prevent. Always cover the drain opening with a rag before you start. And don’t forget to photograph the assembly before taking it apart, because reassembling from memory rarely goes smoothly when those small rods and springs all look alike.
Expert Tips
A little prevention goes a long way. Once a month, flip the lever a few times and pour a kettle of hot water down the overflow to keep the linkage moving and discourage buildup.
When buying replacement parts, bring your old assembly to the hardware store or note your tub’s brand. Matching the exact style beats guessing and returning parts later.
If you live in a hard-water area, expect mineral scale to return faster. A yearly vinegar soak of the linkage keeps everything sliding smoothly. Finally, dab a tiny bit of plumber’s grease on the threaded adjustment nut before reinstalling. This keeps the mechanism easy to fine-tune next time and slows down corrosion in that critical spot.
Frequently Asked Questions
Why won’t my tub hold water after I adjust the lever?
Usually the linkage sits too short, so the plunger doesn’t drop far enough to seal the pipe. Pull the assembly out and lengthen the threaded rod a quarter turn at a time, then reinstall and test. If lengthening doesn’t help, check the plunger itself for cracks or worn edges that prevent a tight seal against the drain opening.
How do I know if I need new parts or just a cleaning?
Pull out the linkage and inspect it closely. If the parts move freely once you scrub off the grime, cleaning is all you need. Replace parts only when you spot:
- A cracked or chipped plunger
- A stretched or rusted spring
- A bent or snapped linkage rod
Can renters do this repair without landlord permission?
Most leases allow minor maintenance like cleaning a drain mechanism, since you’re not altering plumbing. Always check your agreement first, though. A quick text to your landlord covers you and may even get the repair reimbursed. Keep the original parts in case you need to show what was replaced when you eventually move out.
How long does this repair usually take?
For a straightforward cleaning and adjustment, plan on 30 to 45 minutes including setup and testing. If you’re replacing parts or wrestling with corroded screws, give yourself up to an hour. First-timers should add a little buffer. Working slowly and testing as you go always beats rushing and redoing the whole job twice.
What if the screws are completely stripped or rusted?
Apply penetrating oil and wait ten minutes before trying again. If the screw head is fully stripped, a rubber band placed over the head can give your screwdriver extra grip. For badly rusted screws, a screw extractor tool from the hardware store grabs the threads and backs them out without damaging the surrounding overflow plate.
Conclusion
Fixing a stubborn tub drain doesn’t require a plumber’s license or a deep wallet, just a free afternoon and a willingness to get your hands a little dirty. By identifying your drain type, cleaning the linkage, dialing in the adjustment, and swapping worn parts only when truly needed, you’ve tackled a repair that intimidates plenty of homeowners.
Remember the key lessons: go slow on those corroded screws, cover your drain so nothing falls in, and make tiny adjustments while testing as you work. These small habits separate a smooth repair from a frustrating one.
The real payoff goes beyond a tub that drains and seals like new. You’ve added a genuine skill to your toolkit, one that saves money every time something around the house acts up. Now that you know how to repair tub drain lever problems, you’ll approach your next fix with more confidence and less hesitation. So grab your screwdriver, trust the process, and enjoy that perfectly working bath you earned yourself.