

You reach for the door, snag your sleeve on the handle, and hear that awful little tearing sound. Suddenly your favorite coat has a gaping split right along the arm. It’s frustrating, but it’s far from the end of that jacket.
Here’s the good news: most sleeve tears are simple repairs you can finish at your own table in under an hour. You don’t need a sewing machine or a tailor’s bill. Learning how to fix a ripped coat sleeve takes just a few basic supplies and a bit of patience.
In this guide, you’ll walk through every step to close that tear, strengthen the fabric, and get your coat looking sharp and ready for the next chilly morning.
Why Fixing a Ripped Coat Sleeve Matters
A coat sleeve takes more abuse than almost any other part of your outerwear. You bend it, brush it against walls, and shove it into bags all day long. Once the fabric splits, that small tear only spreads wider with each movement.
For homeowners and renters, a quick fix saves you from tossing a coat you still love and trust. For DIY enthusiasts, it’s a handy skill that carries over to jackets, shirts, and bags too.
Campers and outdoor beginners feel the stakes even more. A torn sleeve lets cold air and rain reach your skin when you’re far from shelter. Knowing how to mend it on the spot keeps you warm and dry. A few minutes of seam repair protects your comfort, your safety, and your wallet all at once.
Tools and Materials You’ll Need
Gather everything before you sit down, so you’re not hunting for supplies with a needle dangling mid-stitch. Most of these items cost little and probably live in a basic sewing kit or a nearby craft shop.
- Matching thread that blends with your coat’s color
- A sharp hand-sewing needle sized for your fabric weight
- Small, sharp scissors for trimming frayed edges and thread
- Straight pins to hold the tear closed while you stitch
- A fabric patch for backing larger or weaker tears
- Fabric adhesive or fusible tape to reinforce the repair
- A thimble to protect your finger through thick layers
- An iron to press seams flat and smooth
- A seam ripper (optional, but it makes opening the lining far easier)
That seam ripper is a small convenience that helps you reach inside the cuff area cleanly when a tear hides near the lining.
Step-by-Step Guide on How to Fix a Ripped Coat Sleeve
Work through these eight steps in order, and don’t skip the prep. Clean, well-aligned edges are what separate a repair that lasts for years from one that splits open again in a week.
Step 1 – Inspect the Tear
Lay your coat flat under bright light and study the damage closely. Is it a clean slit along the seam, a jagged rip across the fabric, or fraying near the cuff area? The type of tear tells you which method works best.
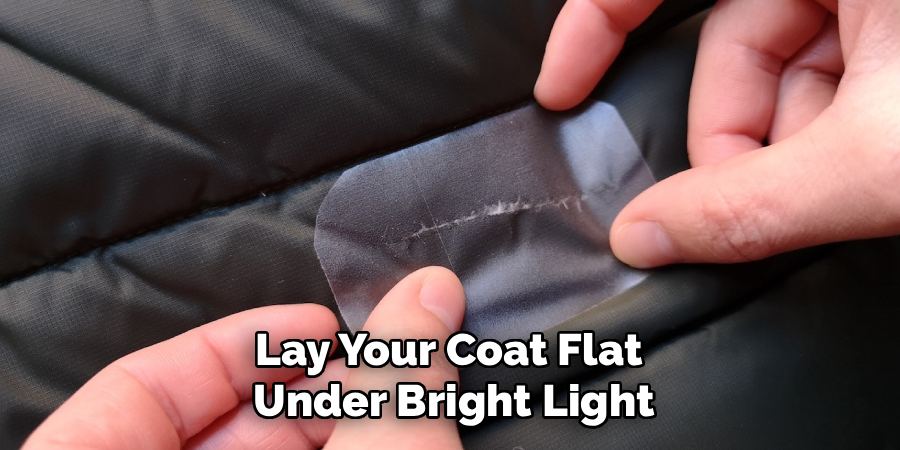
Run your finger gently along the edges to feel for loose threads and weak spots. A tear that follows a seam usually needs simple hand stitching, while a hole in the middle of the fabric may call for a fabric patch behind it.
Knowing how to fix a ripped coat sleeve starts with this honest look. Spend a minute matching the right approach to the damage, because guessing wrong means redoing the whole job later.
Step 2 – Trim the Frayed Edges
Before you stitch anything, clean up the mess around the tear. Use your sharp scissors to snip away loose threads and fuzzy frayed edges that stick out from the fabric.
Trim carefully and conservatively. You want a tidy edge, not a bigger hole, so cut only the threads that hang loose and refuse to lay flat. Pull each stray strand gently first to see where it leads before you cut.
A clean edge gives your needle a smooth path and helps the two sides of the tear meet neatly. You’ll notice the fabric already looks more manageable once the fuzz is gone. This small step makes the actual stitching faster and far tidier in the end.
Step 3 – Turn the Sleeve and Reach the Tear
Most coat sleeves have a lining, so you’ll often need to work from the inside for a clean finish. Turn the sleeve inside out, or use your seam ripper to open a few inches of the lining near the tear.
Reaching the back of the fabric lets you hide your stitches and any fabric patch out of sight. Slide your hand in and feel for the torn area from behind.
Work gently around the cuff area, since that section often has extra layers and stiff interfacing. If the lining blocks your access, open just enough to get your needle through comfortably. A little patience here keeps the outside of your coat looking smooth and professional.
Step 4 – Pin the Torn Edges Together
Now bring the two sides of the tear back together so they sit flush. Pinch the edges and align them the way the fabric naturally lays, without stretching or overlapping either side.
Slide straight pins across the tear to hold it closed while you work. Space them about half an inch apart so the edges can’t shift as you stitch.
For a jagged rip, take your time matching the contours so the seam closes evenly. Smooth the fabric flat with your palm and check that no puckers form around the pins. Well-pinned edges keep your stitches straight and even, which means a stronger, cleaner repair that won’t pull apart at the first bend of your elbow.
Step 5 – Stitch the Tear Closed
Thread your needle with about eighteen inches of matching thread, then knot the end. Start just past one edge of the tear so the knot stays hidden underneath.
Use small, close stitches with a whipstitch or a backstitch, keeping your tension snug but not so tight that the fabric puckers. Push the needle through slowly, especially through thick spots, and let your thimble take the pressure.
Work along the entire tear, then add a second pass back over the same line for a durable repair. The doubled stitches handle the constant bending your arm puts on the sleeve. Knot the thread securely at the end and trim the tail close. Run your finger over the seam to feel that it sits flat and firm.
Step 6 – Reinforce With a Patch if Needed
For a hole in the middle of the fabric or a thin, worn spot, stitching alone may not hold. Cut a fabric patch that extends at least half an inch beyond the damage on every side, and round the corners so they won’t peel.
Slide the patch behind the tear, on the inside of the sleeve, and pin it in place. Stitch around its edges with small, even stitches, or press fusible tape to bond it if you prefer a no-sew option.
The patch spreads stress across a wider area and backs up your repair where the fabric is weakest. On a heavy winter coat or a high-wear elbow, this extra layer turns a quick fix into one that truly survives daily use.
Step 7 – Apply Fabric Adhesive for Extra Hold
Even a well-stitched seam benefits from a little reinforcement. Run a thin bead of fabric adhesive along the back of your stitches or around the edge of your patch, then smooth it with a toothpick.
Keep the layer thin and even, with no thick globs that stay tacky for hours. The glue seeps into the fibers and locks your stitches down, blocking the seam from loosening over time.
Wipe away any excess right away, since dried adhesive is hard to remove later. Pay close attention to the spots that flex most, like the inner elbow, because those areas strain first. Let the glue cure for the time on the label before you wear the coat. This step adds quiet, lasting strength to your work.
Step 8 – Press and Close the Lining
Patience pays off at the finish. Turn the sleeve right side out and lay it flat, then press the repaired area with a warm iron to smooth the seam and set your stitches.
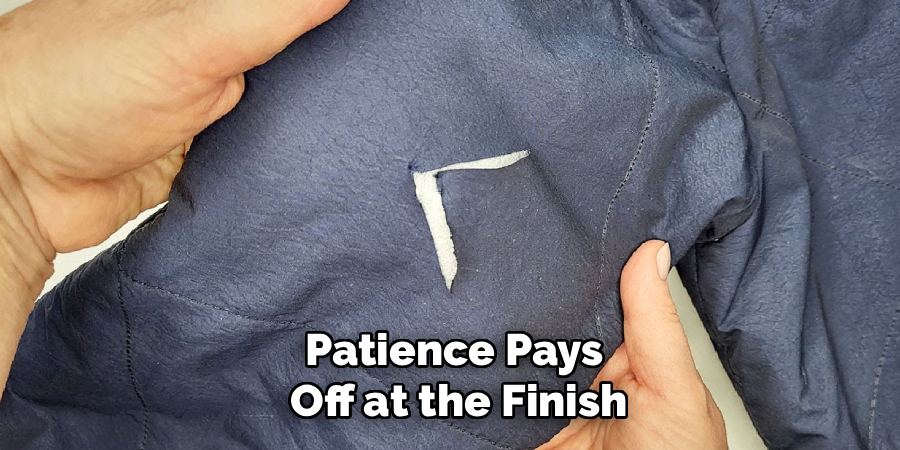
Use a low to medium heat and check your coat’s outerwear care tag first, since some shells scorch easily. A quick press flattens any puckers and makes the repair nearly invisible.
If you opened the lining earlier, stitch it closed now with a few neat slipstitches, hiding the knot inside. Smooth everything down and inspect your work from the outside. The seam should feel flat, look tidy, and blend into the surrounding fabric. Your coat is ready for the next cold morning.
Critical Mistakes to Avoid When Fixing a Ripped Coat Sleeve
Even careful beginners trip over a few common traps, so let’s clear them up before you start.
The biggest mistake is skipping the trim step. When you stitch over loose, frayed edges, the fabric bunches and your seam looks lumpy and weak. Take a moment to snip those stray threads so the two sides meet cleanly.
Another frequent slip is using mismatched or weak thread. Thin all-purpose thread snaps under the strain a sleeve takes, and a bright, clashing color makes your repair stand out. Choose strong matching thread that blends in and holds up to daily bending.
Many people also pull their stitches far too tight. Over-tightened thread puckers the fabric and creates a stiff, bunched ridge that’s uncomfortable and prone to tearing again. Keep your tension snug but relaxed, letting the fabric lay naturally.
Rushing past the lining causes trouble too. Stitching through both the shell and lining at once traps the sleeve and leaves an ugly pucker outside. Open the lining first when you can. Finally, don’t ignore a small tear near the cuff. A two-minute fix now beats a major repair after it unravels.
Expert Tips
A few smart habits turn a decent fix into one that lasts for seasons.
First, always test your thread color against the coat in natural light before stitching. Colors that match indoors can clash outside, and good matching thread makes the repair disappear.
Second, work from the inside whenever the lining allows. Hidden stitches and a backing patch keep the outside of your sleeve looking clean and store-bought.
Third, double your stitch line on any high-stress spot like the elbow or cuff area. The extra pass costs you two minutes and adds real durability where the strain is worst.
Finally, build outerwear care into your routine. Check your seams now and then, store coats on sturdy hangers rather than crammed in a closet, and tackle tiny snags early. Catching a small tear fast means quick hand stitching instead of a big, fiddly repair.
Frequently Asked Questions
Can I fix a ripped coat sleeve without sewing?
Yes, plenty of tears need no needle at all. For small splits and clean seam tears, fabric adhesive or fusible tape works well:
- Tiny slits: a thin line of fabric glue seals them fast
- Seam tears: fusible tape bonds the edges with a warm iron
- Worn holes: an iron-on patch covers and reinforces them
Just clean the frayed edges first, and the no-sew route handles most everyday sleeve damage.
What thread should I use for a durable repair?
Reach for a strong polyester or all-purpose thread in a color that matches your coat. Polyester flexes and resists snapping under the constant bending a sleeve takes. For heavy winter coats, use a thicker upholstery or button thread for extra strength. Always test the color in natural light first, and double your stitch line on high-stress spots like the elbow for a longer-lasting hold.
How do I hide my stitches on the outside?
Work from the inside of the sleeve whenever you can. Turn the sleeve inside out or open a few inches of the lining with a seam ripper, then stitch from behind. Use small, close stitches and matching thread so any thread that shows blends right in. A quick press with a warm iron afterward flattens the seam and makes the repair nearly invisible from the outside.
Will the repair hold up in the wash?
A properly stitched and reinforced repair survives washing when you let any adhesive cure fully first. Wait the complete time on the glue label before the coat sees water. Then check the outerwear care tag, use a gentle cycle, and skip harsh heat in the dryer. Air drying or low heat protects your stitches and keeps fabric adhesive from softening over time, so your durable repair lasts through many washes.
What if the tear is right at the cuff?
The cuff area carries extra layers and stiff interfacing, so it needs a little more care. Open the lining if you can to reach the tear cleanly, then stitch with a thimble to push through the thick fabric. Add a small fabric patch behind the tear for backing, since cuffs take heavy daily strain. Press the finished seam flat so it stays comfortable against your wrist.
Conclusion
Mending a torn sleeve feels intimidating until you break it into simple steps. You’ve seen that success comes down to clean prep, well-aligned edges, and snug, even stitches backed up where the fabric needs it most.
Start by inspecting the tear and trimming the frayed edges, then reach the damage from the inside, pin the edges together, and stitch them closed. Add a fabric patch on weak spots, reinforce with adhesive, and press the seam flat for a tidy finish. Respect those steps, dodge the common mistakes, and your sleeve will hold strong through the coldest months.
A little regular outerwear care, like checking your seams and storing coats properly, keeps small snags from turning into big problems. Once you’ve mastered how to fix a ripped coat sleeve, you’ve gained a skill that protects your favorite coat, your comfort, and your budget.
So gather your supplies, clear a flat surface, and get to work. Your coat will be ready for the next cold day in no time.