

Soft, spongy floors mean trouble underneath. When water seeps into your subfloor, it attacks the joists holding everything up. Left alone, that damage spreads, weakens your structure, and turns a small fix into a costly one. The good news? You can repair floor joists with water damage yourself with the right plan and a free weekend.
This job sounds intimidating, but it follows a clear sequence. You find the damage, support the load, cut out the rot, and rebuild stronger than before. Plenty of homeowners and renters handle this without calling a contractor.
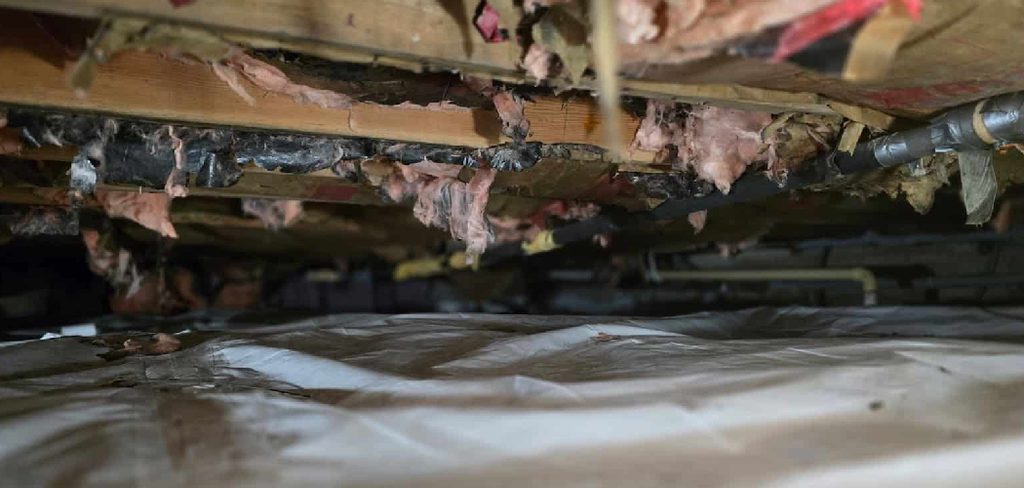
This guide walks you through every step how to repair floor joists with water damage, from spotting the first signs of rot to bolting in fresh lumber. By the end, you’ll know exactly how to bring your floor back to solid ground.
Why Repairing Water-Damaged Floor Joists Matters
Weak joists don’t just creak. They sag, bounce, and eventually fail. A single rotted beam shifts the weight onto its neighbors, and the damage chains outward fast. Wait too long and you risk a collapsing floor.
Water damage also invites mold and pests. Damp wood becomes a feeding ground for termites and a breeding spot for spores that drift into your air. Fixing the joists cuts off both problems at the source.
There’s a financial reason too. A small repair costs a few hundred dollars in materials. A neglected one becomes a full structural overhaul with permits and labor bills. Acting early protects your home’s value and your wallet.
Learn this skill once and you gain real control over your home’s bones. You’ll spot problems faster and fix them before they spread.
Tools and Materials You’ll Need
Gather everything before you start. Working under a floor with missing tools wastes time and patience.
- Pry bar and hammer – remove damaged wood and subfloor
- Circular saw or reciprocating saw – cut out rotted sections cleanly
- Hydraulic bottle jack and support posts – lift and hold the load safely
- Pressure-treated lumber – match your existing joist dimensions
- Galvanized joist hangers and structural screws – anchor new framing
- Construction adhesive – bond sister joists for extra strength
- Tape measure, level, and speed square – keep cuts and placement accurate
- Safety glasses, gloves, and a respirator – protect against dust and mold
- Moisture meter – read the wood’s water content before and after
- Work light or headlamp (optional) – brighten tight crawl spaces for cleaner work
Buy lumber that matches your current joist size exactly. Mismatched dimensions create weak points.
Step-by-Step Guide: How to Repair Floor Joists With Water Damage
Step 1 – Locate and Assess the Damage
Start by finding every weak spot. Walk the floor slowly and feel for soft, springy areas underfoot. Those usually sit directly above rotted wood.
Head into the crawl space or basement with your work light. Press a screwdriver into each joist near the wet zones. Healthy wood resists; rotted wood crumbles like wet cardboard and smells musty.
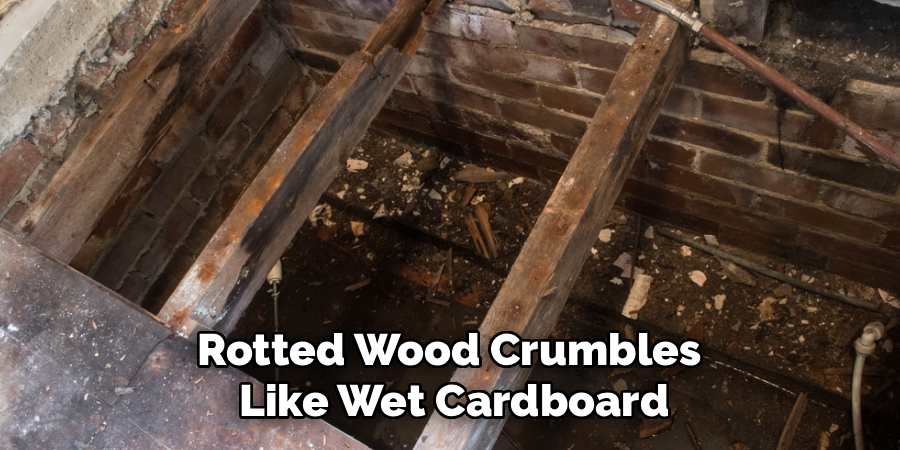
Run your moisture meter across suspect beams. Anything above 20 percent moisture needs attention, even if it still feels firm. Mark the damaged sections with chalk so you know exactly where to cut later.
Take photos and notes. Knowing the full scope before you start helps you buy the right amount of lumber and prevents surprises once you open things up.
Step 2 – Find and Stop the Water Source
Repairs fail when the leak keeps flowing. Before you touch a single joist, trace the water back to its origin.
Common culprits include leaking pipes, cracked foundations, poor drainage, and overflowing gutters. Look for dark stains, drip lines, and damp insulation that point you toward the source.
Run faucets and flush toilets while you watch the joists below. Drips often appear within minutes. Outside, check that gutters carry water away from the foundation, not into it.
Fix the leak completely before moving forward. Tighten fittings, seal cracks, or reroute drainage as needed. Skipping this step guarantees you’ll be back under the floor in six months repairing the same rot all over again.
Step 3 – Support the Floor Above
Never cut a load-bearing joist without supporting the weight first. The floor above relies on that beam, and removing it without backup risks a dangerous drop.
Position your hydraulic bottle jack on a solid base, like a thick plywood pad or a concrete footing. Set a temporary support post on top, topped with a flat board that spans two or three joists.
Pump the jack slowly until it just kisses the framing above. Don’t lift hard. You only want to hold the existing position, not raise the floor.
Listen for creaking and watch for movement. Tighten gradually over a few minutes. Once the load feels stable and supported, you can work under it safely without the structure shifting.
Step 4 – Remove the Subfloor and Damaged Wood
With the load supported, expose the rot. Pull up the subfloor above the damaged joist using your pry bar. Pop the nails or screws and lift the panels away to reveal the full extent of the problem.
Now cut out the rotted section. Use your reciprocating saw to slice through the soft wood, cutting back to solid, dry material on both sides. You’ll feel the saw bite harder once it reaches healthy lumber.
Bag the wet, crumbling debris right away. Rotted wood often carries mold, so wear your respirator and avoid breathing the dust.
This is the heart of how you repair floor joists with water damage—removing every trace of compromised wood so nothing weak stays behind to spread.
Step 5 – Treat and Dry the Area
Moisture lingers even after the leak stops. Before adding new wood, dry everything completely so fresh lumber doesn’t rot too.
Aim a fan into the cavity and let it run for a day or two. Crack open nearby vents to push damp air out. Recheck the surrounding joists and subfloor with your moisture meter until readings drop below 15 percent.
Wipe down any wood that touched the rot with a borate-based wood preservative. This treatment kills lingering mold spores and protects against future fungal growth. Brush it on generously and let it soak in.
The space should smell clean and feel dry to the touch when you’re done. A properly dried cavity sets the foundation for a repair that actually lasts.
Step 6 – Install Sister Joists
Sistering means bolting a new joist alongside the old one to share the load. It’s the strongest fix when the original beam is only partly damaged.
Cut a pressure-treated board to match the length of your existing joist. The longer the overlap with solid wood, the better. Aim for at least three feet of contact on each side of the repaired area.
Run a bead of construction adhesive along the face of the old joist. Press the new board against it, lining up the top edges flush so your subfloor sits level.
Drive structural screws in a staggered zigzag pattern, every six inches. The two beams now act as one. This method is how many pros repair floor joists with water damage without replacing the entire run.
Step 7 – Replace Fully Rotted Joists
Sometimes the damage runs too deep to sister. When an entire joist crumbles end to end, swap it out completely.
Cut and remove the failed beam, working from your supported position. Measure the gap carefully, then cut a fresh pressure-treated joist to fit snugly between the supports.
Slide the new beam into place. It should sit tight, with the top edge level against its neighbors. Tap it gently with a hammer if it needs coaxing.
Secure each end with galvanized joist hangers. These metal brackets cradle the beam and anchor it to the rim joist or beam below. Drive the recommended structural screws into every hole.
Check your level one more time. A perfectly seated joist keeps your finished floor flat and quiet.
Step 8 – Reinstall the Subfloor
With solid framing in place, close everything back up. Measure the opening and cut a matching piece of plywood or OSB subfloor to fit.
Lay a bead of construction adhesive across the top of every joist the panel will touch. This glue stops future squeaks and adds grip.
Set the panel down and screw it into the joists every eight inches. Use deck or subfloor screws long enough to bite deep without poking through. Keep your lines straight so the fasteners hit solid wood.
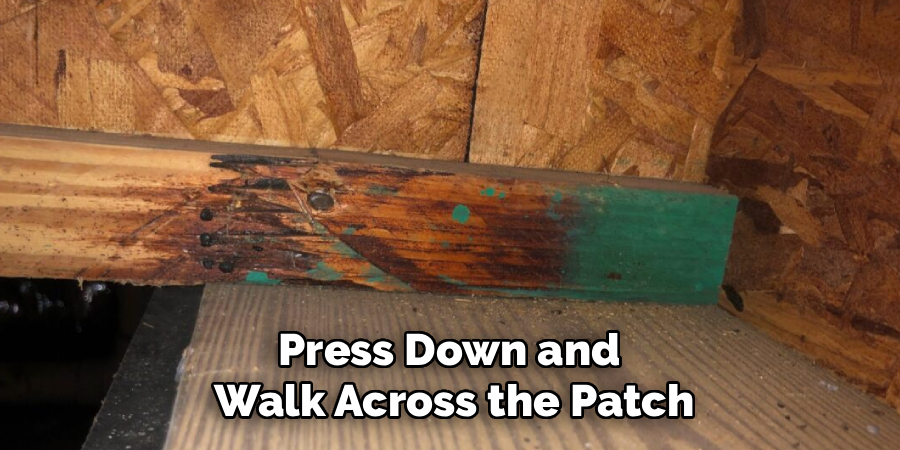
Press down and walk across the patch. It should feel rock solid, with zero bounce or give. That firm, quiet response tells you the repair worked. Now you’re ready to lower the support and finish up.
Step 9 – Lower the Jack and Inspect
Easing the load off completes the job. Release the hydraulic jack slowly, letting the floor settle onto its new framing one click at a time.
Watch and listen as the weight transfers. The new joists should hold firm without sagging, popping, or shifting. Stop and recheck your fasteners if anything moves.
Once the jack is fully down, remove the support post and pad. Walk the floor above thoroughly. Bounce on the once-soft spot and feel for that solid, reassuring firmness.
Run your moisture meter across the whole area one last time. Dry readings confirm you’ve sealed out the water for good. Give the framing a final visual check, looking for gaps or missed screws, then pack up your tools.
Critical Mistakes When Repairing Water-Damaged Floor Joists
The biggest mistake is skipping the water source. People rush to replace the wood, admire the fresh lumber, then watch it rot again within a year. The leak never stopped. Always trace and fix the water problem first, even when it slows you down. A dry repair is the only repair that lasts.
Another common error is working without proper support. Cutting a load-bearing joist while the floor still rests on it is dangerous and can drop the structure onto you. Set your jack and post every single time, no exceptions.
Many DIYers also undersize their lumber or use the wrong type. Standard pine in a damp crawl space rots fast. Use pressure-treated wood that matches your existing joist dimensions exactly, or you create weak points and uneven floors.
Finally, people cut corners on drying. They install new wood against damp framing and trap moisture inside. That hidden dampness breeds mold and undoes your work. Run fans, check moisture levels, and treat the wood before you rebuild.
Expert Tips
Buy more lumber than you think you need. Once you open the floor, hidden rot often extends further than the surface showed. An extra board saves a second trip to the store mid-project.
Photograph each stage as you go. These shots help if you need advice, file an insurance claim, or simply remember how things fit back together.
Sister your joists generously. The longer the overlap with solid wood, the stronger the bond. Three feet of contact on each side beats the bare minimum every time.
Keep a dehumidifier running in crawl spaces and basements year-round. Lower humidity means slower rot and fewer repairs down the road.
Finally, label your support setup. Mark how high you jacked the floor so you can lower it back to the exact same position without overcorrecting.
Frequently Asked Questions
How do I know if a floor joist is damaged or just old?
Press a screwdriver into the wood. Healthy joists resist the point, while damaged ones sink in or crumble. Other clear signs include:
- Soft, bouncy spots on the floor above
- A musty, damp smell in the crawl space
- Visible dark stains or fungal growth
- Moisture meter readings above 20 percent
Old but dry wood stays firm. Wet, soft wood needs attention.
Can I repair a floor joist without removing the whole floor?
Yes, in most cases. Sistering lets you bolt a new joist alongside the damaged one through the crawl space or basement, no flooring removal needed. You only pull up the subfloor when the damage is severe or you can’t reach the beam from below. This keeps your finished flooring intact and saves significant time and cost.
How long does this repair take?
Most single-joist repairs take one full weekend for a confident DIYer. Locating the damage and stopping the leak fills the first few hours. Drying the area can add a day or two before you rebuild. Replacing multiple joists or working in a tight crawl space extends the timeline. Plan generously and never rush the drying or support steps.
What type of wood should I use?
Use pressure-treated lumber that matches your existing joist dimensions exactly. Pressure-treated wood resists moisture and rot far better than standard pine, which matters in damp crawl spaces. Match the depth and width of your current joists to keep the floor level and the load balanced. Mismatched sizes create weak points and uneven, squeaky floors.
Should I call a professional instead?
Handle minor sistering and single-joist repairs yourself with basic tools and care. Call a structural engineer or contractor when you see widespread rot, multiple failed joists, foundation cracks, or sagging across a large area. These signal deeper problems that need expert assessment. When the damage threatens your home’s overall structure, professional help protects your safety and your investment.
Conclusion
Soft floors and rotted beams don’t have to mean a contractor’s bill. You now have a clear path to repair floor joists with water damage from start to finish.
Remember the order that keeps your work solid. Find the damage, stop the water, support the load, and only then cut out the rot. Dry everything completely, treat the wood, and rebuild with pressure-treated lumber sized to match. Lower the jack slowly and test your work until the floor feels rock solid underfoot.
The two rules that matter most: never skip the leak, and never cut without support. Get those right and your repair lasts for decades.
This is a job real homeowners and renters finish every weekend. With patience, the right tools, and the steps above, you can bring a sagging floor back to firm, quiet ground. Take it one stage at a time, trust the process, and enjoy the satisfaction of fixing your home with your own two hands. You’ve got this.