

A sagging or torn strap can turn your favorite patio chair into a wobbly hazard overnight. The good news? You don’t need to toss the whole chair or call a repair service. With a few basic tools and a little patience, you can bring that chair back to sturdy, comfortable life. Learning how to repair patio chair straps saves money, keeps your outdoor setup looking sharp, and gives you a real sense of accomplishment.
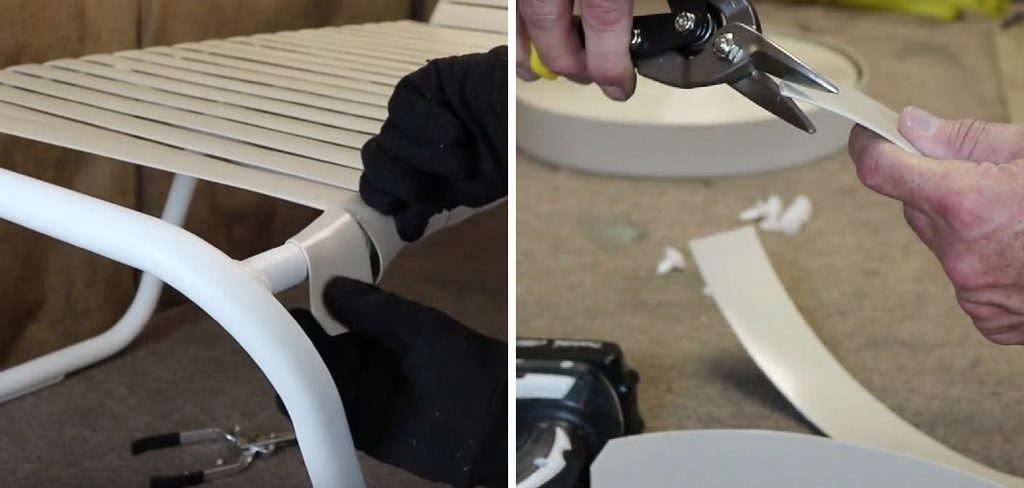
Whether you have a single cracked vinyl strap or a whole set ready to fail, the steps stay simple once someone walks you through them. You just need clean hands, a steady grip, and the right replacement straps. This guide breaks each fix into clear, beginner-friendly steps so you can restore your patio furniture quickly and safely.
Why Repairing Patio Chair Straps Matters for Campers and Outdoor Beginners
When you’re set up at a campsite or relaxing on the deck, a snapped strap can ruin a peaceful afternoon fast. Knowing how to handle worn or torn straps means you stay comfortable and self-reliant wherever you go. That confidence matters when the nearest store is hours away.
Repairs also protect your budget. A new outdoor chair can cost a lot, while a fresh set of straps often runs just a few dollars and takes minutes to install. You learn how your furniture actually fits together, which makes you a smarter DIYer.
Beyond savings, there’s real satisfaction in fixing your own gear. You start spotting small problems early, like a fading strap or a loose rivet, before they leave you sitting on the ground.
Tools and Materials You’ll Need
Before you start, gather everything within easy reach so you’re not running back and forth mid-project. Most fixes use simple supplies you can grab at any hardware store.
- Replacement straps in vinyl or your preferred material, matched to your chair’s color and width
- Measuring tape to size each strap accurately
- A drill with the right bit for removing and setting screws or rivets
- Replacement rivets or screws to secure the straps to the frame
- Scissors or a sharp utility knife for trimming strap ends
- A flathead screwdriver to pry old fasteners loose
- A bucket of warm water to soak and soften stiff vinyl straps
- A heat source like a hair dryer to make straps flexible
- Optional: A rivet gun for faster, cleaner fastening if your chair uses rivets instead of screws
Step-by-Step Guide on How To Repair Patio Chair Straps
Step 1 – Inspect the Chair and Straps
Start by giving your chair a slow, hands-on look in good light. Run your fingers along each strap and feel for cracks, brittle spots, or thinning vinyl. A strap that crackles when you bend it is ready to fail.
Check where each strap meets the frame, since rivets and screws often loosen before the straps themselves give out. Wiggle the buckle ends and note any that slip free. Press on the seat and back to feel for that telltale sag.
Mark every damaged strap with a piece of tape so you don’t lose track. Knowing exactly what needs work now saves you from a half-finished chair later. A careful inspection sets up everything that follows.
Step 2 – Measure the Old Straps
Accurate measurements make or break this project. Pull out your measuring tape and record the full length of an undamaged strap, from one mounting point to the other. Include the part that wraps around the frame.
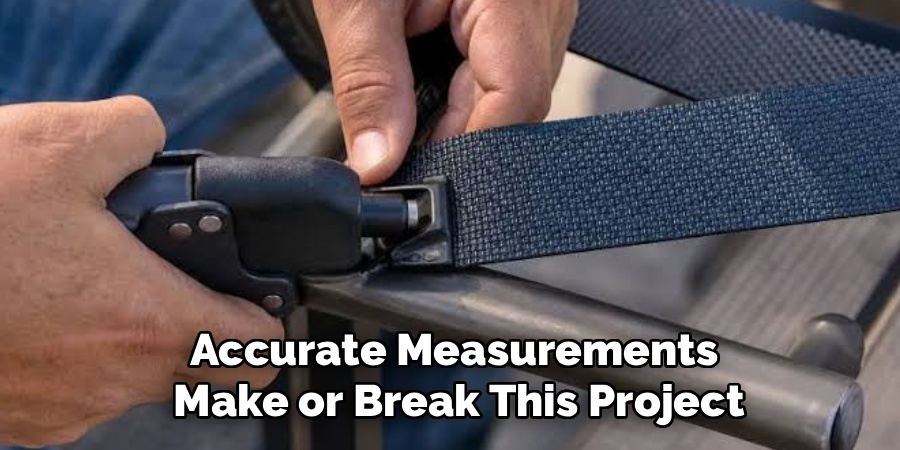
Next, measure the width carefully. Vinyl straps come in standard sizes, and even a small mismatch leaves gaps or bunching that looks sloppy and wears out fast. Jot every number down so you can order or cut replacement straps to match.
Count how many straps you need too, since buying a few extra costs little and saves a second trip. Take your time here. A two-minute measurement now prevents the frustration of straps that don’t fit when you’re ready to install them.
Step 3 – Remove the Damaged Straps
Now clear away the old, worn straps. If your chair uses screws, grab your drill or screwdriver and back them out slowly, catching the hardware in a small cup so nothing rolls away.
For riveted straps, drill carefully through the center of each rivet head until it pops loose. You’ll feel the resistance give as the metal lets go. Keep your drill steady so the bit doesn’t skate across the frame and scratch the finish.
Peel the old strap free and set it aside as a sizing reference. Wipe down the mounting points while you’re there, clearing away dirt, old caulk, or corrosion. A clean frame helps your new straps seat tight and last for many more seasons outdoors.
Step 4 – Soften the New Straps
Fresh vinyl straps often arrive stiff and tightly coiled, which makes them tricky to stretch and align. Softening them first makes the whole job smoother. Fill a bucket with warm water and soak the new straps for several minutes.
You’ll feel them relax and grow noticeably more flexible. If you want faster results, run a hair dryer along each strap and watch it loosen under the gentle heat. Just keep the heat moving so you don’t scorch the vinyl.
Warm, pliable straps stretch into place far more easily and hold the right tension once installed. This step is where many beginners learning how to repair patio chair straps see the biggest difference. Skip it, and you’ll fight every single strap.
Step 5 – Attach the First End
With your straps warm and ready, anchor the first end to the frame. Line up the strap’s mounting hole with the spot on the frame, checking that it sits straight and matches the woven pattern of the surrounding straps.
If you’re using screws, drive one through the hole and into the frame until it’s snug but not stripped. For rivets, slot the rivet through both the strap and frame, then set it with your rivet gun. You’ll hear a satisfying click as it locks.
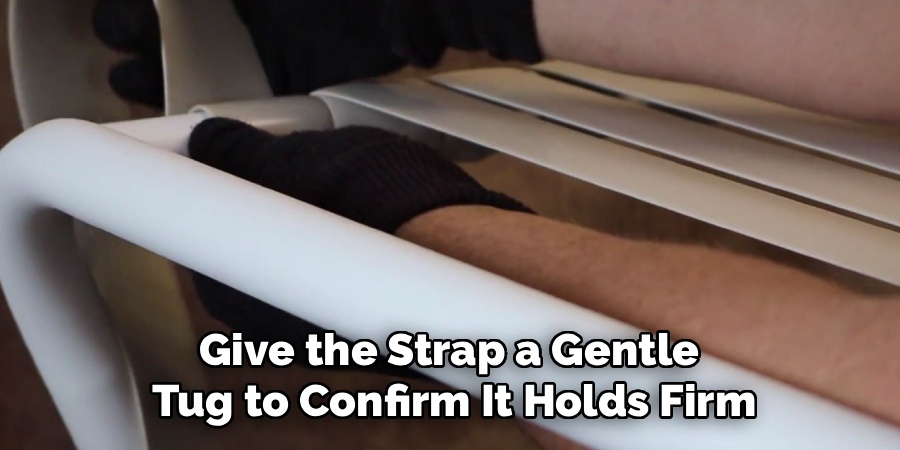
Give the strap a gentle tug to confirm it holds firm. A secure first end gives you a solid anchor to pull against when you stretch the strap across to the other side. Get this end right and the rest follows easily.
Step 6 – Stretch and Align the Strap
This is where tension matters most. Grip the loose end and pull the strap firmly across the frame, stretching it just enough to remove any slack without overdoing it. You want it taut, not strained to the breaking point.
Keep the strap parallel to its neighbors so the woven pattern stays even and clean. A crooked strap stands out instantly and weakens the whole seat. Press it flat and check the alignment from a few feet back.
Hold that tension steady as you guide the end toward its mounting point. Your warm, softened vinyl should cooperate nicely here. Consistent stretch across every strap gives the chair that firm, supportive feel and keeps you from sinking through when you sit down.
Step 7 – Secure the Second End
With the strap stretched tight, fasten the second end while you keep the tension held. This part takes a little coordination, so don’t rush it. Line up the mounting hole and hold the strap in place with one hand.
Drive your screw or set your rivet with the other, locking the strap down before it can slip back. You’ll feel the strap pull firm and flat against the frame once it’s secured. Tug it again to double-check.
Repeat this whole process for each remaining strap, working in the same direction so the pattern stays uniform. Knowing how to repair patio chair straps really comes down to this steady rhythm: anchor, stretch, secure, and check. Each strap gets easier as you build confidence.
Step 8 – Trim and Test the Chair
Once every strap is fastened, clean up the edges. Use scissors or a sharp utility knife to trim any excess strap material, cutting close and clean so no flaps catch on clothing.
Run your hand over the whole seat and back, feeling for loose ends, sharp fastener edges, or uneven tension. Tighten any screw that still feels soft. The straps should sit flat, even, and tight, with that crisp woven look you started with.
Now test your work. Sit down slowly and shift your weight from side to side, listening for any creak or pop. The chair should hold you firmly without sag. If everything feels solid, you’re done and ready to relax in your refreshed patio furniture.
Critical Mistakes When Repairing Patio Chair Straps
The most common mistake is guessing at measurements instead of measuring carefully. Straps that come out too short snap under tension, while straps cut too long sag and bunch. A quick check with your measuring tape prevents both problems and saves you from reordering.
Another frequent error is skipping the softening step. Cold, stiff vinyl resists stretching, so you end up with uneven tension and straps that pop loose within weeks. A short soak in warm water or a pass with a hair dryer makes the material cooperate and seat properly.
Many beginners also overtighten their straps, thinking tighter always means better. Stretch a strap too far and it strains the frame, distorts the woven pattern, and tears prematurely. Aim for firm and taut, not stretched to the limit.
Ignoring alignment ruins otherwise solid work too. If straps run crooked or uneven, the chair looks sloppy and wears unevenly, with some straps carrying more load than others. Keep every strap parallel and check from a distance. Finally, don’t reuse worn rivets or stripped screws. Tired fasteners fail fast, so swap in fresh hardware every time.
Expert Tips
Work on a warm, sunny day whenever you can. Heat keeps vinyl straps naturally flexible, so they stretch into place with far less effort and hold their tension better once installed.
Always buy a few extra straps and fasteners. Strips and rivets cost very little, and having spares on hand turns a future failure into a five-minute fix instead of another shopping trip.
Snap a quick photo of your chair before you remove anything. That reference shows you the original woven pattern and strap direction, so you can match it perfectly during reassembly. Finally, repair early. A single replaced strap today protects the others from extra strain, while waiting often means redoing the entire chair sooner than you’d like.
Frequently Asked Questions
Can I replace just one strap or do I need to redo the whole chair?
You can absolutely replace a single damaged strap if the rest are still strong and flexible. Match the new strap’s width, color, and material to the existing ones for a clean look. That said, if several straps feel brittle or faded, replacing them all at once gives you even tension and a longer-lasting result.
What size replacement straps should I buy?
Measure before you buy. Check three things:
- Length: from one mounting point to the other, including the wrap around the frame
- Width: standard vinyl straps come in common sizes, so match yours exactly
- Quantity: count every strap and add a couple of extras
A mismatch in width causes bunching or gaps, so accuracy here matters most for a tidy, durable finish.
Should I use screws or rivets to attach the straps?
Use whatever your chair was built with whenever possible. Screws are easier for beginners because you can adjust or remove them with a basic drill or screwdriver. Rivets sit flatter and resist loosening, but they need a rivet gun to install. Both hold well outdoors when fresh, so pick the method that matches your tools and comfort level.
How do I keep my new straps from cracking again?
Sun and weather cause most strap damage over time. Protect your patio furniture by covering or storing chairs during harsh weather and extreme heat. Wipe straps clean with mild soap and water a few times a season. Avoid harsh chemicals, which dry out vinyl. A little routine care keeps your new straps flexible and crack-free for years.
Why do my straps keep loosening after I install them?
Loosening usually points to one of two causes. Either the fasteners weren’t fully tightened, or the straps were installed cold and stiff, then relaxed over time. Always soften straps before stretching them, secure each fastener firmly, and check the tension after a day of use. Retighten any screw that feels soft to lock everything in place.
Conclusion
Restoring your own patio furniture feels great, and it’s far more doable than most beginners expect. You’ve now seen how a careful inspection, accurate measurements, and a steady anchor-stretch-secure rhythm can bring a sagging chair back to firm, comfortable life. Add in softening your straps, keeping the alignment true, and trimming clean edges, and you’ve covered every step from start to finish.
The real secret to learning how to repair patio chair straps is patience. Take your time measuring, soften every strap before stretching, keep your tension even, and always use fresh fasteners. Those habits keep your chair sturdy and looking sharp season after season.
Don’t let one torn strap send a good chair to the curb. Grab your tools, follow these steps, and trust the process. Each strap you replace builds skill and confidence for the next project around your patio. Your next move? Pull that chair into the light, inspect every strap closely, and fix that nagging sag today.