

Cracks, chips, and gaps in your siding don’t fix themselves. Left alone, they let in water, invite rot, and chip away at your home’s value. The good news? You can repair cement siding yourself with a few common tools and an afternoon of focused work.
Cement siding—often called fiber cement—is tough, but it’s not invincible. Impact damage, settling, and years of weather take their toll. When you spot a problem early, the fix is simple and cheap.

This guide walks you through every step how to repair cement siding, from assessing the damage to sealing the final coat. No contractor required. Whether you own your place or just want it looking sharp, you’ll learn exactly what to do and how to do it right.
Why Repairing Cement Siding Matters
Water is the enemy. A small crack today becomes a rotted wall cavity next year. Fixing damage early protects the structure behind your siding and saves you from a far bigger repair bill down the road.
Strong siding also keeps your home looking sharp. Buyers notice cracked or patched-over panels, and curb appeal moves the needle on resale value. Clean, well-maintained siding signals a well-maintained home.
Then there’s the money you keep. A professional repair runs hundreds of dollars per panel. Doing it yourself costs the price of caulk, patch material, and paint—usually under thirty dollars.
Learn this skill once and you’ll use it for years. Every patch you make builds confidence and adds to your home maintenance toolkit.
Tools and Materials You’ll Need
Gather everything before you start. Stopping mid-job to run to the hardware store kills momentum.
- Seal cracks and gaps: cementitious patching compound or exterior-grade caulk
- Cut and shape patches: carbide-tipped utility knife or fiber cement shears
- Remove damaged sections: pry bar and hammer
- Smooth the surface: putty knife and 120-grit sandpaper
- Fasten new pieces: corrosion-resistant siding nails or screws
- Protect the finish: exterior primer and matching paint
- Stay safe: N95 dust mask, safety glasses, and work gloves
- Measure accurately: tape measure and pencil
- Optional for convenience: an oscillating multi-tool to cut clean, precise lines around damaged panels in tight spots
Buy patch material rated for outdoor use. Indoor compounds won’t survive the weather.
Step-by-Step Guide on How to Repair Cement Siding
Step 1 – Inspect and Assess the Damage
Start with a close look. Run your hand along the siding and feel for cracks, soft spots, or loose panels. Hairline cracks need only caulk. A panel that crumbles under pressure needs full replacement.
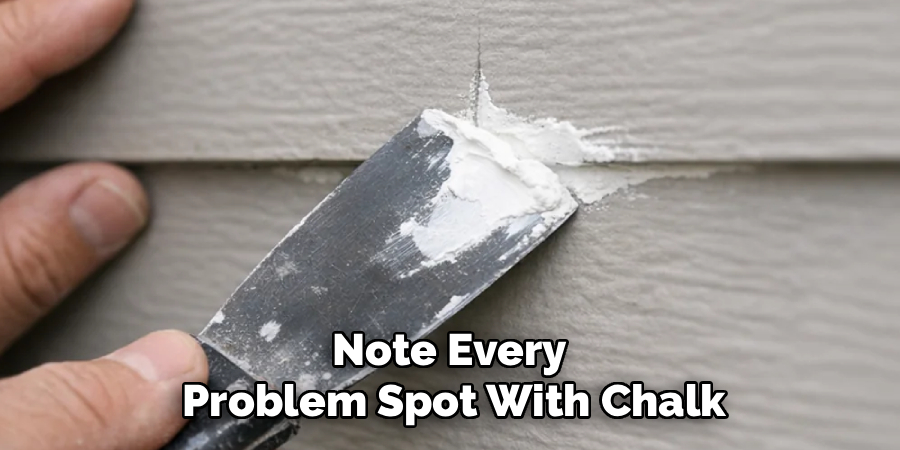
Press near the damaged area. If it flexes or sounds hollow, moisture may have reached the wall behind it. Note every problem spot with chalk so you don’t miss one later.
Check the surrounding paint too. Bubbling or peeling often points to trapped water. Knowing the full scope before you repair cement siding keeps you from patching one crack while a worse one hides nearby. Take five minutes here and save yourself a redo.
Step 2 – Clean the Repair Area
Dirt ruins adhesion. Scrub the damaged section with a stiff brush and a mix of water and mild detergent. Rinse it clean and let it dry completely—patching compound won’t bond to a damp or dusty surface.
Pull away any loose paint chips, crumbling edges, or old caulk. A putty knife works well for scraping these off. You want a stable, solid base around the crack.
Wipe the area one last time with a dry cloth. Run your fingers across it; the surface should feel gritty and clean, not slick or powdery. A spotless area means your patch grips tight and lasts for years instead of months.
Step 3 – Remove Severely Damaged Sections
Some panels are too far gone to patch. If a section is shattered, rotted, or sagging, take it out. Slip a pry bar under the bottom edge and gently lift to expose the nails.
Pull the nails with a hammer claw or cut them flush with your oscillating tool. Work slowly so you don’t crack the panels above or below. Cement siding is brittle and chips if you rush.
Once free, lift the damaged piece away. Wear your dust mask here—broken fiber cement releases fine silica dust you don’t want to breathe. Set the old panel aside as a template for cutting its replacement to the exact size.
Step 4 – Cut a Replacement Panel
Measure the gap twice before cutting. Lay your old panel on the new board and trace its outline with a pencil for a perfect match.
Score the line with a carbide knife, then snap the board along the cut—or use fiber cement shears for a cleaner edge. Cut outdoors and wear your mask; the dust is heavy and gritty.
Dry-fit the new piece into the opening before you fasten anything. It should slide in with a slight gap on each side for expansion. Sand any tight edges until it sits flush. A good fit now means no rattling, gapping, or warping once the weather changes.
Step 5 – Patch Cracks and Small Holes
For damage that doesn’t need a full panel, reach for patching compound. Scoop a small amount onto your putty knife and press it firmly into the crack, forcing it deep so no air pockets remain.
Drag the knife across the surface at a low angle to feather the edges smooth. The patch should sit slightly proud of the siding—you’ll sand it level once it cures.
Work in thin layers for deep cracks rather than one thick glob. Each layer dries faster and shrinks less. Let it cure fully according to the label, usually a few hours. The compound feels cool and firm when it’s ready for sanding.
Step 6 – Fasten the New Panel
Position the replacement panel in the opening and hold it tight against the wall. Drive corrosion-resistant nails or screws through the fastening line, about an inch from the edges.
Don’t sink them too deep. Drive each fastener until the head sits flush with the surface—overdriving cracks the board and creates weak spots. Space them roughly every 16 inches to hit the studs behind.
Give the panel a gentle tug to confirm it’s locked in place. It shouldn’t shift or rattle. Proper fastening is the difference between a repair that holds through storms and one that loosens in a season. Take your time and check each nail before moving on.
Step 7 – Seal the Seams and Edges
Open seams let water sneak behind your siding. Run a bead of exterior-grade caulk along every joint, edge, and gap around your new panel or patch.
Smooth the bead with a wet finger or a caulk tool, pressing it into the seam for a tight seal. The line should look even and slightly concave, not lumpy. Wipe away excess before it skins over.
Pay special attention to corners and where the siding meets trim. These spots take the worst weather abuse. A clean seal here blocks moisture, drafts, and pests. Let the caulk cure fully—check the tube for timing—before you prime or paint over it.
Step 8 – Sand, Prime, and Paint
Once everything cures, sand your patches smooth with 120-grit paper until they blend into the surrounding surface. Run your hand over the area; it should feel seamless, with no ridges or bumps.
Wipe off the dust, then brush on a coat of exterior primer over every bare patch and new panel. Primer locks out moisture and helps paint stick. Let it dry fully.
Finish with two thin coats of matching exterior paint, feathering the edges into the existing finish so the repair disappears. The second coat hides any lingering color difference. Stand back and admire it—done right, nobody will ever spot where the damage was.
Critical Mistakes When Repairing Cement Siding
Skipping the dust mask tops the list. Fiber cement contains silica, and cutting or sanding it releases fine particles that damage your lungs over time. Always wear an N95 mask and work in open air. This isn’t optional—respiratory protection matters more than any tool in your kit.
Using interior patching compound is another common error. Indoor products can’t handle rain, sun, and freeze-thaw cycles. They crack, crumble, and fall out within months. Always choose materials rated for exterior use, even if they cost a little more.
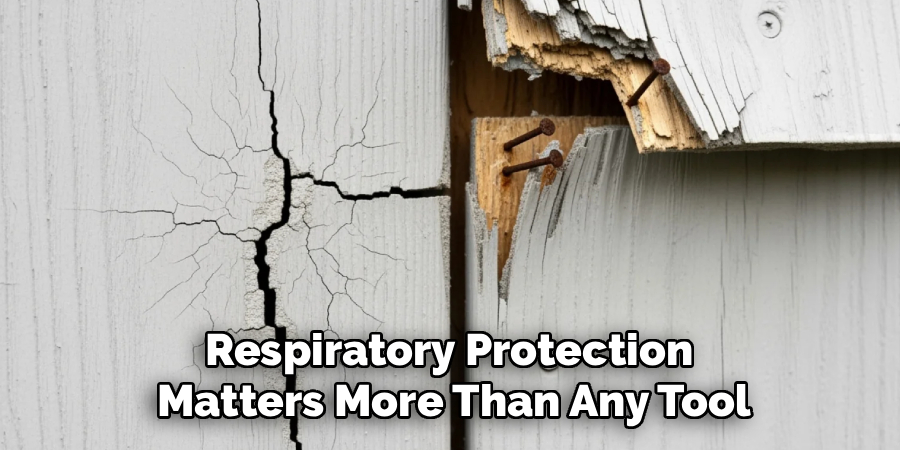
Many people overdrive their nails. Sinking a fastener too deep cracks the brittle board and creates a weak point where water gets in. Drive each nail until it sits flush, then stop. A nail gun set too high causes this constantly, so dial back the pressure.
Painting over damp or unprimed siding wastes your effort. Paint won’t bond to moisture or bare fiber cement, and it’ll peel within a season. Let every layer dry completely and never skip the primer. Finally, don’t ignore expansion gaps—butting panels too tightly causes buckling when the material swells in heat.
Expert Tips
Match your caulk color to your paint when possible. It hides seams even before you paint and gives you a backup if a spot gets missed.
Work on a mild, dry day. High heat makes compound cure too fast and crack; cold and damp slow everything down. Aim for 50 to 80 degrees with low humidity.
Keep a damaged offcut as a color reference for buying matching paint later. Hardware stores can scan it for an exact match.
Prime the back and cut edges of any replacement panel before installing it. This seals the most vulnerable surfaces against moisture you’ll never see again.
Buy one extra panel and store it flat. Future repairs get faster, and you’ll have a guaranteed color match if your siding line gets discontinued.
Frequently Asked Questions
How much does it cost to repair cement siding yourself?
A DIY repair usually costs under $30 for caulk, patching compound, primer, and paint. If you need a full replacement panel, add $5 to $15 per board. Compare that to $300 or more per panel for a professional job. Most homeowners already own the basic tools, which keeps your total spend low and your savings high.
Can I paint over cracked cement siding without patching it first?
No. Painting over a crack hides it temporarily but traps moisture inside, leading to rot and worse damage. Always:
- Clean the crack
- Fill it with exterior patching compound
- Sand it smooth
- Prime and paint
This sequence stops water from getting in and gives you a finish that actually lasts through the seasons.
How long does a cement siding repair last?
A proper repair lasts 10 to 15 years or longer when you use exterior-grade materials and seal every seam. The key is full curing, good adhesion, and quality paint. Patches done with cheap indoor compound or applied to damp surfaces fail within a year. Take your time, use the right products, and your fix will outlast many other parts of your home.
Is fiber cement siding dust dangerous to cut?
Yes. Fiber cement contains crystalline silica, and cutting or sanding it releases fine dust that harms your lungs over time. Always wear an N95 mask, cut outdoors, and use shears or a score-and-snap method instead of a high-speed saw when possible. These methods produce far less airborne dust and keep your work area cleaner and safer.
When should I call a professional instead of doing it myself?
Call a pro when damage covers multiple panels, when you find rot in the wall behind the siding, or when repairs sit above the first floor. Structural water damage and high ladder work carry real risk. Small cracks, single panels, and ground-level fixes are well within reach for most DIYers willing to follow each step carefully.
Conclusion
You now have everything you need to tackle the job with confidence. Inspect the damage, clean the area, patch or replace what’s broken, fasten it tight, seal every seam, and finish with primer and paint. Each step builds on the last, and none of them require a contractor.
The payoff is real. You protect your home from water damage, keep your curb appeal sharp, and save hundreds of dollars in the process. A skill you learn once pays off for years.
Start small if you’re nervous. Fix one hairline crack and see how straightforward it is. That first win builds the confidence to handle bigger repairs later.
Grab your tools, pick a dry day, and get to work. When you repair cement siding yourself, you take real control of your home’s upkeep—and the results speak for themselves. Your house stays stronger, looks better, and holds its value, all because you decided to do it right the first time.