

A failing septic tank shows itself fast. You smell sewage near the drain field. Water backs up in the lowest drain. Grass over the tank grows greener than the rest of the yard. These are warning signs you can’t ignore.
Learning how to repair a septic tank saves you money and keeps your home safe. Many problems start small. A cracked pipe, a clogged inlet, or a worn baffle won’t fix itself. Left alone, these issues turn into expensive replacements and health hazards.
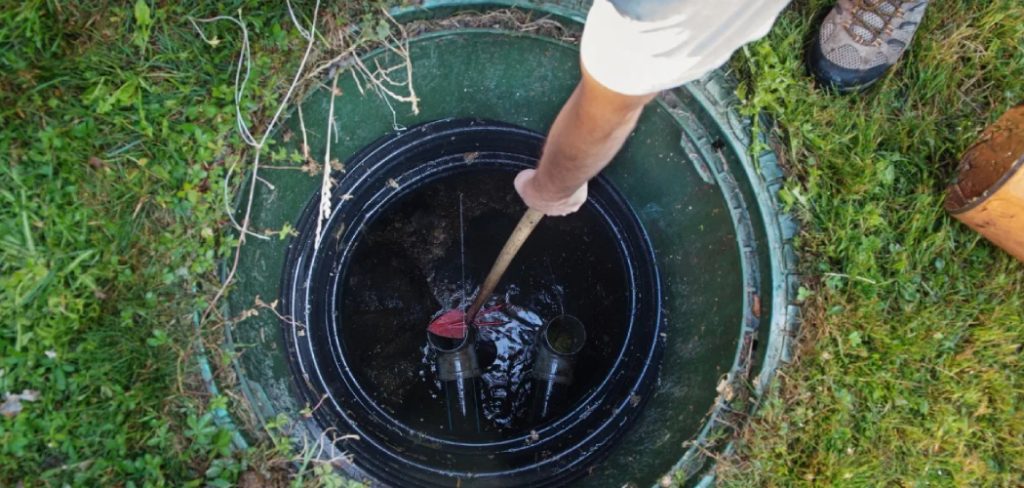
You don’t need to be a plumber to handle basic repairs. With the right tools and a clear plan, you can tackle common faults yourself. This guide walks you through diagnosing, accessing, and fixing your septic system step by step — safely and with confidence.
Why Repairing Your Septic Tank Matters
A working septic system protects your home, your family, and your wallet. Ignore a small problem, and you face raw sewage in your yard, contaminated groundwater, and repair bills that climb into the thousands.
Early repairs keep costs low. Replacing a baffle costs a fraction of replacing an entire tank. Catching a clog before it floods the drain field saves the most expensive part of your system.
There’s a health angle too. Untreated wastewater carries bacteria and viruses. A leaking tank puts that close to your living space and your water supply.
You also protect your property value. Buyers walk away from homes with failed septic systems. Keeping yours in good shape means fewer surprises and a stronger sale when the time comes.
Tools and Materials You’ll Need
Gather everything before you start. Stopping mid-job with an open tank is dangerous and frustrating.
- Protective gear: rubber gloves, safety goggles, and a respirator mask
- Pry bar or lid lifter: for removing the heavy concrete tank lid
- Long-handled shovel: to dig down to buried access ports
- Septic-safe pipe sealant and replacement PVC fittings
- Plumber’s snake or auger: to clear clogged inlet and outlet pipes
- Replacement baffle or effluent filter: match the size to your tank
- Bucket and stiff brush: for cleaning ports and inspecting components
- Flashlight or headlamp: for clear visibility inside the tank
- Wet/dry vacuum(optional): speeds up cleaning around access points and makes inspection easier
Buy parts rated for septic use. Standard hardware-store fittings degrade fast in wastewater.
Step-by-Step Guide on How to Repair a Septic Tank
Step 1 – Locate and Confirm the Problem
Start by finding the source. Walk your yard and note where the smell is strongest. Check which drains run slow or back up first. The lowest fixtures in your home usually fail before the rest.
Look at the ground over your tank and drain field. Soggy, spongy soil or unusually lush grass points to a leak or overflow below. Press your boot into the soil. If it squelches and water pools, you’ve found trouble.

Knowing how to repair a septic tank starts with an accurate diagnosis. A backed-up drain often means a clogged pipe. A surface leak suggests a cracked tank or full system.
Write down what you see. These notes guide every step that follows.
Step 2 – Locate and Expose the Tank Lid
Find your tank’s access lids. Check your property’s septic permit or as-built drawing first — it shows exact locations. No paperwork? Probe the ground with a metal rod about 10 to 20 feet from your home’s foundation.
When the rod strikes concrete or fiberglass, you’ve found the lid. Mark the spot and dig carefully with your shovel. Most lids sit 4 to 12 inches below the surface.
Clear away all soil from the lid edges. You’ll feel the rim and see the seam where the lid meets the tank. Brush off loose dirt so nothing falls in when you open it.
Work slowly here. Rushing the dig can crack a fiberglass lid or damage the tank collar.
Step 3 – Ventilate and Open the Tank Safely
Septic gases kill. Hydrogen sulfide and methane build up inside the tank, and they can knock you out in seconds. Never lean over an open tank or climb inside.
Put on your gloves, goggles, and respirator before you lift the lid. Use your pry bar to break the seal, then slide the heavy lid aside. Concrete lids weigh 60 to 150 pounds — get a helper.
Let the tank air out for at least 10 minutes. Stand upwind. You’ll notice the sharp rotten-egg smell fade as fresh air circulates through the opening.
Keep children and pets far away. An open tank is a fall hazard and a poison source. Rope off the area if needed.
Read More: How to Repair a Leaking Toilet Tank.
Step 4 – Inspect the Interior Components
Shine your flashlight into the tank. Look at the liquid level first. Healthy tanks hold liquid up to the bottom of the outlet pipe. Liquid above that line signals a clog or full drain field.
Check the inlet and outlet baffles. These tees direct flow and trap scum. Cracked, missing, or corroded baffles let solids escape into your drain field — the most common failure you’ll find.
Scan the walls and floor for cracks. Note any root intrusion at pipe joints. Roots squeeze through tiny gaps and create big blockages over time.
Look at the scum layer on top and the sludge at the bottom. A thick crust or deep sludge means the tank needs pumping before any repair.
Step 5 – Clear Clogs in the Inlet and Outlet Pipes
Clogged pipes cause most slow drains and backups. Feed your plumber’s snake into the inlet pipe from the tank side. Push until you feel resistance, then crank the auger to break through the blockage.
You’ll feel the snake punch through and move freely once the clog clears. Pull it back slowly to drag debris out. Repeat on the outlet pipe leading to the drain field.
Flush the lines with water afterward to confirm flow. Watch the liquid level drop as the outlet clears. That visible movement tells you the path is open.
If roots caused the clog, cut them with the auger’s blade head. Persistent root problems need a sectioned pipe replacement, which the next step covers.
Step 6 – Replace Damaged Baffles or Filters
Worn baffles are simple to swap. Remove the broken or corroded baffle by unscrewing or cutting it free at the pipe joint. Clean the pipe end with your stiff brush until the surface is smooth and dry.
Slide the new baffle or effluent filter into place. Apply septic-safe sealant around the joint and press firmly. The fit should feel snug with no wobble.
If your tank uses an effluent filter at the outlet, pull it out and rinse it with a hose over the tank opening. Caked filters restrict flow and trigger backups. A clean filter feels light and lets water pass freely.
Let the sealant cure according to the label before you run water through the system.
Read More: How to Repair Fiberglass Cracks.
Step 7 – Seal Cracks in the Tank
Small cracks let groundwater in and effluent out. Drain the liquid level below the crack first if you can, then dry the surface completely. Sealant won’t bond to wet concrete.
Brush away loose debris and widen hairline cracks slightly with a chisel so the sealant grips. Apply hydraulic cement or a septic-rated epoxy along the full length of the crack. Press it deep into the gap with a putty knife.
Smooth the surface and let it cure fully — usually 24 to 48 hours. You’ll see the patch turn from dark and wet to a uniform dry gray as it sets.
Large structural cracks are different. They mean the tank is failing, and you’ll need professional replacement rather than a patch.
Step 8 – Reseal and Close the Tank
Once your repairs cure, prepare to close up. Inspect the lid gasket or seal around the rim. A cracked gasket lets gases escape and odors leak into your yard.
Replace a worn gasket with a new septic-rated seal. Press it into the rim channel so it sits flat all the way around. Run a bead of sealant under the lid edge for extra protection.
Lower the lid carefully with your helper. Line up the seam and set it down evenly. You’ll hear a solid, flush thud when it seats correctly.
Backfill the soil over the lid, but leave a riser or marker so you can find it next time. Tamp the dirt down to prevent settling and pooling.
Critical Mistakes When Repairing a Septic Tank
The deadliest mistake is entering or leaning into the tank. Septic gases displace oxygen and contain toxic hydrogen sulfide. People die every year from a single breath inside a tank. Always work from outside, ventilate first, and keep a helper nearby. No repair is worth your life.
The second mistake is skipping the pump-out. You can’t inspect or repair a tank buried under scum and sludge. Trying to fix a full tank leaves you guessing and often makes the problem worse. Have the tank pumped before any serious repair so you can see what you’re working with.
Many people also use the wrong materials. Standard PVC fittings, household caulk, and generic concrete patch break down fast in wastewater. Use septic-rated sealants, fittings, and baffles every time. Cheap parts fail within months and force you to dig the tank up again.
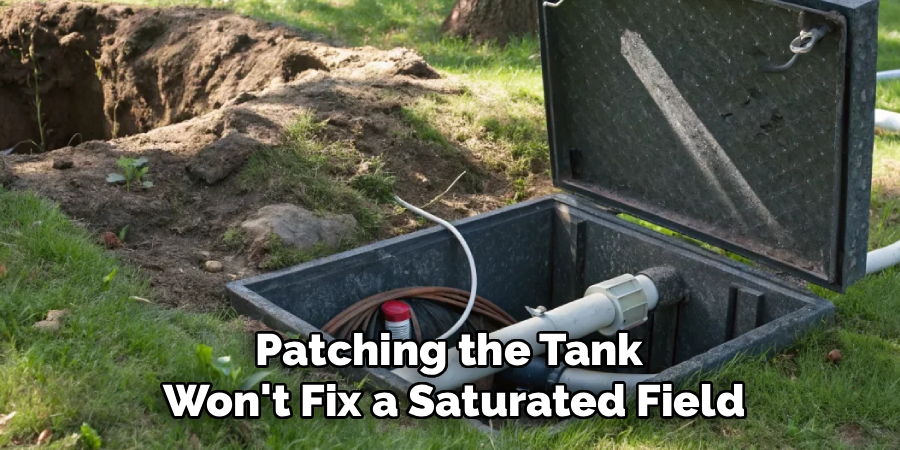
Finally, owners often misread the real problem. A backup might point to a failed drain field, not the tank itself. Patching the tank won’t fix a saturated field. Diagnose carefully, and call a professional when symptoms point beyond a simple tank repair.
Expert Tips
Pump your tank every three to five years. Regular pumping prevents most failures and lets you spot small problems before they grow.
Keep a record of every inspection and repair. Note the date, what you fixed, and the liquid level. This history makes future diagnosis faster and helps any pro you hire later.
Install risers on your access lids. They bring the openings to the surface and turn future inspections into a five-minute job instead of an afternoon of digging.
Watch what goes down your drains. Grease, wipes, and harsh chemicals kill the bacteria your tank needs to break down waste. Skip the chemical additives — they do more harm than good.
Map your drain field and keep heavy vehicles off it. Compacted soil ruins drainage and undoes your repair work.
Frequently Asked Questions
Can I repair a septic tank myself, or do I need a professional?
You can handle many repairs yourself, including clearing clogs, swapping baffles, replacing effluent filters, and sealing small cracks. Call a professional when you face:
- Large structural cracks or a collapsed tank
- A saturated or failed drain field
- Any work requiring entry into the tank
Always prioritize safety. If a job feels beyond your skill, hire a licensed septic contractor.
How do I know if my septic tank is cracked or just clogged?
Check the liquid level inside the tank. A clog usually raises the level above the outlet pipe, with slow drains throughout the house. A crack often shows as wet soil, sinkholes, or a dropping liquid level that won’t hold. Cracks let water escape; clogs trap it. Inspect the walls directly with a flashlight to confirm.
How often should I pump my septic tank?
Pump your tank every three to five years for an average household. Larger families and smaller tanks need more frequent service. Pump sooner if you notice slow drains, odors, or a thick scum layer during inspection. Regular pumping is the single best way to extend your system’s life and avoid costly repairs.
What should I never flush into a septic system?
Keep these items out of your drains:
- Wipes, paper towels, and feminine products
- Grease, oils, and fats
- Harsh chemicals, paint, and solvents
- Coffee grounds and food scraps
These clog pipes, kill helpful bacteria, and fill your tank faster. Stick to human waste and toilet paper only.
Is it safe to be near an open septic tank?
Stay cautious. An open tank releases toxic gases and poses a serious fall risk. Never lean over the opening or climb inside. Ventilate the tank for at least 10 minutes, wear a respirator, and work from outside. Keep children and pets well away, and never work alone — always have a helper present.
Conclusion
A healthy septic system protects your home, your family, and your budget. You’ve now seen how to repair a septic tank from start to finish — diagnosing the problem, exposing the lid safely, clearing clogs, swapping baffles, and sealing cracks. None of it requires a plumbing license. It requires the right tools, the right materials, and respect for the dangers involved.
Remember the essentials. Ventilate before you open the tank. Never climb inside. Use septic-rated parts every time. Pump regularly and keep records. These habits prevent most failures and stretch the life of your system for years.
Know your limits too. Small repairs are well within reach. Collapsed tanks and failed drain fields belong to the pros. Calling for help isn’t defeat — it’s smart maintenance.
Start with a simple inspection this weekend. Catch the small problems early, fix them with confidence, and keep your system running clean. Your home, your wallet, and your peace of mind will thank you.