

A dark backyard pathway, a spotlight that flickers, or a whole section of lights that suddenly quits can take the magic right out of your evenings. You spent good money on that glow, and watching it fade feels frustrating. Here’s the encouraging part: most problems with these systems are simple, safe fixes you can handle yourself.

Learning how to repair low voltage landscape lighting saves you a service call and brings your yard back to life in an afternoon. Loose connectors, corroded sockets, tired bulbs, and a confused timer cause the vast majority of failures. None of them require an electrician for routine repairs.
This guide walks you through diagnosing, fixing, and protecting your outdoor lighting system step by step, while showing you exactly when a fault is serious enough to call in a licensed pro.
Why Learning To Repair Low Voltage Landscape Lighting Matters
Outdoor lighting shows up well beyond the front yard. Think campsite paths, RV awning lights, garden trails, and portable setups that run on the same low voltage principles. When you understand how these systems work, you can troubleshoot almost any 12-volt lighting problem on the spot.
For outdoor beginners, this skill builds real confidence. You’ll learn to spot a voltage drop on a long run, catch moisture intrusion before it spreads, and swap a dead bulb without panic. That knowledge travels with you, from the backyard to the trailhead.
It also saves serious money. Electricians and landscape crews charge a premium for jobs you can often finish in minutes. A little know-how keeps your pathway lights and spotlights glowing season after season, whether you’re lighting a patio, a driveway, or a tucked-away camp table.
Tools and Materials You’ll Need
Gather your supplies before you start so you’re not running back inside mid-repair. Here’s what to keep on hand:
- Multimeter to test voltage and find dead spots
- Replacement LED bulbs or halogen bulbs that match your fixtures
- Waterproof wire connectors rated for outdoor and direct burial use
- Wire strippers and a small screwdriver set for clean connections
- Replacement photocell or timer if your controls have failed
- Electrical tape and dielectric grease to block corrosion
- A garden trowel for uncovering buried cable
- Soft cloth and mild cleaner for wiping fixture lenses
- Work gloves and safety glasses to protect yourself
- Optional: a headlamp or clip-on work light so you can test fixtures after dark and see results in real time
A clean, dry workspace and good light make every step easier and your results far more reliable.
Step-by-Step Guide on How To Repair Low Voltage Landscape Lighting
Step 1 – Cut power at the transformer
Safety comes first, every single time. Before you touch a wire, a socket, or a connector, head to the transformer and switch it off completely.
The transformer is that boxy unit mounted near an outdoor outlet, usually by the garage or deck. Flip its switch to off, then unplug it from the wall to be certain. You’ll hear the faint hum stop.
Working on a live system, even at 12 volts, risks shorts, sparks, and damaged components. Killing the power protects both you and your gear.
Give the unit a quick look while you’re there. Listen for buzzing, sniff for any burnt smell, and check for scorch marks. Those signs hint at deeper trouble you’ll want to investigate before going further.
Step 2 – Inspect the whole system
With the power off, walk your entire lighting run slowly. A calm, careful inspection often reveals the problem before you test anything.
Look closely at each fixture, connector, and visible stretch of cable. Hunt for cracked lenses, loose connections, chewed wires from critters, and any spot where insulation looks damaged or melted.
Pay attention to your senses here. A greenish crust signals corrosion. A musty, damp feel around a socket points to moisture intrusion. A faint burnt odor means heat damage.

Note every issue as you go. One failed connector can darken every light beyond it, so finding that single weak point saves hours. This patient sweep is the heart of knowing how to repair low voltage landscape lighting the smart way.
Step 3 – Test voltage with a multimeter
Now put numbers to your suspicions. A multimeter turns guesswork into a clear diagnosis.
Set the meter to DC volts. Briefly restore power at the transformer, then touch the probes to the wire leads at the transformer output. You should read close to 12 volts on a standard system.
Next, switch the power back off, then test again at a dim or dead fixture’s connection point with power restored. A reading far below 12 volts reveals a voltage drop along that run.
That drop usually means a long cable, an undersized wire, or too many fixtures crowded on one line. Spotting it tells you whether to rewire, rebalance the load, or simply fix a bad connection nearby.
Step 4 – Replace dead or dim bulbs
Bulbs are the most common culprit, so check them early. Power off, twist or pull the old bulb from its socket and inspect it under good light.
A blackened LED bulb or a halogen bulb with a broken filament is clearly done. Swap in a matching replacement with the same base, wattage, and voltage rating. Mixing types can overload the system.
Handle halogen bulbs by the base only. Oil from your fingers creates hot spots that shorten their life dramatically. LEDs are more forgiving and sip far less power.
Before sealing the fixture, dab a little dielectric grease into the socket. You’ll feel it create a smooth, protective barrier that fights corrosion and keeps the next bulb change easy.
Step 5 – Clean and repair connections
Bad connections cause more failures than almost anything else. Open each questionable connector and take a close look inside.
You’ll often find a film of corrosion, a loose pinch connector that barely grips the wire, or a splice that’s let moisture creep in. Any of these can choke the current and dim your lights.
Cut away corroded wire ends and strip back to bright, clean copper. Then join the wires with a waterproof wire connector rated for direct burial. Press it firmly until it seats with a satisfying click.
Avoid the cheap pinch-style connectors that came with many kits. They invite moisture intrusion and fail fast. A solid, sealed splice gives you years of reliable, worry-free performance.
Step 6 – Fix or replace the photocell and timer
If your lights won’t turn on or off at the right time, the controls are likely to blame. The photocell senses darkness, while the timer runs your schedule.
Test the photocell by covering it with your hand during a power-on check. A healthy one should trigger the lights within a few seconds. No response usually means it’s failed.
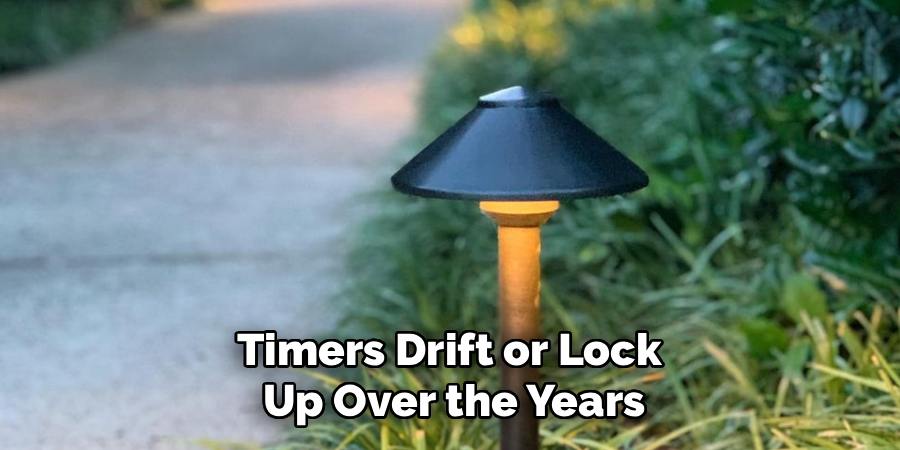
Timers drift or lock up over the years. Reset yours to the correct time and program, then watch it cycle. If it ignores your settings, replace the unit.
Both parts are inexpensive and snap or wire in easily. Match the replacement to your transformer’s specs. Fresh controls often cure mysterious “the lights have a mind of their own” complaints instantly.
Step 7 – Address buried cable and moisture damage
Sometimes the trouble hides underground. If a whole section stays dark and the bulbs test fine, suspect the buried cable.
Gently uncover the cable along the dead run with a trowel. Feel for nicks, slice marks from a shovel, or spots where the insulation has cracked and let water in. Damp, swollen wire is a clear warning sign.
Cut out any water-damaged or compromised section. Replace unsafe wiring rather than patching it loosely, since moisture intrusion only spreads. Join clean ends with waterproof connectors and wrap the splice with electrical tape for extra protection.
Rebury the repaired cable a couple of inches down. That depth shields it from foot traffic and mower blades while keeping it accessible for future checks.
Step 8 – Restore power and test everything
Time for the rewarding part. Double-check that every connection is sealed, every fixture is closed, and no bare wire is exposed.
Switch the transformer back on. Walk the full run as the lights warm up, ideally near dusk so you can judge brightness honestly. Each pathway light and spotlight should glow evenly and steadily.
Look for any fixture that flickers, stays dim, or refuses to light. That points you straight back to a connection or bulb you may have missed.
Run the multimeter one more time at the far end to confirm healthy voltage all the way down the line. When everything shines bright and consistent, you’ve successfully repaired your outdoor lighting system. Stand back and enjoy that warm, even glow.
Critical Mistakes When Repairing Low Voltage Landscape Lighting
The biggest mistake is working on a live system. Even at 12 volts, skipping the step of cutting power at the transformer risks shorts, sparks, and fried components. Always switch off and unplug before you handle any wire or connector.
Reusing cheap pinch-style connectors trips up countless beginners. Those little clips pierce the cable and invite moisture intrusion, which leads straight to corrosion and failure. Swap them for proper waterproof wire connectors rated for direct burial, and your repairs will actually last.
Ignoring voltage drop is another common slip. People keep adding fixtures to one long run, then wonder why the far lights look dim. Use a multimeter to confirm your readings and rebalance the load instead of guessing.
Many folks also patch water-damaged wiring instead of replacing it. Compromised insulation only spreads trouble, so cut out the bad section completely and install fresh cable.
Finally, don’t push past your comfort zone. Melted wiring, scorched transformers, repeated breaker trips, or anything tied to home wiring and code questions deserve a licensed electrician. Knowing when to call a pro protects your home and your safety.
Expert Tips
Test your system at dusk whenever possible. Real-world lighting conditions reveal dim spots and flicker that daytime checks completely hide.
Keep a few spare bulbs and a handful of waterproof connectors in a labeled box. When a light dies on a busy evening, you’ll fix it in minutes instead of hunting through stores.
Apply dielectric grease to every socket and connection you open. That thin protective layer blocks corrosion and makes future repairs far smoother.
Map your layout on paper or your phone, noting how many fixtures sit on each run. This makes diagnosing voltage drop quick and stops you from overloading a single line later.
Finally, clean your fixture lenses a couple of times a year. A simple wipe removes grime and restores surprising brightness without any new parts.
Frequently Asked Questions
Why did one section of my lights go dark?
A single dark section almost always points to one weak link upstream. A failed connector, a corroded splice, or a cut in the buried cable can kill every fixture beyond that point. Start at the last working light and inspect the connection just past it. Check for moisture intrusion, loose wires, or damaged insulation, then repair or replace that spot.
How do I know if my transformer is bad?
Test the transformer output with a multimeter set to DC volts. A healthy unit reads close to 12 volts. If you get zero, a wildly low number, or you notice buzzing, a burnt smell, or scorch marks, the transformer may be failing. Melted or scorched units are a safety hazard, so replace them or call a licensed electrician rather than risking it.
Can I mix LED and halogen bulbs in the same system?
You can run both, but match each bulb to its fixture’s voltage and base. Keep these points in mind:
- LED bulbs draw far less power and run cooler
- Halogen bulbs pull more wattage and add heat
- Overloading one run causes voltage drop and dimming
Switching fully to LED usually frees up capacity, so you can add more fixtures without straining the transformer.
How deep should buried cable be?
Bury low voltage cable about two to three inches below the surface. That depth protects it from foot traffic, mower blades, and garden tools while keeping it easy to reach for future repairs. Lay it along the edges of beds and paths where you’re less likely to dig. Always use cable rated for direct burial to resist moisture intrusion and corrosion.
When should I call a licensed electrician?
Call a pro when you spot melted wiring, a scorched transformer, repeated breaker trips, or any sign that the problem reaches into your home’s main wiring. Code questions, permits, and high-voltage connections also belong to a licensed electrician. Low voltage repairs are generally safe for DIY, but anything involving heat damage, persistent faults, or uncertainty is worth a professional’s eye.
Conclusion
Bringing your yard’s glow back to life is far more approachable than it looks. The secret is working in order: cut power at the transformer, inspect the whole run, then use a multimeter to pinpoint exactly where the trouble hides. From there, swapping bulbs, sealing connections with waterproof connectors, and refreshing a tired photocell or timer handles the vast majority of failures.
Keep the key points close. Always kill the power first, replace water-damaged wiring instead of patching it, and watch for voltage drop on long runs. Recognize the warning signs, like melted wiring or a scorched transformer, that mean it’s time to call a licensed electrician.
Now that you understand how to repair low voltage landscape lighting the right way, you can tackle dark pathways, flickering spotlights, and stubborn timers with real confidence. That skill keeps your outdoor lighting system shining and your evenings warm and inviting. So grab your tools, wait for dusk, and give your landscape the bright, welcoming glow it deserves. You’ve got this.