

Welcome, neighbor! If your garage door is stuck, sitting crooked, or refusing to open, you might be dealing with a broken cable.
Learning how to repair a garage door cable safely at first. However, tackling this project yourself can save you a significant amount of money and time.
In this guide, we will walk through exactly what you need to do to get your door rolling smoothly again. We will cover everything from safety tips to step-by-step instructions.
Let us roll up our sleeves and get started on fixing that garage door.
What Causes Garage Door Cables to Break or Snap?
Before we dive into the fix, it helps to understand why this happened in the first place. Garage doors do a lot of heavy lifting. Over time, that takes a toll.
Here are the most common reasons your cables might fail:
- Natural wear and tear: Years of opening and closing weaken the metal strands in the cable.
- Rust and corrosion: Moisture in your garage can cause the cables to rust, making them brittle and prone to snapping.
- Fraying from friction: If the cable rubs against the track or other hardware, the friction will slowly cut through the wire.
- Improper track alignment: If your door tracks are uneven, it puts extra stress on one side of the cable system.
- Failing springs: When a torsion spring loses tension or breaks, the cables take on extra weight and can snap.
Tools and Materials Needed for the Job
You cannot fix a garage door with just good intentions. You need the right gear. Gather these tools before you even think about touching the door.
Here is what you need to grab from your workbench:
- A new pair of garage door cables (always replace both at the same time).
- Two winding bars (crucial for safely unwinding torsion springs).
- Two pairs of locking pliers (Vise-Grips).
- A sturdy step ladder.
- Safety glasses and heavy-duty work gloves.
- A set of sockets and wrenches (usually 7/16-inch, 1/2-inch, and 9/16-inch).
- A wire cutter or heavy-duty pliers.
Step-by-Step Guide: How to Repair a Garage Door Cable
Now we get to the main event. Follow these steps carefully, and do not rush the process. Safety and patience are your best tools here.
Step 1: Disconnect the Garage Door Opener
First things first, unplug your automatic garage door opener from the ceiling outlet. You do not want the door accidentally activating while your hands are in the machinery.
Next, pull the red emergency release cord hanging from the opener track. This disconnects the door from the automated system, allowing you to move it manually.
Step 2: Secure the Garage Door in Place
Manually lift the garage door until it is fully open. If the door is too heavy due to the broken cable, ask a friend to help you lift it.
Once the door is fully open, clamp a pair of locking pliers onto the metal track just below the bottom roller on both sides. This prevents the heavy door from crashing down on you while you work.
Step 3: Release the Tension from the Springs
This is the most critical part of learning how to repair a garage door cable. Put on your safety glasses and heavy gloves.
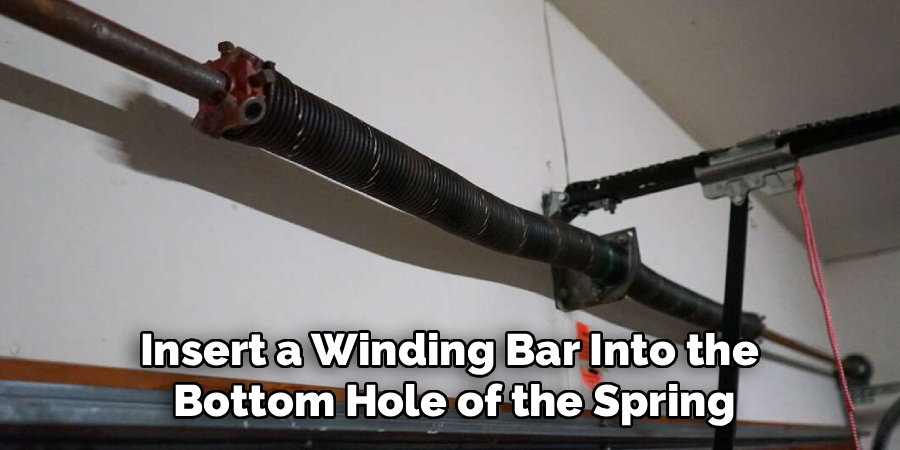
If you have torsion springs (mounted above the door), insert a winding bar into the bottom hole of the spring winding cone. Hold it firmly, loosen the set screws, and slowly unwind the spring using the two winding bars hand-over-hand.
Step 4: Remove the Old, Broken Cable
With the tension safely removed from the springs, you can now remove the old cables. Go to the bottom corner of the garage door where the cable connects to the bottom bracket.
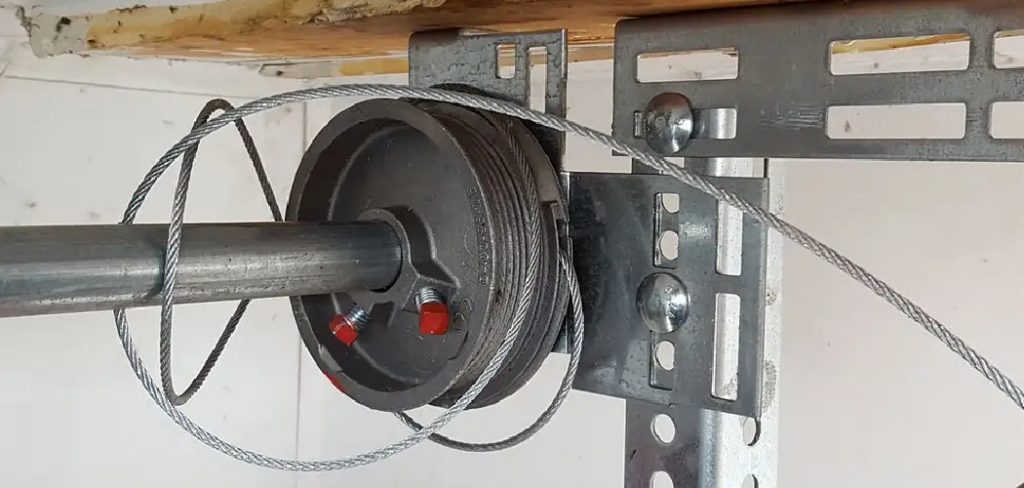
Slip the cable loop off the peg on the bottom bracket. Then, unspool the remaining wire from the cable drum located at the top of the door track. Pull the old cable completely free and discard it.
Step 5: Install the New Garage Door Cable
Take your new cable and thread the un-looped end through the slots on the cable drum at the top. Secure it tightly so it locks into the drum’s notch.
Run the cable straight down the side of the door, behind the track rollers. Slip the looped end of the new cable securely over the peg on the bottom bracket. Make sure the cable is seated properly in the grooves of the drum.
Step 6: Rewind the Springs and Test the Door
Once both cables are installed and seated snugly, you need to add tension back to the springs. Use your winding bars to carefully rewind the torsion spring to its original tension. Tighten the set screws securely.
Remove the locking pliers from the tracks. Carefully lower the door by hand to ensure it moves smoothly and stays level. Finally, reconnect the automatic opener and run a test cycle.
Crucial Safety Warnings When Handling Cables and Springs
I cannot stress this enough: garage door systems hold a massive amount of stored energy. A mistake here can lead to serious injury.
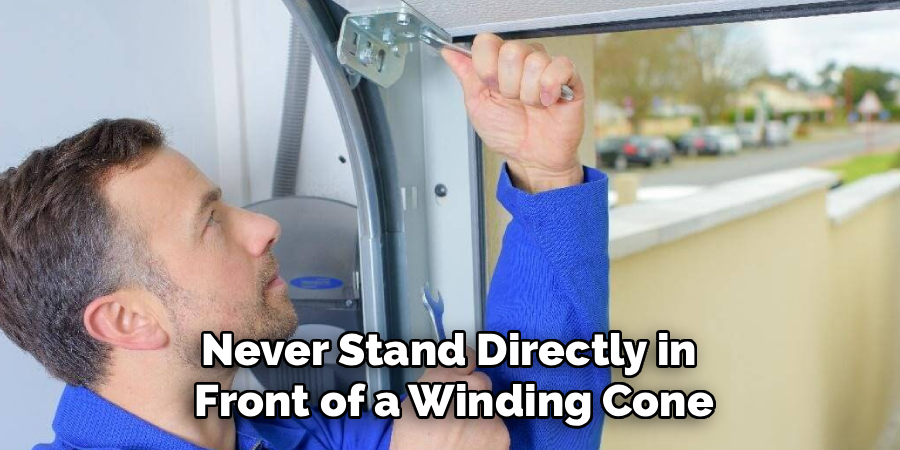
Never stand directly in front of a winding cone when adjusting a torsion spring. Always stand off to the side so you are out of the way if a winding bar slips.
If your cables are connected to extension springs (stretching along the upper tracks), ensure safety cables are installed through the center of the springs. This stops the spring from becoming a dangerous projectile if it snaps.
When to Call a Professional (And Stop Your DIY Repair)
Being a DIY enthusiast is great, but knowing your limits is even better. You should never force a repair if you feel unsafe or lack the proper tools.
If you find that your torsion springs are rusted solid, cracked, or broken, call a professional immediately. Replacing springs is highly dangerous without extensive experience.
Additionally, if your door is severely bent, off the tracks completely, or if you simply do not feel confident handling heavy spring tension, step back. Calling a local technician is much cheaper than an emergency room visit.
Cost Estimate: DIY vs. Hiring a Pro
Fixing things yourself is highly rewarding, especially when you look at the savings. A simple cable repair is one of the most cost-effective DIY projects you can tackle.
If you buy the replacement cables and basic tools yourself, expect to spend between $15 and $30 at your local hardware store. It is an incredibly cheap fix if you already own locking pliers and wrenches.
On the other hand, hiring a professional technician will generally cost between $150 and $300. This covers the cost of parts, the service call fee, and the labor for about an hour of work.
Frequently Asked Questions
Can I open my garage door with a broken cable?
No, you should not try to open the door with an automatic opener if a cable is broken. It can damage the door panels, bend the tracks, or burn out your opener motor.
Do I need to replace both garage door cables at the same time?
Yes, you should always replace both cables together. If one cable snapped, the other is likely weak and stretched, meaning it will probably fail very soon.
How long does it take to repair a garage door cable?
For an average homeowner with the right tools, this repair usually takes about one to two hours. Professionals can often do it in under 45 minutes.
What size garage door cable do I need?
Standard residential garage doors typically use 1/8-inch or 3/32-inch thick cables. Check your owner’s manual or bring the broken cable to the store to match the length and thickness.
Conclusion: Mastering How to Repair a Garage Door Cable Safely
You did it! By following these simple steps, you have successfully learned how to repair a garage door cable on your own.
Taking care of your own home maintenance not only saves you hundreds of dollars, but it also gives you a fantastic sense of pride. Just remember to always prioritize your safety when working around heavy doors and tension springs.
If you found this guide helpful, be sure to bookmark our page for more practical DIY home repair tutorials. Happy fixing, neighbor!