

A worn-out mower deck can turn a simple weekend chore into a frustrating mess. You might notice uneven grass, strange rattling sounds, or rust creeping along the metal housing. The good news? You don’t need a professional to fix most of these problems. With a few basic tools and a little patience, you can repair lawn mower deck damage right in your own garage.
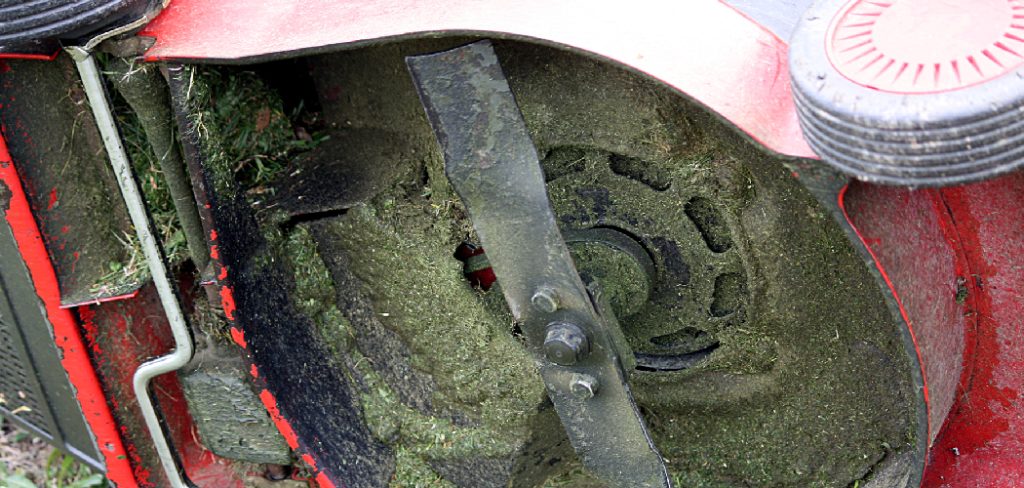
This guide walks you through the whole process how to repair lawn mower deck, from spotting trouble to tightening that final bolt. Whether you’re dealing with cracks, rust holes, or a deck that just won’t level out, you’ll find clear, beginner-friendly steps here. By the end, you’ll feel confident handling the job yourself and saving money in the process. Let’s get your cutting deck back in top shape so your lawn looks crisp and clean again.
Why Repairing Your Lawn Mower Deck Matters
Your mower deck does more than hold the blade. It controls how grass gets cut, lifted, and discharged. When the housing cracks or rusts, your cutting quality drops fast. You’ll see scalped patches, missed strips, and clumps of clippings scattered everywhere.
Ignoring deck problems also puts extra strain on the spindle and belt. A wobbly deck can throw the blade off balance, which wears out parts quicker and even creates safety risks. Flying debris and loose bolts are no joke when a mower runs at full speed.
Fixing the deck early keeps your machine running smoothly for years. It protects your investment, improves your lawn’s appearance, and saves you from buying a brand-new mower too soon. A little upkeep now means a lot less hassle down the road.
Tools and Materials You’ll Need
Before you start, gather everything so you’re not running back and forth mid-project. Having the right gear makes the whole job faster and safer.
- Socket wrench set and screwdrivers
- Wire brush for scrubbing rust
- Metal patch kit or sheet metal for holes
- Rust-resistant spray paint or primer
- Heavy-duty work gloves and safety glasses
- Putty knife or scraper
- Penetrating oil for stuck bolts
- Replacement bolts and washers (if yours are stripped)
- Bucket of soapy water and a stiff brush for cleaning
- Welding kit (optional, for large cracks or serious structural damage)
The welding kit is the one extra item worth having if your deck has deep cracks. For most light rust and small holes, a patch kit handles the job just fine.
Step-by-Step Guide on How to Repair Lawn Mower Deck
Follow these steps in order. Take your time, and don’t skip the safety prep.
Step 1 – Disconnect the Spark Plug
Safety comes first, always. Before you touch anything underneath the mower, pull the spark plug wire off the plug. This stops the engine from accidentally starting while your hands are near the blade.
Grab the rubber boot firmly and give it a steady tug. You’ll feel it pop loose with a soft click. Tuck the wire away from the plug so it can’t reconnect on its own.
If your mower runs on gas, this is also a smart time to empty the tank or run it dry. A tilted mower with fuel inside can leak and create a fire hazard. Once the plug is disconnected, you’re ready to flip the machine and get a good look at the cutting deck.
Step 2 – Tip the Mower and Inspect the Deck
Carefully tip your mower onto its side, with the air filter and carburetor facing up. This keeps oil and gas from dripping into places they shouldn’t go.
Now shine a flashlight across the underside. Run your fingers (with gloves on) along the metal housing. You’re feeling for rough rust patches, thin spots, cracks, and any holes that have rusted through. Pay close attention around the spindle area and the edges where grass builds up.
Take note of what you find. A few surface rust spots are easy fixes. Larger cracks near the spindle may need welding or a metal patch. Knowing the damage helps you plan your repair before you grab a single tool.
Step 3 – Remove the Blade
To work safely and reach the full deck, take the mower blade off. Hold the blade steady with a thick rag or a block of wood, then loosen the center bolt with your socket wrench.
You’ll likely need some muscle here. If the bolt feels stuck, spray a little penetrating oil and wait a few minutes. The oil seeps in and loosens the grip, so the bolt turns with less effort.
Once it’s free, set the blade aside on a flat surface. Notice which side faces down so you can reinstall it correctly later. This is also a great moment to check the blade for dents or dull edges that might need sharpening.
Step 4 – Clean the Deck Thoroughly
A clean surface makes every repair stick better. Scrape off caked-on grass and dirt with your putty knife. You’ll be surprised how much dried clipping builds up underneath.
Next, scrub the whole deck with a wire brush to knock off loose rust. The scratchy sound means it’s working. Then wash everything down with soapy water and let it dry completely.
A clean cutting deck reveals damage you might have missed before. Sometimes a layer of grime hides cracks or thin spots. Once the metal is bare and dry, you’ll see exactly where rust has eaten through and where the surface is still solid. Don’t rush this step, since paint and patches won’t bond to a dirty surface.
Step 5 – Treat and Patch the Rust
Now tackle the rust head-on. For light surface rust, sand it smooth until you reach clean metal underneath. You’ll feel the surface go from gritty to even.
For rusted-through holes, cut a piece of sheet metal slightly larger than the hole. Apply your metal patch kit’s adhesive or epoxy around the edges, then press the patch firmly in place. Hold it for a moment so it grips tight.
If you’re confident with a welding kit, you can weld larger patches for a stronger, longer-lasting fix. Either way, smooth out any rough edges once the patch sets. This is the heart of how you repair lawn mower deck rust damage and keep the housing solid for seasons to come.
Step 6 – Seal and Repaint
After patching, protect your work with a coat of primer and rust-resistant paint. Bare metal rusts fast, so sealing it matters more than you’d think.
Spray a thin, even layer of primer first and let it dry. Then add the rust-resistant paint in light coats. Two or three thin coats beat one thick, drippy layer every time. You’ll smell the fresh paint, which means it’s curing.
Give the paint plenty of time to dry, usually a few hours or overnight. A well-sealed deck resists moisture, grass acid, and future rust. This simple finish step is what makes your repair last, turning a quick fix into a lasting one that keeps the mower housing looking sharp.
Step 7 – Reinstall the Blade and Check the Belt
With the deck patched and dry, reattach the blade. Line it up the way it came off, then tighten the center bolt snugly. A loose blade wobbles and cuts poorly, so make sure it’s secure.
While you’re under there, glance at the drive belt. Check for cracks, fraying, or a glazed shine that signals wear. Press on it gently; it should have a little give but not feel loose. If the belt looks worn, swap it now while everything’s apart.
A solid blade and a healthy belt work together with the deck to deliver clean cuts. Spending a minute on the belt now saves you a separate repair job later.
Step 8 – Level the Deck
A properly leveled deck cuts grass evenly, with no scalped spots or shaggy strips. Set your mower on a flat, hard surface like a driveway.
Measure the height of the blade tips from the ground on both sides. They should match within an eighth of an inch. If one side sits lower, adjust the deck-leveling bolts or links until both sides line up. You’ll hear the satisfying clink of the wrench as you dial it in.
Deck leveling makes a huge difference in how your lawn looks. Spin the blade by hand to check it clears the housing all the way around. Once both sides match and the blade spins freely, you’re ready to fire it up.
Step 9 – Reconnect and Test
Almost done. Set the mower upright and push the spark plug wire back onto the plug until it clicks. Refill the fuel tank if you emptied it earlier.
Start the engine and let it idle for a moment. Listen closely. A smooth, steady hum means everything’s seated right. Any rattling or grinding tells you to shut it off and recheck the blade and bolts.
Then take it for a test cut on a small patch of grass. Look at the trimmed area. Even, clean cuts mean your repair worked. If you spot uneven stripes, go back and fine-tune the deck leveling until the finish looks crisp.
Critical Mistakes When Repairing a Lawn Mower Deck
Even careful folks slip up, so watch out for these common errors.
The biggest mistake is skipping the spark plug disconnection. People get eager and dive right in, but a mower that starts unexpectedly can cause serious injury. Always pull that wire first, no exceptions.
Another frequent error is painting over dirt or rust without proper cleaning. Paint won’t bond to a grimy or flaky surface, so it peels within weeks and the rust returns worse than before. Scrub the metal down to a clean base every single time.
Many beginners also patch holes without treating the surrounding rust. If you cover a hole but leave active rust around it, the corrosion keeps spreading underneath your patch. Sand and treat the whole affected area, not just the visible damage.
Overtightening bolts is another trap. Cranking too hard can strip threads or crack the housing, especially on older decks. Tighten firmly but stop once it feels snug.
Finally, plenty of people forget deck leveling after the repair. A patched deck that sits crooked still cuts unevenly, leaving you frustrated. Always measure both blade tips and adjust before you call the job finished.
Expert Tips
Want professional-level results? Start by cleaning your deck after every few mows, not just during repairs. A quick scrape and rinse stops grass acid from eating away at the metal, so rust never gets a foothold.
Keep a spare blade and belt on hand. Swapping them while the deck is already apart saves you time and an extra teardown later.
When painting, warm the spray can in a bucket of warm water for a few minutes first. The paint flows smoother and dries with a more even finish. Just don’t overheat it.
Lastly, mark your deck-leveling settings with a paint pen once you dial them in perfectly. Next time you adjust anything, you’ll have a reference point and won’t have to start from scratch. These small habits keep your mower cutting clean for years.
Frequently Asked Questions
How do I know if my mower deck needs repair?
Look for clear warning signs during and after mowing. Common clues include:
- Uneven or scalped grass patches
- Visible rust holes or cracks in the housing
- Clumps of clippings left behind
- Rattling or grinding noises while running
If you spot any of these, flip the mower and inspect the deck closely. Catching problems early makes the repair simpler and protects the blade, spindle, and belt from extra wear.
Can I fix a rusted hole without welding?
Yes, you can. For small to medium holes, a metal patch kit with epoxy works great. Cut a piece of sheet metal slightly larger than the hole, then bond it in place with the adhesive. Let it cure fully before painting. Welding is only necessary for large cracks or major structural damage near the spindle, where extra strength really matters.
How often should I clean my cutting deck?
Aim to clean your cutting deck every few mows, or at least once a month during peak season. Built-up grass traps moisture against the metal, which speeds up rust. A quick scrape with a putty knife and a rinse keeps the housing healthy. Regular cleaning also lets you spot small cracks or thin spots before they grow into bigger, costlier problems.
Why is deck leveling so important?
Deck leveling controls how evenly your blade cuts across the lawn. If one side sits lower than the other, you’ll get scalped strips next to shaggy patches. Level decks also reduce strain on the spindle and blade, helping parts last longer. Just measure both blade tips from the ground and adjust the leveling bolts until they match within an eighth of an inch.
What kind of paint should I use on the deck?
Use a rust-resistant enamel or a primer-and-paint combo made for metal surfaces. These products handle moisture, grass acid, and constant friction better than regular spray paint. Apply two or three thin coats rather than one thick layer for a smooth, durable finish. Always let the deck dry completely between coats so the paint cures properly and protects the bare metal underneath.
Conclusion
Fixing your mower deck isn’t as hard as it might seem. With a few tools, some patience, and the steps above, you can tackle rust, holes, and uneven cuts yourself, no technician required. You’ve learned how to disconnect the spark plug safely, clean and patch the housing, seal it with paint, and dial in proper deck leveling for clean, even cuts.
The payoff is real. A solid deck means a healthier mower, a sharper-looking lawn, and money saved on repairs or replacements. Plus, you’ll feel that nice sense of pride that comes from fixing something with your own two hands.
Remember to clean your cutting deck regularly, check the blade and belt while you’re under there, and never skip the safety steps. When you repair lawn mower deck damage early, you keep small issues from becoming expensive headaches. So grab your gloves, roll up your sleeves, and give your mower the care it deserves. Your lawn, and your wallet, will thank you for it.