

Finding hollow, crumbling wood in your home can make your heart sink. Termites are notorious for causing silent destruction right under our noses.
But do not panic just yet. Learning how to repair termite damage yourself is entirely possible for the average homeowner.
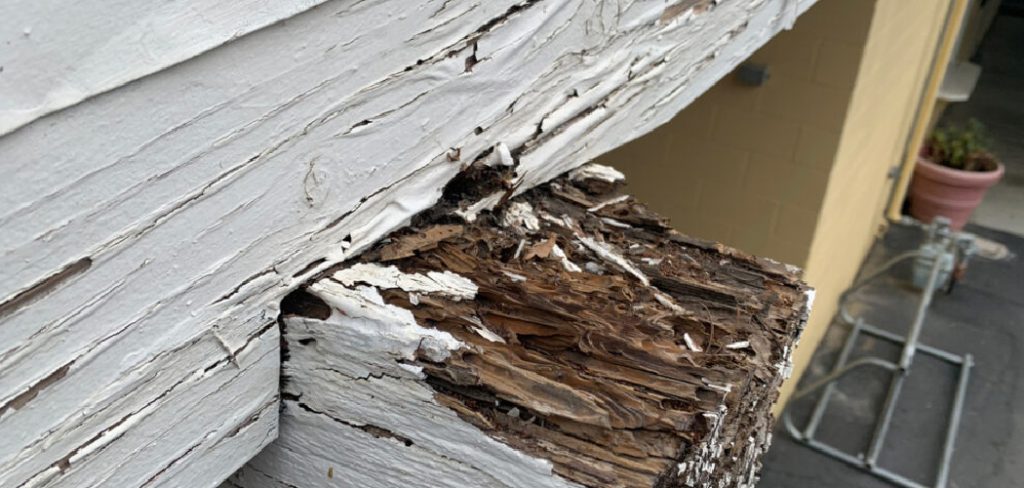
If the damage is cosmetic or isolated to minor non-load-bearing areas, fixing it yourself is a fantastic idea. Tackling this project on your own saves you a significant amount of money.
Instead of paying a contractor high labor rates, you only pay for materials. You get to restore your home’s beauty, protect its value, and gain some serious DIY bragging rights.
Let’s grab your tool belt and walk through exactly how to fix up your home, step by step.
What Causes Termite Damage in the First Place?
Before we start fixing things, it helps to know why the damage happened. Termites do not just appear out of nowhere.
They are drawn to specific conditions in and around your house. Here are the most common culprits:
- Excess Moisture: Leaky pipes, poor drainage, or damp basements create the perfect humid environment for subterranean termites.
- Wood-to-Ground Contact: Deck posts, siding, or fence panels touching the soil act as a direct highway into your home.
- Cracks in the Foundation: Tiny gaps in your concrete foundation allow pests to easily bypass your exterior defenses.
- Poor Ventilation: Crawlspaces and attics with trapped, stagnant air retain moisture, softening the wood fibers.
- Untreated Wood: Using non-pressure-treated lumber for outdoor projects leaves the wood completely vulnerable to hungry swarms.
Essential Tools and Materials You Will Need
Having the right gear makes this project run smoothly. Gather these items before you begin.
You can find all of these at your local hardware store.
- Safety gear: Work gloves, safety goggles, and a dust mask.
- Assessment tools: A flathead screwdriver or an awl to probe the wood.
- Removal tools: A chisel, a hammer, and a utility knife.
- Repair compounds: Liquid wood hardener and a high-quality two-part wood epoxy or wood filler.
- Applicators: Putty knives in various sizes.
- Finishing supplies: Sandpaper (medium and fine grit), a sanding block, wood primer, and matching paint.
- Replacement materials: If replacing whole sections, you will need matching lumber, a saw, and wood screws.
Step-by-Step Guide on How to Repair Termite Damage Yourself
Ready to roll up your sleeves? Follow these simple steps.
We will focus primarily on repairing wood using the epoxy method, which is perfect for moderate, localized damage.
Step 1: Confirm the Termites Are Officially Gone
You should never start repairing wood if active pests are still present. Doing so is a waste of time and money.
Check for live insects, fresh mud tubes, or new frass (termite droppings).
If you see signs of an active colony, call a pest control professional immediately. Wait until they give you the all-clear before starting your repairs.
Step 2: Probe and Assess the Extent of the Damage
Take your flathead screwdriver and gently poke around the damaged area.
You need to find out exactly where the soft, compromised wood ends and the healthy, solid wood begins.
Press firmly into the timber. If the screwdriver sinks in easily, that section needs to be addressed.
Step 3: Scrape Away the Rotted and Damaged Wood
Once you know the boundaries, it is time to clear out the debris.
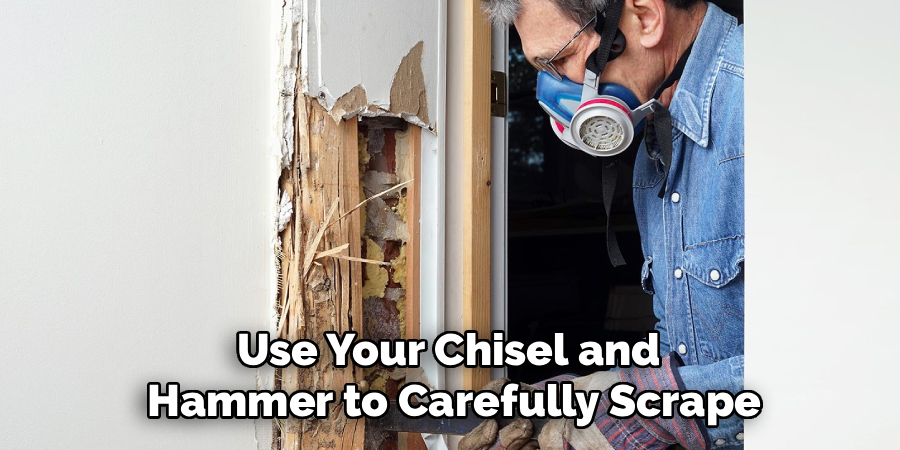
Use your chisel and hammer to carefully scrape out the crumbling, hollowed-out wood.
Remove all the loose cellulose material until you reach a solid, unyielding wood surface underneath.
Step 4: Clean and Prepare the Repair Site
A clean surface is crucial for the repair materials to stick properly.
Use a stiff wire brush to sweep away any lingering dust, splinters, or dirt.
You can also use a shop vacuum to suck up the fine dust from deep inside the crevices.
Step 5: Apply a Liquid Wood Hardener
Termite-damaged wood often has weakened fibers around the edges.
Brush a generous coat of liquid wood hardener over the exposed, porous wood.
This liquid penetrates deep into the fibers, curing and solidifying the remaining structure. Let it dry completely according to the manufacturer’s instructions.
Step 6: Mix and Apply the Wood Epoxy
Now comes the fun part. Mix your two-part wood epoxy exactly as the package directs.
Using your putty knife, press the epoxy firmly into the gaps, cavities, and carved-out spaces.
Overfill the area just slightly. The epoxy will shrink a tiny bit as it cures, and you want enough material to sand down later.
Step 7: Shape and Sculpt the Filler
While the epoxy is still slightly pliable, use your putty knife to shape it.
Try to match the natural contours and edges of the original wood profile.
Once you are happy with the rough shape, leave it alone to cure fully. This usually takes a few hours.
Step 8: Sand the Surface Smooth
Once the epoxy is rock-hard, grab your medium-grit sandpaper.
Sand down the excess material until it is flush with the surrounding healthy wood.
Switch to a fine-grit sandpaper for a perfectly smooth, seamless finish. Run your hand over it to ensure there are no noticeable bumps.
Step 9: Prime and Paint to Match
Your repair is structurally sound, but it probably looks like a messy patch job right now.
Wipe away the sanding dust and apply a high-quality wood primer.
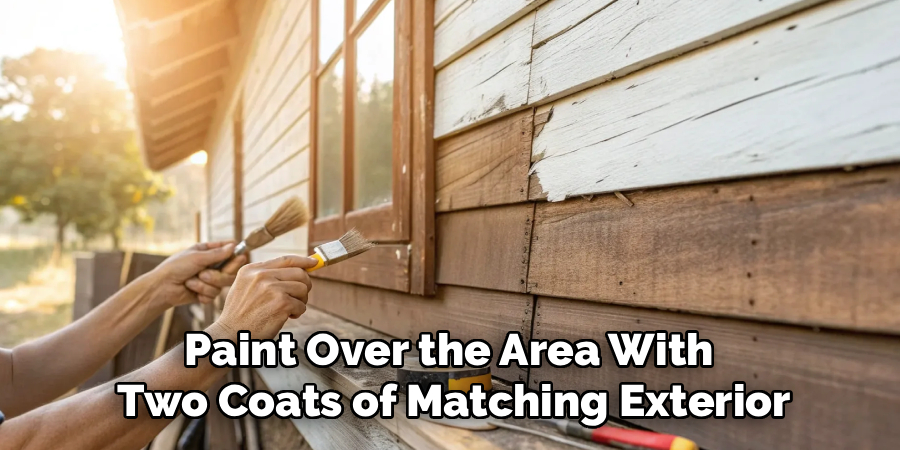
Once the primer dries, paint over the area with two coats of matching exterior or interior paint. Your wood will look as good as new!
Important Safety Warnings to Keep in Mind
Your safety always comes first when tackling home repairs.
Always wear your dust mask and safety goggles when scraping or sanding wood. You do not want old paint chips or fine sawdust in your lungs or eyes.
Work in a well-ventilated area when using wood hardeners and epoxies, as the fumes can be quite strong.
Finally, be cautious around electrical wiring or plumbing that might be hidden behind damaged baseboards or wall studs.
When to Skip the DIY and Call a Professional
Knowing your limits is the mark of a smart DIYer.
If you probe the wood and discover the damage extends to major structural supports, put your tools down.
Load-bearing walls, main floor joists, and roof trusses hold your house up. Repairing these requires engineering knowledge, structural bracing, and specialized permits.
Always call a licensed general contractor or structural specialist if you suspect the framing of your home is compromised.
DIY vs. Professional Cost Estimates
Budget is usually the biggest factor when deciding between DIY and hiring out.
If you tackle a cosmetic repair yourself using wood filler and hardener, your total cost will typically range from $40 to $100 for materials.
If you hire a professional carpenter to do that exact same cosmetic patch, expect to pay between $200 and $500 for their labor and time.
For major structural repairs, professional costs can easily skyrocket from $1,000 to over $5,000, depending on the severity.
Frequently Asked Questions About How to Repair Termite Damage Yourself
Can I just paint over termite damage?
No. Painting over damaged wood traps moisture and hides the problem while the wood continues to degrade. Always remove the damaged sections and fill them properly before applying any paint.
Is termite damage covered by homeowners insurance?
In most cases, no. Insurance companies view termite infestations as a preventable maintenance issue. You will likely have to pay for these repairs out of your own pocket.
How do I know if the termite damage is old or new?
Old damage features dry, brittle wood with no live insects or fresh mud tubes. New damage often feels slightly damp, features active bugs, and contains light-colored frass nearby.
Will wood filler hold a screw?
Standard wood filler will not hold a screw under pressure. However, high-quality, two-part wood epoxy cures hard enough to be drilled, nailed, and screwed into just like real wood.
Should I replace the wood instead of patching it?
If a piece of wood is more than 50% hollowed out, replacing the entire board is much safer and more efficient than trying to patch it with gallons of epoxy.
Conclusion
Finding out your home has been chewed on is incredibly stressful.
But once the pests are eradicated, understanding how to repair termite damage yourself brings massive peace of mind.
By taking the time to assess the area, clear out the rot, and apply quality epoxy, you can restore your home beautifully. You will save hundreds of dollars and learn a valuable new skill along the way.
Remember, take it one step at a time, wear your safety gear, and do not hesitate to call a pro for the heavy structural lifting.
Ready to get started? Head to your local hardware store today to pick up your supplies and reclaim your home!