

A broken sprinkler line can turn a healthy yard into a muddy mess fast. You may notice a soft patch in the grass, weak sprinkler spray, bubbling water, or a sudden drop in water pressure. The good news is that many underground irrigation leaks come from a small cracked section, loose fitting, or damaged PVC pipe you can fix with basic tools.
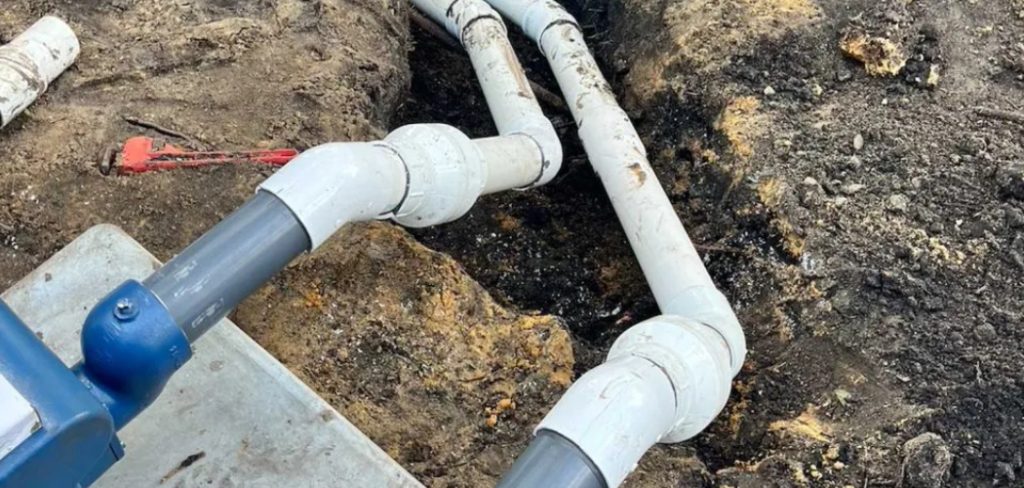
Learning how to repair irrigation pipe saves money, prevents wasted water, and helps protect your plants from dry spots or overwatering. You do not need to be a plumbing expert, but you do need to work carefully and let each connection set the right way. This guide walks you through the full repair process from finding the leak to testing the line.
Why Repairing an Irrigation Pipe Matters
Repairing an irrigation pipe matters because small leaks rarely stay small. A tiny crack can wash soil away, weaken nearby roots, and make your sprinkler system work harder than it should. If you ignore it, the damage can spread to fittings, valves, or other parts of the line.
This skill also helps campers and outdoor beginners. If you use a drip line at a campsite, garden plot, cabin, or RV space, you may face the same problems: cracked tubing, loose couplings, or low water pressure. Knowing the basics helps you respond quickly without waiting for help.
Once you understand how the system fits together, you can make calm, practical repairs in your yard or outdoor setup.
Tools and Materials You’ll Need
Gather everything before you dig so the repair goes smoothly. Irrigation pipe repairs often involve muddy soil, tight spaces, and wet fittings, so having the right supplies within reach saves time and frustration.
You will need:
- Shovel or hand trowel
- Pipe cutter, PVC cutter, or fine-tooth hacksaw
- Replacement PVC pipe or drip line tubing
- Correct-size coupling or repair fitting
- PVC primer and PVC cement
- Clean rag or paper towels
- Tape measure
- Marker
- Work gloves
- Safety glasses
- Optional convenience item: small bucket for holding wet soil and loose debris
Match your pipe size before buying parts. A coupling that looks close but fits loosely can leak once pressure returns.
Step-by-Step Guide on How To Repair Irrigation Pipe
Step 1 – Shut Off the Water
Start by turning off the irrigation system at the controller and the water supply valve. Do not rely only on the timer. A sprinkler zone can start unexpectedly, and that can flood your trench while you work.
Listen for the water to stop moving through the line. The rushing or hissing sound should fade after a few moments. If the ground still bubbles or the leak keeps flowing, check the main valve again.
Open a nearby sprinkler head or drain point if your system has one. This releases trapped pressure and lets extra water escape. A dry, quiet pipe gives you more control and helps the primer and cement bond correctly later.
Step 2 – Find the Damaged Area
Look for clues before you start digging. Soft soil, unusually green grass, pooling water, or weak spray from nearby sprinkler heads can point you toward the leak. If one zone has poor water pressure while others work well, the break likely sits in that zone.
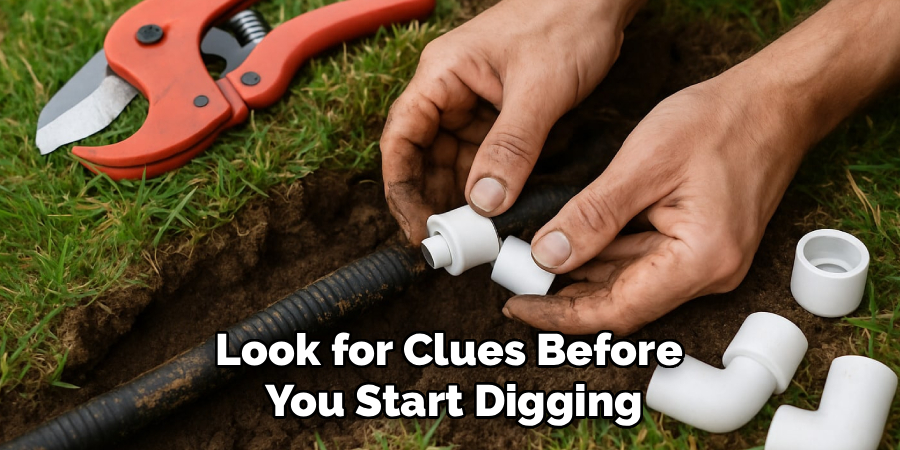
Walk the line slowly and press the soil with your boot. Wet ground may feel spongy or sink slightly under your weight. You may also hear a faint gurgle if water remains in the pipe.
Mark the likely repair area with a small flag, stick, or stone. Finding the right spot first keeps the trench smaller and reduces the chance of damaging good pipe.
Step 3 – Dig Around the Pipe
Dig slowly once you reach the marked area. Use a shovel for the first few inches, then switch to a hand trowel as you get close to the sprinkler line. Fast digging can turn one cracked section into two broken sections.
Clear soil from around and under the pipe. You need enough room to hold the pipe, cut it squarely, and install a coupling without forcing the fitting. The soil may smell earthy and wet, especially near an active leak.
Keep the trench wide enough for your hands to move freely. A cramped hole makes it harder to line up the repair and increases stress on the new joint.
Step 4 – Expose and Inspect the Crack
Wipe the pipe with a clean rag so you can see the damage clearly. Mud can hide hairline cracks, crushed spots, and tiny pinhole leaks. Take your time here because the visible wet spot may not be the only problem.
Check both sides of the cracked section. Look for splits, bent pipe, damaged fittings, or roots pressing against the line. If the pipe feels brittle or chalky, cut back farther until you reach solid material.
This is also a good moment to confirm pipe size. When you learn how to repair irrigation pipe, sizing matters as much as sealing. The repair fitting must match the pipe diameter exactly.
Step 5 – Cut Out the Damaged Section
Use a PVC cutter if you have one because it makes a clean, square cut. A hacksaw also works, but cut slowly and keep the blade straight. Jagged edges can prevent a coupling from seating fully.
Remove the cracked section with enough extra pipe on both sides to reach clean, undamaged material. Do not cut too close to the break. Small cracks often spread farther than they first appear.
After cutting, wipe the open pipe ends and remove plastic burrs. The cut edge should feel smooth under your glove. A clean edge helps the fitting slide on evenly and reduces the chance of a weak seal.
Step 6 – Dry-Fit the Replacement Piece
Before using primer or cement, test the parts dry. Slide the coupling or repair fitting onto the pipe and make sure everything lines up without bending the line. The pieces should feel snug, not loose or forced.
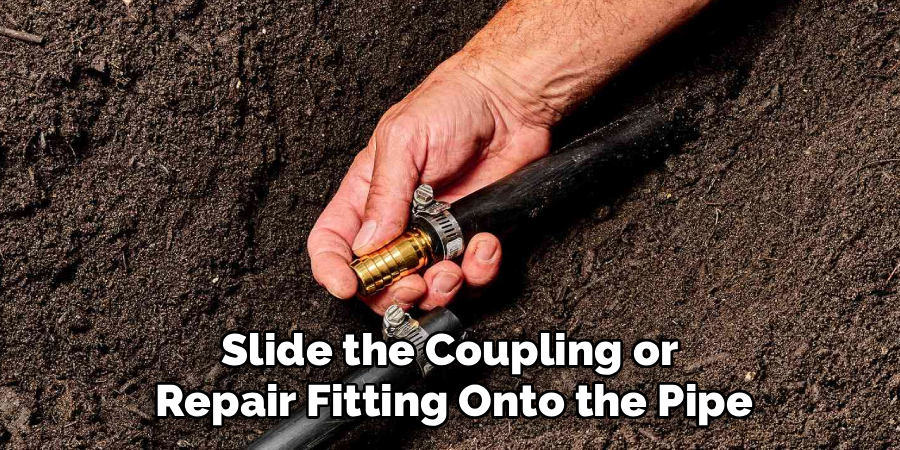
Measure the gap carefully if you need to add a short replacement section. Mark the insertion depth on the pipe with a marker so you know how far each end should slide into the fitting.
This dry run prevents panic once the cement goes on. PVC cement sets quickly, and you have only a short window to twist and seat the parts. Good alignment now leads to a stronger repair.
Step 7 – Prime and Cement the Joint
Put on safety glasses and work in open air if possible. PVC primer has a sharp chemical smell, and cement can drip if you rush. Wipe each pipe end one more time so dust and moisture do not weaken the bond.
Apply primer to the outside of the pipe and inside of the fitting. Then apply PVC cement to the same surfaces. Push the pipe and fitting together with a firm twist, then hold them in place for several seconds.
When practicing how to repair irrigation pipe, do not skip the hold time. Fresh joints can push apart slightly under pressure. A steady grip helps the connection stay seated while the cement grabs.
Step 8 – Test the Repair and Backfill
Let the joint cure according to the cement label. Waiting feels slow, especially when the yard is torn open, but it protects the repair. Cool or damp weather may require extra time.
Turn the water on slowly and watch the repaired area. Listen for hissing, look for beads of water, and feel around the fitting with a dry finger. If everything stays dry under pressure, the repair has likely sealed well.
Backfill with loose soil first and avoid dropping rocks directly onto the pipe. Pack the soil gently in layers. Then run the zone again and check the sprinkler pattern to confirm normal water pressure has returned.
Critical Mistakes When Repairing an Irrigation Pipe
One common mistake is cutting out only the obvious crack. Underground pipe can split beyond the wettest spot, especially if roots, freezing, or pressure caused the damage. Always inspect both sides and remove any weak or brittle section.
Another mistake is using the wrong fitting size. Irrigation parts can look similar, but even a small mismatch can leak once the zone pressurizes. Bring the damaged piece to the hardware store if you are unsure, or read the size markings on the pipe.
Many beginners also rush the primer and cement process. Dirty, wet, or unprimed PVC may hold briefly, then fail later. The joint needs clean surfaces, proper primer, enough cement, and steady pressure while it sets.
A final mistake is backfilling too soon. If you bury the repair before testing it, you may have to dig everything up again. Always test under water pressure while the pipe remains exposed.
Expert Cleaning Tips
Clean pipe makes a stronger repair. After you expose the damaged area, wipe away mud, grit, and slimy buildup with a dry rag. If the pipe stays wet, give it a few extra minutes to drain before applying primer.
Clean inside the fitting too. Dust or tiny plastic shavings can create channels where water escapes. For drip line repairs, flush the tubing before reconnecting it so dirt does not clog emitters downstream.
Keep soil out of open pipe ends while you work. If dirt falls inside, rinse or wipe it out before assembly. A clean system protects sprinkler heads, improves water pressure, and helps the repair last longer.
Frequently Asked Questions
How do I know if my irrigation pipe is leaking underground?
Look for wet soil, muddy spots, sunken ground, or grass that grows faster in one area. You may also notice weak sprinkler spray or a zone that will not build normal water pressure. Turn on one zone at a time and watch the ground closely. Bubbling water or a sudden puddle usually points to the damaged section.
Can I repair a sprinkler line without replacing the whole pipe?
Yes, you can often replace only the cracked section. Most repairs involve cutting out the damaged piece and installing a coupling, repair fitting, or short length of new PVC pipe. If the pipe is brittle in several areas, a longer replacement may be smarter. The goal is to connect to solid pipe that can handle pressure.
How long should PVC cement dry before turning water back on?
Drying time depends on pipe size, temperature, humidity, and the cement brand. Many small irrigation repairs need at least 15 minutes before light handling, but pressure testing may require longer. Always follow the label on the cement can. If the soil is cold or damp, wait extra time before turning the water on.
What if the pipe keeps leaking after the repair?
First, shut the water off and inspect the exact leak point. Water may come from a loose fitting, a missed crack, or a joint that did not seat fully. If the coupling leaks, you may need to cut it out and redo the repair. Check that the pipe ends are clean, square, and matched to the right fitting size.
Can renters fix an irrigation leak themselves?
Renters should contact the landlord or property manager before digging or cutting any pipe. Some leases require approval for yard repairs, even simple ones. If you get permission, take photos before and after the repair. For a small drip line or above-ground sprinkler issue, the fix may be simple, but underground systems still need care.
Conclusion
A broken irrigation pipe looks stressful at first, but the repair becomes manageable when you slow down and follow a clear process. Shut off the water, locate the leak, dig carefully, remove the cracked section, and install the right coupling or replacement pipe. Clean surfaces, square cuts, and proper cure time make the biggest difference.
You now have the basic skills to handle many common sprinkler line and drip line problems without calling a technician right away. Start with a careful inspection, keep the trench open until testing is complete, and never force fittings that do not line up.
With patience and the right materials, you can restore water pressure, stop waste, and protect your landscape. Use this guide whenever you need a practical reminder of how to repair irrigation pipe the right way.