

Nothing puts a damper on holiday decorating quite like plugging in your favorite lights, only to find half of them are completely dark. We have all been there, staring at a tangled mess of wires and wondering if it is time to just throw them in the trash.
But wait! Learning how to repair a string of Christmas lights is surprisingly easy, and it is a skill every homeowner should know.
Fixing your own lights saves you from the frustration of rushing to the store during the busy holiday season. It also keeps perfectly good decorations out of the landfill and saves you a nice chunk of money.
Instead of buying new strands every single year, you can bring your old ones back to life with just a few simple tools and a little bit of patience. Let’s roll up our sleeves and get those holiday lights glowing again.
What Causes Christmas Lights to Stop Working?
Before you can fix the problem, it helps to understand what went wrong in the first place. Christmas lights are relatively simple electrical circuits, but a few common culprits can cause them to fail.
Here are the most frequent reasons your holiday lights are not shining bright:
- A burnt-out bulb: In series circuits, one dead bulb can occasionally take out the whole strand if the internal shunt fails.
- A blown fuse: Most standard light strands have tiny fuses hidden inside the male plug that can blow during a power surge.
- Loose bulbs: If a bulb gets knocked loose from its socket, it breaks the electrical connection for that section of the wire.
- Faulty shunted bulbs: When the backup wire (shunt) inside a bulb fails to pass the current along, the entire section goes dark.
- Broken or frayed wires: Rough handling, harsh weather, or even hungry squirrels can damage the wiring and break the circuit.
Tools & Materials Needed for the Fix
You do not need a fancy electrical engineering degree to fix your holiday decorations. You just need a few basic supplies that you might already have sitting in your garage or junk drawer.
Gather these items before you start your repair project:
- A light tester: A specialized Christmas light tester (like the LightKeeper Pro) is a lifesaver for quickly finding the exact point of failure.
- Replacement bulbs: Make sure they match the voltage and type (LED vs. incandescent) of your current strand.
- Replacement fuses: These are the tiny glass tubes usually included in a small plastic bag when you first buy the lights.
- Small flathead screwdriver: You will need this to slide open the tiny plastic door on the plug to access the fuses.
- Needle-nose pliers: These are incredibly helpful for pulling out stubborn, stuck bulbs without breaking the glass.
- Work gloves: Protect your hands from accidentally broken glass, especially when dealing with older, brittle incandescent bulbs.
Step-by-Step Guide: How to Repair a String of Christmas Lights
Ready to play electrician? Do not worry, we will take this one simple step at a time. Follow this beginner-friendly guide to troubleshooting and fixing your festive decorations.
Step 1: Check for a Blown Fuse First
Whenever a whole string of lights is completely dead, the fuse is usually the culprit. The fuses are meant to sacrifice themselves to protect the wiring from a power surge.
Unplug the strand from the wall. Look closely at the male plug (the end with the prongs). You will see a tiny sliding door.
Use your small flathead screwdriver to gently slide that plastic door open. Inside, you will see two tiny glass fuses.
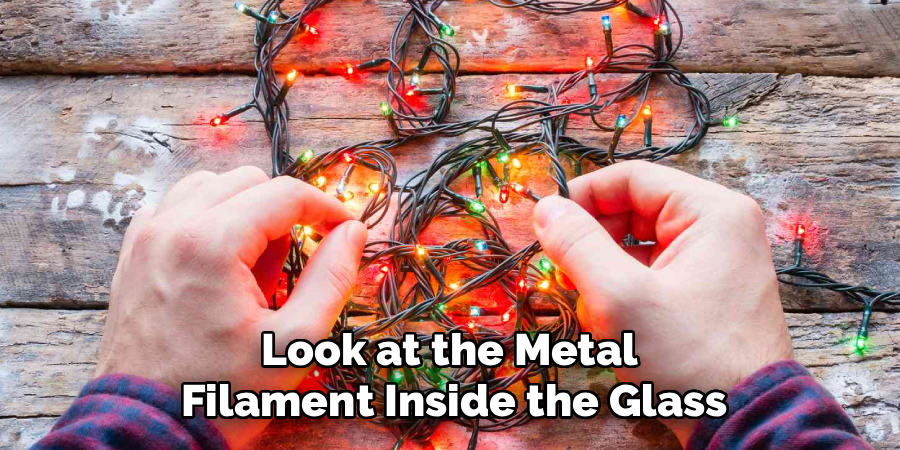
Look at the metal filament inside the glass. If it is broken, blackened, or missing, you have a blown fuse. Carefully pop it out and push a new fuse into the slot. Close the door, plug the strand in, and see if it lights up.
Step 2: Look for Visibly Broken or Missing Bulbs
If the fuses are perfectly fine, but a section of the strand is out, you need to inspect the bulbs. Unplug the lights and run the dark section through your hands.
Visually inspect every single socket in that dead section. Are there any empty sockets? Is there a visibly smashed or burnt-out bulb?
If a bulb is missing, the electrical circuit is broken. Push a replacement bulb firmly into the empty socket.
If you see a blackened or broken bulb, use your needle-nose pliers to gently pull it out by the plastic base, not the glass. Insert a fresh replacement bulb and test the strand again.
Step 3: Use a Light Tester to Find the Culprit
If there are no missing or obviously broken bulbs, finding the bad apple can feel like looking for a needle in a haystack. This is where a light tester becomes your best friend.
Plug your light tester into an outlet. Start at the beginning of the unlit section of your Christmas lights.
Bring the tip of the tester close to each bulb. The tester will beep or light up when it detects electrical voltage flowing through the wire.
Move down the line, bulb by bulb. When the tester suddenly stops beeping, you have found the exact spot where the current stops. The bulb right before or right after that spot is usually the bad one. Replace it and check your progress.
Step 4: Fix Malfunctioning Shunted Bulbs
Incandescent Christmas lights are designed with a clever backup plan called a shunt. When the filament burns out, the shunt is supposed to take over and keep the current flowing to the rest of the strand.
Sometimes, these shunts fail to activate. You end up with a dead section even though the bulbs look totally fine.
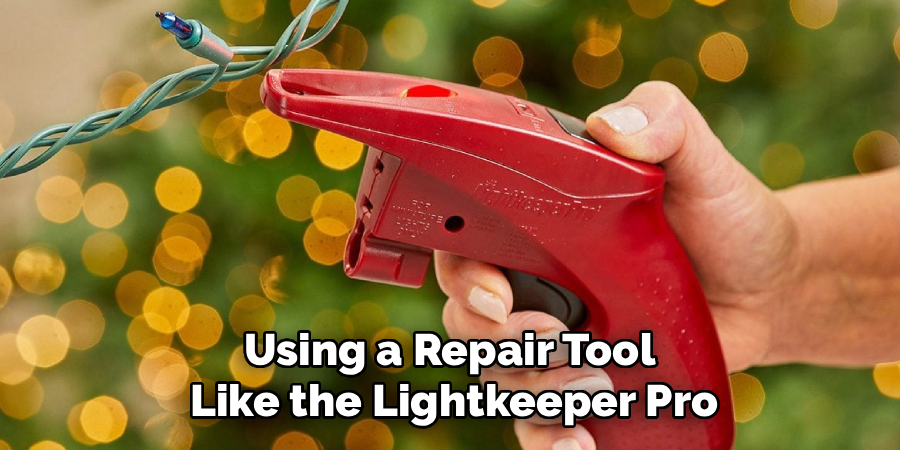
You can fix shunted bulbs using a repair tool like the LightKeeper Pro. Remove one unlit bulb from the dark section and plug the empty socket directly into the tool.
Click the trigger on the tool a few times. This sends a tiny electrical pulse through the wire that forces the defective shunts to close. Suddenly, the rest of the section will light up, revealing the one true burnt-out bulb.
Step 5: Test and Secure the Bulbs
Once you have identified and replaced the bad bulbs, it is time to make sure everything is secure. Sometimes, bulbs just get bumped and sit loosely in their sockets.
With the lights still plugged in, gently wiggle the remaining unlit bulbs one by one. If they flicker on and off, they just need to be pushed in tighter.
Make sure the two tiny copper wires at the base of the bulb are properly aligned before you push them into the socket. If those wires are bent, they will not make contact with the metal plates inside the socket.
Important Safety Warnings for Holiday Lighting
Working with electricity always requires a healthy dose of caution, even when it is just low-voltage holiday decorations. Safety should always come before a perfectly lit porch.
First and foremost, never work on exposed wires while the string is plugged into the wall. Always unplug the lights before changing fuses or splicing wires.
Do not mix LED bulbs with incandescent bulbs on the same strand. They require different voltages, and mixing them can create a serious fire hazard.
If you find a strand with chewed wires, frayed insulation, or exposed copper, throw it away. No amount of electrical tape can make a heavily damaged wire completely safe for outdoor weather conditions.
Always plug your outdoor decorations into a GFCI (Ground Fault Circuit Interrupter) outlet. This protects you and your home from accidental shocks if moisture gets into the plugs.
When to Call a Professional
DIY repairs are incredibly satisfying, but it is important to know your limits. Sometimes, fixing a string of lights is just not worth the time, effort, or potential risk.
If you are dealing with large, commercial-grade lighting installations on your roof, it is usually best to call in a professional. Navigating steep pitches with tangled wires is a job for trained experts with proper safety harnesses.
You should also consult a professional electrician if your outdoor lights are repeatedly tripping your home’s circuit breaker. This points to a larger electrical issue with your home’s wiring, not just a faulty light strand.
If you are setting up elaborate holiday light shows that require complex electrical panels and programming, do not try to guess your way through it. Hire a pro to ensure your spectacular display is totally safe.
Cost Estimate: DIY vs. Buying New vs. Pro Repair
Is it actually worth it to repair your own lights? In almost every case, the answer is a resounding yes. Let’s break down the rough costs.
A DIY repair is incredibly cheap. A pack of replacement bulbs and fuses usually costs between $3 and $6. A high-quality light tester tool might cost you $20 upfront, but you can use it for years to come.
Buying brand-new lights every time a strand goes out adds up fast. A standard string of quality LED lights costs between $15 and $30. Replacing five dead strands could easily cost you over $100 every single holiday season.
Hiring a professional holiday lighting company is the most expensive route. They typically charge between $300 and $1,000+ for installation, maintenance, and takedown.
If you just have a few dark strands sitting in your garage, the DIY route is by far the most economical choice. You will save money that you can spend on actual holiday gifts instead.
FAQs About How to Repair a String of Christmas Lights
Can I fix a cut string of Christmas lights?
Yes, but it requires wire strippers, heat shrink tubing, and electrical tape. If the wire is completely severed, it is often safer and easier to just replace the strand, especially for outdoor use where moisture can seep into the repair.
Why did half of my light string go out?
Most modern light strands are wired in two separate series circuits. If a bulb gets loose, a shunt fails, or a wire breaks in one half, only that specific section will go dark while the other half stays lit.
How do I know which bulb is causing the problem?
The easiest way is to use a voltage detector or a specialized light tester. If you do not have one, you will have to systematically remove and replace each bulb in the dark section with a known good bulb until the strand lights up.
Are LED Christmas lights harder to fix than incandescent ones?
LEDs generally do not have the same shunted bulb issues as incandescent lights, making them slightly easier to diagnose. However, LED bulbs often cannot be removed from their sockets in cheaper strands, meaning the whole string must be tossed if it fails.
Can a blown fuse ruin my lights permanently?
No! Fuses are designed to protect the lights from damage. Replacing a blown fuse with a new one of the exact same amperage will usually bring the entire strand back to life instantly.
Conclusion
Figuring out how to repair a string of Christmas lights does not have to be a frustrating holiday chore. By understanding the common causes of failure and keeping a few simple tools on hand, you can confidently tackle this project yourself.
Remember to start with the easiest fixes first. Check for a blown fuse, secure any loose bulbs, and use a handy light tester to locate stubborn burnt-out shunted bulbs.
You will save money, keep waste out of landfills, and feel a great sense of accomplishment when your house is glowing brightly once again. You now have all the knowledge you need to be the neighborhood hero of holiday decorating.
Are your holiday lights tangled in a ball of frustration? Grab your light tester, set up a comfortable workspace on the kitchen table, and start repairing those strands today!