

A broken luggage handle is the last thing you want on a trip. Dragging a heavy bag through a crowded airport without a functioning grip is frustrating and exhausting.
You might think a damaged bag is completely ruined. Fortunately, learning how to repair suitcase handle issues is much easier than you might expect.
Fixing your travel bag yourself saves you a significant amount of money. You will avoid the high cost of buying brand-new luggage or paying expensive repair shop fees.
We will walk you through the entire process from start to finish. You do not need to be a mechanical expert to get your luggage rolling smoothly again.
Grab your basic tools, and let’s get that bag ready for your next adventure.
What Causes This Problem?
Understanding why your handle failed helps prevent future issues. Most luggage damage happens when we least expect it.
Here are the most common culprits behind a broken or stuck handle:
- Rough Baggage Handling: Airport conveyor belts and tossing can snap plastic grips easily.
- Dirt and Grime Buildup: Dust and debris get trapped inside the telescopic extension tubes.
- Loose Screws and Fasteners: Constant vibrations from rolling loosen the internal hardware over time.
- Rust and Corrosion: Moisture exposure causes the metal sliding rails to stick and jam.
- General Wear and Tear: Plastic components become brittle and break after years of heavy use.
- Overpacking: Pulling a massive amount of weight puts extreme stress on the handle mechanism.
Tools & Materials Needed
Having the right gear makes this DIY luggage repair project smooth and simple. Gather these items before you unzip your bag.
You probably already have most of these tools in your home toolbox.
- Screwdriver Set: You need both Phillips and flathead screwdrivers to remove internal mounts.
- Replacement Handle Kit: Buy a universal handle or an exact match from the manufacturer online.
- Allen Wrenches: Some luggage brands use hex screws instead of traditional ones.
- Needle-Nose Pliers: These help you grab small, dropped screws inside the bag lining.
- Silicone Lubricant: A spray like WD-40 Specialist keeps the telescopic poles gliding smoothly.
- Small Flashlight: This helps you see into the dark corners of your suitcase interior.
- A Small Bowl: Use this to hold your screws so they do not roll away.
Step-by-Step Fix Guide: How to Repair Suitcase Handle
Ready to fix your bag? Follow these numbered steps to get the job done right.
Take your time and keep your workspace well-lit.
1. Unzip the Interior Lining
Open your suitcase fully and lay it flat on a table or the floor. Look at the bottom half of the luggage where the handle tubes run.
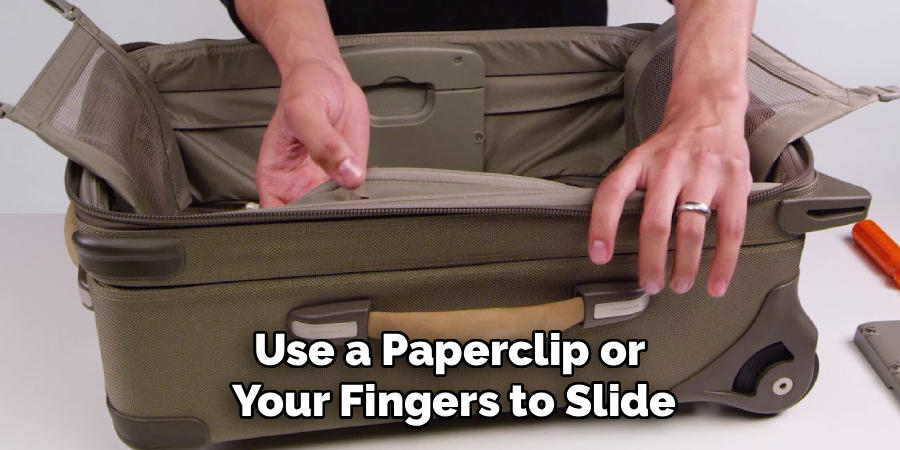
Most modern suitcases have a hidden zipper right down the middle of the lining. This zipper usually lacks a pull tab to prevent snags on your clothes.
Use a paperclip or your fingers to slide the zipper open. Fold the fabric back to expose the internal handle mechanism.
2. Inspect the Internal Damage
Shine your flashlight inside the exposed cavity. You need to identify exactly what is broken.
Check the mounting brackets at the top and bottom of the metal poles. Look for cracked plastic, missing screws, or bent aluminum tubes.
If the handle is just stuck, look for dirt or rust on the sliding tracks. Identifying the exact problem tells you if you need a full replacement or just a simple adjustment.
Read More: How to Repair Zipper Pull Tabs.
3. Remove the Broken Hardware
Locate the screws holding the handle assembly to the suitcase shell. You will typically find two or four screws near the top base of the handle.
Use your screwdriver to carefully turn the screws counterclockwise. Keep firm pressure so you do not strip the screw heads.
Place all removed screws directly into your small bowl. You will definitely need these later if your replacement kit does not include new hardware.
4. Slide Out the Old Handle
Once you remove all the screws, the handle should feel loose. Pull the handle straight up from the top of the suitcase.
If the handle feels stuck, give it a gentle wiggle back and forth. Sometimes the metal tubes get wedged tightly in the plastic housing.
Set the broken handle aside. Wipe away any dust or debris left behind in the mounting holes.
Read More: How to Repair Toilet Flush Handle.
5. Clean and Lubricate the Tracks
This is a great time to perform some basic maintenance. Spray a small amount of silicone lubricant down the tracks.
Use a clean rag to wipe away excess liquid. Do not use heavy grease, as it attracts dirt and will eventually ruin your clothes.
A clean track ensures your new handle will slide up and down without friction.
6. Insert the New Replacement Handle
Take your new telescopic handle and line it up with the top holes. Slide the metal tubes gently down into the tracks.
Make sure the screw holes on the new handle align perfectly with the holes in your suitcase shell. Do not force it if it feels misaligned.
Check the orientation of the push-button grip. It needs to face the correct direction for comfortable pulling.
7. Secure the Mounting Screws
Reach back inside the suitcase lining with your screwdriver and hardware. Insert the screws through the brackets and into the new handle.
Tighten the screws down firmly, but do not overtighten them. Overtightening can crack the new plastic mounts.
Give the handle a gentle tug to ensure it is firmly attached to the luggage frame.
Read More: How to Repair Etched Marble.
8. Test the Handle Mechanism
Press the release button on your new handle. Pull the handle all the way up to its maximum height.
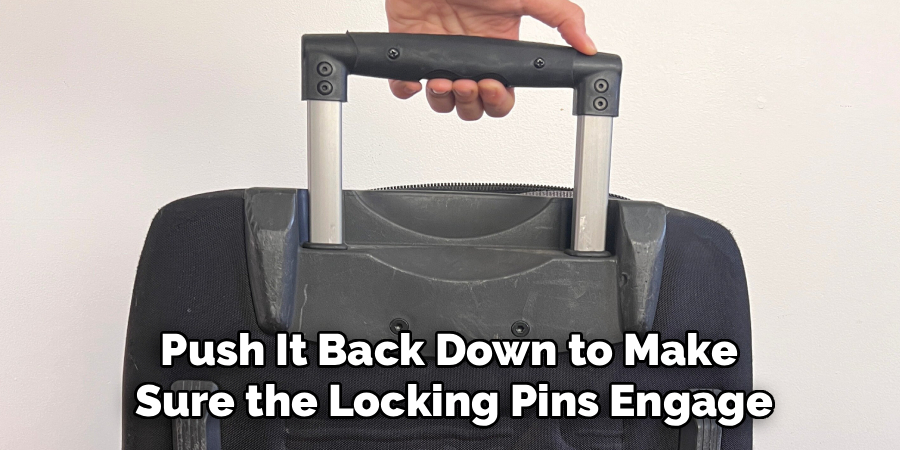
Push it back down to make sure the locking pins engage correctly. The movement should feel smooth and secure.
If it sticks, you may need to loosen the mounting screws just a fraction of an inch to relieve pressure.
9. Zip Up the Lining
Once you are happy with the repair, tuck the fabric lining back into place. Slide the hidden zipper closed to conceal the internal hardware.
Your luggage now looks and functions perfectly. You just completed a successful DIY repair.
Safety Warnings
DIY repairs are fun, but safety must always come first. Working with broken luggage parts carries a few minor risks.
Watch out for sharp metal edges if your aluminum extension tubes snapped. Cracked hard-shell luggage plastics can also cut your fingers.
Keep your fingers clear of the sliding tracks when testing the mechanism. Pinched fingers are very common when adjusting telescoping poles.
Always use the correct screwdriver size for your hardware. Slipping with a sharp tool can cause a nasty hand injury.
When to Call a Professional
Most handle replacements are simple weekend projects. However, some luggage issues require professional intervention.
If your suitcase uses heavy-duty metal rivets instead of screws, you should stop. Removing and replacing rivets requires specialized tools most people do not own.
If the actual hard-shell body of the suitcase is severely cracked around the handle base, a new handle will not hold. A luggage repair shop will need to reinforce the casing first.
Premium luxury brands often void warranties if you perform unapproved DIY repairs. Always check your warranty status before opening the lining of a high-end designer bag.
Cost Estimate: DIY vs. Pro
Fixing things yourself is incredibly satisfying for your wallet. Let us break down the expected costs.
A DIY suitcase handle repair usually costs between $15 and $30. This price covers the cost of a universal replacement handle ordered online.
Taking your bag to a professional luggage repair shop costs significantly more. You can expect to pay between $50 and $120 for parts and labor.
If you own an affordable piece of luggage, a professional repair might cost more than the bag is worth. The DIY route is clearly the most economical choice.
Frequently Asked Questions
You might still have a few questions before you begin. Here are the most common questions people ask about fixing travel bags.
Can I fix a handle that won’t go down?
Yes, a stuck handle is usually caused by jammed locking pins. Unzip the lining, locate the small push-pins near the bottom of the tubes, and press them in manually to release the handle.
Where can I buy replacement luggage parts?
You can find replacement handles on major online retailers like Amazon or eBay. You can also contact your luggage manufacturer directly to request brand-specific spare parts.
Can I use glue to fix a snapped plastic handle?
We do not recommend using glue or tape for load-bearing repairs. Superglue will not hold up to the heavy pulling weight, so replacing the entire part is much safer.
Do all suitcases use the same type of handle?
No, handles vary widely by brand and model. Always measure the distance between your metal extension tubes before buying a replacement to ensure a perfect fit.
How long does a DIY handle replacement take?
For most beginners, the entire process takes about 20 to 30 minutes. Once you gather your tools, swapping the hardware is very straightforward.
Conclusion
We hope this guide showed you exactly how to repair suitcase handle problems with confidence. You do not have to throw away your favorite travel bag just because a plastic piece broke.
By following these simple steps, you can save money and extend the life of your luggage. Taking a DIY approach gives you a great sense of accomplishment.
Always remember to measure your replacement parts carefully and work in a well-lit area. Your bag will be ready for the baggage claim in no time.
Do you have other broken items around the house? Check out our other DIY repair guides to keep your home running smoothly.