

A soggy lawn and a terrible smell are nightmare signs for any homeowner. If you are dealing with these issues, you are likely wondering how to repair a leach field. You are not alone. Thousands of homeowners face this frustrating problem every single year.
Usually, a failing system means slow drains, gurgling pipes, and a soggy, foul-smelling yard. It can feel incredibly overwhelming.
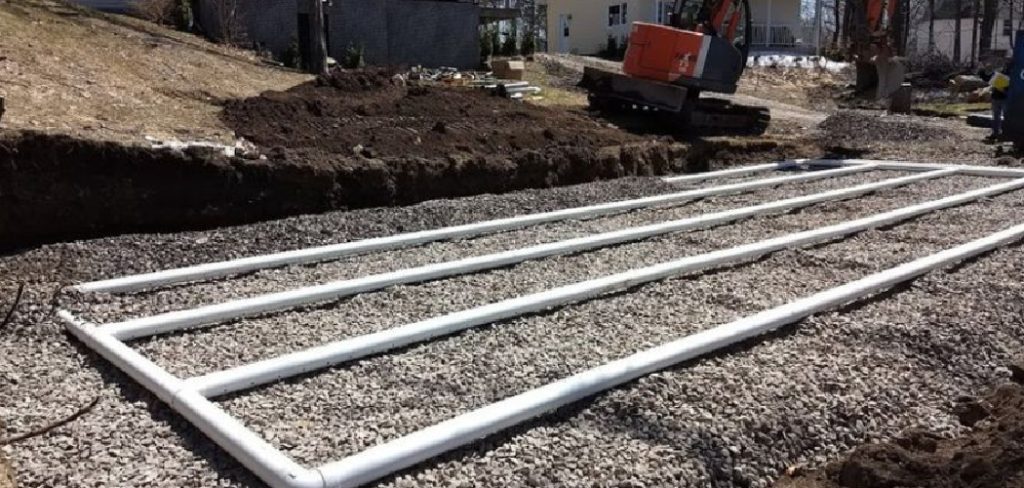
However, you do not always need to write a massive check to a septic company. Learning how to repair a leach field yourself can save you thousands of dollars. With a little elbow grease and the right knowledge, you can get your system flowing again.
In this guide, we will walk you through the process step-by-step. We will cover the causes, the tools you need, and the exact steps to take. Let’s roll up our sleeves and get your yard back to normal.
What Causes This Problem?
Before you start digging, you need to know why your system stopped working. A leach field (also known as a drain field) relies on soil to filter wastewater.
When the soil stops absorbing water, the effluent backs up. This causes poor percolation and a messy yard. Here are the most common culprits:
- Biomat Buildup: A thick, slimy layer of bacteria can form in the soil trenches. This slime blocks water from soaking into the ground.
- Tree Root Intrusion: Thirsty tree roots naturally seek out water sources. They can easily crush or clog your underground pipes.
- Hydraulic Overload: Using too much water in your home floods the septic tank. The drain field simply cannot keep up with the excess water.
- Compacted Soil: Driving heavy vehicles over your lawn crushes the underground pipes. It also compacts the dirt, ruining percolation.
- Lack of Maintenance: Failing to pump your septic tank regularly causes solid waste to escape. This sludge quickly clogs the distribution pipes.
Tools & Materials Needed
Preparation is the secret to any successful DIY project. Having everything ready saves you time and frustration.
You do not want to stop in the middle of a messy job to visit the hardware store. Gather these items before you start:
- A sturdy shovel: For digging and exposing the distribution boxes and pipes.
- Sewer snake or drain auger: Essential for clearing out solid clogs and minor root intrusions.
- High-pressure hose or hydro-jetter: Perfect for blasting away thick sludge and dirt buildup.
- Septic-safe biological treatments: High-quality bacterial enzymes help break down heavy biomat layers.
- Replacement PVC pipes and fittings: Just in case you find cracked or crushed sections underground.
- Work gloves and safety goggles: To protect your hands and eyes from harmful bacteria.
- Hydrogen peroxide (septic grade): Useful for chemical shocking to break up organic clogs.
Step-by-Step Fix Guide
Ready to get your hands dirty? Fixing this issue takes patience, but it is highly rewarding.
Follow these beginner-friendly steps to troubleshoot and fix the issue. We will start with the easiest solutions first.
Step 1: Locate and Inspect the Area
You cannot fix what you cannot find. Grab your home’s septic blueprints to locate the distribution box.
Carefully dig around the box to expose the lid. Take off the lid and look inside the distribution box.
If the box is completely flooded, the issue is further down the line. If it is dry, the pipe from your septic tank might be clogged.
Step 2: Clear the Distribution Box
Sometimes the problem is right at the starting point. Sludge and solids can easily block the exits of the distribution box.
Put on your gloves and safety goggles. Use a small trowel to scoop out any thick, black sludge blocking the pipe openings.
Once the openings are clear, run a garden hose into the box. Check to see if the water flows freely into the outgoing lines.

Step 3: Snake the Drain Lines
If the water still will not drain, you have a blockage in the pipes. This is where your drain auger comes in handy.
Feed the snake down into each outgoing pipe from the distribution box. Push it gently until you feel resistance.
Crank the handle to break up roots, dirt, or solid waste. Pull the snake back out and rinse it off with your hose.
Step 4: Hydro-Jet the Pipes
Sometimes a snake is not enough to clear heavy biomat or grease. You need the power of high-pressure water.
Attach a hydro-jetting nozzle to a pressure washer or strong garden hose. Feed it down the lines just like you did with the snake.
The high-pressure water blasts the sides of the pipes clean. This washes the thick effluent out of the small drainage holes.
Step 5: Apply a Chemical or Biological Shock
If the pipes are clear but percolation is still poor, the soil is clogged. You need to treat the thick biomat layer.
Pour a heavy dose of septic-safe biological enzymes directly into the distribution box. These bacteria will aggressively eat away the slime layer.
Alternatively, some homeowners use a septic-grade hydrogen peroxide treatment. This introduces oxygen to the soil, killing the bad bacteria and clearing the dirt.
Step 6: Fix Broken Pipes
Did you pull up crushed plastic when you snaked the line? You will need to replace that section of pipe.
Dig down to expose the crushed or broken pipe. Cut out the damaged section with a simple hacksaw.
Measure and cut a new piece of perforated PVC pipe. Attach it using PVC primer and cement, ensuring the drainage holes face down.
Step 7: Let the System Rest
Sometimes, the best repair is simply doing nothing. A flooded, overloaded system just needs time to dry out.
If you have a diversion valve, switch the flow to an alternate trench. Let the soggy side rest for several months.
If you do not have an alternate system, drastically reduce your household water usage. Take shorter showers and spread out your laundry days.
How to Repair a Leach Field: Safety Warnings
Dealing with human waste requires serious caution. Your health and safety must always come first.
Septic systems generate methane and hydrogen sulfide gases. These gases are highly toxic and can even be explosive.
Never lean your head inside a septic tank or deep distribution box. Always work in a well-ventilated outdoor area.

Wear thick rubber gloves, long sleeves, and eye protection. Raw sewage carries dangerous pathogens that can cause severe illnesses.
Finally, never drive heavy equipment over the yard while working. The ground may be unstable and could collapse under the weight.
When to Call a Professional
DIY repairs are fantastic, but they have their limits. Knowing when to wave the white flag is crucial.
If you have entirely crushed pipes deep underground, you need heavy machinery. Renting and operating an excavator is usually a job for the pros.
If you try snaking and shocking the system, but the yard remains a swamp, the field might be dead. Soil can eventually lose its ability to absorb water entirely.
Replacing an entire system requires local permits and soil testing. Always call a licensed professional if a full replacement is necessary.
Cost Estimate: DIY vs. Professional
Money is often the biggest factor when deciding how to tackle this problem. Let’s look at the numbers.
If you fix it yourself, costs stay incredibly low. Renting a snake or hydro-jetter costs around $50 to $100 for the day.
Biological shock treatments or hydrogen peroxide run about $100 to $300. Minor PVC repairs will cost less than $50 in materials. Total DIY cost: $100 to $450.
Hiring a professional is much more expensive. A professional hydro-jetting service typically costs $400 to $800.
If they need to rejuvenate the soil or replace sections, expect to pay $1,000 to $3,000. A total replacement can easily soar past $10,000. DIY is clearly the winner for minor issues!
Frequently Asked Questions
You likely still have a few specific questions. Here are the most common things homeowners ask.
Can a clogged leach field be saved?
Yes, absolutely. Most clogs are caused by biomat buildup or minor root intrusions. Hydro-jetting and biological treatments can often restore proper percolation without replacing the system.
How long does a drain field usually last?
With proper maintenance, a standard system lasts between 20 and 30 years. Regular pumping of your septic tank is the best way to extend its lifespan.
Will bleach clear my system?
No. Never pour bleach down your drains to fix this issue. Bleach kills the good bacteria needed to break down solid waste, making your effluent problem much worse.
How do I know if my biomat is too thick?
If your pipes are totally clear but water simply pools in the trenches, the biomat is the issue. The soil has become waterproof due to the bacterial slime.
Does copper sulfate work for roots?
Yes, flushing copper sulfate twice a year kills small tree roots inside the pipes. However, it will not remove dead roots—you still need to snake the line to pull them out.
Conclusion: Taking Control of Your Yard
Dealing with a soggy, smelly yard is incredibly stressful. However, knowing how to repair a leach field puts the power back in your hands.
By taking the time to inspect the distribution box and clear the pipes, you can save a fortune. Simple steps like snaking, hydro-jetting, and biological shocking work wonders for a sluggish system.
Remember, patience is key. Give your treatments time to work, and drastically cut back on your water usage while the soil recovers.
You do not have to be a master plumber to tackle this issue. With the right tools and a practical approach, you can restore your property.
Are you ready to fix your yard and save thousands of dollars? Grab your shovel, put on your gloves, and get started today!