

Walking into a room and seeing a literal bump in your beautiful hardwood is enough to make your heart sink. You might immediately picture thousands of dollars going down the drain.
But take a deep breath. Learning how to repair buckled wood floor issues is easier than you might think. You do not always need to tear up the entire room or hire a pricey contractor.
Homeowners and DIY lovers tackle this common issue every single day. Fixing it yourself puts the control back in your hands. Best of all, it keeps your hard-earned cash in your wallet.
In this guide, we will walk through exactly how to repair buckled wood floor planks step-by-step. Grab your toolbelt, and let us get that floor laying flat again.
Understanding the Problem: What Is Floor Buckling?
Before we start ripping up planks, we need to understand what we are dealing with. Buckling happens when wood planks lift away from the subfloor.
Wood is a porous, natural material that expands and contracts. When it expands too much, the boards push against each other. With nowhere else to go, they pop upward.
This creates an unsightly tent or peak in your floor. Left ignored, it can become a major tripping hazard. It can also lead to deeper structural issues in your home.
Cupping vs. Buckling
It is important to know the difference between cupping and buckling. Cupping is when the edges of a single board rise, leaving the center dipped.
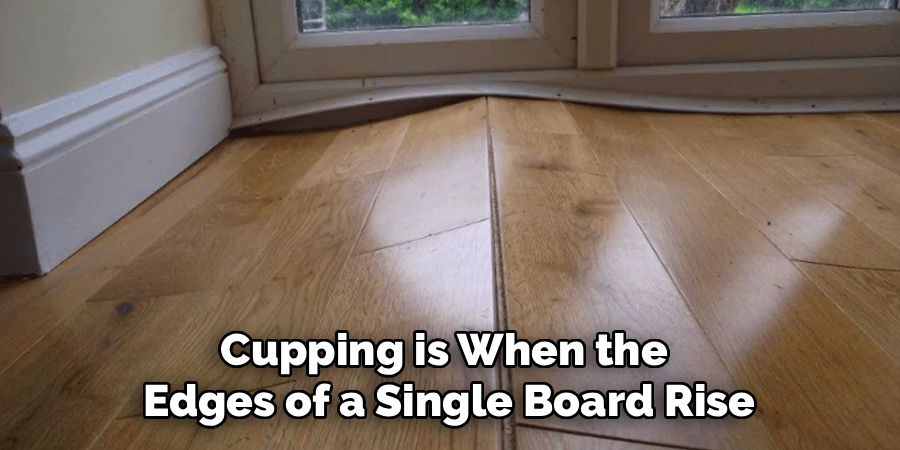
Buckling is much more severe. The entire board actually separates from the subfloor underneath. If you can push down on the bump and feel empty space, you have a buckled floor.
What Causes This Problem?
You cannot properly learn how to repair buckled wood floor damage without fixing the root cause first. If you just replace the wood, the new planks will buckle again. Here are the most common culprits:
- Major water spills or floods: Standing water quickly seeps into wood fibers, causing massive swelling.
- Plumbing leaks: Slow drips from dishwashers, refrigerators, or hidden pipes create constant moisture.
- High humidity: Homes without proper climate control let wood absorb excess moisture from the air.
- Missing expansion gaps: Wood floors need a small gap near the walls to expand. Without it, boards crash into the wall and push upward.
- Wet subfloors: If the concrete or wood subfloor was damp during installation, the moisture transfers to the hardwood.
- Poor acclimation: Hardwood must sit in a room for a few days to adjust to the climate before installation.
Tools & Materials Needed
Preparation is the secret to any good DIY project. Gathering everything beforehand saves you frustrating trips to the hardware store.
Here is exactly what you need to successfully fix your floor:
- Moisture meter: Essential for finding hidden wet spots.
- Pry bar or crowbar: To gently lift damaged planks.
- Circular saw or oscillating multi-tool: For cutting out the warped wood.
- Chisel and hammer: To chip away stubborn pieces and old glue.
- Replacement floorboards: Make sure they match your existing wood species and finish.
- Wood flooring adhesive: For gluing down new planks.
- Heavy weights (like cinder blocks): To press the new boards flat while glue dries.
- Utility knife: For scoring edges.
- Safety gear: Glasses, work gloves, and a dust mask.
- Dehumidifier and box fans: To thoroughly dry the area.
Step 1: Find and Stop the Moisture Source
This is the most critical step in learning how to repair buckled wood floor boards. Do not touch a saw until you find the water source.
Check nearby appliances for leaks. Look under the sink and inspect your refrigerator water line.
Use your moisture meter around the buckled area. Trace the highest moisture readings to find the origin point. Once you find the leak, fix it completely.
Step 2: Dry Out the Subfloor Completely
With the leak stopped, you must dry the surrounding area. Wood holds onto moisture for a surprisingly long time.
Set up box fans pointing directly at the damaged spot. Place a heavy-duty dehumidifier in the center of the room.
Let these run continuously for at least 48 to 72 hours. Check the wood again with your moisture meter to ensure the area is bone dry.
Step 3: Remove the Baseboards
If your buckling stretches near the wall, you need to remove the baseboards. This lets you see if the floor has a proper expansion gap.
Take your utility knife and gently score the caulk line along the top of the baseboard. This prevents peeling your drywall paint.
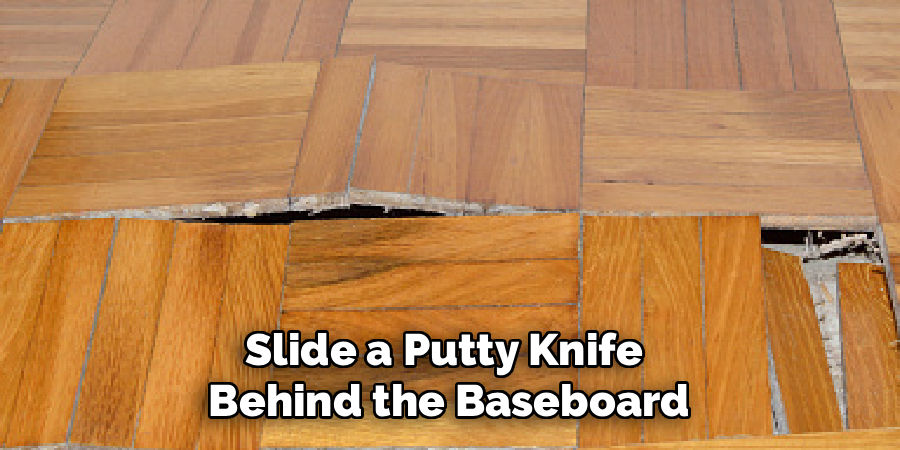
Slide a putty knife behind the baseboard, then insert your pry bar. Gently rock the pry bar back and forth to pull the baseboard away from the wall. Set it aside safely.
Step 4: Cut Out the Buckled Wood Floor Planks
Now comes the fun part: removing the damaged wood. Put on your safety glasses and gloves.
Take your circular saw and adjust the blade depth. It should match the exact thickness of your hardwood so you do not cut into the subfloor.
Cut one or two lines directly down the center of the buckled board. This relieves the pressure and gives you space to work.
Step 5: Pry Up the Damaged Pieces
With the center cut, the board is much easier to remove. Insert your chisel into the cut line and pry the pieces upward.
Work slowly so you do not damage the healthy boards sitting right next to the buckled ones.
If the floor was glued down, you might need to use a scraper to pull up the remaining splinters. Clear out all the debris so you have an empty, clean channel.
Step 6: Inspect and Prep the Subfloor
Look at the subfloor you just exposed. Is it stained, moldy, or rotting?
If it is just damp, run your fans for another day until the subfloor dries completely. If the subfloor is soft and rotting, you will need to replace that section too.
Once dry and sturdy, scrape away any old adhesive or protruding nails. The subfloor must be perfectly smooth and clean for the new boards to sit flat.
Step 7: Prepare the Replacement Boards
Take your matching replacement boards and measure the empty gap. You want a snug fit, but you also need to make sure the boards can actually drop into place.
If you are dealing with tongue-and-groove flooring, the last board will not drop in easily. You must cut off the bottom lip of the groove on the replacement board.
Use your circular saw to rip that bottom groove off. This allows the new board to lay flat over the tongue of the existing floor.
Step 8: Apply Adhesive and Install
Now it is time to put your floor back together. Apply a generous, zig-zag bead of wood flooring adhesive directly to the clean subfloor.
Slide the tongue of your new board into the groove of the adjacent old board. Press it firmly downward into the adhesive.
If you had to remove the bottom groove of the last board, apply a little wood glue to the tongues before pressing it down.
Step 9: Weight It Down and Wait
The glue needs time to cure, and the boards need pressure to sit flush. Wipe away any wet glue that squeezed out of the seams with a damp rag.
Place heavy weights on top of the newly installed boards. Cinder blocks wrapped in towels work perfectly. Heavy stacks of books also do the trick.
Leave the weights in place for at least 24 hours. Check the adhesive manufacturer’s instructions for exact curing times.
Step 10: Sand and Finish (If Needed)
If you bought pre-finished boards that match perfectly, your job is done! You can reinstall your baseboards and admire your work.
If you used unfinished wood, you will need to blend it. Sand the new boards lightly so they are perfectly flush with the surrounding floor.
Apply your matching wood stain. Once dry, seal it with a polyurethane finish to protect your hard work.
Safety Warnings for Floor Repair
DIY projects are incredibly rewarding, but safety must always come first. Working with wood and moisture presents a few unique hazards.
First, always watch out for black mold. If you pull up a wet board and see fuzzy black or dark green growth, stop immediately.
Wear a highly rated N95 respirator mask. If the mold covers a large area, it is safer to call a mold remediation specialist.
Second, treat your power tools with respect. Always unplug saws when changing blades. Keep your hands well away from the cutting path.
Finally, be mindful of hidden utilities. If you need to cut into the subfloor, check your home’s blueprints to avoid slicing electrical wires or plumbing lines.
When to Call a Professional
Knowing how to repair buckled wood floor issues yourself is great, but knowing your limits is even better. Some jobs are too big for a weekend DIYer.
Call a professional if the flooding came from a major natural disaster or sewage backup. Black water requires professional sanitation.
You should also call a pro if the buckling stretches across the entire room. Replacing a few boards is manageable; reinstalling 400 square feet requires a crew.
If your subfloor is severely compromised or the floor joists are rotting, bring in a structural expert. Safety is always worth the investment.
Cost Estimate: DIY vs. Pro
One of the biggest reasons to learn this repair is the massive cost savings. Let us break down the rough numbers.
For a DIY fix, a box of replacement planks usually costs $50 to $100. Adhesive, a chisel, and a moisture meter might run you another $70.
If you already own a saw, your total DIY cost hovers around $150.
Hiring a professional is much steeper. Contractors usually charge a minimum call-out fee. Factoring in labor and materials, a pro repair easily costs $500 to $1,200 for a small section.
By doing it yourself, you keep hundreds of dollars in your own pocket.
Frequently Asked Questions
Can a buckled wood floor fix itself?
No, a severely buckled floor will not magically fix itself. While minor cupping might settle once the humidity drops, buckling means the board has detached. It must be manually reattached or replaced.
How long does it take to dry out a wood floor?
It can take anywhere from a few days to a few weeks to completely dry out a wood floor. It depends on the severity of the leak. Using commercial dehumidifiers dramatically speeds up this timeline.
Can I just nail a buckled board back down?
Nailing a buckled board back down rarely works. The board is usually warped and stretched out of shape. Nailing it forces the tension outward, which will just cause the neighboring boards to buckle instead.
Do I need to replace the underlayment?
If the underlayment (like tar paper or foam) got soaking wet, yes, replace it. Wet underlayment traps moisture against your new wood. Always start with a dry, clean foundation.
How can I prevent my floors from buckling in the future?
Maintain a consistent indoor humidity level between 30% and 50%. Clean up spills immediately. Ensure your home has proper expansion gaps around the perimeter of the room.
Conclusion
Seeing a massive bump in your beautiful hardwood is stressful, but it is not the end of the world. Now you know exactly how to repair buckled wood floor planks like a seasoned pro.
By taking the time to find the moisture source, drying the subfloor, and carefully replacing the damaged pieces, you restore your home’s beauty. You also save a ton of money along the way.
Do not let a little warped wood intimidate you. Gather your tools, put on your safety glasses, and tackle that bump today!
If you found this repair guide helpful, check out our other step-by-step home maintenance tutorials to keep your house in top shape.