

Let’s face it: noticing a crack or peel on your favorite sofa is a terrible feeling. You sit down to relax, only to feel rough edges where smooth fabric used to be. Suddenly, your living room centerpiece looks tired and worn out.
If you are wondering how to repair imitation leather couch flaws at home, you are not alone. Faux leather is incredibly popular, but it wears down over time. Many homeowners and renters deal with this exact issue.

The good news? You do not have to throw your sofa away. Fixing it yourself is completely doable, even if you are a total beginner. You just need a little patience and the right supplies.
Tackling this DIY project will save you a massive amount of money. You skip the high costs of hiring an upholstery technician. Plus, you avoid the massive expense of buying brand-new furniture. Let’s roll up our sleeves and get that sofa looking great again.
What Causes This Problem?
Before we dive into the fix, it helps to understand why your sofa is acting up. Imitation leather, also known as faux leather or pleather, consists of a fabric base coated in polyurethane (PU) or polyvinyl chloride (PVC). Over time, this synthetic top layer can degrade.
Here are the most common culprits behind faux leather damage:
- Sunlight Exposure: UV rays dry out the synthetic materials. This leads to brittleness and eventual cracking.
- Body Oils and Sweat: The natural oils from human skin and hair break down the polyurethane coating over time.
- Harsh Cleaning Chemicals: Using bleach or alcohol-based cleaners strips the protective layer right off the fabric.
- Pet Claws: Our furry friends love the sofa, but their sharp nails easily puncture and scratch the synthetic surface.
- Temperature Fluctuations: Placing your sofa right next to a radiator or air vent causes the material to expand and contract.
- Normal Wear and Tear: Simple friction from sitting down and standing up repeatedly wears out the top layer.
Tools & Materials Needed
Preparation is the secret to a perfect DIY repair. Before you start pulling at loose threads, gather your supplies. Having everything within reach makes the job much smoother.
You can find most of these items at a local craft store, hardware shop, or online. Here is what you need:
- Mild Soap and Water: A gentle dish soap works perfectly for prepping the surface.
- Microfiber Cloths: You need these for cleaning and wiping away excess moisture.
- Soft-Bristled Brush: This helps lift dirt out of the artificial grain without causing scratches.
- Small Scissors or Tweezers: Essential for snipping away hanging threads or loose, peeling flakes.
- Rubbing Alcohol (Isopropyl): You will use a tiny amount just to prep the immediate repair zone.
- Leather Repair Kit: Make sure it includes liquid leather filler and color-matching compounds.
- Small Spatula or Palette Knife: Usually included in the kit, used for spreading the filler smoothly.
- Fine-Grit Sandpaper: Look for 600-grit or higher. You want it very fine to avoid new scratches.
- Grain Paper: Often included in repair kits, this gives your patch that realistic textured look.
- Faux Leather Conditioner: This seals the repair and protects the rest of the sofa.
Step-by-Step Fix Guide: Fixing Peeling and Cracking
Now we get to the fun part. If your sofa is shedding little flakes of material everywhere, this is the method you need.
Take your time with each step. Rushing the process usually leads to a messy result. Follow these beginner-friendly instructions to restore your seat.
Step 1: Clean the Area Thoroughly
First, you must start with a completely clean canvas. Dirt and body oils prevent the repair filler from sticking to the fabric.
Mix a few drops of mild dish soap into a bowl of warm water. Dip your microfiber cloth into the suds and wring it out well. You want the cloth damp, not dripping wet.
Gently wipe down the damaged area and the surrounding upholstery. Use the soft brush if you need to loosen stubborn grime. Wipe the area dry with a fresh cloth.
Step 2: Prep with Rubbing Alcohol
Once the area is dry, take a cotton ball or a corner of your cloth. Add a few drops of rubbing alcohol to it.
Lightly dab only the specific spot that needs fixing. Do not wipe the alcohol over the healthy faux leather, as it can cause drying.
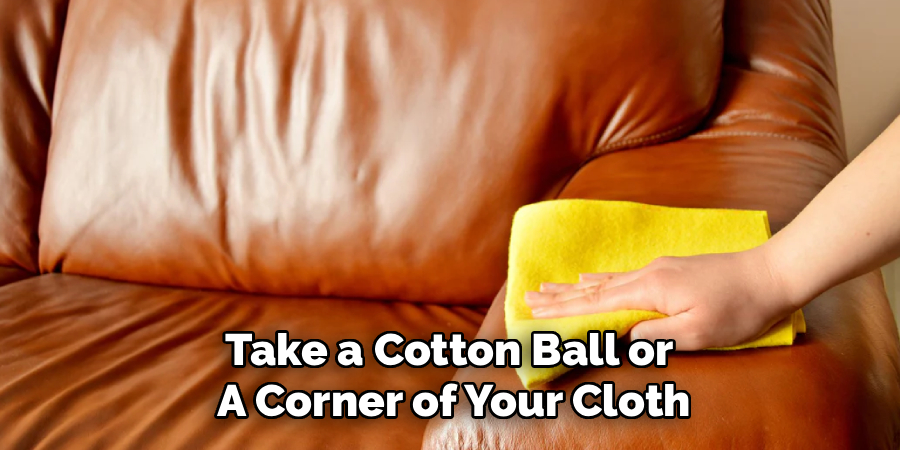
This quick dab removes any invisible grease left behind. It ensures your liquid filler will bond tightly to the base fabric. Wait about five minutes for the alcohol to evaporate completely.
Step 3: Remove the Loose Flakes
You cannot build a strong patch over crumbling foundations. You need to clear away the debris.
Take your small scissors or tweezers. Carefully pull or snip away any pieces of faux leather that are already peeling up.
Do not pull too hard, or you might strip away good material. Just remove the bits that are hanging loose. You want a relatively flat surface to work with.
Step 4: Apply the Leather Filler
Now grab the liquid leather filler from your repair kit. This acts like putty, filling in the gap where the faux leather peeled away.
Use your small spatula to scoop up a modest amount of filler. Spread it over the damaged fabric, pressing it down firmly.
Smooth the edges out so it blends flat against the surrounding good material. Try to make it as even as possible. It is better to apply two thin layers than one massive, clumpy layer.
Step 5: Let It Dry and Sand Smooth
Patience is key here. Let the filler dry completely according to your kit’s instructions. This usually takes a few hours, or you can speed it up with a hair dryer on a low setting.
Once it is completely dry and firm to the touch, take your fine-grit sandpaper. Gently buff the surface of the dried filler.
Your goal is to remove any harsh ridges or bumps. You want your hand to glide smoothly over the patched area and the original sofa. Wipe away any dust with a dry cloth.
Step 6: Apply the Color Compound
Now you need to make the patch match the rest of the couch. Most kits come with basic colors you can mix.
Follow the kit’s color-mixing guide to match your sofa’s specific shade. Test a tiny dot of the color on a hidden area of the couch first. Let it dry to ensure it matches perfectly.
Use a small sponge or brush to apply the color over the sanded filler. Dab it on lightly for an even coat. You might need two or three thin coats to completely hide the white filler underneath.
Step 7: Stamp the Grain Texture
Imitation leather has a textured pattern stamped into it. If you leave your patch completely smooth, it will look like a shiny bald spot.
While your final coat of color is still slightly tacky, grab the grain paper from your kit. Press the textured side of the paper firmly onto the wet color compound.
Hold it there for a moment, then carefully peel it away. This transfers the leather-like wrinkles into your wet patch. Let the color dry entirely.
Step 8: Condition and Protect
Congratulations, the hard part is over! Your patch should now be dry, colored, and textured.
The final step is to protect your hard work. Apply a high-quality faux leather conditioner to the entire sofa.
This adds a protective barrier over your new patch. It also moisturizes the older material, preventing new cracks from forming next week.
Step-by-Step Fix Guide: Repairing Tears and Holes
Sometimes the problem isn’t peeling. Sometimes a sharp object or a pet claw punctures right through the material.
If you have a clean tear or a small hole, the process is slightly different. You need to reinforce the backing before you patch the top. Here is how you handle it.
Step 1: Trim the Edges of the Tear
When imitation leather tears, the edges usually stretch and curl outward. You need neat borders for a solid repair.
Take your small scissors and trim away the frayed, curly edges. You want the tear to lay as flat as possible.
Do not cut away too much material. Just snip off the ragged bits so the edges can sit flush against each other.
Step 2: Insert a Sub-Patch
You cannot just put filler into an empty hole; it will fall right through into the sofa cushions. You need a backing layer.
Cut a piece of scrap fabric from your repair kit. It should be slightly larger than the tear itself.
Use tweezers to slip this fabric patch inside the hole, pushing it flat under the existing faux leather. This creates a tiny “floor” for your filler to sit on.
Step 3: Glue the Edges Down
Now you need to secure the torn faux leather to your new sub-patch. Use the fabric adhesive provided in your repair kit.
Apply a thin line of glue under the edges of the tear. Press the faux leather down firmly onto the sub-patch.
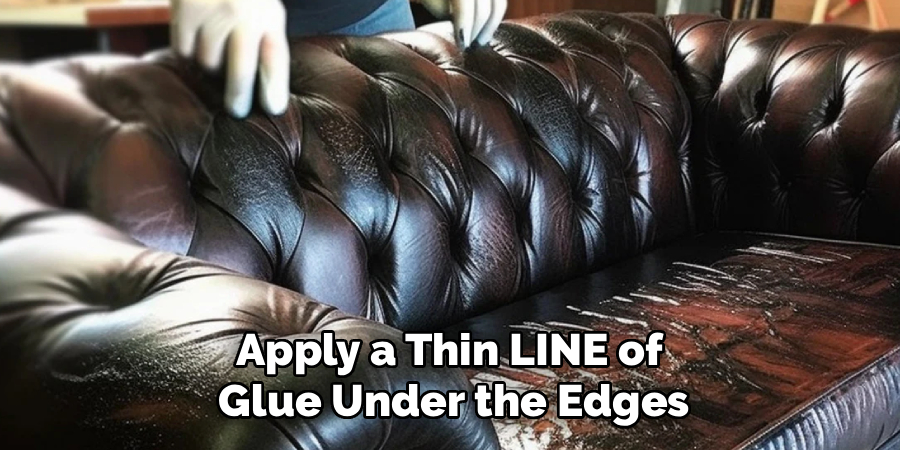
Wipe away any excess glue that squeezes out immediately. Let this dry completely before moving forward. Once dry, you can proceed with applying filler, color, and grain texture just like in the peeling steps above.
Safety Warnings
DIY projects are fun, but safety should always come first. Working with chemical fillers and dyes requires some basic precautions.
First, ensure your workspace is well-ventilated. Open a few windows or run a fan. Some rubbing alcohols and liquid fillers release strong fumes that can cause headaches.
Second, wear protective gloves. The color compounds in these repair kits are highly pigmented. If you get them on your hands, you will be scrubbing for days.
Finally, keep pets and children out of the room while things are drying. A curious cat walking across wet brown leather filler will leave a trail of paw prints all over your house.
When to Call a Professional
We firmly believe in the power of DIY, but it pays to be realistic. Sometimes, a job is just too big for a tiny bottle of liquid leather.
If the peeling covers an entire seating cushion or the armrests are completely shredded, a basic repair kit won’t cut it. Extensive structural damage requires professional reupholstery.
Similarly, if the actual foam underneath the fabric is crumbling or missing, you have a bigger project on your hands. Upholstery experts can rebuild the cushion density and stitch new panels of matching material.
If you attempt a small patch and simply hate how it looks, don’t panic. You can always call a pro to fix it later. Knowing your limits saves you frustration in the long run.
Cost Estimate: DIY vs. Professional
Money is often the biggest motivator for DIY projects. Let’s look at the numbers to see how much you actually save.
Buying a high-quality leather repair kit online usually costs between $15 and $30. Add another $10 for rubbing alcohol, sandpaper, and microfiber cloths if you don’t already own them.
Your total DIY investment sits comfortably under $40.
Now, let’s look at the professional route. Hiring an upholstery technician to patch a small tear typically starts at $150. If they have to replace an entire panel of faux leather, costs easily soar to $300 or more.
By taking an afternoon to do it yourself, you keep hundreds of dollars in your pocket. That is money much better spent elsewhere.
Frequently Asked Questions
You might still have a few lingering thoughts before you grab your tools. Here are some of the most common questions people ask about this process.
Can I use super glue on my faux leather couch?
No, you should avoid super glue. Super glue dries incredibly hard and brittle. Since your sofa needs to flex when you sit on it, super glue will simply crack and cause a bigger tear. Always use a flexible fabric or leather adhesive.
How long does a DIY faux leather patch last?
If done correctly, a good patch can last for years. The key is proper preparation and letting the filler cure completely. Regularly applying a faux leather conditioner will also extend the lifespan of your repair.
Does olive oil fix scratched imitation leather?
Olive oil might temporarily hide light surface scratches by darkening the material. However, it is not a true fix. Over time, the oil can go rancid or attract dirt, making the sofa look worse. Stick to proper faux leather conditioners.
Can I paint my peeling faux leather couch?
Yes, you can use specialized acrylic leather paint to change the color or cover massive stains. However, paint alone will not fix peeling or structural holes. You must use filler to smooth out the surface before painting.
How do I stop my imitation leather from peeling further?
Moisture and protection are your best friends. Keep the sofa out of direct, blazing sunlight. Wipe it down weekly with a damp cloth to remove oils, and apply a specialized faux leather protectant spray every few months.
Conclusion for how to repair imitation leather couch flaws
Seeing your favorite furniture start to flake is frustrating, but it doesn’t mean the end of its life. Knowing how to repair imitation leather couch damage puts the power back in your hands. You don’t have to live with an eyesore or empty your wallet for a replacement.
By taking the time to clean the area, apply a flexible filler, and match the color correctly, you can seamlessly blend away the damage. The process requires a bit of patience, especially while waiting for things to dry. Yet, the final result is incredibly rewarding.
You have all the steps and insider tips you need to tackle this weekend project like a seasoned pro. Keep your living space looking sharp and save your hard-earned cash at the same time.
Ready to get started? Grab a high-quality faux leather repair kit today and give your beloved sofa the second chance it deserves!