

Touch lamps add a bit of magic to any room. You simply tap the base, and the room lights up.
But what happens when that magic fades? If you are wondering how to repair a touch lamp, you are not alone.
Many homeowners and renters face this frustrating problem. You tap the lamp, but nothing happens. You might think it is time to throw it away.
Do not toss it in the trash just yet. Fixing it yourself is highly rewarding. It is also a great way to save money.
Instead of buying a new lamp, you can fix your old one. You will save money and learn a great new skill. Let’s dive into how to fix your favorite light fixture.
Understanding Your Broken Touch Lamp
Before grabbing your tools, we need to understand the problem. Touch lamps work using a small piece of internal technology.
They rely on human capacitance. Your body acts as a tiny battery. When you touch the lamp, you add electrical capacity.
A small touch sensor inside the lamp detects this change. It then tells the light to turn on, change brightness, or turn off.
When this system fails, the lamp stops responding. This is the exact moment you need a solid DIY plan.
What Causes This Problem?
Several issues can cause your lamp to stop working. Knowing these helps you figure out how to repair a touch lamp quickly.
Here are the most common culprits:
- A burned-out bulb: Often, the simplest answer is the right one.
- A blown touch sensor: These small black boxes often fail after years of use.
- Loose or frayed wiring: Wires inside the base can easily come loose.
- Power supply issues: The outlet or power cord might be completely dead.
- Wrong bulb type: Modern bulbs do not always play nice with older sensors.
- Dirty lamp base: Grease and dust can block your physical touch.
Gathering Your Tools and Materials
Every good neighbor knows that a successful project starts with the right tools. You do not need a massive toolbox.
You only need a few simple items. Grab these before you sit down to work.
Here is what you need:
- A replacement touch sensor (match your lamp’s wattage).
- A fresh incandescent bulb.
- A basic Phillips head screwdriver.
- A flathead screwdriver.
- Small wire nuts.
- Wire strippers.
- A multimeter (optional but very helpful).
- A clean, dry microfiber cloth.
Having everything ready keeps the project moving. You will not have to stop halfway through to find a tool.
Step-by-Step Fix Guide: How to Repair a Touch Lamp
Now, we get to the fun part. Fixing things with your own hands feels great.
Follow these simple, beginner-friendly steps. Take your time and do not rush.
Step 1: Check the Power Source
Always start with the easiest fix. Sometimes the lamp is perfectly fine.
Plug a different device into the wall outlet. See if that device turns on.
If the outlet is dead, check your home’s breaker box. If the outlet works, move on to the next step.
Step 2: Clean the Lamp Base
Sometimes dirt blocks your hand’s electrical signal. Dust and natural oils build up over time.
Take your dry microfiber cloth. Wipe down the entire metal base of the lamp.
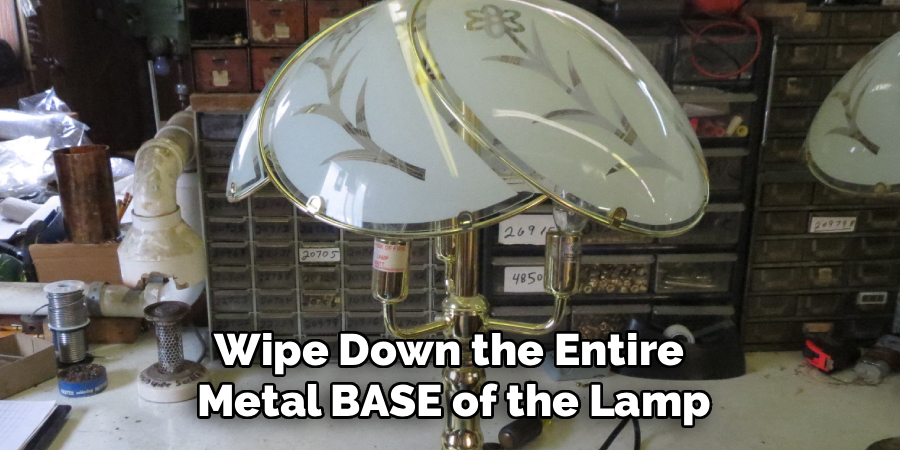
Plug the lamp back in and test it. If it still fails, the problem is likely internal.
Step 3: Inspect the Bulb
Touch lamps are incredibly picky about light bulbs. They need specific types to work well.
Unplug the lamp from the wall again. Remove the lampshade to get a better look.
Unscrew the current bulb. Inspect it closely.
If the filament is broken, you just need a new bulb. Replace it with a fresh incandescent bulb.
LED bulbs often confuse older touch sensors. An incandescent bulb is always your safest bet for testing.
Step 4: Open the Lamp Base
If the bulb is fine, we must look inside. This is where the actual repair work begins.
Keep the lamp completely unplugged. Lay the lamp gently on its side.
Look at the bottom of the base. You will see a felt pad or a metal plate.
Use your screwdriver to remove the small screws. Peel back the cover to expose the inside.
Step 5: Inspect the Internal Wiring
Take a close look at the wires inside. You are looking for obvious damage.
Do you see any loose connections? Are there any burned or frayed wires?
If a wire nut has fallen off, simply twist it back on. Make sure all connections are tight and secure.
Step 6: Locate the Touch Sensor
If the wiring looks good, the sensor is likely dead. This is the most common failure point.
Look for a small plastic box inside the base. It is usually black and has three or four wires coming out.
This little box is the brain of your lamp. When it dies, the whole lamp stops working.
Step 7: Document the Current Setup
Do not just start pulling wires apart. You need to remember how they go back together.
Grab your smartphone. Take a clear picture of how the sensor connects to the lamp.
Most sensors use a standard color code. Black goes to black, white to white, and yellow to the metal base.
Your picture will be your roadmap later.
Step 8: Remove the Old Sensor
Now, untwist the wire nuts connecting the old sensor. Pull the wires apart gently.
Remove the broken sensor from the lamp base. Throw it in the trash.
Take a breath. You are doing great, and the hard part is mostly over.
Step 9: Prepare the Wires
Look at the wire ends inside the lamp. If they look messy, trim them slightly.
Use your wire strippers. Expose about half an inch of fresh, clean copper on each wire.
Clean wires make better electrical connections. This prevents future problems.
Step 10: Install the New Sensor
Grab your brand new touch sensor. It is time to wire it in.
Match the colored wires according to your photo. Usually, white connects to white.
Black connects to the black wire. The yellow wire attaches directly to the metal lamp body.
Step 11: Secure the Connections
Twist the matching wires together tightly. Cap them with your small wire nuts.
Give each wire nut a gentle tug. You want to make sure the wires will not slip out.
If they feel loose, undo them and twist them tighter. Secure connections are safe connections.
Step 12: Reassemble the Lamp
Carefully tuck all the wires and the new sensor back into the base. Do not force them.
Make sure no wires are pinched. Pinched wires can cause a dangerous short circuit.
Place the bottom plate back on. Tighten the screws until they are snug.
Step 13: The Final Test
Stand the lamp upright. Put the lampshade back on.
Plug the power cord into the wall. Now, simply tap the metal base.
Your lamp should light up beautifully. You have just successfully fixed it yourself!
Crucial Safety Warnings for DIY Projects
Safety must always come first. Electricity is nothing to joke around with.
Always unplug the lamp before doing any work. Never work on a plugged-in fixture.
Let the lamp cool down completely before touching the bulb. Bulbs get incredibly hot and can burn your skin.
Keep water and drinks away from your workspace. Water and bare wires are a terrible mix.
If you ever feel unsure, stop immediately. It is okay to take a break and double-check your steps.
When to Call a Professional Technician
DIY is great, but it has limits. Knowing when to stop is a valuable skill.
Some lamps require a professional touch. This is especially true for family heirlooms.
Signs You Need Expert Help
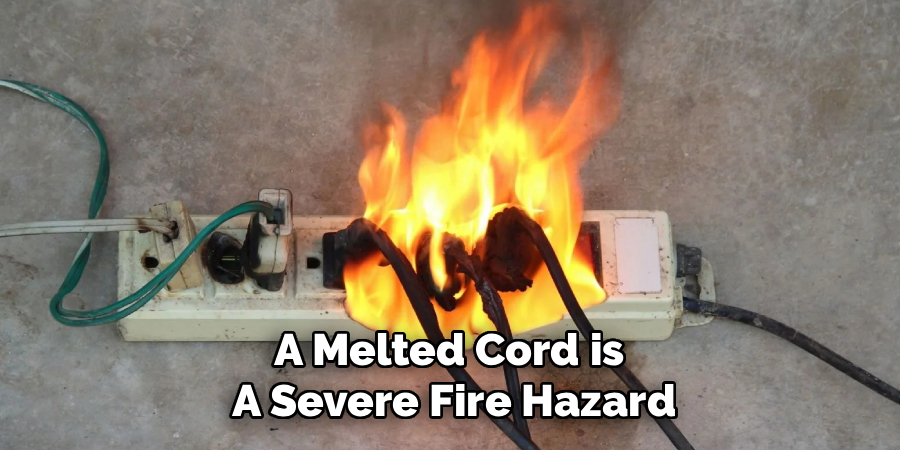
Call a professional if the main power cord is melted. A melted cord is a severe fire hazard.
Seek help if your lamp is a valuable antique. Older lamps have fragile, cloth-covered wires.
If you replace the sensor and it immediately pops, stop working. You might have a deeper electrical short.
A licensed electrician or lamp repair shop can handle these tough jobs safely.
Cost Estimate: DIY vs. Pro Repair
We all want to save money. Let us look at the real numbers.
Fixing it yourself is incredibly cheap. A new touch sensor costs between $10 and $15.
A fresh pack of light bulbs might cost $5. Your total DIY cost is around $20.
The Cost of Professional Repair
Taking it to a repair shop is much more expensive. Labor costs add up very quickly.
Most shops charge a minimum fee just to look at it. This fee is often $30 to $50.
With parts and labor, a pro repair can easily cost $75 to $100. Fixing it yourself saves you a lot of cash.
Frequently Asked Questions
You might still have a few questions. That is completely normal.
Here are the most common questions people ask during this project.
Why does my lamp turn on by itself?
This is called “ghosting.” It happens when the sensor gets old and overly sensitive. Replacing the sensor fixes this spooky problem easily.
Can I use an LED bulb in my lamp?
It depends on the sensor. Many older models only work with a standard incandescent bulb. Dimmable LEDs might work, but they often flicker or buzz.
Why does the lamp only have one brightness level now?
You probably bought a basic single-way sensor. If your lamp used to have three levels, you need a 3-way touch sensor. Always check the packaging before buying.
Is it safe to leave a touch lamp plugged in?
Yes, it is perfectly safe. As long as the wiring is secure, they operate like any standard light. Just ensure your outlet is in good condition.
My new sensor burned out instantly. What happened?
You likely exceeded the wattage limit. If your sensor maxes out at 150 watts, do not use a 200-watt bulb. Always match the bulb wattage to the sensor rating.
Troubleshooting Lingering Issues
Sometimes, a repair does not go perfectly the first time. Do not get discouraged.
If your lamp still does not work, re-check your wire connections. A loose wire nut is the most common mistake.
Make sure the yellow sensor wire is touching bare metal. If it touches painted metal, it cannot read your touch.
Use some sandpaper to scrape away paint inside the base. This gives the yellow wire a clean connection point.
Patience is key when troubleshooting. Take it one step at a time.
Keeping Your Lamp in Great Shape
Once your lamp is fixed, you want it to last. Proper maintenance goes a long way.
Dust your lamp regularly. Keep the metal base free of heavy grease and dirt.
Always use the correct wattage bulb. Overpowering the lamp will fry your new sensor quickly.
Treat the power cord gently. Do not yank it out of the wall by the wire.
With a little care, your repaired lamp will shine for many more years.
Conclusion
You do not need to be a master electrician to tackle home repairs. With a little patience, anyone can learn how to repair a touch lamp.
We covered the common causes, from dead bulbs to faulty sensors. You gathered your tools and followed the step-by-step guide safely.
You saved yourself money and kept a great piece of furniture out of the landfill. That is a major win for any homeowner.
The next time something breaks, remember this success. You have the skills to fix it.
Ready to tackle your next home project? Browse our other easy DIY repair guides today and keep expanding your skills!