

A snapped pillar, a cracked jar candle, or a wick that’s vanished into a pool of wax can feel like a small disaster. But before you toss that favorite scented candle in the trash, know this: you can usually save it. Learning how to repair a broken candle is one of those quiet little skills that saves money and keeps something you love burning bright again.
The good news? You don’t need fancy gear or years of experience. With a few household tools and a bit of patience, you can mend most candle mishaps right at your kitchen table. This guide walks you through every step, from gathering supplies to lighting that revived flame, so you can fix your candle with confidence and skip the store.
Why Repairing a Broken Candle Is Worth Learning
Candles aren’t cheap anymore, especially the good ones with rich scents and clean-burning wax. Tossing a broken candle means throwing money straight into the bin. When you learn to fix it yourself, you stretch every dollar and get more cozy evenings out of a single purchase.
There’s an environmental win too. Fewer discarded candles mean less wax, glass, and packaging heading to the landfill. You’re reusing what you already own.
Beyond the savings, there’s a real satisfaction in mending things with your own hands. A snapped taper or a tunneled jar candle becomes a fun little project instead of a frustration. Once you master this skill, you’ll find yourself rescuing candles you’d have written off, and your home stays warm and glowing without extra trips to the store.
Tools and Materials You’ll Need
Most of what you need is probably sitting in a drawer right now. Gather these before you start so the job goes smoothly:
- A double boiler or a heatproof bowl over a pot for melting wax gently
- Spare wax (leftover candle stubs, wax pellets, or crayon-free candle wax work great)
- New wicks with metal tabs, sized for your candle’s width
- A hairdryer or heat gun for softening surfaces and smoothing dents
- A butter knife or small spatula for shaping and scraping
- Skewers or chopsticks to center and hold the wick
- Paper towels and a drop cloth to catch drips
- A thermometer(optional, but handy for keeping wax at the right temperature)
Keep everything within reach and work on a flat, protected surface. Hot wax cools fast, so being organized makes all the difference.
Step-by-Step Guide on How to Repair a Broken Candle
Step 1 – Assess the Damage
Start by taking a good look at what you’re working with. Is the candle snapped clean in two? Cracked down the side? Or has the wick disappeared into a sunken well of hardened wax? Each problem calls for a slightly different fix, so knowing the issue saves you time later.
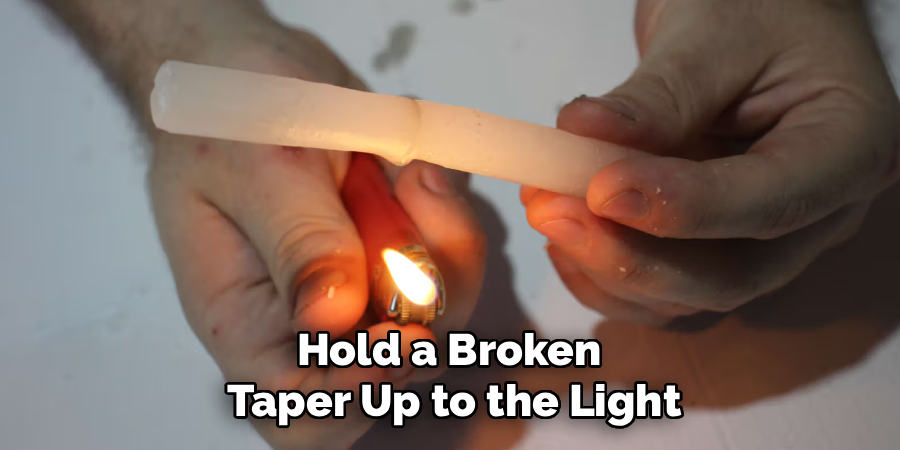
Run your fingers gently over the surface to feel for loose chunks or rough edges. Hold a broken taper up to the light to check whether the wick inside is still intact and centered. If the wick has shifted or burned down too far, you’ll need a replacement.
Take a moment here. A clear picture of the damage now means a cleaner result when you repair a broken candle and bring it back to life.
Step 2 – Clean and Prepare the Surfaces
Before any wax melts, tidy up the pieces. Wipe away soot, dust, and stray bits with a dry paper towel. If there’s grime around a jar candle’s edge, a slightly damp cloth works, but make sure the surface dries completely afterward.
For a snapped candle, gently scrape the two broken faces flat with a butter knife. You want them to fit together snugly, like puzzle pieces. Rough, jagged edges leave gaps where the seam will show or weaken.
Clean wax bonds far better than dirty wax. As you brush away the debris, you’ll notice the surfaces look brighter and feel smoother. This small step makes your repair hold strong and look almost invisible once finished.
Step 3 – Melt Your Spare Wax
Set up your double boiler, or rest a heatproof bowl over a pot of simmering water. Drop in your spare wax pieces and let them melt slowly over low heat. Never melt wax directly over an open flame, since it can scorch or even catch fire.
Stir gently as the chunks soften into a clear, glossy pool. You’ll catch a faint, warm scent rising from the bowl. If you have a thermometer, aim for around 180°F, warm enough to flow but not bubbling.
The melted wax acts as your glue and filler. Keep it liquid while you work, returning the bowl to the heat if it starts to thicken or cloud at the edges.
Step 4 – Replace or Reposition the Wick
If your wick has burned out or vanished into the wax, now’s the time to fix it. For a jar candle, warm the surface with a hairdryer until the top layer softens, then press a new wick tab firmly to the bottom center.
For a solid pillar or taper, you can poke a heated skewer down through the center to create a channel, then thread a fresh wick through it. Seal it in place with a few drops of melted wax.
Center the wick carefully. A crooked wick burns unevenly and tunnels fast. Lay a chopstick across the top and rest the wick against it to hold everything straight while the wax sets.
Step 5 – Join the Broken Pieces
For a candle snapped in two, this is the satisfying part. Dip the flat edge of one broken piece into your melted wax, just enough to coat it. Then press the two halves together, lining up the wick and the outer edges as closely as you can.
Hold them firmly for a full minute. You’ll feel the wax grip and begin to set beneath your fingers. Wipe away any wax that squeezes out of the seam with a paper towel before it hardens.
If the join feels wobbly, add a little more melted wax around the seam and smooth it with your finger. Let it rest undisturbed so the bond grows strong.
Step 6 – Fill Cracks and Dents
Cracks, chips, and sunken spots are easy to mend with your leftover melted wax. Pour small amounts directly into the damaged areas, building them up slowly rather than flooding all at once. Too much wax at once can crack as it cools.
Watch as the liquid wax settles and fills each gap, turning glossy then matte as it firms up. For deeper dents, let one layer set before adding the next.
This patient layering gives you a smooth, even surface. Once you’ve learned how to repair a broken candle this way, you’ll spot fixable flaws everywhere and feel ready to tackle each one without a second thought.
Step 7 – Smooth and Reshape the Surface
Now make it look good again. Run a hairdryer or heat gun on low across the repaired areas, keeping it moving so you don’t melt too deep. The surface will turn shiny and soft, letting you blend the seams.
Use a butter knife or your fingertip to gently smooth bumps and ridges while the wax stays warm. Work in small sections, pausing to let each spot cool and check your progress.
You’re aiming for a finish that feels even under your touch, with no obvious lumps where the breaks once were. Take your time here. A few extra minutes of smoothing turns a patched-up candle into one that looks practically brand new.
Step 8 – Trim the Wick and Test the Burn
Once everything has cooled and hardened completely, trim the wick to about a quarter inch. A long wick produces a tall, smoky flame and uneven melting, so keep it short and tidy.
Light the candle and watch closely for the first few minutes. The flame should be steady, the wax should begin to pool evenly, and the seams shouldn’t gap or leak.
If the flame flickers wildly or the candle smokes, blow it out, let it cool, and adjust the wick. A good first burn sets the pattern for every burn after, so give your repaired candle the attention it deserves before you walk away.
Critical Mistakes When Repairing a Broken Candle
Even simple repairs can go sideways if you rush. The most common mistake is overheating the wax. When you crank up the heat to melt things faster, the wax can scorch, lose its scent, or even ignite. Always melt slowly over low heat with water between the flame and the wax. Patience here protects both your candle and your safety.
Another frequent slip-up is ignoring the wick. People focus so hard on gluing pieces together that they forget to check whether the wick is centered and intact. A crooked or buried wick means an uneven burn, tunneling, and a candle that never works right no matter how nicely you patched it.
Many folks also pour too much filler wax at once. Thick layers cool unevenly and crack within days. Build up gradually instead, letting each layer set first.
Finally, don’t skip the cooling time. Lighting or moving the candle before the wax fully hardens breaks fresh seams apart. Give your work several hours to cure completely. A little waiting now saves you from redoing the whole repair tomorrow.

Expert Tips
Want professional-looking results? Match your filler wax to the original candle whenever possible. Mixing soy wax with paraffin, for example, can create cloudy seams that burn at different rates.
Save your candle stubs in a jar. They make perfect free filler material and let you blend scents for fun custom repairs.
Warm your tools slightly before smoothing. A heated butter knife glides through soft wax far more cleanly than a cold one and leaves fewer drag marks.
For jar candles that have tunneled, the hairdryer trick works wonders. Melt the top layer flat to reset an even surface and free a buried wick.
Finally, work in a draft-free spot. Even a gentle breeze cools wax unevenly and can leave ripples across your freshly smoothed surface.
Frequently Asked Questions
Can I fix a candle that has cracked in half?
Yes, absolutely. A candle snapped in two is one of the easiest repairs. Coat both broken faces with melted wax, press them firmly together with the wick aligned, and hold for about a minute. Wipe away excess wax from the seam, then smooth it with a warm knife. Let it cool fully for several hours before lighting, and it’ll burn just fine.
What kind of wax should I use for the repair?
Use wax that matches your original candle for the best results. If it’s a soy candle, use soy; if it’s paraffin, stick with paraffin. Leftover stubs from the same candle are ideal since they melt and burn at the same rate. Mixing wax types can cause cloudy seams and uneven burning, so try to keep things consistent whenever you can.
How do I replace a wick that’s buried in wax?
Warm the candle’s surface with a hairdryer until the top layer softens. For jar candles, press a new wick tab to the bottom center. For solid candles, poke a heated skewer through the middle to make a channel, then thread a fresh wick in and seal it with melted wax. Center it carefully so the candle burns evenly afterward.
Is it safe to repair candles at home?
It’s safe when you take basic precautions. The main risks come from melting wax, so always use a double boiler instead of direct heat, and never leave hot wax unattended. Keep a clear, protected workspace and tie back loose hair or sleeves. Work away from anything flammable. With these simple steps, home candle repair is a low-risk, satisfying project.
How long should I wait before lighting a repaired candle?
Give it at least four to six hours to cool and cure completely. Larger candles or deep filler repairs may need overnight. Lighting too soon can soften fresh seams and undo your work. To check, gently touch the repaired area. It should feel firm and cool, not the least bit soft or tacky, before you light it.
Conclusion
Bringing a candle back to life turns out to be far simpler than most people expect. You’ve learned how to assess the damage, melt and apply spare wax, reset a stubborn wick, join broken pieces, and smooth everything into a finish that looks nearly new. None of it requires special talent, just a little patience and a few common tools.
The real reward goes beyond the saved money, though that’s a nice bonus. There’s something deeply satisfying about rescuing an object you love instead of tossing it aside. Every flickering flame becomes proof of your own handiwork.
So next time a favorite candle snaps, cracks, or loses its wick, don’t reach for the trash can. You now have everything you need to repair a broken candle and enjoy many more cozy, glowing evenings. Grab your supplies, take your time, and trust the process. Your candles, your wallet, and the planet will all thank you for it.