

Your electric mower hums to life every weekend, until the day it doesn’t. You press the button, and instead of that familiar whir, you get silence, a stutter, or a sudden stop halfway through the lawn.
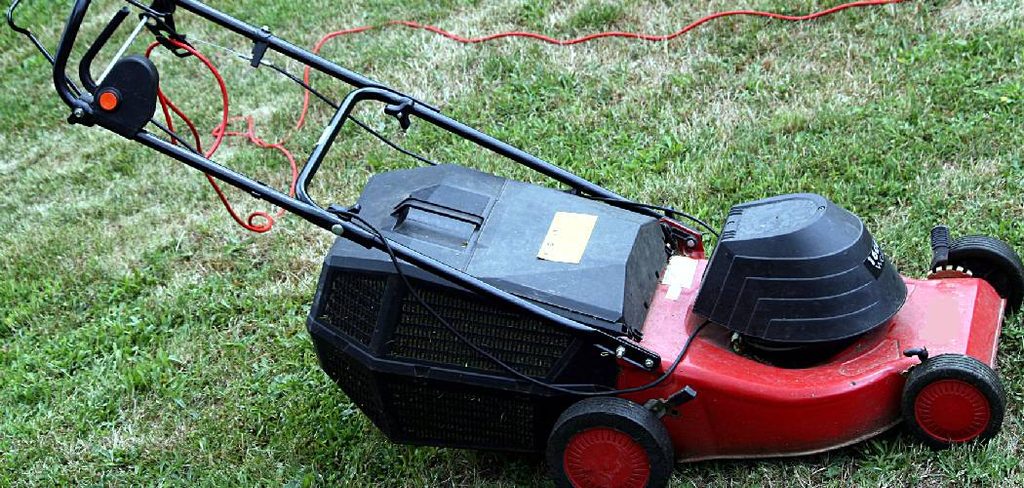
Before you assume the worst, take a breath. Most electric mower problems come down to simple, fixable issues like a tripped breaker, grass buildup, or a worn blade. You don’t need a workshop or a technician to sort them out.
Learning how to fix electric lawn mower troubles puts the power back in your hands, often with tools you already own. A little know-how saves money and keeps your yard work on schedule.
This guide walks you through diagnosing and repairing the most common electric mower faults, step by step, in plain language.
Why Fixing an Electric Lawn Mower Matters
A dead mower in the middle of mowing season is more than annoying. It throws off your whole routine and leaves your grass growing wild while you wait on a repair shop.
For homeowners, renters, and DIY enthusiasts, fixing it yourself means no service bills and no waiting days for an appointment. Most repairs cost a few dollars in parts, if anything at all.
The skill matters even more when you’re off the beaten path. Campers and outdoor beginners maintaining a cabin lot, a small property, or a campsite can’t always reach a service center. Knowing the basics keeps your outdoor equipment running and cuts downtime to minutes instead of weeks.
You’ll also understand your machine better, from the power supply to the motor housing. That confidence carries into other repairs around the home and yard.
Tools and Materials You’ll Need
Gather your gear before you start so you’re not hunting for a screwdriver mid-repair. Most of these live in a standard toolbox.
- A screwdriver set (Phillips and flathead) for the deck and switch box screws
- A socket or wrench to remove the blade bolt
- Work gloves to protect your hands from the blade and sharp edges
- A stiff brush or putty knife to clear grass buildup from the deck and vent slots
- A multimeter to test the power cord, fuse, and electrical contacts
- A replacement blade or fuse if yours shows wear or damage
- Safety glasses to keep debris out of your eyes
- A headlamp (optional, but it makes spotting frayed wiring and hidden screws far easier)
That headlamp is a small luxury that frees both hands while you inspect the motor housing and wiring up close.
Step-by-Step Guide on How to Fix Electric Lawn Mower
Work through these eight steps in order. Always cut the power first, whether your mower runs on a cord or a battery pack.
Step 1 – Cut the Power and Remove the Safety Key
Safety comes before anything else. For a corded mower, unplug it from the extension cord and the wall outlet completely. For a battery model, pull the battery pack out and set it aside.
Next, remove the safety key from the switch box. You’ll feel it slide free with a light click, and that simple act guarantees the motor can’t spin while your hands are near the blade.
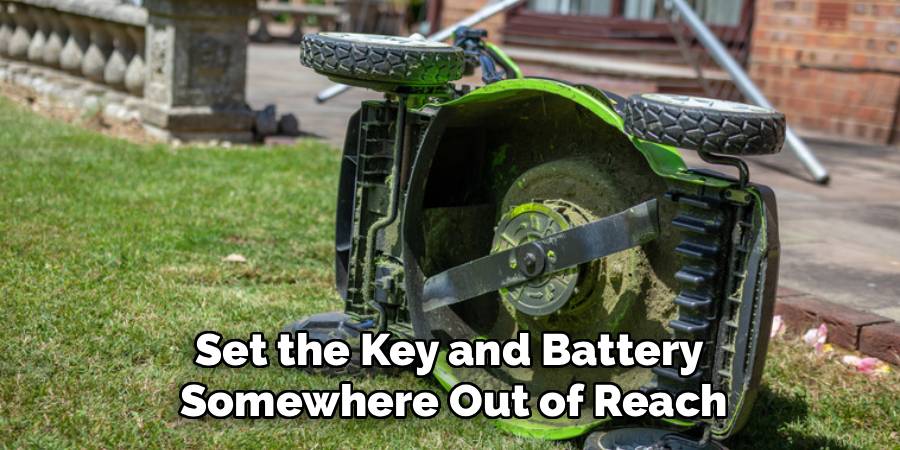
Set the key and battery somewhere out of reach, not on the mower deck where they might get bumped back in. A spinning blade causes serious injury in a split second, so never rush this part. With the power fully disconnected, you can work calmly and safely.
Step 2 – Check the Power Source and Connections
Start with the simplest culprit. Many “dead” mowers just lost their power supply somewhere along the line.
For a corded model, inspect the extension cord and power cord end to end. Look for cuts, melted spots, or bent prongs, and feel for any spot that grows warm during use. Check your home’s electrical panel too, since a tripped breaker is a common, easily missed cause.
For a battery mower, make sure the battery pack is fully charged and seated firmly. Wipe the electrical contacts with a dry cloth if they look dull or dusty.
Learning how to fix electric lawn mower issues often ends right here, because a reset breaker or a fresh charge solves the problem in seconds.
Step 3 – Inspect the Switch Box and Safety Key
If power reaches the mower but it still won’t start, turn your attention to the switch box. This is where the safety key and start button send the signal to the motor.
Reinsert the safety key and feel whether it seats fully and firmly. A loose or worn key often breaks the circuit without you realizing it.
With the power still disconnected, unscrew the switch box cover and peek inside. Look for loose wiring, corrosion, or a stuck button. A faint burnt smell points to a failed switch.
Wiggle the connections gently. If a wire slips free easily, you’ve likely found the fault. Reseat any loose connectors and clean light corrosion with a small brush before testing again.
Step 4 – Test the Fuse and Reset Button
Many electric mowers include a fuse or a thermal overload reset button that protects the motor from damage. When the mower overheats or draws too much current, these cut the power on purpose.
Find the reset button, usually a small raised tab near the motor housing or switch box. Press it firmly until you feel a click, then try the mower again.
If your model uses a fuse instead, locate it and check it with your multimeter. A blown fuse shows no continuity and needs a matching replacement.
Don’t ignore why the protection tripped. Repeated overloads usually mean grass buildup or a struggling motor, so address the root cause rather than resetting again and again.
Step 5 – Clear Grass Buildup From the Deck and Vents
Thick, matted grass is a quiet troublemaker. It chokes the blade, blocks airflow, and forces the motor to overheat.
With the power disconnected, tip the mower on its side, keeping the motor housing facing up. You’ll likely see a packed layer of damp clippings clinging to the underside of the deck.
Scrape it away with a putty knife or stiff brush until the metal shows through. The smell of fresh-cut grass will fill the air as you work.
Don’t forget the vent slots on the motor housing. These let cooling air reach the motor, and when they clog, the thermal overload trips fast. Brush them clean so air flows freely and your mower runs cooler.
Step 6 – Examine and Replace the Blade if Needed
A worn or bent blade strains the motor and leaves a ragged cut. While the mower is tipped over, take a close look.
Slip on your gloves and run a careful eye along the cutting edge. Nicks, deep dents, or a dull, rounded edge all signal trouble. Hold a straightedge across it to spot any bend.
To remove the blade, brace it with a block of wood and loosen the center bolt with your socket. It’ll break free with a firm turn.
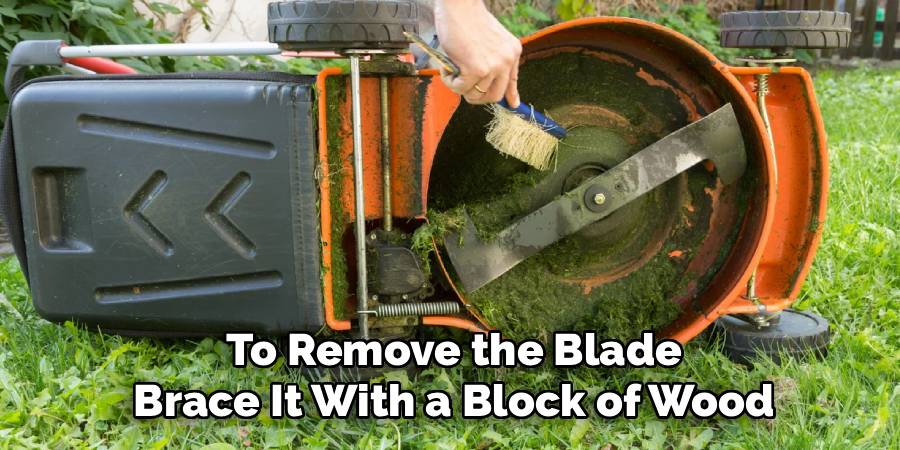
Install a sharp replacement blade in the same orientation, then tighten the bolt snugly. A clean, balanced blade cuts grass cleanly and eases the load on your brushless motor, helping the whole machine last longer.
Step 7 – Inspect the Motor and Internal Wiring
If the basics check out and the mower still struggles, open up the motor area. Unplug everything and remove the screws holding the upper housing.
Look closely at the wiring leading to the motor. Frayed insulation, loose terminals, or a dark, scorched patch all point to an electrical fault. A faint smell of burnt plastic confirms it.
Gently tug each connector to confirm it’s secure, and reseat any that feel loose. Use your multimeter to check for continuity across the motor terminals.
If the motor is seized, smells burnt, or shows no reading, it may need professional repair or replacement. Knowing how to fix electric lawn mower wiring issues handles most faults, but a dead motor is one limit worth respecting.
Step 8 – Reassemble and Test Your Repair
You’re in the home stretch. Put everything back together in the reverse order you took it apart.
Reattach the switch box cover, secure the deck, and double-check that every screw is snug. Make sure no wires are pinched and that the blade bolt is tight.
Reinsert the safety key and reconnect the power, plugging the cord back in or clicking the battery pack into place. Stand clear of the blade, then press the start button.
Listen for a smooth, steady hum rather than a stutter or grinding sound. Let it run for a minute and watch for any heat or unusual noise. If it runs strong, you’ve fixed it. Take it to the lawn for a real-world test pass.
Critical Mistakes to Avoid When Fixing an Electric Lawn Mower
A few common slip-ups can turn an easy repair into a dangerous or costly one, so let’s head them off early.
The biggest mistake is working on the mower with the power still connected. People assume an off switch is enough, but a stray bump can start the motor. Always unplug the cord or pull the battery pack, and remove the safety key before your hands go near the blade.
Another frequent error is ignoring grass buildup. Beginners chase electrical faults while a thick mat of clippings quietly overheats the motor and trips the thermal overload again and again. Clean the deck and vent slots first, since this alone fixes many problems.
Many folks also force the blade bolt or reinstall the blade upside down. A backward blade won’t cut and strains the motor, while overtightening can warp the deck. Note the blade’s orientation before removal and tighten to a firm, sensible snug.
Finally, don’t skip testing the extension cord. A damaged cord mimics a broken mower perfectly, sending people to replace expensive parts when a five-dollar cord was the real culprit. Test the power source before tearing into the machine.
Expert Tips
A few smart habits make your repairs cleaner and keep your mower healthy between fixes.
First, clean the deck and vent slots after every few mows, not just when something breaks. A quick brush-down prevents the overheating that causes most electric mower failures.
Second, store your battery pack and charger somewhere cool and dry. Heat and damp shorten battery life fast, and a healthy pack saves you the cost of an early replacement.
Third, keep a spare fuse and a sharp replacement blade on hand. When a repair strikes mid-season, having parts ready means minutes of downtime instead of days.
Finally, coil your extension cord loosely and avoid running it over the cutting path. Cord damage is one of the most common and most preventable mower faults out there.
Frequently Asked Questions
Why won’t my electric lawn mower turn on at all?
Start with the power supply, since that’s the usual cause. Check these in order:
- A tripped breaker at your electrical panel
- A damaged or unplugged extension cord
- A loose or missing safety key
- A drained or poorly seated battery pack
If power reaches the mower and it still won’t start, inspect the switch box and reset button next.
How do I know if the motor is bad or just overheated?
An overheated motor usually shuts off mid-mow, then restarts once it cools or after you press the reset button. A bad motor won’t run at all, may smell burnt, or shows no continuity on a multimeter. Clean the vent slots and clear grass buildup first, since overheating is far more common and much cheaper to fix than a failed motor.
Can I fix a frayed power cord myself?
You can replace a cord, but you shouldn’t patch a frayed one with tape. Damaged insulation is a shock and fire risk. Cut off the bad section and install a proper replacement plug or cord, or swap the entire extension cord. If the damage is inside the mower’s wiring, replace the section fully and test continuity with a multimeter before use.
How often should I sharpen or replace the blade?
Sharpen the blade once or twice each mowing season, depending on how much you mow. Replace it when you see deep nicks, bends, or a rounded edge that tears grass instead of slicing it. A dull blade strains the motor and leaves a ragged, brown-tipped lawn, so keeping a sharp edge protects both your grass and your machine.
Why does my mower keep tripping the breaker?
A repeated tripped breaker usually means the mower draws too much current. Common causes include thick grass buildup, a worn blade forcing the motor to strain, or a wet lawn overloading the motor. Clear the deck and vent slots, install a sharp blade, and mow dry grass. If it still trips on a clean machine, suspect a motor or wiring fault.
Conclusion
A stubborn electric mower rarely means it’s time for a new one. As you’ve seen, most faults trace back to simple causes like a tripped breaker, a damaged extension cord, clogged vent slots, or a worn blade.
Always start with safety by disconnecting the power and pulling the safety key. Then work from the easy fixes outward, checking the power source, switch box, reset button, and fuse before opening up the motor housing. Clearing grass buildup and swapping a tired blade solves a surprising number of problems on their own.
Steer clear of the common traps, like working with the power live, ignoring clogged decks, or skipping the cord test, and your repairs will go smoothly every time.
Now that you know how to fix electric lawn mower problems, you’ve saved yourself a service bill and gained real confidence with your equipment. Grab your tools, clear a little workspace, and get that mower humming across the grass again. Your lawn, and your wallet, will thank you.