

You sling your bag over your shoulder, take one step, and suddenly the whole thing drops to the floor. The strap has given out, dangling by a few loose threads or a snapped buckle. It’s annoying, but that pack is far from done.
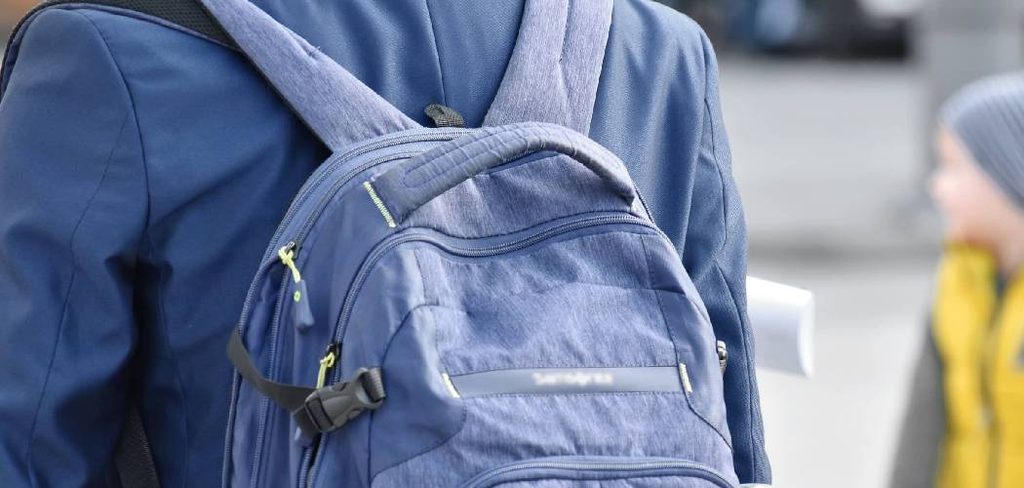
Here’s the reassuring part: most strap failures are quick fixes you can handle at your own table in under an hour. You don’t need a sewing machine or a pricey replacement. Knowing how to fix broken backpack strap problems takes only a few basic supplies and a little patience.
In this guide, you’ll walk through every step to secure that strap, reinforce the weak spots, and get your backpack ready to carry your gear again with confidence.
Why Fixing a Broken Backpack Strap Matters
A backpack strap carries the full weight of everything you pack, so it takes constant strain every time you lift, twist, or shift your load. Once the webbing frays or the stitching pulls loose, that weakness only grows with each trip.
For homeowners and renters, a fast repair saves a trusted bag from the trash and spares you the cost of buying new. For DIY enthusiasts, it’s a transferable skill that works on duffels, purses, and tool bags too.
Campers and outdoor beginners feel the stakes most of all. A strap that snaps miles from the trailhead leaves you hauling heavy gear by hand or improvising in the cold. Solid seam repair and reinforcement at every load-bearing point keep your pack secure when you need it. A few minutes of work protects your comfort, your gear, and your budget.
Tools and Materials You’ll Need
Gather everything before you sit down, so you’re not searching for supplies with a needle in hand. Most of these items cost little and likely live in a basic repair kit or a nearby craft store.
- Heavy-duty thread, like upholstery or bonded nylon, for strength
- A sturdy hand-sewing needle sized for thick webbing
- Sharp scissors for trimming any frayed end
- A lighter or match to seal cut nylon strap edges
- Replacement buckle or strap webbing if the original is destroyed
- A fabric patch for backing weak or torn spots
- Strong straight pins or clips to hold layers in place
- A thimble to push the needle through stiff layers
- A leather sewing awl (optional, but it punches clean holes through thick webbing fast)
That awl is a small convenience that turns stubborn, dense straps into an easy job, especially near reinforced load-bearing points.
Step-by-Step Guide on How to Fix Broken Backpack Strap
Work through these eight steps in order, and resist the urge to rush the prep. Clean edges and tight, well-placed stitches separate a repair that lasts for years from one that fails on your next outing.
Step 1 – Inspect the Damage Closely
Lay your backpack flat under bright light and study exactly what went wrong. Did the webbing tear, did the stitching unravel at a seam, or did a plastic buckle crack under pressure? The type of failure decides your whole approach.
Run your fingers along the strap and tug gently to find loose threads and weak spots you might have missed. A clean break at a seam usually calls for fresh stitching, while shredded webbing may need a replacement section or a backing patch.
Learning how to fix broken backpack strap damage starts with this honest look. Spend a minute matching the right method to the problem, because guessing wrong means tearing out your work and starting over.
Step 2 – Clean Up the Frayed End
Before you stitch a single thread, tidy the mess around the break. Use your sharp scissors to trim away any loose, fuzzy fibers and square off each frayed end of the webbing.
Cut carefully and only where needed, since you want a neat edge rather than a shorter strap. Pull stray threads gently first to see how far they run before you snip.
If your strap is nylon, run a lighter flame quickly along the cut edge to melt and seal the fibers. You’ll smell that faint plastic scent and watch the threads fuse into a firm, smooth bead. This sealed edge stops future fraying and gives your needle a clean, solid surface to work against.
Step 3 – Line Up the Strap Ends or New Webbing
Now position the pieces the way they need to sit when finished. For a torn strap, overlap the two ends by at least an inch so they share the load across a wide area.
If the original webbing is shredded beyond saving, cut a fresh length of nylon strap and overlap it onto the surviving anchor point. Match the width exactly so it threads through buckles and slots without binding.
Hold the layers together and feel for any twists, since a twisted strap digs into your shoulder all day. Press everything flat with your fingers and check the alignment from both sides. Getting this overlap straight now makes the stitching far stronger and keeps your pack riding comfortably.
Step 4 – Pin or Clip the Layers Tight
With the ends lined up, lock them in place before you sew. Push strong straight pins through the overlap, or snap sturdy clips along the edges to keep the webbing from shifting.
Webbing is slippery and thick, so loose layers slide apart the moment your needle pushes through. Space your pins close together and smooth the strap flat with your palm as you go.
Tug the strap lightly to confirm the pieces hold their position under a little tension. If anything slips, reset the pins until the overlap stays put. This quick step feels minor, but it keeps your stitch lines straight and even, which means a stronger repair that won’t twist or pucker when you load up the bag.
Step 5 – Stitch the Strap With a Box-X Pattern
Thread your needle with about two feet of heavy-duty thread, then knot the end firmly. Start from the back so the knot hides against the inside of the strap.
Sew a square around the overlapped section, then stitch an X across the middle, connecting the corners. This box-X pattern spreads the strain across the whole overlap and grips far better than a simple straight line.
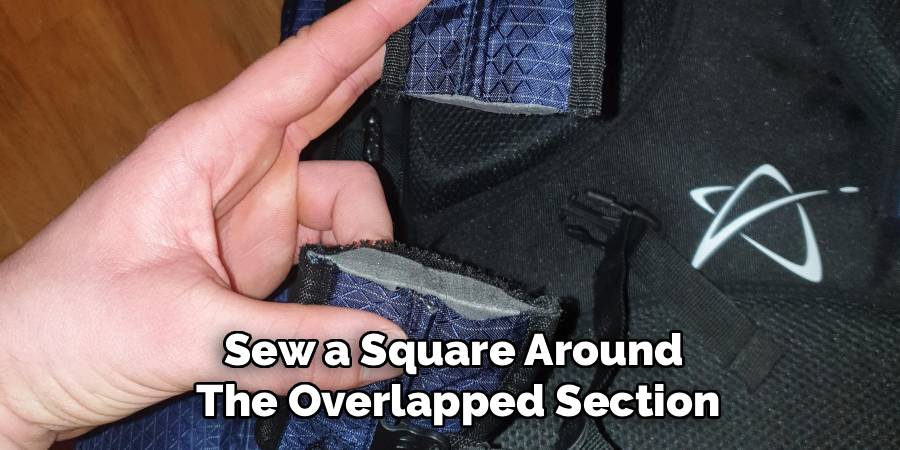
Push the needle slowly through the thick layers and let your thimble take the pressure. Keep your stitches tight and even, pulling each one snug without bunching the webbing. Go around the box and X twice for real holding power. When you tie off, run the thread under the stitches and knot it twice so it can’t work loose.
Step 6 – Add a Bar Tack at the Load-Bearing Point
The spot where the strap meets the pack body takes the most force, so give it extra muscle. A bar tack is a tight cluster of stitches packed side by side across the webbing, and it’s what factory straps use at every high-stress point.
Stitch back and forth across the strap in the same short span, laying ten or more passes right next to each other. Then make a few stitches across that bundle to lock it down.
You’ll feel the strap stiffen into a solid, dependable block under your fingers. This reinforcement at the load-bearing point stops the seam from peeling apart when you hoist a full pack. It’s the single best upgrade you can add to any strap repair.
Step 7 – Reinforce With a Fabric Patch if Needed
If the webbing tore where it joins a thin section of pack fabric, stitching alone may not hold. Cut a fabric patch from heavy material that reaches at least an inch past the damage on every side, and round the corners so they won’t peel.
Slide the patch behind the weak area, pin it flat, and stitch around all four edges with small, even passes. The patch spreads stress across a wider surface and backs up the spot where the material is thinnest.
For a heavy hiking pack or a daily commuter bag, this extra layer turns a quick fix into one that truly survives years of loading and unloading. Press it flat and check that it lies smooth against the pack.
Step 8 – Test the Repair Under Load
Patience pays off at the finish. Before you trust the bag with anything valuable, load it gradually and watch your work closely.
Start with a few light items, sling the pack on, and feel how the strap sits across your shoulder. Add more weight in stages, pausing to inspect the stitches and tug the seam for any sign of slipping or stretching.
Run your finger over the box-X and bar tack to confirm they stay tight and flat. If a stitch loosens, reinforce it now rather than out on the trail. Knowing how to fix broken backpack strap issues means trusting your repair completely. Once it holds a full load without budging, your backpack is ready to carry your gear again.
Critical Mistakes to Avoid When Fixing a Broken Backpack Strap
Even careful beginners stumble over a few common traps, so let’s clear them up before you start.
The biggest mistake is using weak thread. Regular all-purpose thread snaps under the heavy strain a loaded strap creates, and your repair fails fast. Always reach for heavy-duty bonded nylon or upholstery thread that can shoulder the weight you carry.
Another frequent slip is skipping the bar tack at the load-bearing point. A plain straight stitch line peels apart under pressure because all the force lands on the end threads. Pack your stitches tight at that high-stress spot so the strain spreads evenly.
Many people also forget to seal a cut nylon strap. Leave the frayed end raw and it keeps unraveling until your fresh stitching pulls loose again. A quick pass with a lighter melts the fibers and locks them down.
Rushing the alignment causes trouble too. A twisted or uneven overlap digs into your shoulder and weakens the seam, so smooth everything flat before you sew. Finally, don’t trust a fresh repair with a full load right away. Test it gradually, because a strap that fails on the trail beats a strap that fails at your table.
Expert Tips
A few smart habits turn a decent fix into one that lasts for seasons.
First, always match new webbing to the exact width of your old strap. Even a slight mismatch binds in buckles and slots, making the pack awkward to adjust.
Second, copy the factory’s stitch patterns. Look at how the manufacturer reinforced other straps on the bag, then mirror that box-X and bar tack work where you repair.
Third, double every stitch line on high-stress sections. The extra pass costs you only a couple of minutes and adds serious durability at the points that strain first.
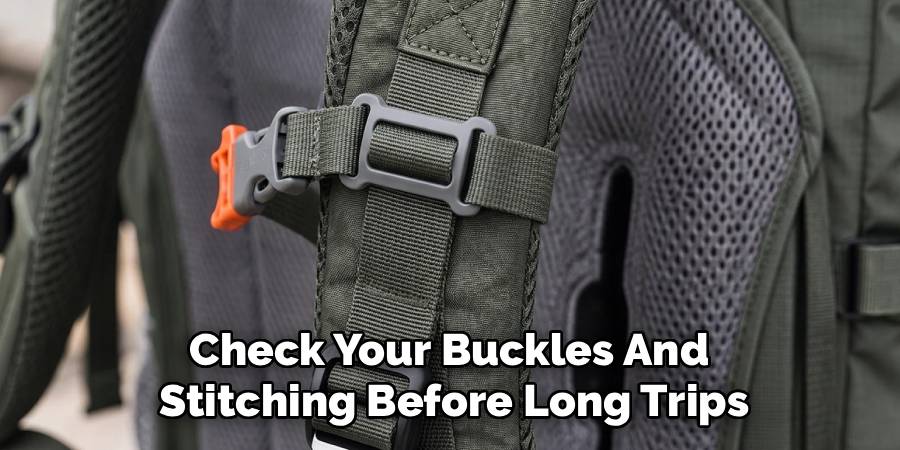
Finally, build outdoor gear care into your routine. Check your buckles and stitching before long trips, store packs loosely instead of crammed, and seal any small frayed end the moment you spot it. Catching trouble early means a quick fix instead of a stranded afternoon.
Frequently Asked Questions
Can I fix a broken backpack strap without sewing?
Yes, several no-sew options work well for quick fixes. Your choice depends on the damage:
- Broken buckle: snap on a replacement side-release buckle in the matching width
- Torn webbing: join the ends with strong fabric glue plus heavy-duty tape
- Worn anchor point: clamp the layers with a strap repair rivet
Just seal any frayed end first, and these methods handle most everyday strap failures without a needle.
What thread is strong enough for a strap repair?
Reach for bonded nylon or polyester upholstery thread, since both resist snapping under heavy loads. Regular sewing thread is far too thin for the strain a strap carries and will fail quickly. For very heavy packs, use a thicker waxed thread that grips tightly. Always stitch a box-X pattern and a bar tack at the load-bearing point so the strength spreads across the whole repair.
How do I keep nylon webbing from fraying?
Seal every cut edge with heat. Run a lighter or match flame quickly along the trimmed end until the fibers melt into a smooth, firm bead. Don’t hold the flame too long, or the nylon scorches and turns brittle. This melted edge stops the strap from unraveling and gives your needle a solid surface to stitch through. Reseal any spot that starts fraying again during future outdoor gear care checks.
Can I replace just the buckle instead of the whole strap?
Often, yes. If the webbing is healthy and only the buckle cracked, a swap is the easiest fix of all. Measure your strap’s exact width, then buy a matching side-release or ladder-lock buckle. Slide the old one off if the strap end is open, or cut, rethread, and reseal the end to fit the new piece. Test the click and tug firmly before loading the pack.
Will my repaired strap hold heavy weight?
A properly stitched strap with a box-X pattern and a bar tack at the load-bearing point handles heavy loads reliably. The key is heavy-duty thread, tight even stitches, and a doubled stitch line. Test the repair gradually by adding weight in stages and checking for slipping. A backing fabric patch adds even more strength on thin spots, so your pack carries gear with full confidence.
Conclusion
Repairing a failed strap feels intimidating until you break it into simple steps. You’ve seen that success comes down to clean prep, tight alignment, and strong stitches reinforced exactly where the load lands hardest.
Start by inspecting the damage and cleaning up the frayed end, then line up the webbing, pin it tight, and sew a box-X pattern. Add a bar tack at the load-bearing point, back up thin spots with a fabric patch, and test the repair under real weight before you trust it. Respect those steps, sidestep the common mistakes, and your strap will hold strong trip after trip.
A little regular outdoor gear care, like checking your buckles and stitching before each adventure, keeps small snags from becoming stranded moments. Once you’ve mastered how to fix broken backpack strap problems, you’ve gained a skill that protects your favorite pack, your gear, and your wallet.
So gather your supplies, clear a flat surface, and get to work. Your backpack will be ready for the next journey in no time.