

You sling your pack over your shoulder, press the clasp together, and hear that sad little click that never quite locks. A broken buckle is one of the most frustrating gear failures because it strikes at the worst moment, usually right as you’re loading up for a trip.
Here’s the good news. You don’t need to toss the whole bag or pay for a repair shop. Most buckle problems come down to a cracked side-release buckle, a worn ladder lock, or a frayed webbing strap, and each one fixes up quickly at your kitchen table.
Learning how to fix backpack strap buckle issues takes a few cheap supplies and about twenty minutes. This guide walks you through every step to replace the hardware, re-thread the strap, and get your pack riding securely again.
Why Repairing a Backpack Strap Buckle Matters
That little plastic clasp carries more weight than you’d guess. It keeps your load balanced on your shoulders and stops the pack from sliding around with every step.
For homeowners and renters, a fast fix rescues a favorite bag from the trash and keeps your money where it belongs. For DIY enthusiasts, the same skills transfer straight to dog leashes, luggage, and tactical gear with similar pack hardware.
Campers and outdoor beginners feel the difference most. A failed buckle on the trail means a sagging pack, sore shoulders, and gear shifting with every mile. Reliable strap tension keeps you comfortable and steady on long days outside. Spending a few minutes on backpack repair now protects your gear, your back, and your whole trip. Once you know the basics, a broken clasp becomes a minor hiccup instead of a ruined outing.
Tools and Materials You’ll Need
Gather everything before you start, so you’re not scrambling mid-repair. Most of these items cost little and probably already sit in a drawer or basic toolkit.
- A replacement buckle that matches your strap width (measure first)
- Sharp scissors for trimming frayed nylon strap ends
- A lighter to seal cut webbing so it won’t unravel
- Heavy-duty thread, like bonded nylon, if you need to sew
- A sturdy hand-sewing needle sized for thick webbing strap
- A measuring tape to confirm strap width and length
- Pliers to grip and feed stiff webbing through tight slots
- A seam ripper to remove old stitching cleanly
- A small clamp or binder clip (optional, but it holds the strap steady while you work)
That clamp is a small luxury that frees up both hands when you’re feeding a stubborn webbing strap through a new side-release buckle.
Step-by-Step Guide on How to Fix Backpack Strap Buckle
Work through these eight steps in order, and don’t rush the measuring. A buckle that matches your strap width turns a quick swap into a repair that holds trip after trip.
Step 1 – Identify the Buckle Type and Damage
Lay your pack flat under good light and study the failed hardware closely. Is it a side-release buckle with a snapped prong, a cracked ladder lock, or a clasp that simply won’t grip the webbing anymore?
Press the two halves together and feel where they fail. A cracked prong usually means the whole buckle needs replacing, while a slipping strap often points to a worn ladder lock.
Knowing how to fix backpack strap buckle problems starts with this honest look. Match the repair to the actual fault, because guessing wrong wastes time and money on the wrong part. Note the buckle’s shape and any branding stamped into the plastic, since that helps you find an exact replacement buckle later.
Step 2 – Measure the Webbing Strap Width
Before you buy anything, measure carefully. Pull the strap flat and lay your tape across it to find the exact webbing width, usually three-quarters of an inch, one inch, or one and a half inches.
Write the number down and double-check it, since a buckle that’s even slightly too wide will let the strap slip loose under load. Too narrow, and it simply won’t thread through.
Run your fingers along the webbing strap to feel for thinning or fraying near the old buckle. That spot may need trimming and resealing before you reattach the hardware. Getting this measurement right is the single most important step, because the correct fit determines whether your repair grips firmly or fails on the first hike.
Step 3 – Remove the Broken Buckle
Now free the damaged hardware from the strap. If the buckle slides on, simply pull the webbing back through the slots, peeling it loose with your fingers or a pair of pliers for stiff sections.
Some buckles are sewn permanently in place. For those, slide your seam ripper under the stitching and lift gently, working along the line until the thread releases.
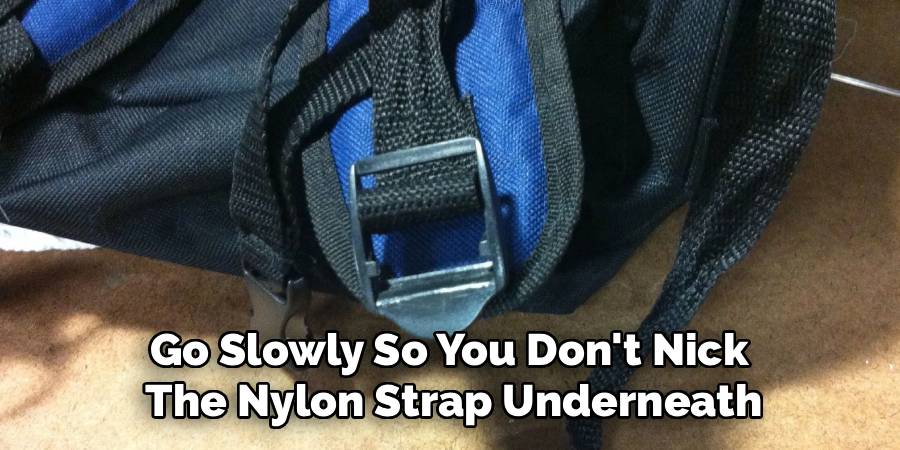
Go slowly so you don’t nick the nylon strap underneath. Brush away the loose threads and set the old broken clasp aside. You’ll feel the strap relax once the hardware comes free. Take a quick photo before you fully remove it, so you remember exactly how the webbing was routed through the original buckle.
Step 4 – Trim and Seal the Strap End
Inspect the freed end of the webbing strap. If it’s frayed, curled, or melted into a hard lump, trim it back with sharp scissors until you reach clean, flat material.
Cut straight across so the end feeds smoothly through the new slots. A ragged edge snags and bunches, making the strap nearly impossible to thread.
Pass a lighter flame quickly along the fresh cut. You’ll catch that faint plastic scent as the nylon fibers melt into a smooth, firm bead that won’t unravel. Don’t hold the flame too long, or the webbing scorches and turns brittle. Let it cool for a few seconds, then pinch the edge flat. This sealed, tidy end slides easily into your replacement buckle.
Step 5 – Thread the New Buckle
Take your replacement buckle and feed the sealed strap end through it, matching the routing from your earlier photo. Most side-release buckles use a simple loop-back pattern that locks the webbing in place once tension pulls against it.
Push the strap through the first slot, around the center bar, and back through the second slot. Use pliers to grip and pull stiff webbing through tight openings.
Tug the strap firmly and watch how the buckle bites down. You want the webbing snug with no slack pooling behind the bar. A correct thread path is what gives you reliable strap tension, so the buckle holds without slipping when you load your pack. Adjust the routing until it sits flat and clean.
Step 6 – Secure the Strap End
A threaded buckle still needs anchoring so the webbing can’t slip back out under weight. For an adjustable strap, fold the loose tail back through the ladder lock and pull it snug, which locks the tension automatically.
For a fixed strap, you’ll sew the end down. Thread your needle with about two feet of heavy-duty bonded nylon thread, knot it firmly, and stitch a tight box pattern through both layers of webbing.
Push the needle slowly and let pliers help on stubborn passes. Sew an X inside the box for extra grip, then knot twice and tuck the tail. You’ll feel the layers lock solid under your fingers. This anchor is what keeps the strap from creeping loose mile after mile.
Step 7 – Test the Buckle Under Load
Patience pays off here. Snap the two halves together and listen for a firm, satisfying click that tells you the side-release buckle has fully engaged.
Then tug hard on both ends of the strap, pulling as if you’re hauling a heavy load. Watch for any slipping at the buckle or shifting in your stitches. The webbing should stay locked and flat without creeping.
Press the release tabs and confirm the buckle pops open smoothly, then clicks shut again every time. Run your finger along the threaded path to check nothing bunches or twists. If anything slips, re-thread or reinforce it now rather than out on the trail, where a field repair is far harder.
Step 8 – Load the Pack and Adjust the Fit
Now put it all to work. Fill your pack with its usual gear, sling it on, and tighten the adjustable strap until the load sits snug against your back.
Walk around, twist, and bend to mimic real trail motion. Feel whether the strap holds its tension or slowly loosens with movement. A good repair keeps the pack steady without you constantly cinching it.
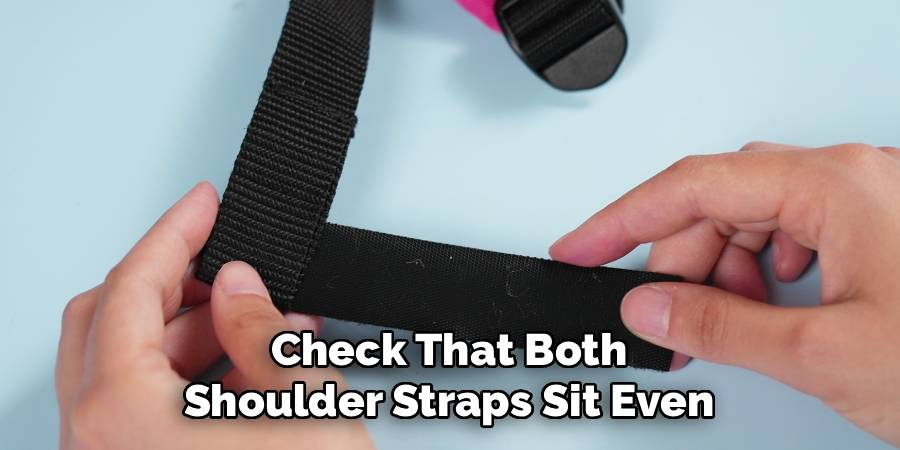
Check that both shoulder straps sit even, since an uneven fit throws off your balance and tires you faster. Slide the ladder lock up or down to fine-tune the length. Once the buckle grips firmly through every move, your repair is ready, and your outdoor gear is set for the next adventure.
Critical Mistakes to Avoid When Repairing a Backpack Strap Buckle
Even careful beginners stumble over a few common traps, so let’s clear them up before you start.
The biggest mistake is buying the wrong buckle size. A clasp that’s even slightly too wide lets the webbing slip under load, while one that’s too narrow won’t thread at all. Always measure your strap width twice before ordering a replacement buckle.
Another frequent slip is leaving the cut webbing raw. Skip sealing the end with a lighter, and the nylon frays steadily until the strap bunches and refuses to feed through the slots. A quick pass of heat melts the fibers and locks them down.
Many people also thread the buckle backward, ignoring the original routing. A wrong thread path won’t hold tension, so the strap creeps loose with every step. Snap a photo before removing the old hardware, and copy that pattern exactly.
Rushing the test is another trap. Snapping the buckle once and calling it done skips the real check. Pull hard on both ends and load the pack before you trust it. Finally, don’t sew with thin all-purpose thread on fixed straps. It snaps under strain, so always use heavy-duty bonded nylon for a repair that lasts.
Expert Tips
A few smart habits turn a decent fix into one that lasts for seasons.
First, keep spare buckles on hand. Order a small assortment in common strap widths, so you’re never stuck waiting when a clasp cracks before a big trip. Cheap insurance for your gear maintenance kit.
Second, choose quick-release buckles with metal pins for high-stress straps. They cost a little more than plastic, but they shrug off cold, impact, and heavy loads far better.
Third, carry a basic field repair kit when you head out. A spare side-release buckle, a few zip ties, and a length of cord can save a trip when hardware fails miles from home.
Finally, build buckle checks into your routine. Inspect the clasps and webbing before long trips, brush out grit that grinds the plastic, and replace any cracked part the moment you spot it. Catching trouble early keeps a quick swap from becoming a stranded afternoon.
Frequently Asked Questions
Can I fix a backpack buckle without replacing it?
Sometimes, yes, depending on the damage. Your options vary by problem:
- Slipping strap: clean grit from the ladder lock and re-thread the webbing tightly
- Stuck release: rinse out dirt and apply a tiny dab of silicone lubricant
- Cracked prong: this can’t be repaired, so swap in a replacement buckle
For anything structural, replacing the buckle is faster and far more reliable than patching it.
How do I know what size replacement buckle to buy?
Measure your webbing strap width with a tape, pulling the strap flat first. Common sizes are three-quarters of an inch, one inch, and one and a half inches. Match the buckle to that exact width, since even a small mismatch lets the strap slip or won’t thread through. When unsure, measure twice and order the closest standard size, then test the fit before trusting it with a heavy load.
What’s the difference between a side-release and a ladder lock buckle?
A side-release buckle has two halves that snap together and pop apart with a squeeze, perfect for opening and closing a strap quickly. A ladder lock is a single piece that grips webbing to set and hold length, so it handles adjustment rather than release. Many packs use both: a side-release buckle to connect the strap and a ladder lock to fine-tune the fit.
How do I stop nylon webbing from fraying after I cut it?
Seal the cut end with heat. Pass a lighter flame quickly along the trimmed edge until the nylon fibers melt into a smooth, firm bead. Don’t hold the flame too long, or the webbing scorches and turns brittle. Let it cool, then pinch it flat. This melted edge stops fraying and slides cleanly through your buckle slots. Reseal any spot that starts unraveling during regular gear maintenance.
Will a repaired buckle hold up on long hikes?
A properly matched and threaded buckle handles serious trail use reliably. The keys are a correctly sized replacement buckle, the original thread path, and a firm load test before you leave. For fixed straps, anchor the webbing with heavy-duty stitching. Add occasional gear maintenance, like rinsing grit and checking for cracks, and your repaired strap will carry your load confidently for many trips to come.
Conclusion
Fixing a broken buckle feels intimidating until you break it into simple steps. You’ve seen that success comes down to matching the right hardware, threading it correctly, and testing it under real weight before you trust it.
Start by identifying the buckle type and measuring your strap width, then remove the broken clasp, trim and seal the webbing, and thread the new buckle along its original path. Secure the strap end, test it under load, and load the pack to fine-tune the fit. Respect those steps, sidestep the common mistakes, and your strap will hold strong outing after outing.
A little regular care, like checking clasps and brushing out grit before each trip, keeps small cracks from becoming bigger problems. Once you’ve mastered how to fix backpack strap buckle damage, you’ve gained a skill that protects your favorite pack, your comfort, and your wallet.
So grab your supplies, clear a flat surface, and get to work. Your backpack will be ready for the next adventure in no time.