

That little knob or lever that sends water from your tub spout up to the showerhead seems simple, until it stops working. Maybe water keeps dribbling from the spout while you shower, or the switch feels stiff and refuses to budge. Annoying, right? The good news is that you don’t need to call a pro for most of these problems. Learning how to repair shower diverter issues is one of the easiest plumbing wins for a beginner, and it usually takes less than an hour.
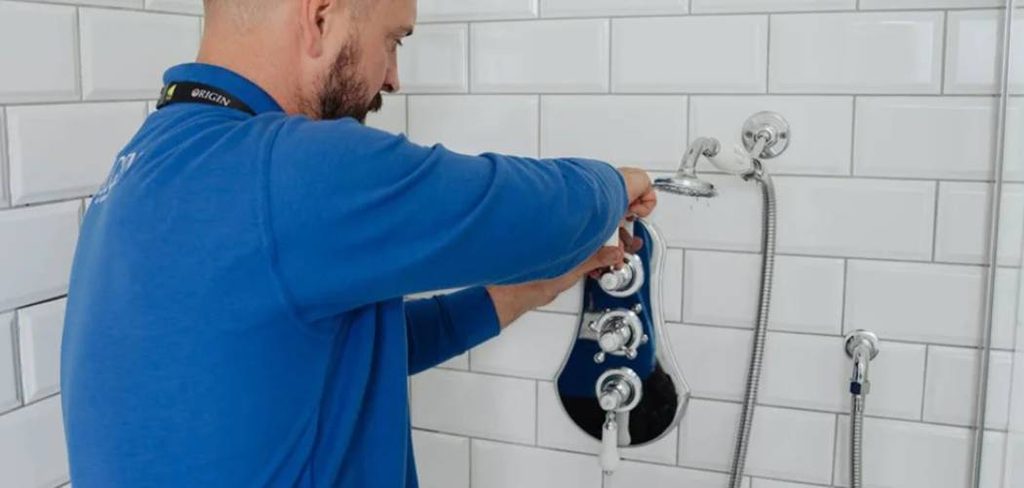
In this guide, you’ll learn what causes diverter trouble, which tools to grab, and exactly how to fix it step by step. By the end, you’ll feel confident tackling the repair yourself and getting strong, leak-free showers again.
Why Learning Shower Diverter Repair Matters
Picking up this skill pays off fast. A plumber visit for something this small can cost you $100 or more, and you’ll often wait days for an appointment. Doing it yourself turns a frustrating problem into a quick afternoon task.
There’s a money angle beyond the service call, too. A faulty diverter wastes water, since half your flow leaks out the tub spout instead of reaching the showerhead. Over weeks, that adds up on your water bill.
For renters and homeowners alike, this kind of small fix builds real confidence. Once you understand how a shower valve and diverter work together, you’ll feel ready to handle other minor repairs around the house. It’s the perfect starter project for anyone new to DIY.
Tools and Materials You’ll Need
Gather everything before you start so you’re not running to the hardware store mid-job. Most of these items are cheap and probably already in your toolbox.
- Adjustable wrench or channel-lock pliers
- Flathead and Phillips screwdrivers
- Plumber’s tape (Teflon tape)
- Replacement diverter or cartridge (match your model)
- White vinegar and an old toothbrush for cleaning mineral buildup
- A clean rag or towel
- Penetrating oil for stuck parts
- Allen wrench set (for some handle screws)
- A small bucket or container for loose pieces
- Optional: A smartphone to snap photos as you disassemble, making reassembly painless
A quick tip: bring your old part to the store to match it exactly. Diverters vary widely between brands.
Step-by-Step Guide on How To Repair Shower Diverter
Step 1 – Shut off the water supply
Start by turning off the water so you don’t get sprayed. Some bathrooms have a dedicated shut-off valve behind an access panel, often near the tub or in an adjacent closet. If you can’t find one, head to your home’s main shut-off and close it there.
Once the water’s off, open the shower handle to drain any pressure still sitting in the lines. You’ll hear a brief gurgle, then silence. Lay a towel down to catch drips and protect the tub surface.
This step feels minor, but skipping it is the fastest way to flood your bathroom. Take the extra two minutes now and save yourself a soggy mess later.
Step 2 – Identify your diverter type
Not all diverters look alike, so figure out which kind you have before going further. The most common is the tub spout type, where you lift a small knob on top of the spout to send water upward.
Others use a third handle on the wall or sit inside the main shower valve as part of the cartridge. Look closely and give each part a gentle wiggle to see what moves.
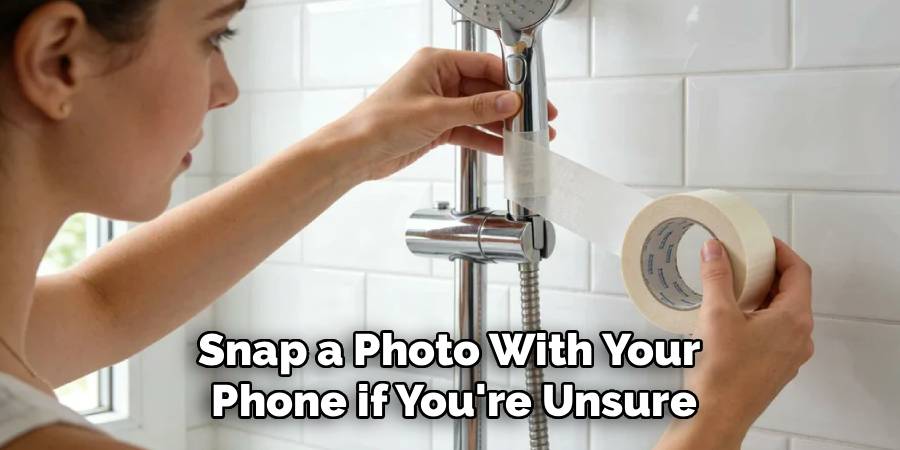
Snap a photo with your phone if you’re unsure. Knowing your type tells you whether you’ll replace the whole spout, a separate handle, or an internal cartridge. Getting this right saves a wasted trip to the store.
Step 3 – Remove the tub spout or handle
For a spout-style diverter, check underneath for a small set screw. If you spot one, loosen it with an Allen wrench, then slide the spout straight off. No screw? Then it threads on, so grip it with a rag-wrapped wrench and turn counterclockwise.
For a handle-style diverter, pop off the decorative cap, unscrew the handle, and set the screws in your bucket so they don’t roll away.
Move slowly here. Old parts can feel stubborn, and forcing them risks cracking the spout or scratching the wall. If something won’t budge, a quick spray of penetrating oil and a five-minute wait usually loosens things right up.
Step 4 – Inspect for damage and mineral buildup
With the part removed, take a good look at what you’re dealing with. Run your finger along the inside and you’ll often feel a gritty, chalky layer. That’s mineral buildup, and it’s the number one reason diverters stick or leak.
Check for cracks, worn rubber washers, or a diverter gate that won’t seat properly. Hold the piece up to the light and rotate it slowly so you can spot hairline damage.
If the part looks corroded or broken, you’ll need a replacement. If it’s just dirty, you can likely clean and reuse it. This quick inspection tells you exactly what comes next, so don’t rush past it.
Step 5 – Clean away buildup with vinegar
If buildup is your culprit, soak the part in white vinegar for about thirty minutes. Pour enough into a small container to fully cover the diverter, and you’ll soon see tiny bubbles forming as the vinegar dissolves the deposits.
After soaking, scrub the gritty spots with an old toothbrush. Pay close attention to moving parts and the small holes where water passes through. You’ll feel the surface go from rough to smooth as the gunk lifts away.
Rinse the piece under clean water and dry it with a rag. This simple cleaning often restores full function and fixes weak water pressure caused by clogged passages. It’s amazing how much a little vinegar can do.
Step 6 – Replace the diverter or cartridge
If cleaning isn’t enough, swap in your new part. For a spout diverter, simply install the new spout. For a cartridge style, pull the old cartridge straight out, noting its exact orientation first.
Slide the replacement in the same direction the old one came out. Push gently until it seats fully; you shouldn’t have to force it. If it resists, back it out and check the alignment rather than shoving harder.
Matching parts matters here, so this is where that old piece you brought to the store earns its keep. A mismatched cartridge won’t seal correctly. Take your time lining everything up, and the new part should settle into place with a satisfying, snug fit.
Step 7 – Apply plumber’s tape and reassemble
Before reattaching a threaded spout, wrap the pipe threads with plumber’s tape. Wind it clockwise three or four times, keeping it snug and flat. This creates a watertight seal and helps prevent a future leak around the connection.
Thread the spout or handle back on by hand first to avoid cross-threading, then tighten with your wrench. Snug is enough; over-tightening can crack fittings or strip threads.
Tuck the rag away and double-check that every screw and cap is back in place. Wiggle the spout gently to confirm it’s secure. Reassembly is basically Step 3 in reverse, so those photos you took earlier make this part quick and stress-free.
Step 8 – Test the repair
Turn the water supply back on slowly and let the pipes refill. Run the tub spout first and watch the flow. Then flip the diverter and listen for water rushing up to the showerhead.
Here’s the key test: with the diverter engaged, almost no water should escape from the spout. A few stray drops are fine, but a steady stream means the seal isn’t right. Run your hand under the spout to feel for leaks.
If everything checks out, you’ve just learned how to repair shower diverter problems on your own. Knowing how to repair shower diverter parts like this means you can spot and fix trouble early next time, long before it gets worse.
Critical Mistakes When Repairing a Shower Diverter
A few common slip-ups trip up beginners, so keep these in mind. The biggest one is forgetting to shut off the water before you start. It sounds obvious, yet plenty of folks loosen a spout only to get blasted across the bathroom. Always confirm the supply is off and pressure is released first.
Another frequent error is buying the wrong replacement part. Diverters and cartridges vary by brand and model, and a part that looks close enough often won’t seal. Bring your old piece to the store and match it exactly, or check your fixture’s model number online.
Over-tightening causes real damage, too. People assume cranking harder means a better seal, but it actually cracks fittings and strips threads. Hand-tighten first, then add just a firm turn with your wrench.

Skipping the plumber’s tape is another mistake that leads to slow leaks behind the wall. That tape costs almost nothing and seals threaded connections reliably.
Finally, don’t ignore mineral buildup elsewhere. If you clean only the diverter and leave a clogged showerhead, your water pressure stays weak and you’ll blame the wrong part.
Expert Tips
A little extra know-how goes a long way. Keep your fixtures running smoothly with these tricks from people who fix them daily.
Soak your showerhead and diverter in vinegar every few months if you have hard water. Regular cleaning stops mineral buildup before it ever causes a stuck diverter.
When you buy a replacement, grab two if they’re cheap. Having a spare on hand saves a future store trip when the next one wears out.
Take photos at every stage of disassembly. Your phone becomes the best instruction manual you’ll ever have for reassembly.
Lastly, label small screws and washers by laying them out in the order you removed them. It’s a tiny habit that prevents that frustrating “what goes where” moment at the end.
Frequently Asked Questions
Why does water still come out of the tub spout when the shower is on?
This usually means your diverter isn’t sealing properly. Common causes include:
- Mineral buildup blocking the diverter gate
- A worn or cracked rubber washer
- A failing cartridge inside the shower valve
Start by cleaning the part in vinegar. If water still leaks heavily from the spout afterward, the diverter or cartridge likely needs replacing. A few stray drops are normal, but a steady stream signals a worn part.
How much does it cost to fix a shower diverter myself?
Doing it yourself is cheap. A replacement diverter or cartridge typically runs $10 to $30, depending on your brand. Plumber’s tape and vinegar cost just a few dollars more, and you may already own the tools. Compare that to $100 or more for a plumber, and the savings are obvious. Matching the right part is the main thing that keeps costs and headaches low.
Can I fix a stuck diverter without replacing anything?
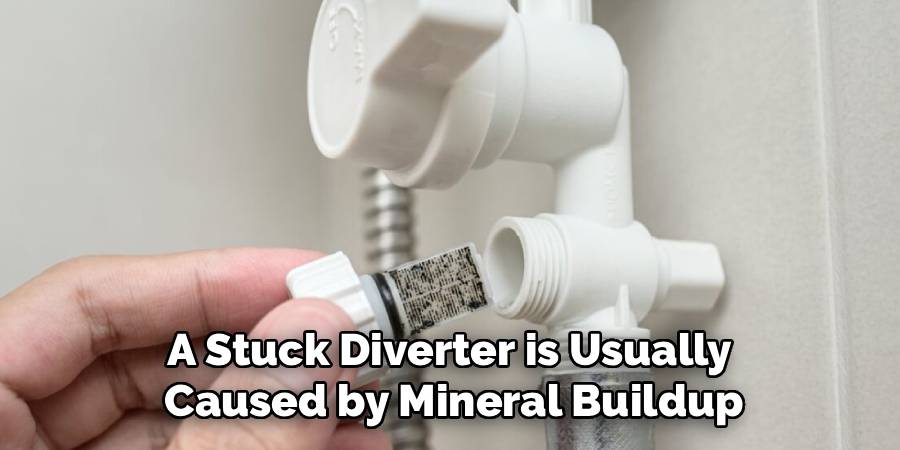
Often, yes. A stuck diverter is usually caused by mineral buildup rather than broken parts. Remove the spout or handle, soak it in white vinegar for about thirty minutes, then scrub away the deposits with an old toothbrush. Rinse, dry, and reassemble. Many people are surprised how well this simple cleaning restores smooth movement and proper water flow without buying a single new part.
Do I need to turn off the main water supply?
Only if you can’t find a closer shut-off. Some bathrooms have a dedicated valve behind an access panel near the tub. If yours does, use it. If not, shutting off the main water supply works just fine. Either way, always open the shower handle afterward to release leftover pressure in the lines before you remove any parts.
How long does a shower diverter last?
It varies, but most diverters last several years before wearing out. Hard water shortens their lifespan because mineral buildup accelerates corrosion and sticking. Soft water and occasional vinegar cleaning can stretch a diverter’s life well past a decade. If yours fails repeatedly in a short time, check your water quality or confirm you’re installing parts that match your fixture correctly.
Conclusion
Fixing a faulty diverter is one of the most satisfying small repairs you can do at home. You’ve seen that most problems come down to two things: mineral buildup or a worn part. Clean the buildup with vinegar, replace anything cracked, wrap your threads with plumber’s tape, and test for leaks. That’s the whole process.
Remember the big rules. Shut off the water first, match your replacement part exactly, and never over-tighten. Those three habits prevent nearly every common mistake.
The best part? You’ve saved money, cut water waste, and built real confidence with your own two hands. Knowing how to repair shower diverter problems means the next time water dribbles from the spout, you’ll fix it in under an hour without a second thought.
So grab your tools, snap a few photos as you go, and give it a try. Your next strong, leak-free shower is closer than you think, and you earned it yourself.