

Does your building’s roof show damp ceiling stains, bubbling spots, or a stubborn puddle that never seems to dry? Those small signs often hint at bigger trouble waiting overhead. The good news is that you can repair commercial roof problems yourself, especially the common leaks and cracks that crop up on flat roofs.
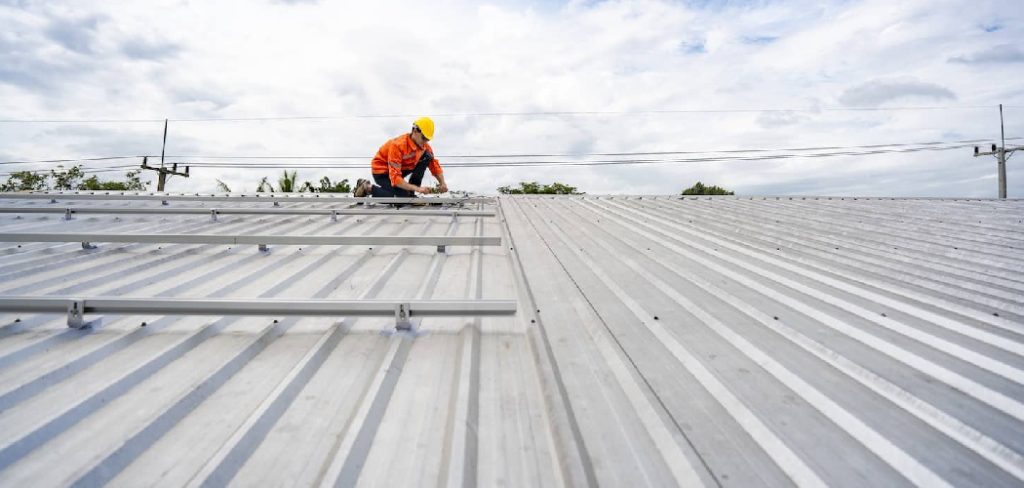
With the right materials and a careful eye, you’ll seal a seam, patch a tear, or recoat a worn area in an afternoon. You don’t always need to call a crew for every blemish. A little know-how goes a long way toward protecting what’s underneath. This guide walks you through the whole process how to repair commercial roof, step by step, so you can find the problem, fix it properly, and keep your roof watertight for years to come.
Why Learning Commercial Roof Repair Matters
A small leak rarely stays small. Water sneaks past the membrane, soaks the substrate, and quietly causes moisture damage long before you spot a stain inside. Catching it early saves you serious money and a much bigger headache later.
For homeowners with workshops, garages, or small business spaces, this skill keeps flat roofs sound without costly callouts. Renters managing a unit can handle minor patches fast. And DIY enthusiasts gain real confidence working with seam tape, roof coating, and flashing.
The same patient approach helps outdoor lovers too. Knowing how to seal seams and read where water pools translates straight to fixing tent flies, RV roofs, and cabin coverings. Once you understand how a flat roof sheds water and where it fails, you’ll spot weak points everywhere and fix them before they spread.
Tools and Materials You’ll Need
Gather everything before you climb up, because a missing tool mid-job means an awkward trip back down the ladder. Here’s what to keep within reach:
- A sturdy utility knife – for trimming membrane, seam tape, and damaged patches
- A stiff broom and rags – to sweep grit and dry the surface fully before sealing
- Roofing cement and a trowel – for filling cracks and bedding patches
- Roofing adhesive or seam tape – matched to your roof type, whether EPDM, TPO, or modified bitumen
- A roller – to press patches flat and squeeze out trapped air
- Roof coating – for resealing worn or sun-baked areas
- Cleaning solvent – to prep the surface so adhesive bonds well
- Work gloves and non-slip shoes – for grip and safety on the roof
- A moisture meter (optional) – handy for pinpointing hidden wet spots in the substrate
Lay it all out on a dry, stable surface.
Step-by-Step Guide on How To Repair Commercial Roof
Step 1 – Inspect the roof and find the damage
Pick a dry, calm day and walk the roof slowly, watching every step. Look for cracks, blistering, lifted seams, and spots where the membrane has pulled away from flashing.
Run your hand lightly over the surface. A soft, spongy feel often means moisture damage hiding in the substrate below. Note any ponding water, since standing puddles point to low spots that fail first.
Trace stains inside the building back to their source overhead, as water often travels before it drips. Mark each trouble spot with chalk so you don’t lose track once you start cleaning.
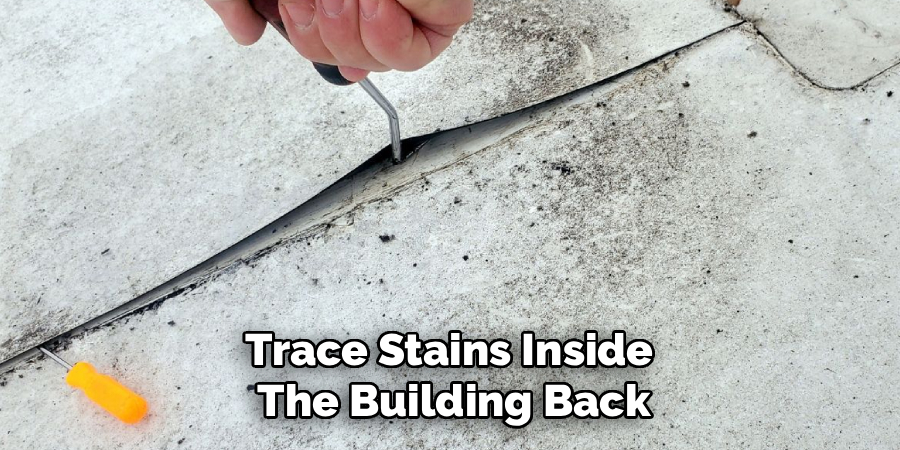
A careful inspection up front tells you exactly what to fix and saves you from patching the wrong area entirely.
Step 2 – Clean and dry the work area
A patch only sticks to a clean, dry surface, so this step matters more than it looks. Sweep away grit, leaves, and loose gravel with a stiff broom until the membrane feels smooth underfoot.
Scrub stubborn dirt and old residue with cleaning solvent and a rag. You’ll smell the sharp tang as it lifts away grime and oils that block adhesion. Wipe until the surface looks dull and uniform, with no shiny film.
Then let everything dry completely. Even a thin layer of trapped moisture ruins the bond and traps water under your repair. On a warm day, give it an hour in the sun. A clean, bone-dry base is the foundation of every lasting fix.
Step 3 – Open up and assess cracks or splits
Now look closely at each marked crack or split. Use your utility knife to gently widen a hairline crack into a clean, shallow groove. This sounds backward, but a slightly opened crack holds roofing cement far better than a tight seam.
Cut away any loose, crumbling, or blistered membrane around the damage. Keep trimming until you reach material that’s firmly bonded to the substrate beneath. You’ll feel the difference as the knife stops catching on loose edges.
Brush out the debris and check the exposed area for soft, wet substrate. If it’s saturated, you’ll need to dry or replace that section first. A clean, solid edge gives your patch something strong to grab onto.
Step 4 – Apply roofing cement to seal cracks
With the crack cleaned and opened, scoop roofing cement onto your trowel. Press it firmly into the groove, working it deep so no air pockets remain. You want the cement packed solid, not just smeared on top.
Spread a layer slightly wider than the crack itself, feathering the edges so water sheds off rather than pooling at a ridge. The cement feels thick and tacky, gripping the trowel as you smooth it.
For a clean repair commercial roof finish, keep the surface even and avoid heavy lumps that catch standing water. Let the cement set according to the label, usually a few hours. This simple seal handles most minor cracks and stops small leaks fast.
Step 5 – Patch larger holes and torn membrane
Bigger tears need a real patch, not just cement. Cut a piece of matching membrane or patch material at least two inches larger than the damage on every side. Round the corners so they won’t peel up later.
Coat the cleaned area with roofing adhesive, then press the patch down firmly from the center outward. Use your roller to squeeze out trapped air and bubbles, working slowly toward the edges. You’ll feel it flatten and grip as you go.
Seal the patch border with seam tape or a thin bead of cement for extra security. Press the edges hard so nothing lifts. A well-rolled patch bonds tight and blends into the surrounding flat roof surface.
Step 6 – Repair and reseal flashing
Flashing seals the joints where the roof meets walls, vents, and edges, and it’s a frequent leak source. Inspect every length closely for cracks, rust, or spots where it’s pulled loose from the membrane.
Press any lifted flashing back into place and check whether the old adhesive still holds. If it’s failing, scrape it clean and apply fresh roofing cement underneath, then press firmly until it seats.
Run a smooth bead of cement along the top edge to seal the transition. Smooth it with your finger or trowel so water flows over, not under. Tight, well-sealed flashing protects the most vulnerable seams on your roof, so don’t rush this part.
Step 7 – Recoat worn or sun-damaged areas
Sun and weather slowly thin the membrane, leaving it brittle, faded, and prone to cracking. A fresh roof coating restores that protective layer and reflects heat to keep the surface cooler.
Stir the coating well, then apply it with a roller in long, even strokes. Work in one direction first, then cross over for full coverage. You’ll watch the dull, weathered surface turn smooth and uniform as you go.
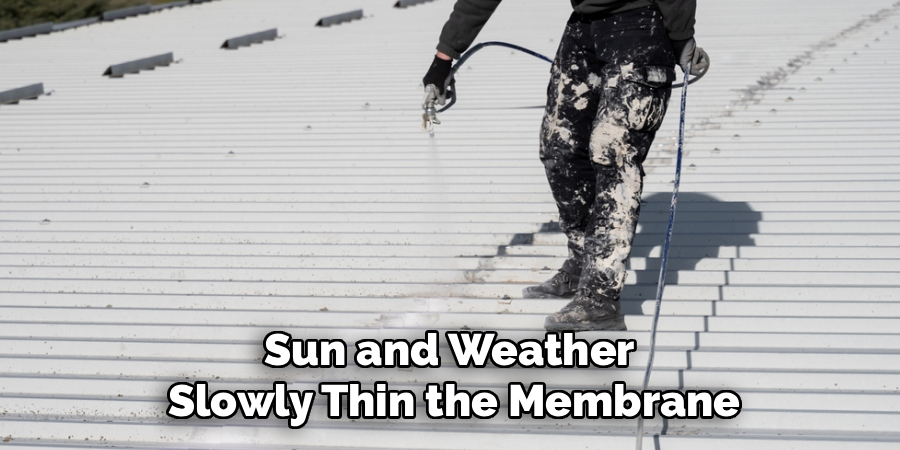
Pay extra attention to seams and patched spots, giving them a second pass. Let the first coat dry fully before adding another if the label calls for it. A good recoat seals tiny pinholes you might miss and adds years of life to the whole roof.
Step 8 – Clear drains and check water flow
Even a perfect patch fails if water can’t escape. Walk the roof and clear every drain, scupper, and gutter of leaves, gravel, and sludge by hand. You’ll feel the trapped muck give way as you scoop it out.
Pour a bucket of water near each low spot and watch where it travels. It should run smoothly toward the drains, not gather into fresh ponding water. Standing puddles signal a clog or a sag that needs attention.
Address any pooling by clearing blockages or noting spots for future leveling. Good drainage protects all the work you just did. A roof that sheds water quickly stays dry and lasts far longer.
Critical Mistakes When Repairing a Commercial Roof
The biggest mistake is patching over a wet or dirty surface. Adhesive and cement simply won’t bond to grime or trapped moisture, so the repair lifts within weeks and traps water underneath, making the damage worse. Always clean thoroughly and let the surface dry completely before you seal anything.
Another common error is mismatching materials. EPDM, TPO, and modified bitumen each need specific adhesives and patches. Grabbing whatever’s on the shelf often leads to a bond that peels, because the chemistry doesn’t match. Confirm your roof type first, then buy products made for it.
Many beginners also ignore the flashing and drains entirely. They fix the obvious crack but leave a clogged drain or lifted flashing in place, so water still finds a way in. Treat the whole system, not just one spot.
Walking carelessly causes trouble too. Stepping hard on brittle membrane or near edges creates new punctures and serious safety risks. Move slowly, test your footing, and stay clear of skylights and weak areas.
Finally, folks often skip recoating and leave feathered edges thick and lumpy. Raised ridges catch standing water and undo your repair. Keep everything smooth so water flows freely off the surface.
Expert Tips
Always work on a dry, mild day with no rain in the forecast. Cool, damp weather slows curing and weakens every bond, while extreme heat makes some products set too fast to spread evenly.
Test a small patch before committing to a large repair. This confirms your adhesive grips well and saves wasted material if the surface needs more prep.
Snap a few photos during your inspection. They help you track problem spots over time and spot patterns, like the same seam failing each season.
Keep your repairs slightly wider than the damage and feather every edge. Water always finds the weakest point, and smooth transitions give it nowhere to sneak in.
Finally, never work alone on a roof. Have someone steady the ladder and stay nearby. Safety matters far more than finishing fast.
Frequently Asked Questions
How do I know what type of commercial roof I have?
Look closely at the surface and color. Common flat roof types include:
- EPDM – a smooth, black rubber membrane
- TPO – a lighter, usually white or gray membrane
- Modified bitumen – an asphalt-based surface, often with a gravelly or rolled texture
Matching your repair products to the right type is essential for a lasting bond. If you’re unsure, check building records or compare a small piece against product samples at a roofing supplier.
Can I really fix a flat roof leak myself?
Often, yes. Most leaks come from cracked seams, small punctures, or lifted flashing, all of which are manageable for a careful DIYer. Clean the area, apply the right patch or roofing cement, and seal the edges well. That said, widespread moisture damage, large sagging sections, or structural issues call for a professional. Know your limits, and tackle the smaller, accessible problems first.
How long will a DIY roof patch last?
A well-applied patch on a clean, dry surface can last several years, sometimes longer with a protective roof coating on top. Lifespan depends on prep quality, the right materials, and weather exposure. Patches near ponding water or constant foot traffic wear faster. Inspect your repairs each season, touch up any lifting edges early, and recoat worn spots to stretch their life considerably.
When should I recoat instead of patch?
Recoat when the whole surface looks faded, chalky, or covered in tiny cracks rather than one clear hole. A roof coating restores the protective layer across the entire roof and seals pinholes you can’t easily see. Patch instead when you have isolated tears, splits, or punctures in otherwise healthy membrane. Many roofs benefit from both: patch the obvious damage first, then recoat for full protection.
What causes ponding water, and is it serious?
Ponding water usually comes from low spots, clogged drains, or a slight sag in the roof structure. It matters because standing water accelerates wear, finds tiny weak points, and adds heavy load over time. Clear your drains first, since blockages cause most pooling. If water still gathers after clearing, note the low area and address the slope or drainage. Don’t ignore persistent puddles.
Conclusion
Keeping a flat roof watertight comes down to patience and good prep. Start by inspecting carefully and marking every crack, blister, and soft spot. Clean and dry the surface thoroughly, because nothing bonds to grime or moisture. Then seal cracks with roofing cement, patch larger tears with matching membrane, and reseal tired flashing where leaks love to start. Finish by recoating worn areas and clearing drains so water flows freely off the surface.
The real secret is treating the whole roof as one system, not just one leak. Match your materials, smooth every edge, and always put safety first by working on dry days with a helper nearby.
You don’t need a full crew to repair commercial roof problems and protect everything underneath. With the right tools, a careful eye, and an afternoon of steady work, you can stop leaks before they spread and add years to your roof’s life. Next time you spot a stain or a puddle that won’t dry, grab your gear, head up safely, and fix it with confidence.