

That faint brown ring spreading across your ceiling is more than an eyesore—it’s your roof asking for help. A small leak today can soak your insulation, rot your decking, and invite mold before you even notice the smell. The longer it sits, the more it costs you.
Here’s the reassuring part: you don’t have to call a contractor for every drip. Learning how to repair a shingle roof leak is a manageable weekend project for most homeowners with a steady ladder and a careful eye.
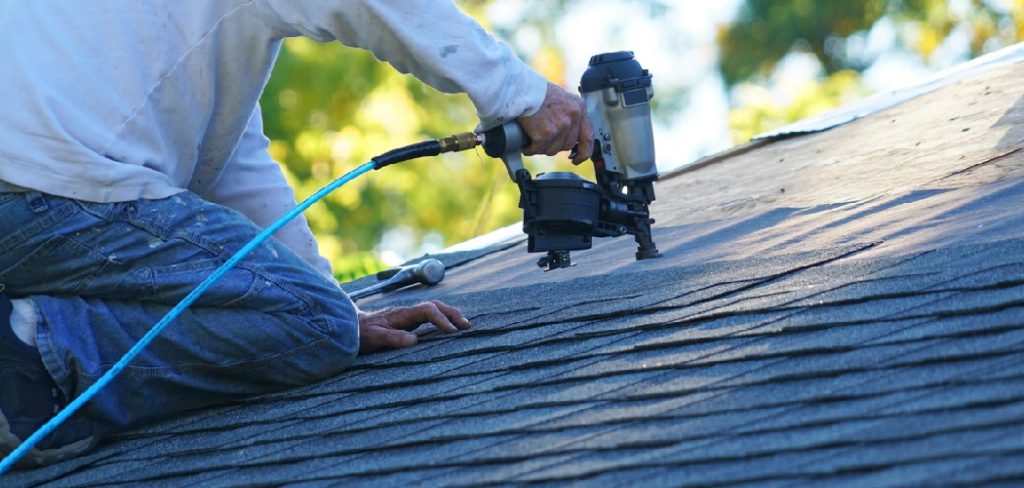
Whether you’ve got a cracked shingle, lifted flashing, or worn sealant, the fix is usually simpler than you think. This guide walks you through finding the source, sealing it properly, and confirming the repair holds—so you can protect your home and your wallet.
Why Repairing a Shingle Roof Leak Matters
Your roof is the one thing standing between your family and the weather. When it fails, everything underneath pays the price.
Water never stays put. A single leak travels along rafters and seeps into drywall, framing, and insulation, often surfacing far from where it actually started. That’s why early action saves you from a much bigger, costlier repair down the road.
Catching moisture early also protects your indoor air. Damp spaces breed mold fast, and that affects both your home’s value and your health.
Learning this skill makes you self-reliant. Instead of waiting days for a roofer or paying a steep service fee, you handle small problems yourself for the cost of a tube of roof cement. That confidence carries into other home projects too, helping new homeowners and weekend DIYers tackle repairs without the stress of always calling someone.
Tools and Materials You’ll Need
Gather everything before you climb, so you’re not stuck on the roof realizing you forgot something. Most of these supplies are cheap and store well for the next fix.
- A sturdy extension ladder with someone to steady the base
- Roof cement (also called plastic roofing sealant)
- A pry bar or flat bar to lift damaged shingles
- Replacement asphalt shingles that match your existing color
- Roofing nails and a hammer
- A caulking gun for sealant and cracked seams
- A putty knife to spread roof cement smoothly
- Work gloves and rubber-soled shoes for grip
- A flashlight for your attic inspection
Optional but handy: a roofing harness with a rope anchor gives you real peace of mind on steeper pitches, letting you focus on the repair instead of your footing.
Step-by-Step Guide on How to Repair a Shingle Roof Leak
Work through these steps in order, and never skip the source-finding stage. Patching the wrong spot wastes time and lets the real leak keep spreading.
Step 1 – Trace the Leak Inside
Before you touch the roof, head into your attic with a flashlight on a dry day. Knowing how to repair a shingle roof leak starts with finding where water actually enters, not just where it drips.
Scan the underside of the decking for dark water stains, streaks, or damp spots. Run your hand along the wood—cool, soft, or spongy patches signal moisture damage. Trace any wet trail uphill, since water always travels down before it drips.
Mark the suspicious area by poking a nail or wire up through the decking so you can spot it from the roof later. The musty smell of damp wood often guides you to the right rafter bay. Pinpointing the entry point now saves you hours of guesswork up top.
Step 2 – Inspect the Roof Surface
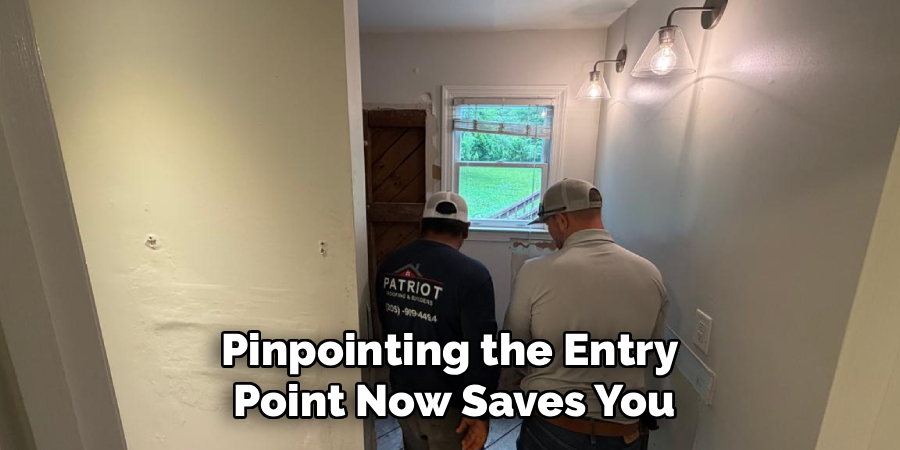
Now climb up on a dry, calm day and head to the area above your attic marker. Walk carefully and keep your weight low.
Look for the obvious culprits first. A missing shingle, a cracked or curling tab, or a dark patch of worn granules often gives the leak away. Lifted shingles flap slightly in a breeze, exposing the underlayment beneath.
Check the flashing around chimneys, vents, and valleys too. These metal joints fail more often than the shingles themselves, especially where the cracked sealant has pulled away from the surface. Run your fingertips along seams and feel for gaps or brittle, crumbling caulk. Take photos as you go so you remember exactly what needs attention before you start tearing anything loose.
Step 3 – Loosen the Damaged Shingle
Once you’ve spotted the failing shingle, free it gently. Slide your pry bar under the tab directly above the damaged one and lift with steady pressure.
You’ll feel the sealant strip release with a slight crack as the adhesive lets go. Work slowly here, especially in cooler weather when asphalt shingles turn stiff and snap easily.
Pop the roofing nails by sliding the pry bar beneath each nail head and rocking upward. Two rows of nails usually hold each shingle, so check above and below. As the nails ease out, you’ll hear a faint squeak of metal against wood.
Lift the damaged shingle free without tearing the felt underlayment underneath. Set the old piece aside and clear away any loose granules.
Step 4 – Inspect the Underlayment
With the shingle gone, look closely at the layer beneath. The underlayment and felt paper are your roof’s backup waterproofing, so they matter.
Press your fingers against the exposed area. If the felt feels wet, torn, or wrinkled, water has been sitting here for a while. Dry, intact underlayment means you caught the leak early.
Check the wood decking too. Soft or darkened plywood needs to dry fully before you cover it, and badly rotted wood may need replacing before you go further.
If the felt is damaged but the wood is solid, cut a patch of new underlayment slightly larger than the tear. Tuck it under the surrounding layer and seal the edges so water can’t sneak past your repair later.
Step 5 – Slide in the New Shingle
Grab your matching replacement and slide it up into the gap. Tuck the top edge under the row of shingles above so they overlap correctly.
This overlap is what sheds water downhill, so don’t force the new shingle on top of the others. Line up the bottom edge with its neighbors on either side for a clean, even row.
You’ll feel it seat into place when the alignment is right. Wiggle it gently until the exposed tab matches the surrounding pattern. A misaligned shingle creates a channel that funnels water straight under the surface, which defeats the whole point.
Take a step back and check that the new piece blends in. The color may look slightly off at first but usually weathers to match within a season.
Step 6 – Nail and Seal the Shingle
Now lock it down. Drive roofing nails into the upper portion of the new shingle, placing them just below the overlapping row above so the next shingle hides the nail heads.
Hammer each nail flush—not too deep. Overdriving cracks the shingle and creates a fresh weak spot. You want the head snug against the surface without crushing the asphalt.
Next, lift the tabs above and dab roof cement under each one with your putty knife. Press them back down so the sealant grips. Add a small bead over each nail head too, since exposed nails are a sneaky leak source.
Smooth the cement so it lies flat. A thin, even layer seals far better than a thick, lumpy glob that traps water.
Step 7 – Repair Flashing and Sealant
If your leak traced back to flashing rather than a shingle, focus here. Flashing failures cause a huge share of roof leaks, especially around chimneys and vents.
Scrape away the old, cracked sealant with your putty knife until you reach clean metal. You’ll feel the brittle caulk flake off in dry chips.
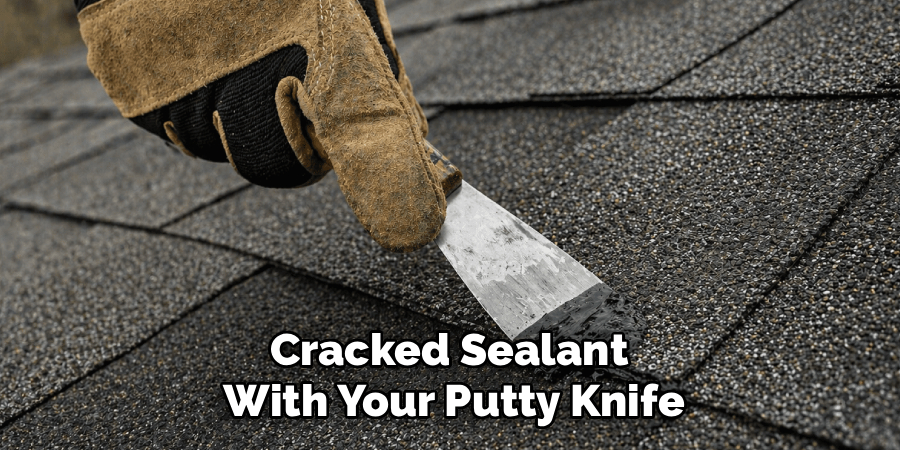
Press any lifted flashing back flat against the surface. Then load your caulking gun with roof cement and lay a steady bead along every seam and edge. Smooth it with the knife so water sheds off instead of pooling.
Pay extra attention to the drip edge along your eaves, where loose metal lets water creep behind the fascia. A solid seal here keeps the roof’s most vulnerable joints watertight for years.
Step 8 – Test and Confirm the Fix
Patience now prevents a repeat climb later. Let the roof cement set for the time listed on the tube, usually a few hours of dry weather.
Once it cures, run a controlled test. Have a helper spray the repaired area with a garden hose for several minutes while you watch from inside the attic with your flashlight.
Look and listen for any new drips, dark spots, or the trickle of moisture finding its way through. A solid repair stays bone dry no matter how long you run the water.
If everything holds, wipe down your old water stain so you’ll notice instantly if a leak ever returns. Clean tools, store leftover shingles, and enjoy the quiet confidence of a roof that finally keeps the rain out.
Critical Mistakes When Repairing a Shingle Roof Leak
Even a straightforward repair can backfire if you rush it. The most common mistake is patching where water drips inside rather than where it actually enters the roof. Water travels along rafters before falling, so always trace the leak to its true source in the attic first—otherwise you’ll seal a dry spot and leave the real problem wide open.
Another frequent error is working on a wet or windy roof. Damp shingles tear easily, sealant won’t bond, and slick surfaces turn dangerous fast. Wait for a dry, calm day every time, and never skip the ladder safety basics.
Many beginners also overdrive their roofing nails. Punching the head too deep cracks the shingle and creates a fresh leak right where you just worked. Drive each nail flush and no further.
Skimping on roof cement around flashing and nail heads is another trap. Those tiny gaps invite moisture back in within weeks. Finally, don’t ignore worn underlayment beneath the shingle. If the felt is soaked or torn and you cover it anyway, your repair won’t last a single storm.
Expert Tips
Want your fix to truly last? Always tackle roof work on a warm, dry afternoon. Asphalt shingles turn soft and pliable in the heat, so they seal better and resist cracking when you bend them.
Keep a few spare shingles from your last roofing job in the garage. Matching the exact color and style later is tough, and having extras on hand means same-day repairs before small problems spread.
Inspect your roof twice a year, especially after big storms. Catching a lifted shingle or cracked sealant early beats discovering a water stain on your ceiling.
Never walk a roof alone. Have someone steady the ladder and stay within earshot. And if the leak covers a large area, involves rotted decking, or sits on a steep pitch you can’t safely reach, calling a pro is the smart, not the weak, choice.
Frequently Asked Questions
Can I repair a shingle roof leak myself without a contractor?
Yes, most small leaks are well within reach for a careful DIYer. Replacing a single cracked or missing shingle, resealing flashing, or patching worn underlayment takes basic tools and a dry afternoon. Just prioritize ladder safety and work on a calm day. Call a professional only if you find widespread rot, structural sagging, or a steep pitch you can’t safely access.
How do I find a roof leak when it isn’t obvious?
Start in the attic on a dry day with a flashlight. Look for these signs:
- Dark water stains or streaks on the decking
- Damp, soft, or spongy wood along the rafters
- A musty smell pointing to trapped moisture
Trace any wet trail uphill, since water runs down before it drips. Mark the entry point so you can find it from the roof.
What’s the best sealant for stopping a shingle roof leak?
Roof cement, sometimes labeled plastic roofing sealant, is the go-to choice for most repairs. It bonds well to asphalt shingles and flashing, stays flexible through temperature swings, and seals seams, nail heads, and lifted tabs reliably. Apply it in a thin, even layer with a putty knife. Avoid thick globs, which trap water and crack over time instead of shedding moisture properly.
How long does a DIY roof leak repair last?
A properly done repair can last many years, often the remaining life of your roof. Longevity depends on solid prep: a dry surface, correctly overlapped shingles, flush nails, and well-sealed flashing. Skip any of those, and the patch may fail within a season. Inspect the area after the next few storms to confirm it’s holding up.
When should I replace the roof instead of patching it?
Patching works great for isolated leaks. But if you’re finding multiple failing spots, curling shingles across large sections, soft decking, or a roof past 20 years old, replacement makes more sense. Repeated patching on an aging roof only delays the inevitable and adds up in cost. A full inspection helps you decide whether to repair or invest in a new roof.
Conclusion
A leaking roof doesn’t have to spiral into a major expense. Now you know how to repair a shingle roof leak from start to finish—trace the source in your attic, inspect the surface, loosen and replace the damaged shingle, reseal the flashing, and test the fix with a hose before calling it done. None of it demands special training, just patience, a dry day, and the right supplies.
The payoff is real. You stop the moisture before it rots your decking, protect your home’s value, and skip a pricey service call. That means a drier, healthier house and real confidence in your own hands.
So grab your ladder, line up a helper, and tackle that leak head-on. Once you’ve sealed your first shingle, you’ll see how approachable these repairs really are. Keep spare shingles handy, inspect your roof twice a year, and catch small problems before they spread. Which spot will you check first?