

A broken wheel can turn a smooth trip into a dragging, scraping nightmare. You know the sound—that grinding wobble as you haul your bag through the airport, wishing you’d dealt with it sooner. The good news? You don’t need a technician or a pricey new bag to fix the problem. Learning how to repair suitcase wheels is easier than most people think, and it saves you both money and frustration.
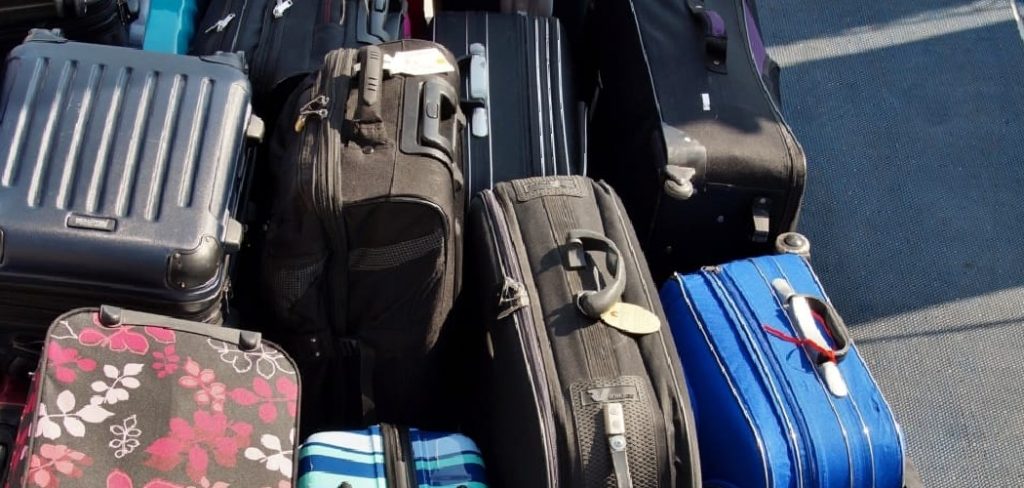
Whether your spinner wheel won’t turn, the axle has snapped, or the wheel bracket is loose, this is a repair you can handle at your kitchen table. With a few basic tools and a little patience, you’ll have your travel bag rolling like new.
This guide walks you through every step, from diagnosing the damage to installing a replacement wheel with confidence.
Why Repairing Suitcase Wheels Matters
If you camp, hike, or travel light, your luggage takes a beating. Gravel paths, muddy trails, and rough campground roads chew through cheap wheels fast. For outdoor beginners, a busted wheel can leave you dragging gear across a parking lot at the worst possible moment.
Learning this skill keeps you self-reliant. Instead of tossing a perfectly good bag or shelling out for a new one, you fix it in minutes. That matters when you’re far from a repair shop or packing for an early morning departure.
There’s also the cost angle. A replacement wheel costs a few dollars, while a new travel bag runs much higher. Fixing it yourself reduces waste, saves cash, and means your trusty carry-on lasts for years of adventures. It’s a small repair with a big payoff.
Tools and Materials You’ll Need
Before you start, gather everything in one spot so you’re not hunting mid-repair. Most of these items already live in a basic toolbox.
- Replacement wheels that match your suitcase size and type (spinner or inline)
- Screwdriver set (Phillips and flathead)
- Pliers for gripping and twisting stubborn parts
- A drill with a bit sized for the rivet or axle
- Replacement screws, nuts, and bolts in case the originals are stripped
- A metal file or sandpaper to smooth rough edges
- Hammer and a small punch to drive out old rivets
- Lubricant like silicone spray or light machine oil
- A wheel repair kit that matches your luggage wheel housing
Optional but handy: a small clamp or vise to hold the suitcase steady while you work, freeing both hands for the trickiest moments.
Step-by-Step Guide on How to Repair Suitcase Wheels
Follow these steps in order, and don’t rush the diagnosis—knowing exactly what’s broken saves you from buying the wrong parts.
Step 1 – Inspect the Damage Closely
Flip your suitcase on its side and run your fingers over each wheel. Spin them one at a time and listen. A healthy wheel glides quietly, while a damaged one clicks, grinds, or refuses to turn at all.
Look for the obvious culprits first. Is the wheel cracked, flat-spotted, or worn down to a stub? Check whether the axle is bent or snapped, and inspect the wheel bracket for loose screws or rust.
Press the wheel side to side. Excess wobble usually means a worn axle or a damaged housing. Take a quick photo with your phone before you take anything apart. That picture becomes your roadmap when it’s time to reassemble everything correctly.
Read More: How to Use Thread Repair Kit.
Step 2 – Identify Your Wheel Type
Not all suitcase wheels are built the same, and grabbing the wrong replacement wheel wastes time and money. Spinner wheels rotate a full 360 degrees and usually mount in a small plastic housing with a single bolt. Inline wheels, common on two-wheel carry-on bags, sit recessed into the corner and ride on a fixed axle.
Measure the wheel’s diameter and width with a ruler. Note how it attaches—some pop into a bracket, while others bolt through a rivet. Snap another photo or jot down the numbers.
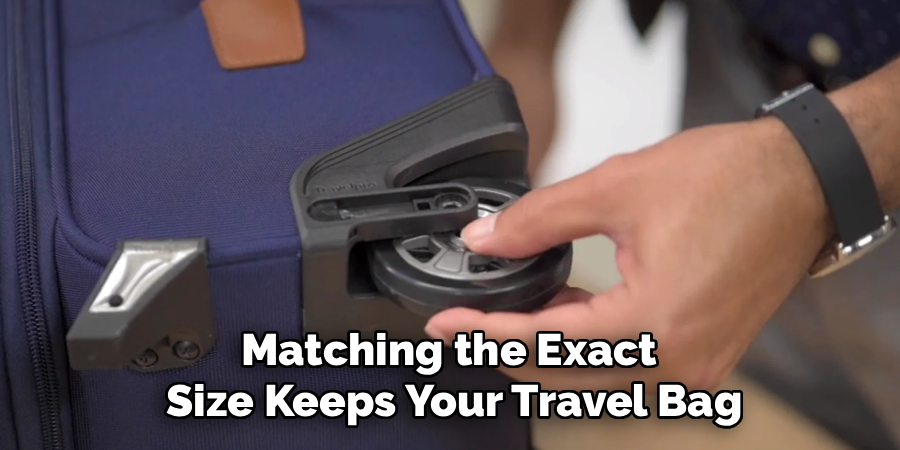
Bring these details when you shop. Matching the exact size keeps your travel bag balanced and prevents new wheels from dragging or rubbing against the frame.
Step 3 – Remove the Old Wheel
Now comes the satisfying part. If your wheel is held by a screw or bolt, grip the screwdriver firmly and turn counterclockwise. Hold the nut on the other side with pliers so it doesn’t spin freely.
If a rivet holds the wheel in place, you’ll need to drill it out. Center your drill bit on the rivet head and press steadily until it pops loose. You’ll feel a slight give and hear a faint pop when it releases. Wear safety glasses here—tiny metal shavings love to fly.
Once the fastener is out, wiggle the old wheel free from the luggage wheel housing. Set the hardware aside in a small dish so nothing rolls away.
Step 4 – Clean the Wheel Housing
With the old wheel gone, you’ll likely find a grimy mess hiding inside. Hair, dust, and packed-in grit build up around the axle over months of travel. Use an old toothbrush or a cloth to scrub the wheel bracket and housing until it looks clean.
Run your finger along the inside edges. Any rough burrs or leftover rivet bits can keep your new wheel from seating properly. Smooth them down with a quick pass of sandpaper or a metal file.
A clean housing makes the next steps easier and reduces rolling resistance once you’re back on the road. This small detail separates a quick fix from a repair that lasts. Wipe everything dry before moving on.
Read More: How to Repair Kitchen Sink Drain Leaks and Clogs.
Step 5 – Position the Replacement Wheel
Hold your new wheel up to the empty housing and check the fit before forcing anything. Knowing how to repair suitcase wheels properly means making sure the parts line up clean and square.
Slide the wheel into the bracket and align the bolt hole with the opening in the frame. The wheel should sit flush, with no gap pinching it to one side. Give it a gentle spin to confirm it clears the housing walls.
If it rubs or sits crooked, pull it back out and check your measurements again. A wheel that’s even slightly too wide will drag every step of your trip. Take your time here—a proper fit now means smooth rolling later.
Step 6 – Secure the New Wheel
With the wheel positioned, it’s time to lock it in place. Slide your bolt or axle through the aligned holes. Thread the nut on by hand first to avoid cross-threading, then tighten it with your screwdriver and pliers.
Aim for snug, not crushing. Over-tightening squeezes the wheel and creates drag, while a loose bolt lets it wobble and rattle. Spin the wheel after each turn of the wrench to find that sweet spot where it rolls freely but holds firm.
If your suitcase used a rivet, replace it with a matching bolt and lock nut instead. Bolts are far easier to remove next time, and they hold just as well for everyday travel.
Read More: How to Repair Solar Lights.
Step 7 – Test the Repair
Set the suitcase upright on a hard floor and give it a push. Listen closely. A good repair sounds smooth and quiet, with no grinding, clicking, or scraping.
Roll it forward, backward, and in tight circles if it’s a spinner. The wheel should glide with low rolling resistance and stay aligned without veering. Lean some weight on the bag and roll again—real luggage carries pounds of gear, so test under load.
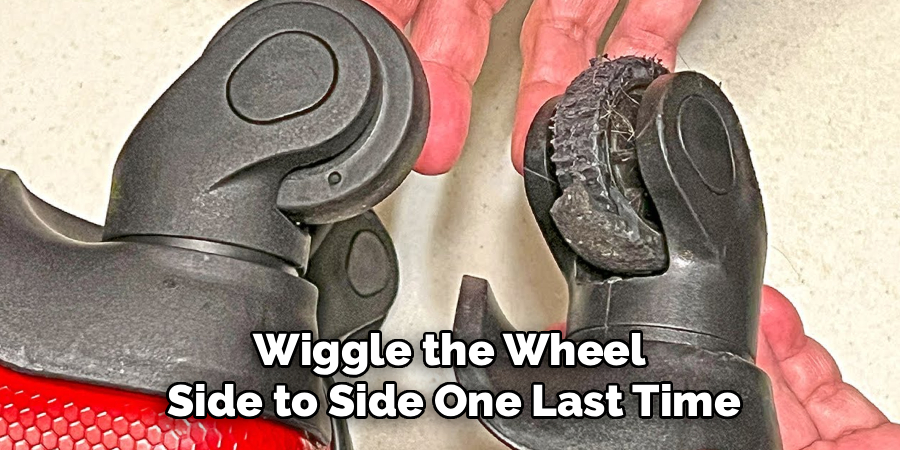
Wiggle the wheel side to side one last time. A tiny bit of play is normal, but heavy wobble means you should recheck the bolt. If everything feels solid and rolls clean, congratulations—you’ve finished the job.
Step 8 – Lubricate and Finish
A final touch keeps your repair running longer. Spray a small amount of silicone lubricant or light machine oil onto the axle where the wheel rotates. Spin the wheel a few times to work it in, and wipe away any excess with a cloth.
This step cuts friction, blocks rust, and quiets that faint hum some wheels make. Check the other wheels while you’re at it—a quick spray on all four keeps your travel bag rolling evenly.
Tighten any loose screws you spotted earlier on the wheel bracket. Then stand back and admire your work. Your bag is ready for the next trip, and you saved the cost and hassle of buying a brand-new one.
Critical Mistakes When Repairing Suitcase Wheels
Even a simple repair can go sideways if you skip the basics. The most common mistake is buying the wrong replacement wheel. People eyeball the size instead of measuring, then end up with a wheel that’s too wide or rides too high. Always measure diameter, width, and the axle hole before you shop.
Another frequent error is over-tightening the bolt. It feels logical to crank it as hard as possible, but a crushed wheel won’t spin freely and creates frustrating rolling resistance. Tighten until snug, then test the spin.
Many beginners also forget to clean the luggage wheel housing. Old grit and hair jam the new wheel and wear it out faster, undoing all your hard work in weeks.
Drilling out a rivet too aggressively is risky too. Press too hard and you’ll widen the hole or damage the frame, leaving you with a bigger problem. Go slow and steady. Finally, don’t ignore the other three wheels—if one wore out, the rest are probably close behind.
Expert Tips
Want your repair to last? Keep a small repair kit in your closet with spare wheels, bolts, and a screwdriver. When a wheel fails, you fix it the same day instead of canceling plans.
Stick with bolts and lock nuts over rivets whenever you can. Rivets look tidy, but they’re a pain to remove next time. A bolt makes future swaps a five-minute job.
After every rough trip, give your wheels a quick spin test and a wipe-down. Catching a worn axle early stops it from damaging the housing.
Finally, buy quality replacement wheels even if they cost a little more. Cheap plastic wheels crack fast under load, while sturdier ones glide smoothly for years. A few extra dollars now means fewer repairs and a carry-on that’s always trip-ready.
Frequently Asked Questions
Can I replace just one suitcase wheel, or do I need to replace all of them?
You can absolutely replace a single wheel if only one is damaged. Just make sure the new wheel matches the others in size and type so your bag rolls evenly. That said, if your wheels are old and worn, replacing them in pairs or all at once prevents another breakdown soon after and keeps the ride balanced.
What if my suitcase wheels are held in by rivets instead of screws?
Riveted wheels need a little more effort, but they’re still beginner-friendly. Drill out the old rivet carefully with a bit matched to its size, then remove the wheel. When reassembling, swap the rivet for a small bolt and lock nut. Bolts hold securely and make any future repair far quicker and easier.
How much does it cost to fix a suitcase wheel myself?
Doing it yourself is remarkably cheap. Here’s a rough breakdown:
- Replacement wheels: a few dollars each
- Bolts and nuts: under a dollar
- Tools: likely already in your toolbox
Compare that to buying a new travel bag, and the savings are obvious. Most DIY wheel repairs cost less than a fast-food meal.
My new wheel rubs against the frame. What did I do wrong?
A rubbing wheel usually means it’s too wide or sits slightly crooked in the housing. Remove it and double-check your measurements against the original. Confirm the bolt isn’t pulling the wheel to one side. If the fit is right but it still rubs, a quick pass with a metal file on any burrs inside the housing often solves it.
How do I keep my suitcase wheels from breaking again?
Regular care goes a long way. Wipe off grit after trips, lubricate the axles a few times a year, and avoid dragging your bag over curbs or rough ground when you can lift it. Tighten loose bolts as soon as you notice wobble. These small habits dramatically extend the life of your wheels.
Conclusion
Fixing a worn or broken wheel is one of the most satisfying DIY repairs you can tackle, and now you know exactly how to repair suitcase wheels from start to finish. You inspect the damage, match the right replacement wheel, remove the old part, clean the housing, secure the new wheel, and test it under load. None of it requires special skills—just a little patience and the right tools.
The payoff is real. You save money, cut down on waste, and keep a trusty travel bag rolling for years of trips and adventures. No more dragging a wobbly carry-on through the airport or canceling plans over a busted spinner wheel.
So grab your screwdriver and give it a try. Once you’ve done it once, you’ll wonder why you ever considered tossing a good bag over a few-dollar part. Keep a small repair kit handy, stay on top of maintenance, and your luggage will always be ready when adventure calls.