

Few things ruin a muddy adventure faster than feeling cold water seep into your sock. A torn or leaky boot can quickly turn a fun day outside into a soggy mess. The good news? You don’t need to toss your favorite pair or pay someone to fix them. Learning how to repair rubber boots is easier than you might think, and most repairs take less than an hour at home.
Whether you’re dealing with a small crack, a separated sole, or a stubborn leak, the right tools and a little patience can bring your boots back to life. This guide walks you through everything step by step, so even a complete beginner can patch, seal, and waterproof their boots with confidence.
Why Repairing Rubber Boots Matters
Good boots aren’t cheap, and replacing them every time they spring a leak adds up fast. Repairing yours saves money and keeps perfectly usable gear out of the landfill. That matters a lot if you camp, garden, fish, or hike often.
For outdoor beginners, knowing how to fix your own gear builds real confidence. You won’t get stuck miles from home with a useless pair of boots. Instead, you’ll know how to handle a quick field fix and keep your feet dry no matter what.
Campers especially benefit from this skill. A reliable boot patch can mean the difference between an enjoyable weekend and a miserable, blistered trek back to the car. Once you learn the basics, you’ll wonder why you ever paid for replacements.
Tools and Materials You’ll Need
Before you start, gather your supplies so you’re not scrambling mid-repair. Most of these items are inexpensive and easy to find at hardware or outdoor stores.
- Rubber adhesive or flexible boot glue (made for footwear)
- A boot patch kit or scrap rubber for larger holes
- Rubbing alcohol for cleaning the surface
- Fine-grit sandpaper (around 120 grit)
- Clean rags or paper towels
- Scissors or a utility knife
- A small clamp or heavy book to press the repair
- Disposable gloves to keep glue off your skin
- A marker or pen to outline the damaged area
- A hair dryer (optional, for speeding up drying and improving flexibility)
That hair dryer is the one luxury item here. It’s not required, but it makes the whole process faster and gives a stronger seal.
Step-by-Step Guide on How to Repair Rubber Boots
Step 1 – Inspect and Locate the Damage
Start by giving your boots a close look in good light. Run your fingers over the surface and feel for any rough spots, thin areas, or obvious tears. Small cracks can be sneaky, so bend the rubber gently to open them up.
If you suspect a hidden leak but can’t see it, fill the boot with water and watch where it drips out. You can also submerge it in a sink and look for tiny air bubbles escaping. Mark every problem area with your pen so you don’t lose track once you start cleaning.
Taking your time here pays off. A repair only works as well as your understanding of the damage, so be thorough before moving on.
Step 2 – Clean the Surface Thoroughly
A clean surface is the secret to a repair that actually lasts. Wipe away mud, dust, and grime with a damp rag first, then let the boot dry completely.
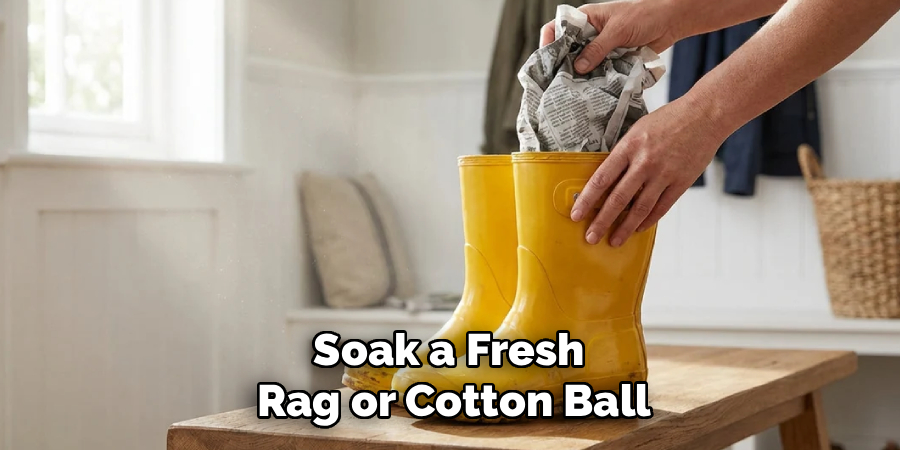
Once dry, soak a fresh rag or cotton ball in rubbing alcohol and scrub the damaged area. You’ll smell that sharp, clean scent as the alcohol lifts away oils and residue. This step matters because rubber adhesive won’t stick to a dirty or greasy surface.
Pay extra attention to the spots you marked earlier. Give them a good wipe and let everything air dry for a few minutes. The rubber should feel slightly tacky and squeaky-clean before you apply anything else.
Read More: How to Repair Peeling Faux Leather Jacket.
Step 3 – Rough Up the Area for Better Adhesion
Smooth rubber doesn’t grip glue well, so you’ll need to scuff it. Grab your fine-grit sandpaper and lightly sand around each crack or hole.
Use small circular motions and apply gentle pressure. You’re not trying to dig in, just create a slightly rough texture that gives the adhesive something to cling to. You’ll see the shiny surface turn dull and matte as you work.
Sand a little beyond the damaged spot too, about half an inch in every direction. This wider area helps your patch or seal bond strongly along the edges. When you’re done, wipe away the dust with a clean cloth or another quick swipe of alcohol so nothing blocks the bond.
Step 4 – Apply Rubber Adhesive to Small Cracks
For thin cracks and minor splits, rubber adhesive alone often does the trick. Squeeze a small amount directly onto the crack and spread it evenly with a toothpick or the applicator tip.
Work the glue into the opening so it fills the gap completely. You want a smooth, slightly raised layer that covers the whole crack and extends just past the edges. The adhesive may feel cool and look glossy as you spread it.
Don’t rush and glob it on. A thin, even coat bonds far better than a thick mess. Let this first layer set for the time listed on your product, then add a second coat if the crack is deep. Patience now means a stronger seal later.
Step 5 – Patch Larger Holes and Tears
Bigger holes need a proper boot patch for real strength. Cut a piece of rubber slightly larger than the damaged area, rounding the corners so they won’t peel up over time.
Spread a thin layer of rubber adhesive on both the boot and the back of the patch. Wait a minute or two until the glue feels tacky to the touch, then press the patch firmly into place. You’ll feel it grab as the two surfaces meet.
Smooth out any air bubbles by pressing from the center toward the edges. A solid patch should sit flat with no lifting corners. This method handles tears, punctures, and worn-thin spots that simple glue can’t fix on its own.
Read More: How to Repair Home Heater.
Step 6 – Fix Sole Separation
Sole separation is a common headache, especially with older boots. When the rubber sole starts peeling away from the upper, grime usually hides in the gap.
Pry the separated section open gently and clean inside with alcohol. Let it dry, then apply a generous bead of flexible adhesive along the entire loose seam. Press the sole back down firmly so the glue spreads evenly.
Clamp the area or wedge it under a heavy book to hold everything tight while it cures. The pressure ensures a strong, lasting bond instead of a weak spot that fails on your next walk. Wipe off any glue that squeezes out before it hardens.
Step 7 – Clamp and Let It Cure
Now comes the hardest part for most people: waiting. Once your adhesive or patch is in place, apply steady pressure with a clamp, a heavy book, or even a brick wrapped in cloth.
Most rubber adhesives need a full 24 hours to cure properly, though some set faster. Resist the urge to test your repair early. Rushing this step is the number one reason fixes fail.
Keep the boots in a dry, room-temperature spot away from direct sunlight. If you used a hair dryer earlier, let things cool fully before clamping. After the wait, the repaired area should feel firm, flexible, and ready for action.
Step 8 – Test for Leaks and Waterproof
Before heading outdoors, make sure your work actually holds. Fill the boot with water again or submerge it like you did during inspection. Watch closely for any drips or bubbles.
If everything stays dry, you’ve nailed it. For extra protection, brush a thin layer of waterproof sealant over the repaired area and surrounding rubber. This adds a flexible, weatherproof barrier that shields your fix from rain, mud, and rough terrain.
Let the sealant dry fully according to the label. Knowing how to repair rubber boots and seal them properly means your outdoor gear will keep your feet dry through many more muddy adventures. Give them one last flex to confirm the repair moves naturally with the boot.
Critical Mistakes When Repairing Rubber Boots
Even simple repairs can go wrong if you skip the basics. The most common mistake is gluing onto a dirty or oily surface. If you don’t clean and sand the rubber first, the adhesive simply won’t bond, and your repair will peel away within days. Always prep the area like your fix depends on it, because it does.
Another frequent error is using the wrong glue. Regular super glue dries hard and brittle, so it cracks the moment your boot flexes. You need a flexible rubber adhesive built to move with the material. Skipping this detail wastes time and ruins your effort.
Many beginners also apply too much glue, thinking more is better. Thick layers take forever to cure and often trap air, creating weak spots. Thin, even coats work far better.
Finally, impatience destroys good repairs. Pulling the clamp off early or wearing the boots before the adhesive fully cures breaks the seal. Give every fix the full drying time it needs, and you’ll avoid the heartbreak of a repair that fails on your first outing.
Expert Cleaning Tips
A clean boot lasts longer and repairs better, so build a simple routine. After each muddy trip, rinse your boots with cool water and wipe them down with a soft cloth. Avoid harsh detergents, which can dry out and crack the rubber over time.
For stubborn grime, mix a little mild dish soap with warm water and scrub gently with a sponge. Rinse well and let them air dry away from direct heat or sunlight, both of which weaken rubber.
Once dry, rub a thin coat of rubber conditioner or even a dab of silicone spray over the surface. This keeps the material flexible and helps prevent future cracks. Store your boots upright in a cool, dry place, and they’ll reward you with seasons of reliable, leak-free wear.
Frequently Asked Questions
How long does a rubber boot repair last?
A properly done repair can last for years if you prep the surface well and use the right adhesive. The key factors are clean rubber, a flexible glue, and full curing time. Boots that flex a lot, like at the ankle, may need touch-ups sooner. With good care and occasional resealing, your patch should hold through many seasons of regular use.
Can I use super glue on rubber boots?
It’s best to avoid regular super glue. It dries hard and brittle, so it cracks the moment your boot bends. Instead, use a flexible rubber adhesive or shoe-specific glue designed to move with the material. These products stay bendable, bond strongly, and resist water far better, giving you a repair that actually survives real outdoor conditions.
What’s the best way to fix a leak I can’t see?
To find a hidden leak, try these methods:
- Fill the boot with water and watch for drips on the outside
- Submerge it in a sink and look for escaping air bubbles
- Run your hand inside while pressing the rubber to feel for cold spots
Once you locate the leak, mark it, clean the area, and seal it with rubber adhesive.
Do I need to waterproof the boots after repairing them?
Waterproofing isn’t strictly required, but it’s highly recommended. A thin layer of sealant over your repair adds an extra barrier against rain and mud. It also protects the patch edges from peeling and extends the life of your fix. Think of it as cheap insurance for your hard work and a sure way to keep your feet dry.
Can old, cracked rubber boots be saved?
Often, yes. If the rubber is only surface-cracked, a good cleaning, sanding, and flexible adhesive can restore it. However, if the rubber has gone stiff, dry, and crumbly all over, repairs may not hold. At that point, the material has broken down too far. Test the flexibility first, and if it still bends without flaking, it’s worth saving.
Conclusion
Fixing your own boots is one of the most satisfying repairs you can tackle at home. With a little cleaning, sanding, and the right rubber adhesive, you can stop leaks, patch holes, and bond loose soles back into shape. The whole process comes down to careful prep, a quality flexible glue, and the patience to let everything cure fully.
Remember the big lessons: clean the surface well, scuff it for grip, use thin even coats, and never rush the drying time. Add a waterproof seal at the end, and your boots will be ready for whatever muddy trail or rainy garden comes next.
You don’t need a technician or a fat wallet to keep your gear going strong. Now that you know how to repair rubber boots, you can save money, cut down on waste, and head outdoors with total confidence. So grab your supplies, set aside an afternoon, and give those trusty boots a second life. Your dry feet will thank you on your next adventure.