

Those tiny craters and rough spots on your garage floor or patio aren’t just an eyesore. Left alone, they trap water, collect dirt, and slowly get worse. The good news? You don’t need to call in a pro or rent heavy equipment to fix them. Learning how to repair pitted concrete is one of the most satisfying weekend projects you can tackle, and it costs far less than hiring someone.
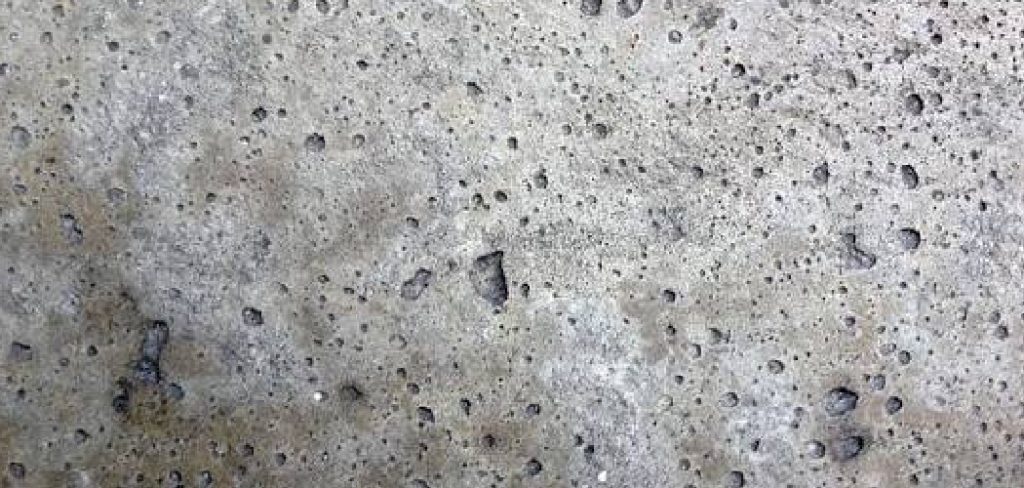
With a few basic tools, the right concrete patch products, and a little patience, you can bring that worn surface back to life. Whether it’s a walkway, driveway, or basement floor, the process is the same. This guide walks you through every step so you can fix those pits confidently and get lasting results.
Why Repairing Pitted Concrete Matters
Pitted concrete isn’t just ugly. Those small holes and rough patches actually speed up the damage to your surface over time. Water settles into the pits, freezes, expands, and creates bigger cracks. Before long, a minor cosmetic issue becomes a real structural problem.
For homeowners, fixing it protects your investment and keeps your property looking sharp. For renters, a smooth patch job can prevent disputes over deposits and make a space feel cared for. And for DIY beginners, this project builds real confidence.
Learning this skill saves you hundreds of dollars in contractor fees. You also gain the know-how to maintain patios, driveways, and floors for years. Once you understand surface prep and patching, you’ll never look at a damaged slab the same way again.
Tools and Materials You’ll Need
Before you start, gather everything in one place. Stopping halfway through to run to the hardware store while your patch material starts setting is frustrating, and it can ruin your results. Most of these items are affordable and reusable for future projects, so think of them as an investment in your DIY toolkit.
Here’s what you’ll need to get the job done right:
- Concrete patch or resurfacer mix
- Bonding agent (concrete adhesive)
- Stiff wire brush and a broom
- Cold chisel and hammer (for loose, spalling areas)
- Bucket and mixing paddle or drill attachment
- Steel or magnesium trowel
- Pressure washer or garden hose
- Safety glasses, gloves, and a dust mask
- Painter’s tape and a putty knife
- Optional: A knee pad or foam board to save your knees during longer jobs
Step-by-Step Guide on How to Repair Pitted Concrete
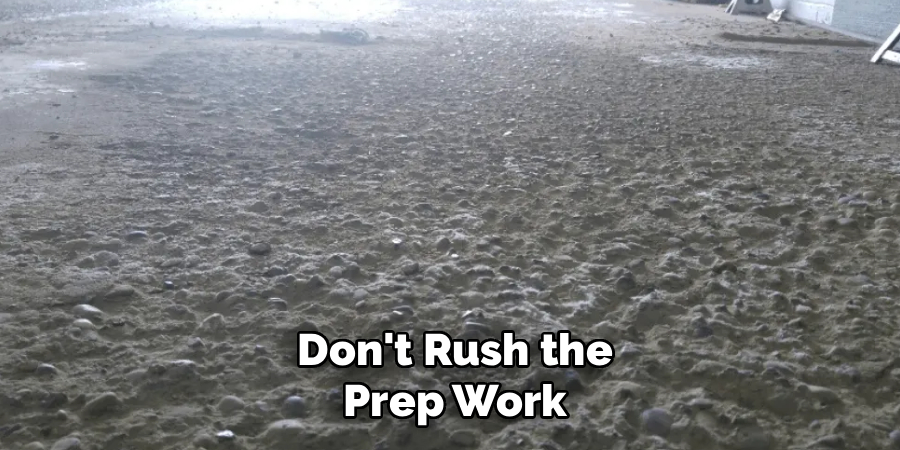
Follow these eight steps in order. Don’t rush the prep work, because a clean, solid surface is what makes your repair last. Take your time and you’ll be rewarded with a smooth, durable finish.
Step 1 – Inspect and Assess the Damage
Start by getting down close to the surface and really looking at it. Run your hand across the concrete and feel for loose grit, flaking edges, and the depth of each pit. Spalling, where the top layer chips away, often spreads beyond what you first notice.
Look for cracks branching out from the pitted areas too. These need attention before you patch, or they’ll telegraph through your new surface.
Knowing exactly what you’re dealing with helps you choose the right product. Shallow surface pits call for a thin resurfacer, while deeper holes need a thicker concrete patch. Mark the worst spots with chalk so you don’t miss them once you start working.
Step 2 – Clear the Area Completely
Remove everything from the work zone. That means cars, furniture, planters, and any debris scattered across the slab. You want full, easy access to every damaged spot without tripping over obstacles.
Sweep the entire surface with a stiff broom to knock away loose dirt and leaves. Pay attention to corners and edges where grime tends to pile up.
If you’re working in a garage, prop the door open for airflow and light. Good ventilation matters once you start mixing products with strong fumes. A clear, open workspace also lets you move freely with your trowel and bucket, which keeps the whole job smoother and far less stressful.
Step 3 – Chip Out Loose and Crumbling Concrete
Now grab your cold chisel and hammer. Tap firmly along the edges of each pit to break away any weak, crumbling material. You’ll hear a hollow, dull sound where the concrete is loose and a sharp, solid ring where it’s still strong.
Keep chipping until you reach concrete that holds firm. This feels like overkill, but patching over loose material guarantees failure. Your new patch needs a stable base to grip.
Wear your safety glasses here, because flying chips are no joke. Brush the debris out of each hole as you go. When you’re done, every pit and crack should have clean, solid edges ready to bond with fresh material.
Step 4 – Clean and Prep the Surface
This step makes or breaks your repair. Use a pressure washer or a strong blast from your garden hose to flush out every speck of dust, oil, and loose grit. Dirt acts like a barrier, stopping your patch from sticking.
Scrub stubborn stains with a wire brush and a degreaser if needed. Oil spots on garage floors are especially sneaky, so treat them seriously.
Solid surface prep is exactly how to repair pitted concrete so it actually lasts. Once clean, let the slab dry according to your product’s instructions. Some patches bond to damp concrete, while others need it bone dry, so check the label carefully before moving on.
Step 5 – Apply the Bonding Agent
A bonding agent is your secret weapon for a patch that won’t pop loose. This liquid adhesive soaks into the old concrete and creates a sticky grip for the new material.
Brush or roll a thin, even coat over every area you plan to patch. You’ll notice the surface darken slightly as it absorbs. Don’t pool it in the pits, just coat them evenly.
Timing matters here. Most bonding agents need to stay tacky when you apply your patch, so read the directions and work within that window. Skipping this step is tempting, but it’s one of the most common reasons repairs fail. A few minutes now saves you a redo later.
Step 6 – Mix and Apply the Patch Material
Pour your concrete patch or resurfacer into a clean bucket and add water slowly. Mix with a paddle or drill attachment until it reaches a smooth, peanut-butter-like consistency. Lumps mean uneven curing, so blend it well.
Work the material into each pit with your trowel, pressing firmly to push out air pockets. Overfill slightly, since patches shrink a touch as they set. The mix should feel thick but spreadable as it grips the surface.
Mastering how to repair pitted concrete really comes down to this moment. Move steadily and confidently, filling every crater and crack while the material stays workable. Don’t mix more than you can use in 15 to 20 minutes.
Step 7 – Smooth and Level the Surface
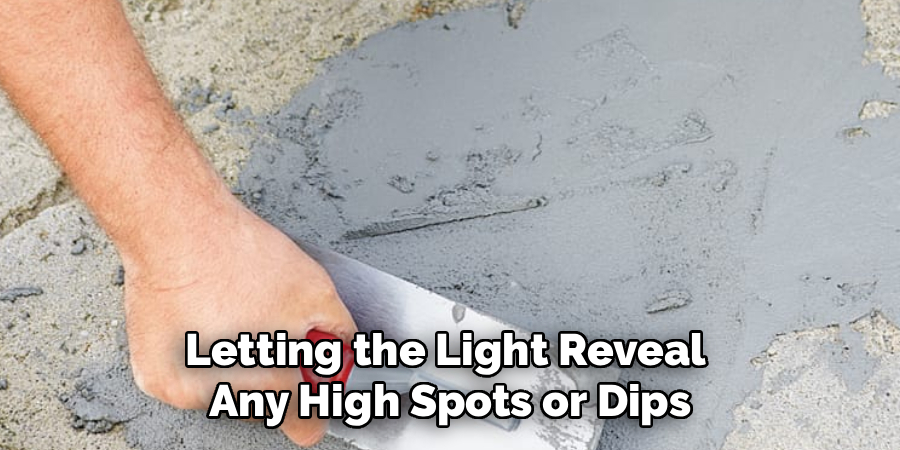
Once the pits are filled, it’s time to feather everything flush. Hold your trowel at a slight angle and glide it across the patch in long, smooth strokes. You’re blending the fresh material into the surrounding concrete so no lumps or ridges remain.
For larger resurfacing jobs, a long-handled squeegee trowel helps you reach without bending. Work quickly but carefully, because the surface starts firming up fast.
Check your work from a low angle, letting the light reveal any high spots or dips. Touch up those areas before the material sets. A smooth, even finish here means your walkway or patio will look professional and feel comfortable underfoot.
Step 8 – Let It Cure Properly
Patience pays off in the curing stage. Fresh cement repair needs time to harden and reach full strength, so resist the urge to walk on it right away.
Keep foot traffic off for at least 24 hours, and wait longer before driving on a repaired driveway. Check your product label for exact times, since they vary.
In hot or windy weather, mist the patch lightly with water to slow drying and prevent cracks. Covering it with plastic sheeting helps lock in moisture too. Curing might feel like the boring part, but rushing it weakens the bond. Give it the full time and your repair will hold strong for years.
Critical Mistakes When Repairing Pitted Concrete
The biggest mistake people make is skipping surface prep. It’s tempting to slap patch material straight onto a dirty slab, but dust and oil prevent any real bond. Your patch will flake off within weeks, leaving you right back where you started. Always clean and chip out loose material first.
Another common error is mixing too much patch at once. These products set fast, and once they start hardening in the bucket, they’re useless. Mix small batches you can actually apply within the working window.
Ignoring the bonding agent is a frequent shortcut that backfires. Without it, even a perfectly mixed patch struggles to grip old, smooth concrete. That thin coat of adhesive makes a huge difference in how long your repair lasts.
People also rush the curing process. Walking or parking on fresh patches too soon creates cracks and dents that ruin all your hard work. Finally, don’t ignore the weather. Patching in direct, blazing sun or freezing temperatures causes the material to cure unevenly and fail prematurely.
Expert Cleaning Tips
A clean surface is the foundation of every successful patch, so it’s worth a little extra effort. For oily garage floors, sprinkle cat litter or baking soda over fresh stains to absorb the grease before you scrub. Old, set-in oil responds well to a dedicated concrete degreaser left to soak for ten minutes.
When pressure washing, hold the nozzle at a steady angle and keep it moving. Lingering in one spot can etch or damage the surface you’re trying to save. Sweep up debris as you go rather than letting it scatter back into your clean pits.
Finally, give the slab a final once-over with a dry brush right before patching. Even a thin layer of fresh dust can weaken your bond, so this last sweep makes a real difference.
Frequently Asked Questions
How long does a concrete patch take to fully cure?
Most concrete patches feel solid within 24 hours, but full curing takes longer. Light foot traffic is usually fine after a day, while heavier loads need more time. Here’s a quick guide:
- Foot traffic: 24 hours
- Furniture or light use: 48 to 72 hours
- Vehicle traffic on driveways: up to 7 days
Always check your product label, since formulas vary.
Can I patch concrete in cold weather?
Cold weather makes patching tricky because freezing temperatures stop the material from curing properly. Aim for temperatures above 50°F during application and for at least 24 hours afterward. If you must work in cooler conditions, use a cold-weather patch product and cover the area with insulating blankets to trap warmth and help the patch set correctly.
What’s the difference between a patch and a resurfacer?
A concrete patch is thicker and designed to fill deep pits, holes, and spalling areas. A resurfacer is thinner and spreads over a wider surface to renew worn, lightly pitted concrete. Use a patch for individual damaged spots and a resurfacer when an entire slab, like a tired patio or garage floor, needs a fresh, smooth top layer.
Do I really need a bonding agent?
Yes, in most cases you do. A bonding agent helps your new patch grip old, smooth concrete that would otherwise reject fresh material. Skipping it is the top reason repairs fail. Some modern patch products include bonding additives in the mix, so read the label. If yours doesn’t, apply a separate bonding agent for the strongest, longest-lasting hold.
How do I prevent pitting from coming back?
Prevention comes down to sealing and maintenance. Apply a quality concrete sealer once your repair fully cures, then reseal every few years. Sealing keeps water, salt, and chemicals from breaking down the surface. Also clean up oil and de-icing salts promptly during winter, since these are the main culprits behind new pitting on driveways and walkways.
Conclusion
Fixing damaged concrete is one of those projects that looks intimidating until you actually start. Once you break it into clear steps, it’s completely manageable for any beginner. The secret really comes down to three things: thorough cleaning, using a bonding agent, and giving the patch enough time to cure.
Now you know how to repair pitted concrete from start to finish, from chipping out loose material to smoothing that final coat. You’ve got the tools, the technique, and the confidence to tackle your garage floor, patio, or walkway without paying a contractor.
Take your time with the prep work, mix in small batches, and don’t rush the curing. Those small habits separate a patch that lasts for years from one that crumbles in a month.
So grab your trowel, gather your materials, and pick a dry weekend to get started. Your concrete will look better, last longer, and you’ll have a satisfying new skill in your back pocket. You’ve got this, and your slab will thank you.