

Few things test your patience like a faucet that dribbles instead of flows or a shower that barely rinses the soap from your hair. Weak water flow slows down your whole day, from washing dishes to filling the bathtub. The good news? You can often fix it yourself in an afternoon, no plumber required.
Learning how to repair low water pressure saves you money and gives you real confidence around your home. Most causes are simple: a clogged faucet aerator, sediment buildup, or a partly closed shutoff valve. This guide walks you through the exact steps to find the problem and restore strong, steady flow throughout your home.
Why Learning to Fix Low Water Pressure Matters
When you know how to tackle weak water flow, you stop feeling helpless every time a faucet sputters. For homeowners, this skill protects your plumbing and prevents small issues from turning into expensive repairs. For renters, it means you can solve quick problems without waiting days for a landlord to send someone.
DIY beginners get an extra reward: hands-on practice with tools, valves, and plumbing fixtures that builds real skill over time. You’ll learn how your home’s water system works, where the trouble spots hide, and how to spot mineral buildup before it spreads.
Best of all, you’ll save money. A single service call can cost more than a year’s worth of replacement parts. So, master these basics before you ever pick up the phone.
Tools and Materials You’ll Need
You don’t need a fancy toolkit to fix weak water flow. Most of these items already live in a kitchen drawer or garage shelf. Gather everything before you start so you’re not running around mid-job with wet hands.
Here’s what to have ready:
An adjustable wrench for loosening fittings and aerators.
A pair of slip-joint pliers for stubborn connections.
A soft cloth or rag to grip parts and protect finishes.
White vinegar to dissolve sediment and mineral buildup.
A small bowl or zip-top bag for soaking small parts.
An old toothbrush for scrubbing away grit.
A flashlight to inspect tight spaces under the sink.
Plumber’s tape to reseal threaded connections cleanly.
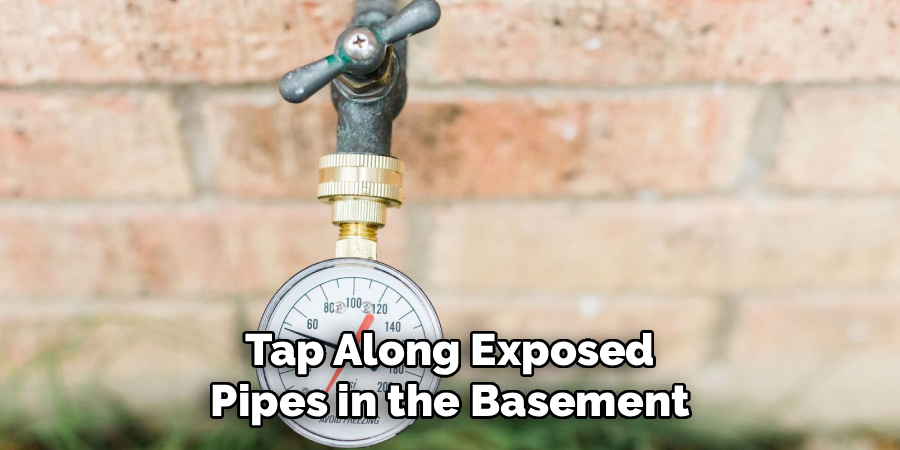
Optional but handy: a water pressure gauge that screws onto an outdoor spigot. It tells you your exact flow rate and helps you confirm whether the problem is one fixture or the whole house.
Step-by-Step Guide on How to Repair Low Water Pressure
Follow these steps in order. Each one rules out a common cause, so you narrow down the problem quickly. Take your time and keep that rag nearby for drips.
Step 1 – Check Whether the Problem Is One Fixture or the Whole House
Start by turning on faucets in different rooms. Run the kitchen sink, then test the bathroom faucet and the shower. Notice where the flow feels weak and where it stays strong.
If only one plumbing fixture struggles, your fix is local and easy. If every tap in the house drips slowly, the issue likely sits with your main supply line or pressure regulator.
Listen for sputtering and watch the stream. A fixture that spits air may have a clogged aerator, while a slow whole-house flow points to something bigger. This quick test saves hours, because it tells you exactly where to focus your energy next.
Step 2 – Clean the Faucet Aerator
The faucet aerator is the small mesh screen at the tip of your spout. It’s the number one cause of weak kitchen and bathroom flow. Over time, sediment and mineral buildup clog those tiny holes.
Unscrew the aerator by hand or wrap a cloth around it and use pliers gently. You’ll see grit, white flakes, or rusty bits trapped inside. Drop the pieces into a bowl of white vinegar and let them soak for an hour.
Scrub the screen with an old toothbrush, rinse under running water, and reassemble. Turn the faucet back on. You’ll often feel the difference right away as the stream returns to full, steady strength.
Step 3 – Inspect and Clean the Showerhead
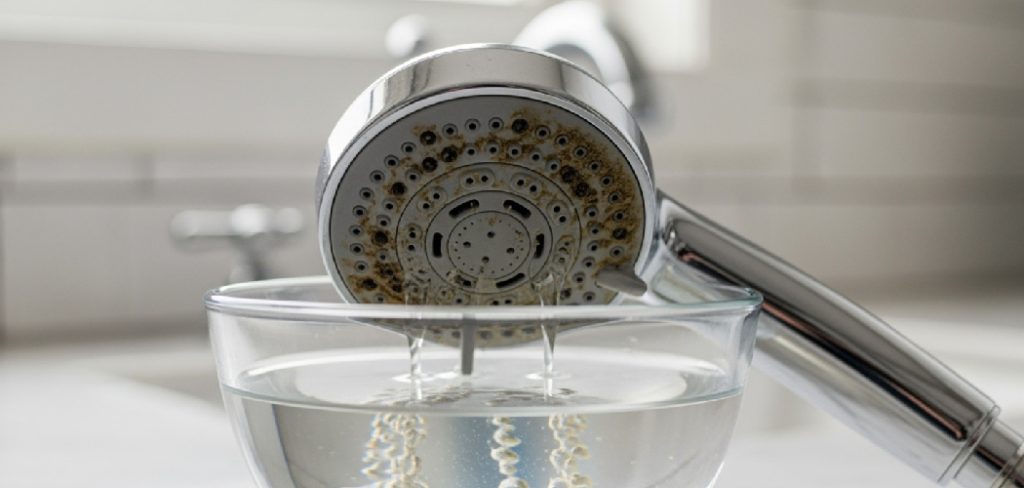
A weak shower usually means the showerhead is choked with mineral buildup. Hard water leaves chalky deposits that block the spray holes one by one until you’re standing under a sad trickle.
Unscrew the showerhead from the arm. Wrap the connection with a cloth first to avoid scratching the finish. Fill a zip-top bag with white vinegar, slip it over the showerhead, and secure it with a rubber band so the nozzle soaks completely.
Leave it for a few hours or overnight for heavy crust. Then scrub the face with a toothbrush, poke any stubborn holes clear, and rinse well. Reattach it with fresh plumber’s tape on the threads, and enjoy that restored, drenching spray.
Step 4 – Verify the Shutoff Valves Are Fully Open
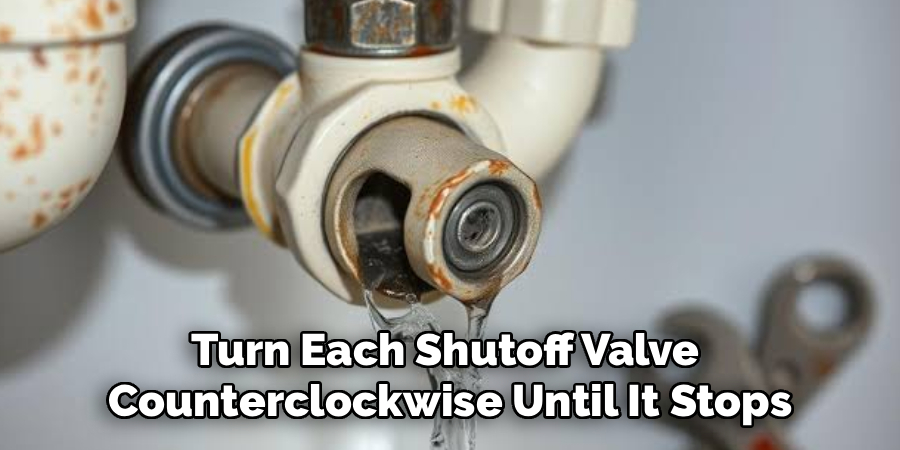
This is the step people overlook most, and it’s embarrassingly simple. Each sink and toilet has a shutoff valve underneath, and your home has a main valve where water enters the house.
A valve that’s only partly open chokes the flow rate without you realizing it. Maybe someone bumped it during a recent repair, or it never got fully reopened after work.
Reach under the sink with your flashlight. Turn each shutoff valve counterclockwise until it stops, opening it all the way. Check the main valve too. Knowing how to repair low water pressure often comes down to this five-minute check that costs you nothing but a quick crouch under the cabinet.
Step 5 – Check the Supply Lines for Kinks or Clogs
The supply line is the flexible hose connecting the shutoff valve to your faucet or toilet. These thin braided or plastic tubes can kink, crimp, or collect debris inside, slowing everything down.
Trace each line with your hand and look for sharp bends or pinch points. Straighten any kinks gently. If a line feels stiff, brittle, or shows corrosion at the fittings, it’s worth replacing for a few dollars.
To test for an internal clog, disconnect the line at the faucet end and aim it into a bucket. Open the valve briefly. Strong flow means the line is clear, while a weak trickle tells you the line or valve is restricted and needs attention.
Step 6 – Examine the Pressure Regulator
If your whole house suffers from weak flow, the pressure regulator may be failing. This bell-shaped device sits near where the main supply line enters your home, often close to the water meter.
Regulators wear out over time and can stick in a low setting, choking flow throughout every plumbing fixture. Some models have an adjustment screw on top. Turning it clockwise slightly raises pressure, but go in small turns and test as you adjust.
If turning the screw does nothing, the regulator has likely failed and needs replacing. This task can sit at the edge of DIY skill, so weigh your comfort level. Replacing it yourself saves money, but it requires shutting off the main water supply first.
Step 7 – Look for a Clogged Pipe or Hidden Buildup
Older homes with galvanized steel pipes are prone to internal corrosion. Decades of rust and mineral buildup narrow the pipe walls, squeezing your flow rate down to a crawl.
You can’t see inside the walls, but you can spot the signs. Rusty or discolored water, flow that drops over months, and weak pressure at faucets farthest from the main line all hint at a clogged pipe.
Tap along exposed pipes in the basement and listen for dull, packed sections versus hollow ones. Sadly, badly corroded pipes need professional replacement. Still, identifying this yourself helps you explain the issue clearly and avoid paying for unnecessary guesswork later.
Step 8 – Test, Confirm, and Reassemble Everything
After working through each step, it’s time to confirm your success. Turn the water supply fully back on and walk through the house testing every faucet, the shower, and each toilet refill.
Watch the streams. They should run full, steady, and free of sputtering. If you used a pressure gauge, screw it onto an outdoor spigot to check that your reading sits in the healthy 40 to 60 psi range.
Double-check every connection you opened for drips, and tighten gently if needed. Wipe down your work area and put your tools away. By now you’ve learned how to repair low water pressure from the faucet tip all the way back to the main line.
Critical Mistakes When Repairing Low Water Pressure
Even careful beginners trip over a few common errors, so watch for these before you start.
The biggest mistake is forgetting to shut off the water before disconnecting anything. Opening a supply line or removing a fixture while the valve is on sends water spraying across your kitchen in seconds. Always close the local shutoff valve first, then open the faucet to relieve any leftover pressure.
Another frequent slip is overtightening fittings during reassembly. Cranking a wrench too hard cracks plastic nuts, strips threads, and warps the faucet aerator screen. Snug is enough; a quarter turn past hand-tight usually seals fine, especially with fresh plumber’s tape.
Many people also skip the simple checks and jump straight to dramatic fixes. They start replacing parts before confirming whether a shutoff valve is half-closed or an aerator is clogged. Work from easy to hard.
Finally, ignoring mineral buildup invites the problem right back. If hard water clogged your fixtures once, it will again unless you clean regularly and consider a water softener for the long haul.
Expert Cleaning Tips
A little routine care keeps your flow strong and saves you from repeat repairs. Once a month, unscrew your faucet aerator and give it a quick vinegar soak. Five minutes of maintenance beats a frustrating slowdown later.
For showerheads, tie a vinegar-filled bag around the nozzle every few months, especially if you live with hard water. The white deposits you scrub away are the same sediment that strangles flow rate over time.
Run a soft toothbrush over screens and spray faces rather than poking with metal, which can widen holes and ruin the spray pattern. Rinse parts thoroughly so no vinegar smell lingers.
Keep a small jar of plumber’s tape and a spare aerator on hand. When buildup strikes, you’ll be ready to swap and clean in minutes instead of waiting on a store run.
Frequently Asked Questions
Why does only my hot water have low pressure?
Low pressure on the hot side alone usually points to your water heater. Sediment settles at the bottom of the tank and can clog the outlet or the hot supply line. Check these spots:
- The shutoff valve on the heater’s hot outlet
- The supply line connecting the heater to your pipes
- Sediment buildup inside the tank, which flushing can fix
If both clear up, you’ve found your culprit.
How do I know if my pressure regulator is bad?
A failing pressure regulator shows clear signs. You’ll notice weak flow across the entire house, pressure that swings up and down for no reason, or a hammering noise in the pipes. Test with a gauge on an outdoor spigot. Readings far below 40 psi, or that won’t respond to the adjustment screw, mean the regulator has worn out and needs replacing.
Can hard water really cause low water pressure?
Yes, absolutely. Hard water carries dissolved minerals that leave chalky deposits inside faucets, showerheads, and pipes. This mineral buildup slowly narrows the path water travels, choking your flow rate over months or years. Regular cleaning with vinegar removes surface deposits, but installing a water softener offers the best long-term protection for your whole plumbing system.
Is it safe to adjust the pressure regulator myself?
You can adjust it safely if you go slowly. Turn the screw in small increments, no more than a quarter turn at a time, and test the flow before adjusting again. Never crank it wide open, since too much pressure stresses pipes and joints. If turning the screw produces no change at all, stop and plan to replace the regulator instead.
How much water pressure should my home have?
Most homes run best between 40 and 60 psi. Below 40, faucets feel weak and showers disappoint. Above 80 psi, the extra force damages plumbing fixtures, appliances, and seals over time. Use an inexpensive gauge on an outdoor spigot to check your number. If it reads outside that healthy range, your regulator likely needs adjustment or replacement.
Conclusion
Weak water flow doesn’t have to leave you frustrated at the sink or under a dribbling shower. As you’ve seen, most fixes are simple, affordable, and well within reach for any beginner willing to grab a wrench and a bottle of vinegar.
Start small and work your way up. Test which fixture is affected, clean the faucet aerator and showerhead, confirm every shutoff valve is fully open, then inspect supply lines, the pressure regulator, and your pipes for sediment or a clogged pipe. Each step rules out a cause and brings you closer to strong, steady flow.
The real win is confidence. Once you understand how to repair low water pressure, you’ll handle these problems in an afternoon instead of waiting on a costly service call. Keep your tools handy, clean your fixtures regularly, and watch for mineral buildup before it spreads.
So grab that toothbrush, soak those screens, and enjoy the satisfying rush of full pressure you fixed with your own two hands.