

Looking up at a damaged ceiling can easily ruin a perfectly good weekend. Homeowners and renters deal with this frustrating issue all the time.
Hiring a professional contractor often costs a small fortune. Paying for labor and travel time adds up quickly.
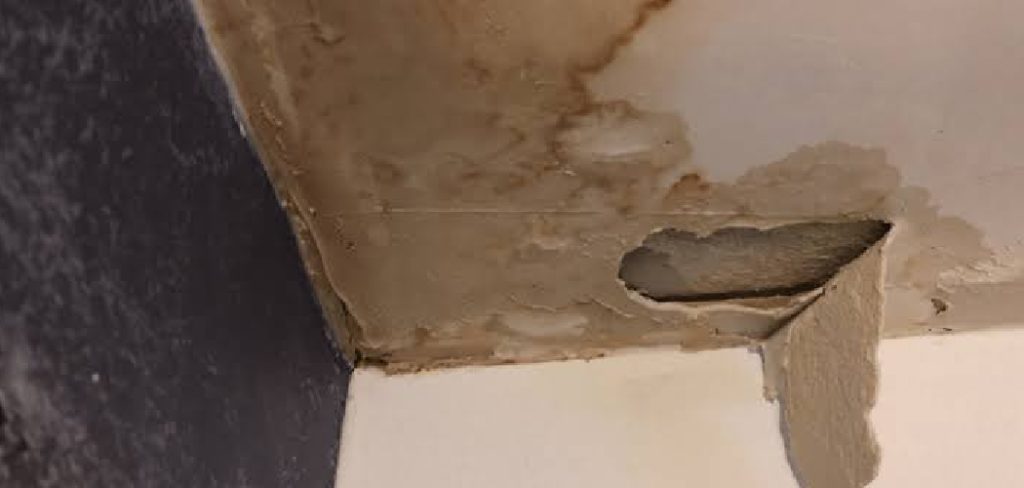
Fixing the damage yourself keeps that money right in your pocket. You can tackle this weekend project with basic supplies from any hardware store.
If you want to know how to repair hole in ceiling, you are in the right place. We will walk you through the entire process. You will learn everything you need to know to make that ceiling look brand new again.
What Causes This Problem?
Ceiling damage happens for many different reasons. Understanding the root cause helps you prevent future issues.
Here are the most common culprits behind ceiling holes:
- Water leaks: Plumbing issues or roof leaks soften the drywall until it crumbles away.
- Accidental impact: Moving tall furniture or swinging objects can easily punch right through the plaster.
- Removed fixtures: Taking down old ceiling fans or lighting leaves behind unwanted gaps.
- Pest damage: Rodents and insects sometimes chew through the drywall in older homes.
- Foundation settling: House movement creates stress cracks that eventually turn into larger holes.
- Electrical work: Electricians often cut access panels to run new wires through the house.
Tools & Materials Needed
Preparation makes any home improvement project much easier. You need to gather all your supplies before climbing up the ladder.
Having everything within arm’s reach saves you time and frustration.
Essential Hardware Tools
You will need a few basic hand tools for this job.
- Sturdy step ladder
- Utility knife with fresh blades
- Drywall saw (keyhole saw)
- Putty knife (6-inch and 10-inch)
- Sanding block or sponge (fine-grit)
- Tape measure and pencil
- Safety glasses and dust mask
Necessary Patching Materials
The right materials ensure a seamless, long-lasting fix.
- Scrap piece of drywall (matching your ceiling thickness)
- Wooden backing strips (1×2 inch lumber works well)
- Drywall screws (1.25 inch)
- Fiberglass mesh drywall tape
- Joint compound (also called drywall mud)
- Ceiling texture spray (if your ceiling is not smooth)
- Stain-blocking primer and matching ceiling paint
Step-by-Step Fix Guide: How to Repair Hole in Ceiling
Tackling a ceiling patch seems intimidating at first glance. We broke the process down into simple, manageable pieces.
Follow these exact steps to achieve a perfectly smooth finish.
Step 1: Prep the Work Area
Drywall dust gets absolutely everywhere. You must protect your floors and furniture first.
Lay down a heavy canvas drop cloth directly under the damaged area. Move small furniture out of the room completely.
Put on your safety glasses and a dust mask. Looking up while scraping drywall guarantees debris will fall toward your face.
Step 2: Square Off the Damage
Jagged edges make patching impossible. You need to create clean lines.
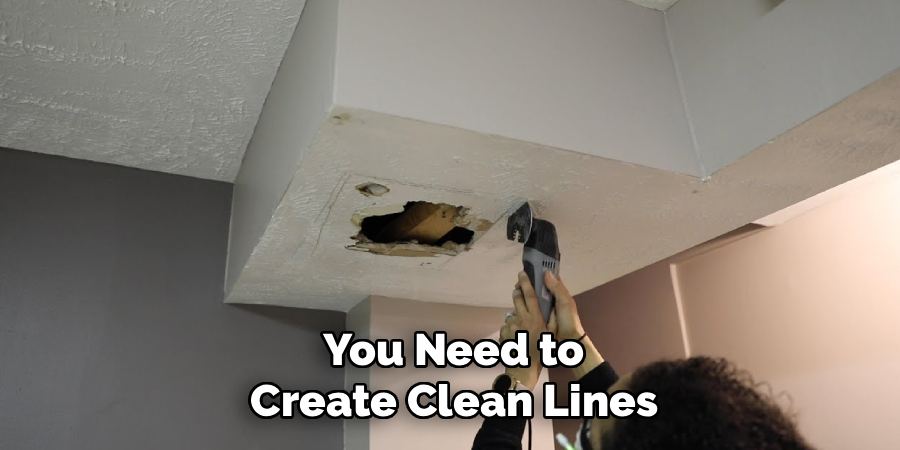
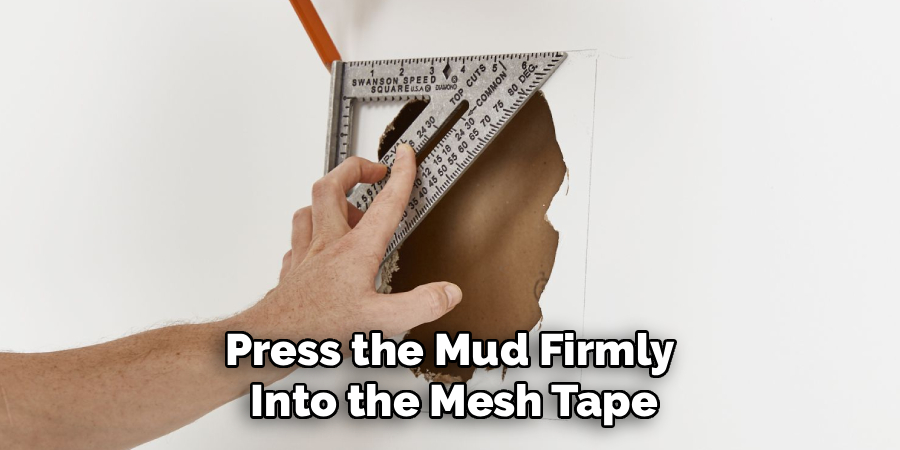
Use your tape measure to draw a perfect square around the damaged area. Make sure the square is slightly larger than the hole itself.
Take your drywall saw and carefully cut along the pencil lines. Remove the damaged piece and discard it. You now have a clean, square opening to work with.
Step 3: Install Wooden Backing
Your new drywall patch needs something to hold onto. The empty space in your ceiling cannot support the patch alone.
Cut two pieces of wooden backing strips. Make them a few inches longer than the hole you just cut.
Slide the wood strips into the hole. Position them so they overlap the edges of the solid ceiling.
Drive drywall screws through the existing ceiling into the wooden strips. This creates a secure, anchored frame for your patch.
Step 4: Cut and Attach the Patch
Measure the exact dimensions of your new square opening. Transfer these measurements to your scrap piece of drywall.
Score the front of the scrap drywall with your utility knife. Snap the piece along the line, then cut the paper backing.
Place your new patch into the ceiling hole. It should fit snugly against the wooden backing strips.
Secure the patch by driving screws through the drywall piece directly into the wood strips. Make sure the screw heads sink slightly below the surface.
Step 5: Tape the Seams
You must bridge the gap between the old ceiling and the new patch. This prevents cracks from forming later.
Apply strips of fiberglass mesh tape over all four seams. The mesh tape is self-adhesive and sticks right to the drywall.
Press the tape down firmly with your fingers. Make sure it lays completely flat without any bubbles or wrinkles.
Step 6: Apply the First Coat of Mud
Now it is time to blend the patch into the surrounding ceiling.
Scoop a small amount of joint compound onto your 6-inch putty knife. Spread a thin layer over the taped seams and the screw holes.
Press the mud firmly into the mesh tape. Scrape off the excess compound to keep the layer thin and smooth.
Let this first coat dry completely. This usually takes between 12 and 24 hours, depending on humidity.
Step 7: Apply Additional Coats
Drywall mud shrinks slightly as it dries. You will always need more than one coat.
Switch to your 10-inch putty knife for the second coat. Apply another layer of mud, extending it further out past the edges of the first coat.
Feathering the edges outwards makes the patch invisible. Let the second coat dry completely.
If you still see the outline of the tape, apply a third, very thin coat.
Step 8: Sand the Area Smooth
Once the final coat is bone dry, grab your fine-grit sanding block.
Gently sand the patched area using light, circular motions. Focus heavily on the outer edges where the new mud meets the old ceiling.
Run your hand over the surface. It should feel completely flush with the rest of the ceiling.
Wipe away all the drywall dust with a slightly damp microfiber cloth.
Step 9: Prime and Paint
Never skip the primer. Joint compound absorbs paint differently than the rest of your ceiling.
Apply a coat of stain-blocking primer over the entire patched area. Let the primer dry according to the manufacturer’s instructions.
Finally, use a paint roller to apply your matching ceiling paint. You may need to paint the entire ceiling if the old paint has faded significantly over the years.
Safety Warnings
Working on ceilings carries specific risks you must take seriously.
Always ensure your ladder is fully locked and positioned on a flat, stable surface. Never stand on the very top step of any ladder.
If you are cutting near light fixtures, turn off the power at the breaker box first. Hidden electrical wires often rest right above the drywall.
Wear your dust mask during the entire sanding process. Inhaling fine joint compound dust irritates the lungs and causes severe coughing.
When to Call a Professional
Most homeowners can easily learn how to repair hole in ceiling. However, some situations require a true expert.
Call a professional if the hole is larger than two feet wide. Massive repairs often require lifting heavy drywall sheets, which requires special equipment.
If you notice black mold growing around the hole, stop immediately. Mold remediation requires professional handling and specialized chemicals.
Homes built before 1980 might have asbestos in the ceiling texture. If you suspect asbestos, do not cut or sand the ceiling. Hire a certified abatement company to test and handle it.
Cost Estimate: DIY vs. Professional
Fixing this yourself saves a considerable amount of cash.
A DIY repair typically costs between $30 and $50 in materials. If you already own basic tools like a putty knife and ladder, your cost drops closer to $20.
Hiring a professional handyman or drywall contractor changes the math entirely.
Professionals usually charge between $150 and $400 for a single ceiling patch. The price increases if they need to match complex textures or paint the entire room.
Investing a little sweat equity makes perfect financial sense for this project.
Frequently Asked Questions
Can I use spackle instead of joint compound?
Spackle works perfectly for tiny nail holes or small dents. However, you should always use joint compound for holes larger than a golf ball. Joint compound spreads easier over wide areas and sands down to a much smoother finish.
How do I match my existing ceiling texture?
Matching texture takes a bit of practice. Buy a can of acoustic ceiling texture spray from the hardware store. Practice spraying it on a scrap piece of cardboard first. Once you master the spray distance and pattern, apply it directly over your dried, primed patch.
Do I really need to use drywall tape?
Yes, you absolutely must use drywall tape. If you skip the tape, the joint compound will eventually crack right along the seams. The tape acts like a strong bridge that holds the old ceiling and the new patch tightly together.
What is the fastest way on how to repair hole in ceiling?
The fastest method involves using a pre-made aluminum drywall patch. These stick-on metal patches work great for holes under four inches wide. You simply stick the metal mesh over the hole, cover it with joint compound, let it dry, and sand it smooth.
Conclusion
A damaged ceiling looks terrible, but it is rarely a structural emergency. You have all the skills needed to make it right.
Taking the time to learn how to repair hole in ceiling saves you money and builds your home improvement confidence. By following these straightforward steps, you can eliminate that eyesore for good.
Gather your tools, prep your space, and take your time with the drywall mud. You will be amazed at how easily the damage disappears.
Ready to tackle more home fixes? Check out our other beginner-friendly repair guides to keep your house in perfect shape!