

A broken fence can make your yard look messy and leave your pets vulnerable. Many homeowners assume that fixing fence damage requires an expensive contractor.
However, learning how to repair a chain link fence is easier than you might think. With a few simple tools, you can easily handle most minor repairs on a weekend afternoon.
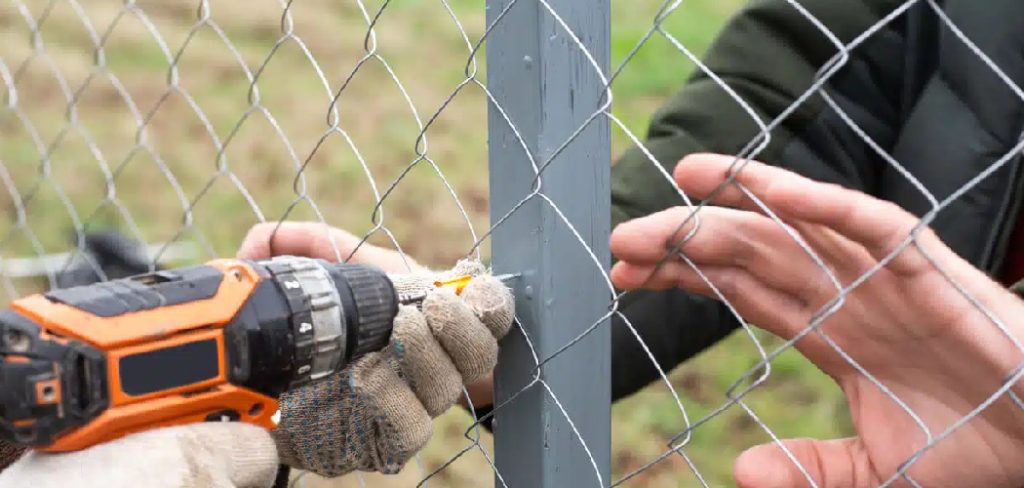
Fixing it yourself saves you serious money on labor costs. It also gives you the confidence to tackle future home maintenance projects.
Whether you have a rusted section or a gaping hole from a fallen branch, you can fix it. Let us walk through the exact steps to restore your yard’s security and curb appeal.
What Causes Chain Link Fence Damage?
Fences take a beating from the elements and daily life. Understanding the root cause of the damage helps you prevent future issues.
Here are the most common culprits behind fence damage:
- Fallen branches: Heavy storms often bring down tree limbs that crush the top rail.
- Rust and corrosion: Years of rain and snow eventually break down the protective galvanized coating.
- Wear and tear from pets: Dogs jumping on or digging under the mesh can warp the metal over time.
- Landscaping accidents: Lawnmowers and string trimmers frequently catch and cut the bottom wires.
- Climbing: People using the fence as a ladder easily bend the top rail and stretch the fabric.
- Shifting soil: Freeze-thaw cycles can loosen the concrete footings, causing posts to lean.
Tools and Materials Needed
Before you learn how to repair a chain link fence, you need the right gear. Gathering everything beforehand saves you frustrating trips to the hardware store.
You likely have some of these tools in your garage already.
Essential Tools
- Heavy-duty wire cutters or bolt cutters
- Lineman’s pliers
- A come-along (cable puller) or a standard fence puller
- Adjustable wrench
- Work gloves (heavy leather is best)
- Safety glasses
Necessary Materials
- Replacement chain link fabric (matching your current fence’s gauge and height)
- Aluminum fence ties
- Replacement tension bars (if your current ones are bent)
- Tension bands and carriage bolts
- A replacement top rail (if your current rail is crushed)
Step-by-Step Fix Guide: How to Repair a Chain Link Fence
Repairing a fence mostly involves unweaving the old wire and weaving in the new. It might look like a complex puzzle, but the wire mesh actually unspools easily.
Follow these beginner-friendly steps to fix your fence perfectly.
Step 1: Assess and Measure the Damage
First, take a close look at the damaged area. You need to know exactly how much fence fabric needs replacing.
Measure the width of the ruined section. Always add at least one extra foot of healthy fence to your measurement.
This overlap ensures you have enough room to weave the new section into the old one. Check your top rails and posts for bends or cracks, too.
Step 2: Remove the Old Fence Ties
Put on your leather work gloves and safety glasses. Metal edges are razor-sharp once cut.
Locate the aluminum fence ties holding the damaged mesh to the top rail and line posts. Use your lineman’s pliers to untwist and remove these ties.
Drop the old ties into a bucket so they do not get lost in the grass. Freeing the mesh makes it much easier to remove the broken section.
Step 3: Extract the Damaged Chain Link Fabric
You do not need to cut the wire to remove a section of fence. Chain link fabric is basically a giant series of interlocking zig-zag wires.
Locate a healthy wire at the far left edge of the damaged section. Untwist the top and bottom loops of this specific wire using your pliers.
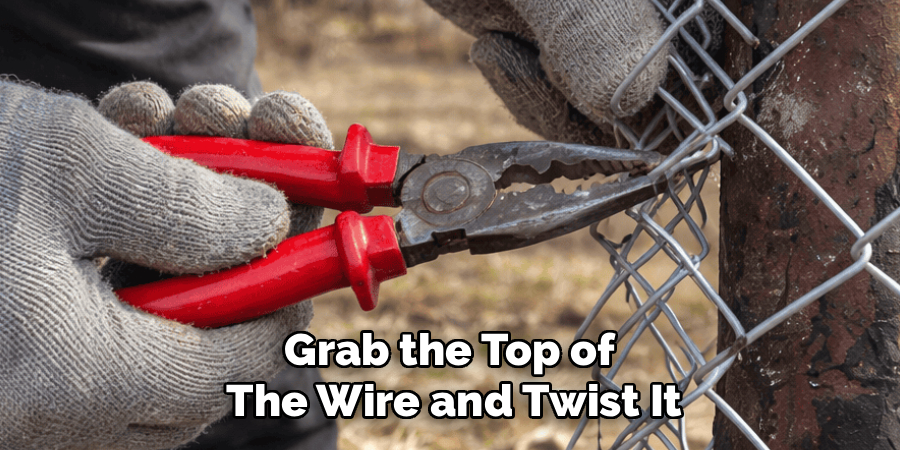
Once untwisted, grab the top of the wire and twist it upward like a corkscrew. The wire will spiral right out of the fence, disconnecting the damaged section. Repeat this on the right side of the damage.
Step 4: Prepare the New Mesh
Roll out your new chain link fabric on a flat area of your driveway or lawn. Measure out a piece that exactly matches the gap you just created in the fence.
Remove the excess new fabric using the exact same corkscrew method from Step 3. Untwist the loops and spiral the wire out to separate your patch piece.
Carry your perfectly sized replacement piece over to the gap in your fence. Prop it up against the top rail to get it into position.
Step 5: Weave the New Fence Section
This is the most satisfying part of learning how to repair a chain link fence. Align the edge of your new fabric with the edge of your existing fence.
Take one of the loose zig-zag wires you removed earlier. Feed it down through the top loops of both the old and new fence sections.
Spiral the wire downward, catching both sides as you turn. Once you reach the bottom, use your pliers to twist the top and bottom loops shut. Repeat this process on the other side of the patch.
Step 6: Pull the Fence Taught
A sagging fence looks terrible and offers poor security. You need to apply tension to the newly woven section.
If it is a small patch, you can often pull it tight by hand. For larger sections, insert a tension bar through the mesh about three feet from a corner post.
Attach your come-along tool to the post and the tension bar. Crank the come-along slowly until the new chain link fabric is tight and springy.
Step 7: Secure the Fence Ties
With the fence pulled tight, it is time to secure the mesh to the top rail. Grab your new aluminum fence ties.
Hook a tie through the mesh and over the top rail every 24 inches. Pull the tie tightly with your pliers and wrap it securely around the rail.
Add ties to the vertical line posts every 12 to 18 inches. Finally, release the come-along and remove the temporary tension bar.
Fixing a Bent Top Rail
Sometimes the damage goes beyond the wire mesh. A falling tree branch will easily crush the hollow aluminum top rail.
You can fix this without replacing the entire fence line. Use a hacksaw or reciprocating saw to cut out the damaged section of the rail.
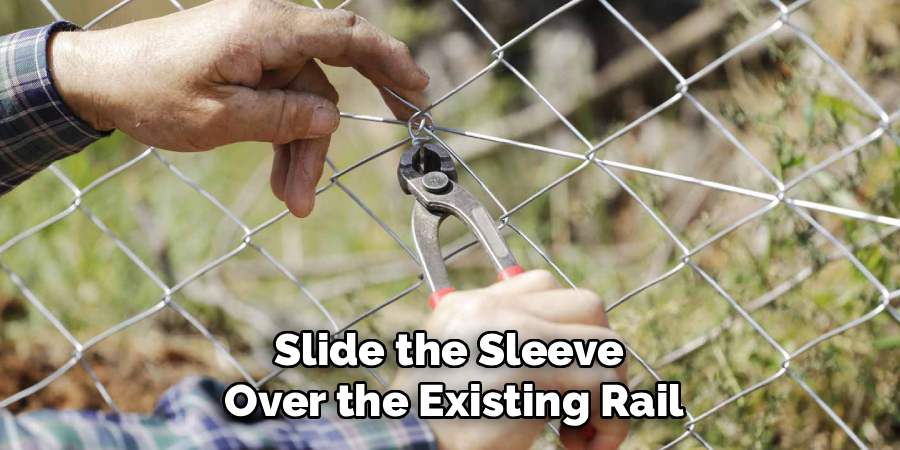
Buy a replacement rail and a top rail sleeve from the hardware store. Slide the sleeve over the existing rail, insert your new cut-to-size pipe, and secure it.
Safety Warnings for Fence Repair
Working with metal carries specific risks that you should never ignore. Safety must be your top priority during this project.
Always wear heavy-duty leather gloves. The tips of cut chain link wire will easily slice through thin fabric gloves and skin.
Never skip the safety glasses. When you clip tight wires, small metal fragments can snap backward toward your face.
If you are replacing a metal post, call your local utility company before digging. Hitting an underground gas or power line is a life-threatening mistake.
When to Call a Professional
While you can fix most mesh issues yourself, some problems require expert help. Be honest about your limits before starting a massive project.
If your concrete footings are crumbling and heaving, call a pro. Digging out massive chunks of old concrete is backbreaking work that requires heavy machinery.
You should also hire a contractor if a vehicle crashed through multiple structural corner posts. Corner posts hold the tension for the entire fence line and require precise installation.
Finally, call a professional if the damaged fence borders a disputed property line. A licensed contractor ensures the new fence stays strictly on your side of the boundary.
Cost Estimate: DIY vs. Pro Fence Repair
Money is the biggest factor when deciding between DIY and hiring a contractor. The savings are substantial if you do the work yourself.
For a DIY repair, a 50-foot roll of standard chain link fabric costs between $60 and $100. Tension bars, fence ties, and a new top rail might add another $40.
If you already own the basic tools, your total DIY cost usually sits between $100 and $150.
Hiring a professional contractor paints a different financial picture. Most fence companies charge a minimum call-out fee just to assess the damage.
With labor rates averaging $50 to $75 per hour, a simple patch job can easily cost $300 to $500. If posts need replacing, expect the professional bill to climb closer to $800.
Frequently Asked Questions
Can I patch a small hole without replacing the whole section?
Yes. You can weave a small square patch directly over a tiny hole. Use standard fence wire to bind the edges of the patch tightly to the existing mesh.
What gauge chain link fence is best for residential yards?
Most residential fences use 11-gauge or 11.5-gauge wire. Lower numbers mean thicker wire, so 9-gauge is heavier and typically used for commercial properties.
How do I remove rust from a chain link fence?
Use a stiff wire brush to scrub away surface rust. Once the rust is gone, apply a rust-inhibiting metal primer and a coat of exterior metal paint.
Can I repair a leaning fence post myself?
If the post itself is not bent, you can often dig around the concrete base and push it upright. Pour quick-setting concrete into the void to lock the post back into its proper position.
Do I need a permit to repair my fence?
Minor repairs and patching rarely require a permit. However, completely replacing a fence or moving its location often requires approval from your local zoning office.
Conclusion
A damaged fence does not have to ruin your weekend or your budget. Now that you know how to repair a chain link fence, you can tackle the job with total confidence.
By taking your time and following the weaving process, your patch will blend in seamlessly. You will restore your home’s security while keeping hundreds of dollars in your pocket.
Do not let that broken mesh deteriorate any further. Grab your pliers, pick up some replacement wire, and fix your yard today!
If you found this guide helpful, check out our other DIY home repair articles for more money-saving tips.