

Noticing a nasty scratch or gouge on your vessel can ruin a great day on the water. If you are wondering how to repair gelcoat on a boat, you are in the right place. Every boat owner eventually faces chips, spider cracks, or deep scratches on their hull.
Taking your boat to a marine body shop for minor cosmetic damage is incredibly expensive. Shops charge high hourly labor rates for tasks you can easily do in your own driveway. Fixing it yourself saves a massive amount of money.
You do not need to be a master mechanic to make your hull look brand new. With a free weekend and a little patience, you can tackle this project. Let us walk through the process together, neighbor to neighbor.
What Causes Gelcoat Damage?
Before diving into the repair, it helps to know why your boat suffered damage. Gelcoat is the protective outer layer over your boat’s fiberglass structure. It is tough, but it is not invincible.
Here are the most common culprits behind hull damage:
- Dock collisions: Bumping into a wooden or concrete dock can easily chip the brittle outer layer.
- Trailering accidents: Flying gravel from the highway often causes deep chips and scratches.
- UV degradation: Years of direct sunlight dry out the finish, leading to chalking and spider cracks.
- Impact from debris: Hitting floating logs or submerged rocks will easily gouge the surface.
- Improper lifting: Stress cracks often form around cleats or lifting eyes from heavy strain.
Tools & Materials Needed
Having the right gear ready makes the job smooth and stress-free. Do not skip any of these items, as each plays a vital role. You can find most of these at your local marine supply or hardware store.
Here is exactly what you need before getting started:
- Gelcoat repair kit: Buy a high-quality kit that matches your hull color.
- MEKP catalyst: This hardener is essential to cure the resin properly.
- Acetone: You need this powerful solvent to clean the surface completely.
- Rotary tool (like a Dremel): Use a cone-shaped grinding bit to clean out the gouge.
- Sandpaper: Get a variety of wet/dry grits ranging from 150 to 1,000.
- Mixing cups and wooden stir sticks: Essential for blending your paste.
- PVA (Polyvinyl Alcohol) or wax paper: You need this to seal out air so the resin can cure.
- Marine polish and rubbing compound: Required for the final buffing process.
- Putty knife or spreader: Plastic spreaders work best for a smooth application.
- Clean microfiber rags: Have plenty on hand for wiping away dust and solvent.
Preparing for Your Boat Gelcoat Repair
Preparation is the secret to a flawless finish. Do not rush this phase. Set up your workspace in a shaded, well-ventilated area.
Direct sunlight can cause your mixture to harden far too quickly. Try to work on a day when the temperature is between 60 and 80 degrees Fahrenheit. If it is too cold, the resin will not cure properly.
Gather all your supplies and place them on a portable table near the boat. Once you mix the hardener, you only have about 10 to 15 minutes to work. Having everything within reach will save you from panicking.
Step-by-Step Fix Guide: How to Repair Gelcoat on a Boat
Ready to roll up your sleeves? Follow these simple, numbered steps. Take your time, and do not worry if you make a small mistake. You can always sand it down and try again.
Step 1: Clean and Inspect the Damage
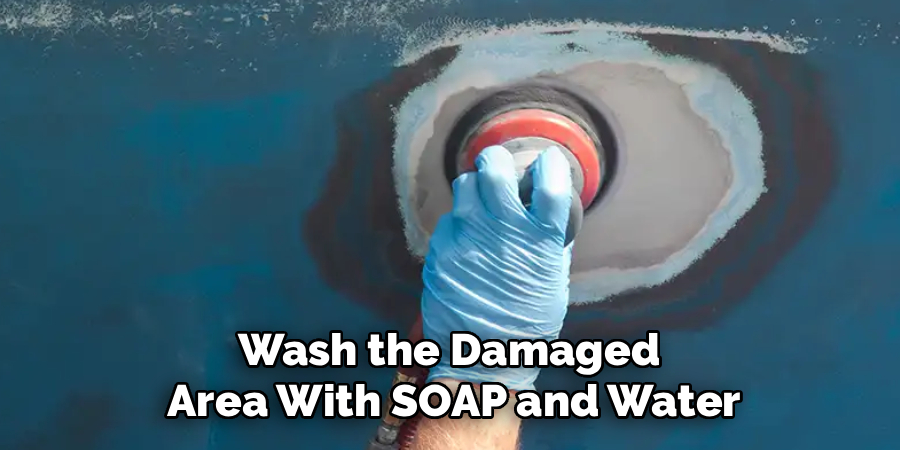
First, you need to see exactly what you are dealing with. Wash the damaged area with soap and water to remove salt and dirt. Dry it completely with a clean towel.
Next, wipe the area down with acetone on a rag. This removes leftover wax, grease, and oils. If you skip the acetone, your patch will not stick to the fiberglass underneath.
Step 2: Prep and Route the Scratch
You cannot just smear paste over a thin scratch and expect it to hold. You actually have to make the hole a little bigger. Grab your rotary tool with a cone-shaped grinding bit.
Gently run the tool along the crack or gouge. You want to create a “V” shape in the scratch. This opens up the edges and gives the new material plenty of surface area to grab onto.
Step 3: Sanding the Damaged Area
Now that you have routed out the damage, it is time for some light sanding. Take a piece of 150-grit sandpaper and lightly scuff the edges of the “V” shape.
You want to bevel the edges outward slightly. This helps blend the new patch into the old surface. Once you finish sanding, brush away the dust. Give the area one more quick wipe with your acetone rag.
Step 4: Mix the Gelcoat and Catalyst
This is where the magic happens. Scoop the desired amount of base paste into a clean mixing cup. If your hull is white, a standard kit might match perfectly. If not, you may need to add coloring tints a tiny drop at a time until it matches.
Once your color is perfect, it is time to add the MEKP catalyst. Follow the instructions on your specific kit carefully. Usually, it requires about 10 to 12 drops of hardener per ounce of paste. Stir it thoroughly with your wooden stick for at least one full minute.
Step 5: Apply the Gelcoat Paste
You now have a short window before the mixture gets hard. Scoop a small amount onto your plastic putty knife. Press the paste firmly into the gouge.
Make sure you push it deep into the repair to force out any trapped air bubbles. Overfill the hole slightly so it sits just above the surface of the hull. The mixture shrinks a tiny bit as it dries, so this extra mound is necessary.
Step 6: Cure and Seal the Repair
Standard gelcoat will not cure correctly if it is exposed to the air. It will remain tacky forever. You must seal it off from the oxygen.
If your kit came with a piece of clear release film or wax paper, gently tape it over the wet patch. Smooth it out lightly with your fingers. Alternatively, you can spray a thin layer of PVA over the patch. Leave the patch alone for at least two to four hours until it is rock hard.
Step 7: Wet Sanding the Surface
Once the patch is completely hard, peel off the film or wash away the PVA with water. You will notice the patch looks lumpy and dull. It is time for wet sanding to make it flush.
Wrap 320-grit wet/dry sandpaper around a small sanding block. Dip it in a bucket of water mixed with a drop of dish soap. Gently sand the mound down until it is flush with the surrounding hull.
Progress up to 600-grit, and finally 1,000-grit paper. Keep the area wet the entire time to prevent deep scratches.
Step 8: Buffing and Polishing for a Perfect Finish
The patch should now be perfectly smooth, but it will still look a bit cloudy. That is where buffing comes in. Apply a dab of marine rubbing compound to a clean rag or a mechanical buffer.
Work the compound into the patch using firm, circular motions. The abrasive compound will remove the fine sanding marks. Finally, wipe it clean and apply a high-quality marine wax or polish. The repair will shine beautifully and blend right in.
Important Safety Warnings
Working with marine chemicals requires some basic caution. Do not take shortcuts when it comes to your health. Always prioritize safety first.
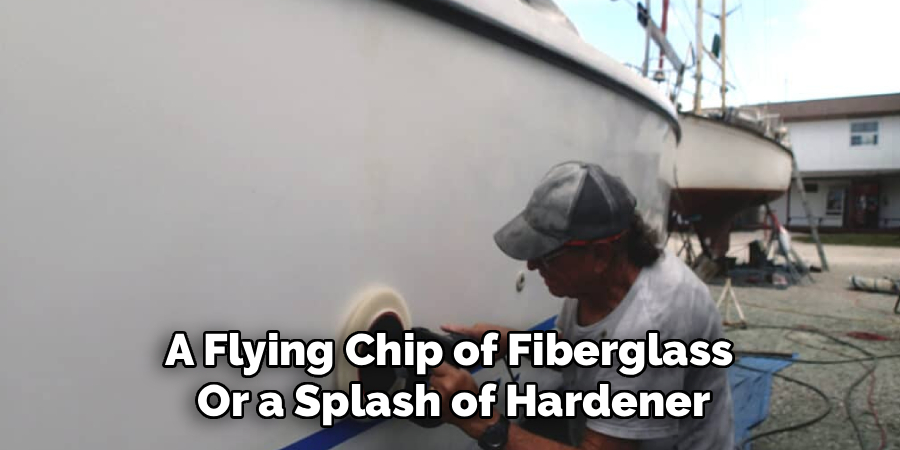
First, always wear safety goggles. A flying chip of fiberglass or a splash of hardener in your eye is a serious emergency.
Second, wear a proper respirator mask, especially during the routing and sanding phases. Breathing in fine fiberglass dust is terrible for your lungs.
Finally, wear nitrile gloves. Acetone and MEKP catalyst are harsh chemicals that will severely dry out or burn your skin. Work in a breezy driveway rather than a closed garage to avoid inhaling strong solvent fumes.
When to Call a Professional vs. DIY
DIY is incredibly rewarding, but you need to know your limits. Learning how to repair gelcoat on a boat is perfect for cosmetic scratches, chips, and small gouges. If the damage is superficial, you can definitely handle it.
However, if the impact compromised the actual structural integrity of the hull, call a pro. If you see broken layers of woven fiberglass fabric deep inside a massive hole, stop. That requires structural fiberglass patching before any cosmetic work can begin.
Additionally, large areas of extensive spider cracking (crazing) across the whole deck are tough to fix. A professional body shop has the heavy-duty spray equipment needed to resurface massive areas correctly. For small dings, though, stick to your DIY skills.
Cost Estimate: DIY vs. Pro
Let us talk numbers. Saving money is the best part of doing it yourself.
A standard DIY repair kit costs between $30 and $50. Acetone, sandpaper, and a cheap plastic spreader might add another $20 to your bill. For under $70, you have enough material to fix a dozen small chips.
Taking your boat to a marine repair shop is a different story entirely. Shops typically charge between $100 and $150 per hour for labor alone. Even a minor scratch repair will often result in a minimum bill of $300 to $500. By doing it yourself, you keep hundreds of dollars in your pocket for fuel and bait.
Frequently Asked Questions
Can I use regular auto body filler on my boat?
No. Standard auto body filler (like Bondo) absorbs water over time. You must use marine-grade products designed specifically for underwater use.
Why is my repair still sticky after a few hours?
It likely did not get sealed from the oxygen. Without a layer of PVA spray or wax paper, standard gelcoat will stay tacky. You will need to wipe it with acetone and try again.
Do I have to use a rotary tool?
Yes, it is highly recommended. If you do not widen the crack into a “V” shape, the new paste cannot grip the edges. The patch will eventually flake right out.
How do I match the color of an older boat?
Sunlight fades hulls over time, so factory white might not match anymore. You will need to buy a coloring tint kit. Add tiny drops of brown or yellow to the white paste to match faded hulls perfectly.
Can I do this repair in the winter?
It is very difficult. The chemical reaction needs heat to cure. If it is below 60 degrees, the paste may never harden. Move the boat to a heated garage if you must do winter repairs.
Conclusion: Mastering How to Repair Gelcoat on a Boat
Fixing your own hull is much easier than most people realize. By following this guide on how to repair gelcoat on a boat, you can restore your vessel’s beautiful shine. You do not have to live with ugly dock rash or highway rock chips anymore.
You gathered the right materials, prepped the surface properly, and took your time sanding and buffing. Now you have a professional-looking repair that saved you hundreds of dollars. The satisfaction of maintaining your own boat is truly unmatched.
Ready to tackle more easy boat maintenance tasks? Bookmark our website for more practical, beginner-friendly repair guides to keep your boat in top shape all season long!