

Vinyl flooring is tough, water-resistant, and looks incredible in any room. But even the most durable floors are not entirely bulletproof.
If you are staring at an ugly scratch, a deep gouge, or a peeling seam, do not panic. You are probably wondering how to repair vinyl floor damage without spending a fortune. The good news is that you can tackle this project yourself.
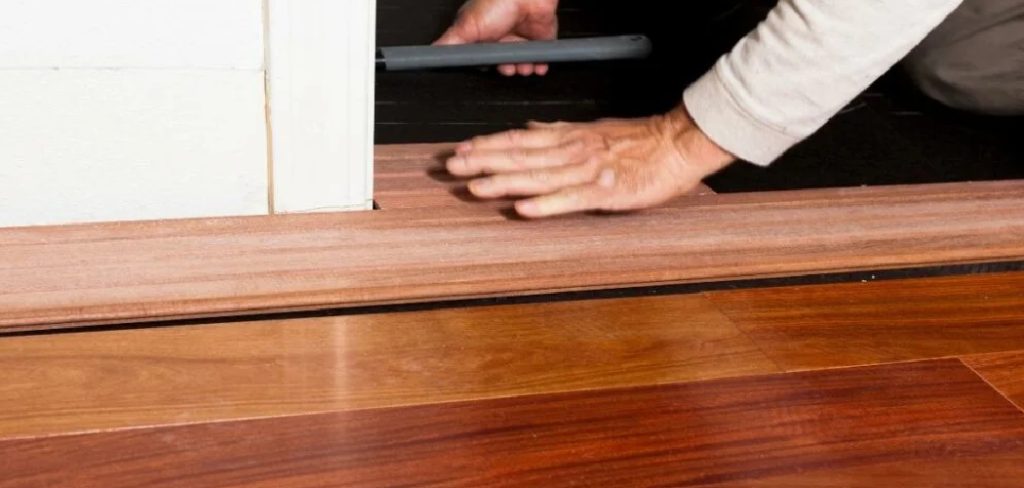
Fixing your floor instead of replacing it completely saves you serious money. You do not need expensive contractors or specialized skills.
Grab a cup of coffee, roll up your sleeves, and let us get that floor looking brand new again.
What Causes Damage to Vinyl Floors?
Before we jump into the fix, it helps to know what caused the mess. Preventing future damage is just as important as the repair itself.
Here are the most common culprits behind damaged vinyl floors:
- Dragging heavy furniture: Moving appliances or heavy sofas without felt pads often leaves deep gouges or rips.
- Pet claws: Large, active dogs running across the house can eventually leave surface-level scratches over time.
- Dropped sharp objects: Dropping a heavy kitchen knife or a heavy tool can puncture the wear layer of your flooring.
- Excessive moisture: Water trapped underneath the planks or sheets can break down the adhesive and cause peeling edges.
- Poor installation: If the subfloor was not properly prepped, your vinyl floor might bubble or buckle under everyday pressure.
Tools and Materials Needed
You cannot start a repair job without the right gear. Gather these supplies before you make your first cut.
Having everything within arm’s reach makes the job much smoother. You can find all of these items at your local hardware store.
- Replacement vinyl: Extra planks, tiles, or a leftover piece of sheet vinyl that matches your floor.
- Utility knife: A sharp box cutter or utility blade for clean, precise cuts.
- Vinyl floor adhesive: High-quality flooring mastic or glue designed specifically for vinyl.
- Seam sealer: Essential for sheet vinyl repairs to keep moisture out of the new seams.
- Heat gun or hairdryer: Used to soften the stiff vinyl and loosen old adhesive.
- Pry bar or putty knife: For lifting edges gently without damaging the subfloor.
- Heavy roller or a rolling pin: To press the new piece firmly into the glue.
- Painter’s tape: To hold things in place while the adhesive dries.
How to Repair Vinyl Floor Scratches
If you have minor surface scratches, you might not need to replace anything at all. Surface scuffs are the easiest problems to tackle.
Here is the best way to handle minor scratches.
Step 1: Clean the Area
Wash the scratched floor with warm water and a mild dish soap. Remove all dust, dirt, and grime from the scratch.
Let the floor dry completely before moving on to the next step.
Step 2: Apply a PU Sealer or Vinyl Polish
For very light scratches, a liquid seam sealer or a polyurethane (PU) vinyl floor polish works wonders. Pour a small amount directly onto a soft cloth.
Rub the polish firmly into the scratch using a circular motion.
Step 3: Buff the Scratch
Once the polish dries, take a clean, dry microfiber cloth. Buff the area until it blends in with the surrounding shine.
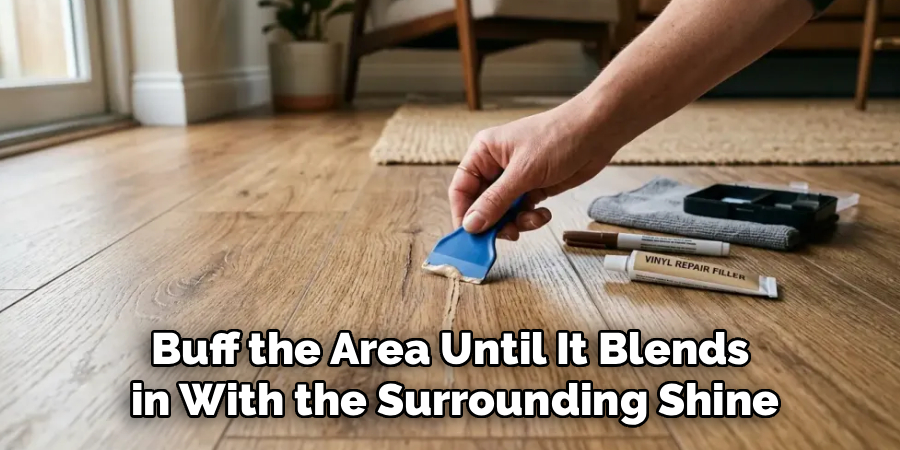
If the scratch is still visible, you may need a vinyl floor repair kit with color-matched putty.
How to Repair Vinyl Floor Planks (LVP)
Luxury vinyl plank (LVP) is incredibly popular, but sometimes a single board gets ruined. Fortunately, you only have to replace the damaged plank.
Follow these steps for a seamless plank replacement.
Step 1: Warm Up the Plank
Grab your hairdryer or heat gun. Set it to medium heat and hover it over the damaged plank for a few minutes.
The heat softens the vinyl and loosens any glue underneath. It makes the material much easier to manipulate.
Step 2: Cut Down the Center
Take your sharp utility knife. Carefully score a line straight down the middle of the damaged plank, from one end to the other.
Make a second cut, creating a “V” shape in the center of the board.
Step 3: Pull Out the Pieces
Insert your putty knife into the cut you just made. Gently pry the center pieces up and out.
Once the middle is gone, carefully wiggle the outer edges free from the interlocking grooves of the surrounding planks.
Step 4: Prep the Replacement Plank
You cannot just snap a new plank into the middle of the floor. You need to modify the new board slightly.
Use your utility knife to carefully shave off the bottom lip of the groove on the new plank. This allows it to drop flat into place.
Step 5: Glue and Drop It In
Apply a high-quality vinyl adhesive to the exposed subfloor. Slide the tongue of your new plank into the groove of the neighboring board.
Press the modified edge down flat into the glue. Use a heavy roller over the entire plank to secure the bond. Wipe away any excess glue immediately.
How to Repair Vinyl Floor Sheets
Sheet vinyl is slightly trickier because it does not have natural seams. You have to create a patch that perfectly matches the existing pattern.
Here is the foolproof way to patch a torn piece of sheet vinyl.
Step 1: Align the Pattern
Take your scrap piece of matching sheet vinyl. Lay it directly over the damaged area on your floor.
Shift the scrap piece around until the pattern lines up perfectly with the existing floor. Tape it down tightly with painter’s tape so it cannot move.
Step 2: Cut the Patch
Grab a metal ruler and a very sharp utility knife. Cut a clean square or rectangle through both layers of vinyl at the same time.
Cutting both layers together guarantees your patch will be the exact size and shape of the hole.
Step 3: Remove the Damaged Floor
Take off the tape and remove your new, perfectly cut patch. Set it aside in a safe spot.
Now, use your putty knife to peel up the damaged square from your floor. Scrape away any old, crusty adhesive from the subfloor underneath.
Step 4: Install the Patch
Spread a thin, even layer of fresh vinyl adhesive onto the bare subfloor. Carefully drop your new patch into the hole.
Press it down firmly. Use a heavy floor roller or a kitchen rolling pin to flatten the patch and squeeze out air bubbles.
Step 5: Seal the Seams
This is the most critical step for sheet vinyl. Apply a liquid seam sealer around the edges of your new patch.
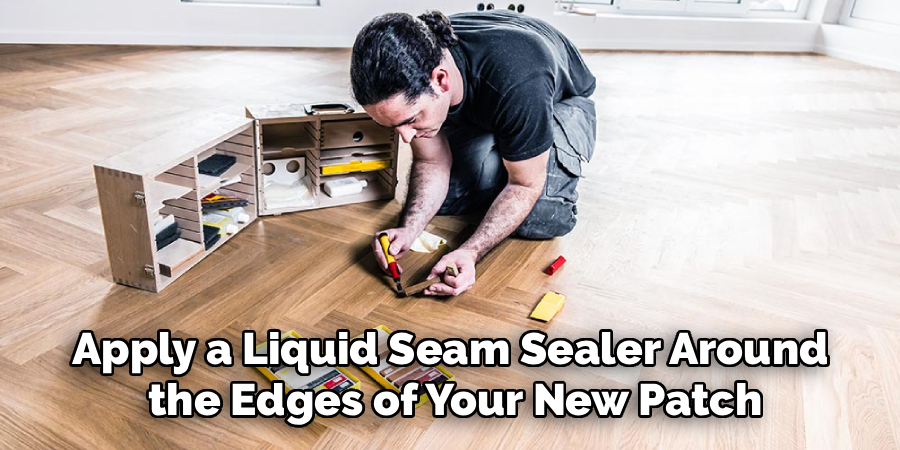
This fuses the vinyl together, blocking dirt and water from ruining the floor later. Let it cure completely according to the package directions.
Crucial Safety Warnings
DIY projects are fun, but your safety always comes first. Repairing flooring involves sharp tools and strong chemicals.
Keep these safety tips in mind while you work:
- Watch your blades: Utility knives are incredibly sharp. Always cut away from your body and keep your fingers clear of the cutting line.
- Ventilate the room: Vinyl adhesives and seam sealers produce strong fumes. Open your windows and run a fan to keep fresh air circulating.
- Be careful with heat: Heat guns get hot enough to blister your skin or melt the floor entirely. Keep the nozzle moving and never hold it in one spot for too long.
- Wear knee pads: Flooring work is notoriously hard on your joints. Protect your knees to avoid severe pain the next day.
When to Call a Professional
I always encourage homeowners to try fixing things themselves. However, there are a few situations where you should definitely call a pro.
Knowing your limits is a key part of successful DIY home maintenance.
Large-Scale Water Damage
If a pipe bursts and floods your room, a simple patch will not fix the problem. Water trapped under the floor leads to toxic mold and subfloor rot.
A professional needs to assess the deep moisture damage, dry the subfloor, and likely replace the entire room’s flooring.
Asbestos Risks in Old Homes
If your home was built before the 1980s, your old vinyl floor or the adhesive underneath might contain asbestos. Never cut, sand, or rip up old flooring if you suspect asbestos.
Call a certified asbestos abatement specialist to test the floor before you do anything.
Cost Estimate: DIY vs. Professional Repair
One of the biggest motivations for learning how to repair vinyl floor damage is the massive cost savings.
Let us break down the numbers so you can see why this DIY project is worth your time.
The DIY Cost
If you already have spare vinyl planks or sheets in your garage, your costs are incredibly low. You only need to buy supplies.
A utility knife, vinyl adhesive, and a bottle of seam sealer will usually cost you between $20 and $40. If you need to buy a whole box of new planks, add about $40 to $80 to that total.
The Professional Cost
Hiring a local flooring contractor or a handyman comes with high labor fees. Most professionals charge a minimum service fee just to show up at your house.
For a simple plank replacement or patch job, expect a professional to charge anywhere from $150 to $300. By doing it yourself, you keep that cash in your wallet.
Frequently Asked Questions
Can I paint over a damaged vinyl floor instead of patching it?
You can paint vinyl floors with specialized floor enamel, but paint will not fill deep gouges or fix peeling seams. You must patch holes and repair structural damage before attempting to paint the surface.
Do I have to replace the underlayment when fixing a torn vinyl floor?
Usually, no. If the damage was caused by a dropped object or a scratch, the underlayment underneath is fine. However, if water caused the damage, you must replace any soggy underlayment to prevent mold.
How long does vinyl floor adhesive take to dry?
Drying times vary by brand, but most vinyl adhesives require 24 to 48 hours to fully cure. Avoid walking on the patched area or moving heavy furniture back until the glue is completely solid.
Can you use super glue to fix peeling vinyl floor seams?
Super glue dries rigid and brittle, which is terrible for floors that flex when you walk on them. Always use a dedicated vinyl floor adhesive or seam sealer designed to remain flexible.
How do I match an old, faded vinyl floor?
Matching an old floor is very tough if you do not have spare pieces from the original installation. Sometimes, the best trick is to steal a matching piece of vinyl from a hidden area, like the floor of a closet or under the refrigerator.
Conclusion
Learning how to repair vinyl floor damage is one of the most rewarding skills a homeowner can master. It might seem intimidating at first, but taking it one step at a time makes the process surprisingly simple.
By cutting clean patches, using the right adhesive, and taking your time, you can easily restore your room’s beautiful appearance. Plus, you get the satisfaction of knowing you saved hundreds of dollars by doing the job yourself.
Your home is your sanctuary, and keeping it in top shape is totally within your reach. Do not let a minor scratch or a torn plank stress you out.
Ready to tackle more home projects? Bookmark our blog for more beginner-friendly repair guides and take control of your home maintenance today!