

Is your Whirlpool washer acting up, refusing to spin, drain, or even start? Before you panic or reach for the phone to call a pro, take a breath. Most washer problems come down to a few simple parts you can check and fix yourself.
Whirlpool builds reliable machines, but every appliance hits a snag eventually. A clogged drain pump, a tired lid switch, or a kinked hose can stop the whole show. Learning how to repair Whirlpool washer issues puts the power back in your hands and your laundry back on track.
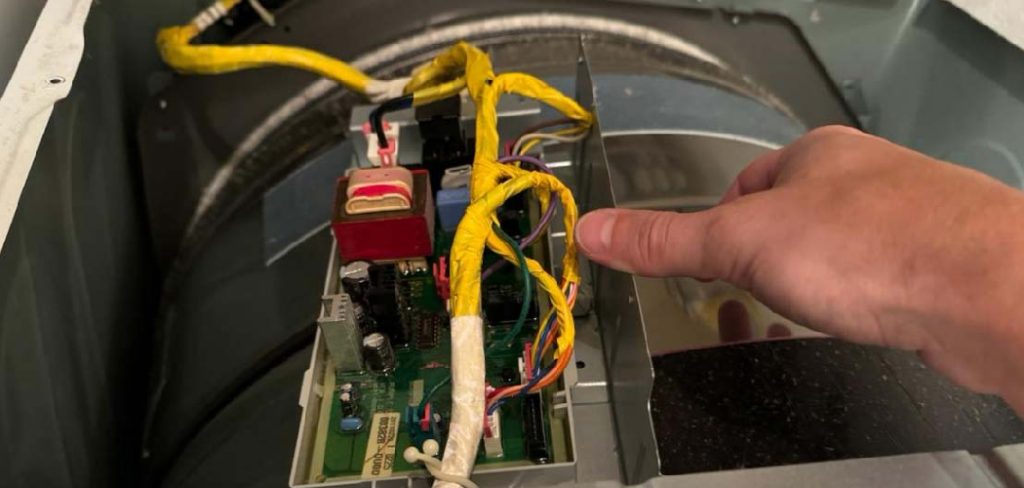
You don’t need to be a master technician. With a few basic tools and a little patience, you can diagnose and solve most common faults. This guide walks you through finding the problem and fixing it step by step, so your washer runs like new again.
Why Learning Whirlpool Washer Repair Matters
A broken washer throws your whole week off. Piles of laundry stack up fast, and a service call can cost more than the part you actually need.
Fixing it yourself saves real money. Most repairs use cheap, common parts like a lid switch or a drain pump, and you skip the labor fee entirely. That’s cash back in your pocket for something better than a repair bill.
There’s the waste angle, too. Tossing a working machine over one faulty component sends a perfectly good appliance to the landfill. A quick fix keeps it humming for years.
For renters and busy homeowners, this skill means no waiting around for an appointment. You spot the issue, grab your tools, and get back to clean clothes the same day. Plus, understanding common washer issues helps you catch small problems before they turn into big, expensive ones.
Tools and Materials You’ll Need
Gathering everything before you start keeps the job smooth. Most of these tools probably already live in your toolbox.
Screwdriver set (Phillips and flathead) – Removes panels, screws, and access covers around the cabinet.
Nut driver or socket set – Loosens hex screws and bolts holding the housing in place.
Multimeter – Tests the lid switch, water inlet valve, and other electrical parts for continuity.
Pliers – Grips hose clamps and pulls out stubborn debris.
Shallow pan and towels – Catches water that spills when you open hoses or the drain pump filter.
Putty knife – Helps release cabinet clips on many top-load models.
Replacement parts – A new lid switch, drain pump, or inlet valve if your diagnosis points there.
Optional: A clip-on work light – A handy convenience for lighting up the dark corners behind and inside the machine.
Step-by-Step Guide on How to Repair Whirlpool Washer
Step 1 – Unplug the Washer and Shut Off the Water
Safety comes first, every single time. Pull the power plug straight from the wall before you touch anything. A washer carries serious voltage, and you don’t want a jolt while your hands are deep in the cabinet.
Next, turn off both the hot and cold water valves behind the machine. Twist them clockwise until they stop firmly. This stops drips and pressure surprises while you work.
Clear the area and lay down a few towels to catch stray water from the tub or hoses. Slide the washer out from the wall so you can reach the back panel easily.
Take a moment to confirm the machine is fully off and quiet. With the power cut and water shut, you’re ready to open things up safely.
Step 2 – Identify the Symptoms
Play detective before you grab a screwdriver. The way your washer misbehaves tells you exactly where to look. A machine that won’t start points to power or the lid switch, while one that won’t drain usually means a clogged drain pump.
Run a short cycle and watch closely. Listen for humming without movement, which often signals a motor or drive belt issue. A loud grinding suggests something jammed in the pump.
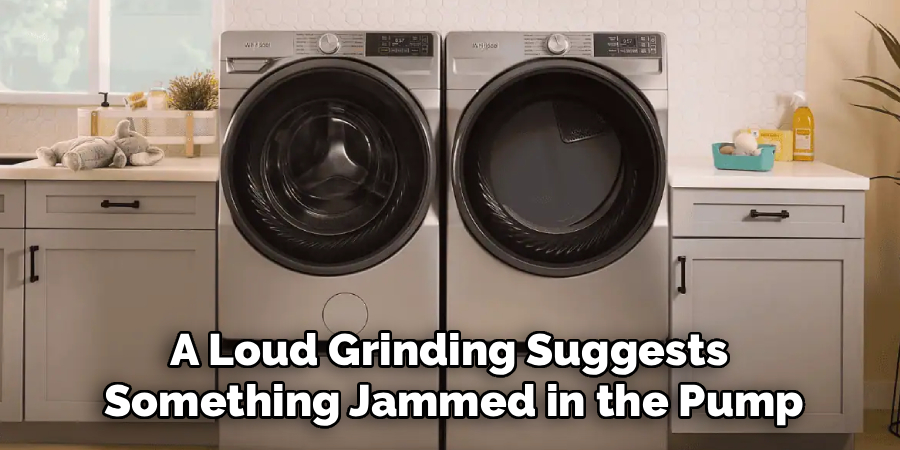
Check the display for any error code. Many Whirlpool models flash codes that pinpoint the fault, saving you guesswork. Jot the code down and look it up later.
Note whether the problem hits the wash cycle, the spin cycle, or both. These clues narrow your search fast and keep you from tearing apart parts that work fine.
Step 3 – Check Power and Controls
Start with the simplest fix before diving deeper. Plug the washer into a different outlet you know works, since a tripped breaker or dead socket often masquerades as a dead machine.
Inspect the power cord for cracks, melted spots, or bent prongs. A damaged cord needs replacing before anything else. Reset your home breaker too, as a power surge may have flipped it without you noticing.
Next, look at the control board and buttons. Press each setting and watch for lights or beeps that respond. If the panel stays dark or freezes, the control board may have failed.
Learning how to repair Whirlpool washer problems starts here, with the easy stuff. A surprising number of “dead” washers just need a working outlet or a firm reset.
Step 4 – Inspect Hoses and Water Inlet Issues
If your washer won’t fill or fills too slowly, the water supply is the prime suspect. Trace both hoses from the wall valves to the back of the machine.
Look for kinks, bulges, or cracks along each hose. A twisted hose chokes the flow, and a worn one can burst under pressure. Straighten or replace any that look tired.
Unscrew the hoses and check the small mesh screens inside the connectors. Mineral buildup and grit clog these fast, especially with hard water. Rinse them clean or swap them out.
Behind the connection sits the water inlet valve. Test it with your multimeter for continuity. A faulty valve won’t open to let water in, no matter how good your hoses look. Replace it if the reading shows no continuity.
Step 5 – Examine the Drain Pump and Filter Area
When water sits in the tub and won’t leave, the drain pump or filter is usually clogged. Place your shallow pan underneath to catch the water that’s about to spill.
Locate the pump, often behind a small access panel on the lower front or back. Open it and brace for a faint, musty smell from trapped water and lint.
Reach into the filter trap and clear out the gunk. You’ll often find coins, hairpins, buttons, and a slimy mat of lint blocking the flow. Pull it all out with your fingers or pliers.
Spin the pump impeller by hand. It should turn freely. If it feels stiff or won’t budge, the pump motor has likely failed and needs a replacement to restore proper draining.
Step 6 – Test the Lid Switch or Door Latch
Your washer won’t spin if it thinks the lid is open. On a top-load washer, the lid switch tells the machine it’s safe to start. On a front-load washer, the door latch does the same job.
Open and close the lid while listening for a soft click. No click often means a broken switch. Press the switch lever by hand and start a cycle to see if the washer responds.
For a precise check, disconnect the switch wires and test for continuity with your multimeter. A dead reading confirms the switch has failed.
Replacing a lid switch or door latch is quick and cheap. Unscrew the old one, swap in the new part, and reconnect the wires. This small fix solves a huge number of no-spin complaints.
Step 7 – Check the Belt or Direct-Drive Components
If the motor hums but the drum won’t turn, the drive system needs a look. Whirlpool washers use either a drive belt or a direct-drive coupling, depending on your model.
For belt-driven machines, find the belt around the motor pulley and tub. Inspect it for cracks, fraying, or a loose, slipping fit. A worn belt slides off and stops the drum cold. Slip on a fresh belt and check the tension.
For direct-drive models, look at the coupling between the motor and transmission. This plastic and rubber piece wears out and crumbles over time. You’ll often spot black bits scattered below the motor.
Replace a failed coupling with an inexpensive new one. Both fixes restore the firm, steady motion your wash and spin cycles depend on.
Step 8 – Reassemble and Run a Test Cycle
You’re in the home stretch. Reattach every panel, hose, and screw in reverse order, making sure clips snap back firmly and nothing sits loose.
Double-check that hose clamps are tight and electrical connectors click into place. A loose connection now means another teardown later, so take your time here.
Turn the water valves back on and watch for leaks at every joint. Then plug the washer in and start a short test cycle with no clothes inside.
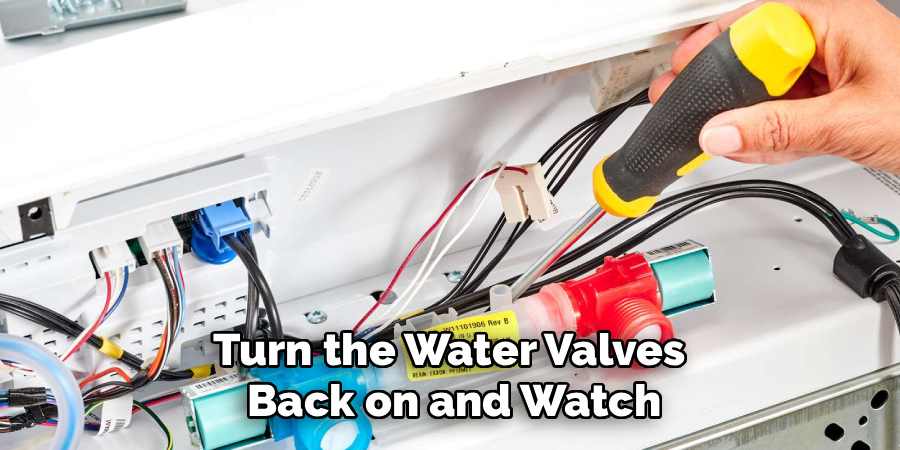
Listen for smooth operation as the tub fills, agitates, drains, and spins. Watch the drum move with strong, even motion instead of grinding or stalling. When each stage runs clean and quiet, you’ve nailed the repair and earned a load of fresh laundry.
Critical Mistakes When Repairing a Whirlpool Washer
The biggest mistake is skipping the safety steps. Leaving the washer plugged in or the water valves open invites shocks and floods. Always cut the power and shut both valves before you start, no exceptions.
Another common slip is guessing instead of diagnosing. People often replace expensive parts like the control board when a five-dollar lid switch was the real culprit. Test each component with your multimeter and check the error code before you spend money on anything.
Many folks also forget to clean the drain pump filter regularly. They tear into the whole pump assembly when a quick filter cleanout would have fixed the slow drain. Always check the simple, accessible spots first.
Forcing parts during reassembly causes plenty of grief, too. Cross-threading a hose connector or overtightening a clamp cracks plastic and creates leaks. Hand-tighten gently and stop when it feels snug.
Finally, some people lose track of small screws and clips. They scatter fast on a hard floor, and missing hardware leaves panels rattling. Keep everything in a labeled cup or tray, and snap a few photos as you go so reassembly stays simple and stress-free.
Expert Tips
Take photos with your phone as you remove each panel and connector. When it’s time to reassemble, those pictures show you exactly where every wire and screw belongs.
Look up your model’s error code online before you start. Whirlpool publishes diagnostic guides that match each code to a specific fault, which saves hours of guessing.
Keep a common-parts kit on hand if your washer is older. A spare lid switch, inlet valve screen, and drive belt cost little and turn a multi-day wait into a same-day fix.
Clean the drain pump filter every few months, even when nothing’s wrong. This simple habit prevents most clogs and keeps your spin cycle draining strong. A little upkeep now saves you a bigger repair down the road.
Frequently Asked Questions
Why won’t my Whirlpool washer spin?
A washer that won’t spin usually has one of a few common faults. Check these first:
- A faulty lid switch or door latch that won’t signal “closed”
- A worn or slipping drive belt on belt-driven models
- A broken direct-drive coupling between the motor and transmission
- A clogged drain pump leaving water in the tub
Test each one in order, and you’ll usually find the culprit fast.
How do I clear an error code on my Whirlpool washer?
Start by writing down the exact code, then unplug the washer for about a minute to reset the control board. Plug it back in and run a short cycle to see if the code returns. If it does, look up that specific code in your model’s manual, since each one points to a particular part like the inlet valve, pump, or motor.
Is it worth repairing a Whirlpool washer myself?
Usually, yes. Most common parts like a lid switch, drain pump, or drive belt cost only a small amount, and the job takes an hour or two with basic tools. Compare that to a technician’s service fee or buying a brand-new machine, and the savings add up quickly. Unless the motor or transmission has failed badly, DIY appliance repair is well worth your time.
Why is my Whirlpool washer leaking water?
Leaks usually trace back to a few spots. Check the fill hoses and their connections for cracks or loose clamps first. Then inspect the drain pump and the rubber door seal on front-load models, since both wear over time. A worn tub seal or a clogged filter overflow can also cause drips. Tighten or replace the failing part to stop the leak.
How often should I clean the drain pump filter?
Aim to clean it every three to four months, or sooner if you notice slow draining. Coins, lint, hairpins, and small fabric bits collect in the filter trap and choke the flow over time. Regular cleaning keeps your spin cycle draining strong, prevents musty odors, and stops small clogs from turning into a stalled pump or a flooded floor.
Conclusion
Fixing a Whirlpool washer feels daunting until you break it into simple steps. Start by unplugging the machine and shutting off the water, then watch and listen for the symptoms that point you toward the real problem. From there, you check power and controls, inspect hoses and the water inlet valve, clear the drain pump, test the lid switch, and look over the belt or direct-drive coupling.
The real secret is to diagnose before you replace. Use your multimeter and any error code to confirm the fault, so you fix the right part the first time instead of guessing.
Knowing how to repair Whirlpool washer issues saves you money, cuts down on waste, and gets your laundry back on schedule fast. It’s a skill that pays off load after load, and it builds the confidence to tackle your next appliance fix, too.
So grab your screwdriver, clear a little workspace, and give your washer the attention it needs. Your clothes, your wallet, and the planet will thank you. You’ve got this.