

Noticed tiny cracks creeping across your tires? That’s dry rot, and it’s more common than you might think. It shows up on cars, trailers, lawn mowers, and RVs that sit unused or bake in the sun. Before you panic, know this: some cosmetic cracking can be cleaned, treated, and slowed down at home with a little care.
But here’s the honest truth right up front. Learning how to repair dry rotted tires means knowing the difference between minor surface cracks and damage that makes a tire unsafe. One you can treat. The other means it’s time for a replacement tire, no exceptions.
This guide walks you through inspecting, cleaning, and treating mild surface cracks safely, while helping you spot the warning signs that mean a tire needs to go.
Why Repairing Dry Rotted Tires Matters
If you camp, tow a trailer, or store outdoor gear, you’ve probably seen tires age faster than the miles suggest. Sunlight, heat, and time dry out tire rubber even when you’re not driving. A camper that sits all winter can develop sidewall cracking before spring arrives.
For outdoor beginners, knowing how to spot and slow dry rot saves real money and keeps you safer on remote roads. The last thing you want is a blowout miles from help.
Learning this skill also builds awareness. You’ll start checking tread depth, doing a quick pressure check, and noticing surface cracks early. Catching problems before they spread means your trailer, mower, or RV tires last longer. And knowing when a tire is truly unsafe protects you, your passengers, and everyone sharing the road.
Tools and Materials You’ll Need
Gather your supplies before you start so the job goes smoothly. Here’s what to have on hand:
- Mild soap and water for cleaning the surface
- Soft-bristle brush to scrub dirt from cracks
- Clean microfiber cloths for wiping and drying
- Tire degreaser to lift old grime and residue
- Rubber conditioner or tire protectant designed to restore flexibility
- Tire pressure gauge for an accurate pressure check
- Tread depth gauge or a simple coin for measuring tread
- Flashlight to inspect deep into surface cracks
- Disposable gloves to keep your hands clean
- Optional: a foam applicator pad for spreading conditioner evenly and reaching tight spots
A shaded, flat workspace helps too. Working out of direct sun keeps products from drying too fast.
Step-by-Step Guide on How To Repair Dry Rotted Tires
Step 1 – Inspect the tire carefully
Start by looking closely at every tire, including the sidewalls and tread grooves. Use a flashlight to peer into each crack so you can judge how deep it really goes.
Run your fingertips gently across the rubber. Shallow surface cracks feel like fine lines and barely catch your skin. Deep cracks feel like grooves and may show different-colored rubber underneath.
This inspection decides everything. Hairline surface cracks from UV damage can often be cleaned and conditioned. But deep cracks, bulges, or cracks that expose the cords inside mean the tire is unsafe. Knowing how to repair dry rotted tires starts with this honest assessment.
If you see structural damage, stop here and plan for a replacement tire instead.
Read More: How To Repair Rotted Window Sill.
Step 2 – Check tread depth and pressure
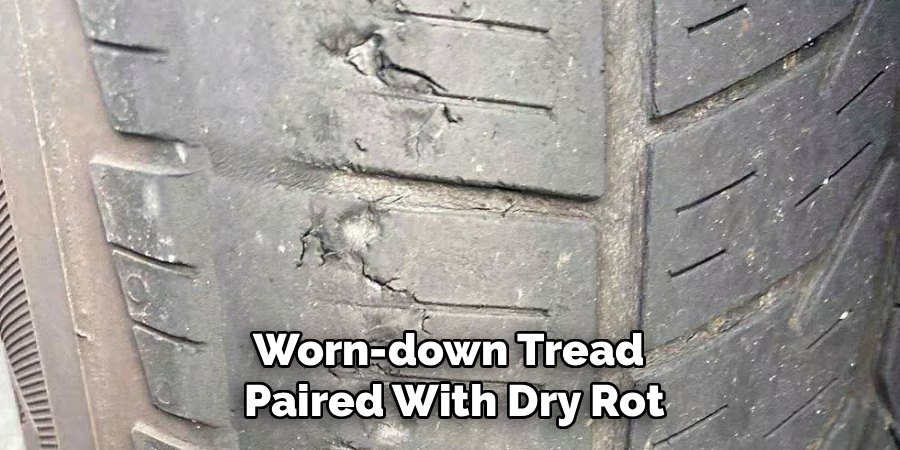
Before treating anything, confirm the tire still has life left. Use a tread depth gauge, or slip a coin into the grooves to judge wear. Worn-down tread paired with dry rot is a clear sign the tire is finished.
Next, do a pressure check with your gauge. Compare the reading to the recommended pressure printed on your door jamb or owner’s manual. Tires losing air quickly may have hidden damage beyond simple cracking.
You’ll hear the soft hiss of the gauge seating on the valve, then get your number. Proper pressure matters because underinflated tires crack and overheat faster. This quick check tells you whether cosmetic treatment even makes sense for this tire.
Step 3 – Clean the tire surface
Mix mild soap with warm water and scrub the tire with your soft-bristle brush. Work the bristles into every crack to loosen trapped dirt, grit, and old residue. You’ll see grimy water run off as the rubber comes clean.
For stubborn buildup, apply a tire degreaser and let it sit briefly. This lifts the waxy film that blocks conditioner from soaking in.
Clean rubber matters more than people realize. Conditioner can’t penetrate dirty cracks, and treating over grime just traps debris inside. Take your time scrubbing the sidewall cracking and tread edges.
The tire should look fresh and matte when you finish. A thorough clean sets up every following step for better, longer-lasting results.
Step 4 – Dry the tire completely
Wipe the tire down with clean microfiber cloths until no moisture remains. Press into the grooves and crack lines, since water loves to hide there.
Then let the tire air-dry in a shaded spot for a while. Direct sun speeds drying but also bakes the rubber, which works against you here. Patience pays off.
You’ll know it’s ready when the surface feels cool and dry to the touch, with no damp residue clinging to your fingers. Even the deeper surface cracks should feel dry inside.
Skipping this step traps moisture under your conditioner, which weakens the treatment and can encourage more breakdown. A bone-dry tire lets the rubber conditioner bond properly and do its job.
Step 5 – Apply rubber conditioner
Now treat the rubber. Squeeze a small amount of rubber conditioner onto your cloth or foam applicator pad, then spread it in even strokes across the sidewall and tread shoulders.
Work the product gently into the surface cracks. You’ll watch the rubber darken slightly and look richer as it absorbs the conditioner. The goal is restoring some flexibility lost to oxidation and UV damage.
Avoid drowning the tire in product. Thin, even coverage beats a thick, greasy layer that just attracts dust. Let the conditioner soak in for the time listed on the label.
This treatment won’t reverse deep damage, but on mild surface cracks it softens rubber and slows further drying. That’s the realistic, honest goal here.
Step 6 – Wipe away excess and inspect
Once the conditioner has soaked in, buff the tire with a clean, dry microfiber cloth. Remove any leftover product so the surface feels smooth, not slick or sticky.
As you wipe, inspect your work again. The fine surface cracks should look less obvious and the rubber should appear more supple. Run your hand across the tire and feel for any spots you missed.
This is your second chance to catch trouble. If conditioning made a deep crack more visible, or you spot bulging you missed earlier, treat that as a serious warning. Cosmetic products never fix structural problems.
A properly treated tire looks refreshed but, more importantly, you’ve confirmed it’s still safe to use.
Step 7 – Apply a protective tire treatment
To slow future drying, finish with a UV-protectant tire treatment. These products shield tire rubber from sunlight, the biggest cause of oxidation and cracking.
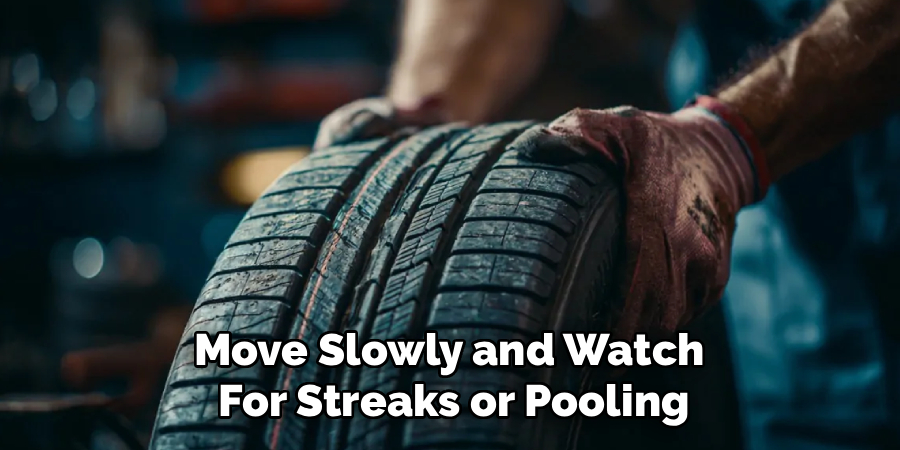
Spread a thin, even layer using a fresh applicator. Cover the sidewalls fully, since that’s where UV damage hits hardest. Move slowly and watch for streaks or pooling.
You’ll notice a subtle, even sheen develop, never a wet, dripping look. A light touch keeps the finish natural and prevents product from flinging onto your vehicle while driving.
Let it dry completely before the tire rolls. This protective step is your best defense, helping the rubber stay flexible longer between treatments. Think of it as sunscreen for your tires, simple but genuinely effective.
Step 8 – Set a maintenance and monitoring routine
Treating tires once isn’t enough. Set a reminder to inspect them every few weeks, especially on vehicles or trailers that sit idle.
Each check should include a quick pressure check, a glance at tread depth, and a look for new surface cracks. Catching changes early keeps small problems from becoming dangerous ones.
Recondition the rubber every couple of months, or as the product suggests. Consistent care does far more than any single treatment ever could.
Keep notes if it helps. Tracking when cracks appear or worsen tells you whether a tire is stable or steadily declining. The moment cracking deepens or spreads, plan for a replacement tire. Smart monitoring is the real secret to handling dry rot safely over time.
Critical Mistakes When Repairing Dry Rotted Tires
The most dangerous mistake is treating dry rot as purely cosmetic when it’s actually structural. Conditioners and protectants can soften mild surface cracks, but they cannot repair deep cracks, bulges, or rubber that has hardened all the way through. If a tire shows these signs, no product makes it safe. Replace it, full stop. Driving on a severely dry-rotted tire risks a sudden blowout.
Another common slip is skipping proper cleaning. Applying conditioner over dirt and grime traps debris inside the cracks and blocks the product from absorbing. The treatment looks fine but does almost nothing.
Many people also ignore tread depth and pressure. A tire with worn tread or that won’t hold air needs replacing regardless of how good the sidewalls look after conditioning.
Overapplying product is another error. A thick, greasy layer attracts dust, flings onto your vehicle, and doesn’t penetrate any better than a thin coat.
Finally, don’t treat tires once and forget them. Dry rot keeps progressing, so skipping regular inspections lets unsafe damage sneak up on you between treatments.
Expert Tips
Always work in the shade. Sunlight dries products before they absorb and bakes the very rubber you’re trying to protect.
Treat tire age as seriously as appearance. Most manufacturers suggest replacing tires around six years old, even if they look okay. Check the DOT date stamp on the sidewall to find the manufacture date.
Condition tires on stored vehicles and trailers a few times a year, not just when cracks appear. Prevention beats treatment every time.
Rotate stored vehicles slightly every few weeks so the same spot isn’t always bearing weight. This reduces flat-spotting and uneven stress on the rubber.
When in doubt about a crack’s severity, have a tire shop inspect it. A quick professional look costs little and could prevent a dangerous failure on the road.
Frequently Asked Questions
Can you actually fix dry rotted tires?
You can treat mild, cosmetic dry rot, but you can’t truly “fix” it. Conditioners and protectants soften shallow surface cracks and slow further drying. They do not restore strength or reverse deep damage. If a tire has:
- Deep cracks exposing inner cords
- Bulges or soft spots
- Cracking around the whole sidewall
then it’s unsafe and needs replacing. Treatment only helps minor, surface-level cracking.
How do I know when a tire is too dangerous to use?
Look for deep cracks you can fit a fingernail into, bulges, exposed cords, or cracking that wraps across the sidewall. Rubber that feels brittle and hard all over is also a red flag. Any of these signs mean the tire can fail suddenly. When you see them, stop using the tire and replace it rather than risking a blowout.
Will tire sealant fix dry rot cracks?
No. Tire sealant is designed to plug small punctures in the tread, not repair dry rot. Dry rot is rubber breakdown from age, UV damage, and oxidation, which sealant can’t reverse. Using sealant on cracked, brittle rubber gives a false sense of safety. For dry rot, focus on conditioning mild cases and replacing tires with structural damage.
How can I prevent dry rot in the first place?
Prevention comes down to limiting sun, heat, and neglect. Helpful habits include:
- Parking in shade or a garage
- Using tire covers on stored vehicles and trailers
- Keeping correct tire pressure
- Applying UV protectant a few times a year
Driving vehicles regularly also helps, since flexing keeps the rubber’s natural oils working and slows cracking.
How long do treated dry rotted tires last?
It depends on the damage and your climate. Mild surface cracks that you clean, condition, and protect can stay stable for a good while with regular care. But conditioning only slows aging, it doesn’t stop it. Inspect treated tires often, and remember that any tire showing deepening cracks or reaching about six years old should be replaced for safety.
Conclusion
Dealing with dry rot comes down to one key skill: knowing the difference between minor cosmetic cracking and damage that makes a tire unsafe. Mild surface cracks respond well to a good clean, a quality rubber conditioner, and a UV protectant that slows future drying. Deep cracks, bulges, or exposed cords mean only one thing, a replacement tire.
Remember the steps that matter most. Inspect carefully, check your tread depth and pressure, clean thoroughly, condition lightly, and protect against the sun. Then keep monitoring, because dry rot never stops progressing on its own.
Now that you understand how to repair dry rotted tires the safe way, you can treat the small stuff confidently and recognize when it’s time to retire a tire for good. That knowledge protects your wallet and, far more importantly, keeps you and everyone on the road safe. So grab your flashlight, inspect those tires, and give your gear the care it deserves. Safety always wins.